
Before you even think about floor plans or furniture catalogs, let’s get one thing straight: a great office design starts with data, not guesswork. At Cubicle By Design, we’ve seen it time and again—companies jump straight to the fun stuff and end up with a space that looks nice but doesn’t actually work. The most important step you can take is to first understand what your people, your company culture, and your business goals truly need from your office.
Setting the Stage for a Smarter Workspace
Skipping a proper needs assessment is a recipe for expensive mistakes. You end up with an office that frustrates employees and gets in the way of productivity. A real assessment translates your company’s unique DNA into a practical blueprint, making sure the final design supports how your teams actually operate day-to-day.
Think about it. A high-energy sales team that thrives on spontaneous huddles needs a completely different setup than a team of engineers who require deep, quiet focus. A one-size-fits-all approach just ends up fitting no one particularly well. Your goal is to create a workspace that feels custom-built for the people using it.
How to Find Out What Your Team Really Needs
To get real, actionable insights, you need to go beyond just asking people what they want. A mix of direct feedback and old-fashioned observation will give you the full picture.
Start with employee surveys, but ask smarter questions. Instead of a generic “Do you like the layout?”, get specific:
- On a scale of 1-5, how easy is it to find a quiet spot for focused work?
- What are the biggest roadblocks to collaborating with your team?
- Walk me through your typical day. Where do you spend your time and what do you do there?
Questions like these uncover the real friction points. Then, back that up by just watching how people use the space. Where do meetings naturally happen? Are there high-traffic bottlenecks near the coffee machine? Which areas are ghost towns? You’ll often spot realities that people don’t even think to mention in a survey.
A well-executed needs assessment ensures every square foot has a purpose. It’s the difference between managing real estate costs and turning your office into a strategic asset that actively helps your business.
This isn’t just a nice-to-have anymore. In fact, 73% of corporate real estate leaders now rank optimizing their portfolio as their number one priority. Companies are focused on using their space more efficiently, which makes every design decision that much more important.
To make this process a bit more structured, here’s a table outlining the key areas you should be digging into.
Key Considerations for Your Needs Assessment
| Assessment Area | Key Questions to Ask | Data to Collect |
|---|---|---|
| Workflow & Collaboration | How do teams interact? Do they need ad-hoc meeting spaces or formal conference rooms? | Employee surveys, observational notes on traffic flow, meeting room booking data. |
| Focus & Privacy | What percentage of the day requires deep concentration? Are noise levels a problem? | Survey results on distractions, requests for private spaces, decibel level readings. |
| Technology & Infrastructure | Do teams have enough outlets and data ports? Is the Wi-Fi reliable in all areas? | IT help desk tickets, employee feedback on connectivity, inventory of current tech assets. |
| Storage & Amenities | Is there enough personal and departmental storage? What amenities (kitchen, lounge) are most valued? | Physical audit of storage usage, employee wish lists, observation of common area use. |
| Future Growth | What are the company’s growth projections for the next 1, 3, and 5 years? | Headcount forecasts from HR, business expansion plans from leadership. |
Gathering this information at the outset prevents costly changes down the road and ensures your final plan is grounded in reality.
Turning Your Findings Into a Plan
Once you’ve gathered all this info, patterns will start to pop. You might find your marketing team desperately needs a project hub with whiteboards, while the finance department is crying out for secure, private office cubicles. These insights are the foundation of your space plan. If you want to dive deeper into the fundamentals, check out our guide on what is space planning.
This prep work also includes practical operations. For example, now is the perfect time to develop an effective office recycling plan for all your old and new electronics.
By rooting your design in a solid understanding of your team, you create a workspace that doesn’t just look good—it actively boosts efficiency, collaboration, and morale from day one.
Getting Your Space Down on Paper
Now that you have a solid grasp of what your team needs, it’s time to get down to the brass tacks. We’re moving from ideas to the physical world, which means getting intimately familiar with every square inch of your office. A great layout isn’t just about dropping desks onto a floor plan; it’s about understanding the canvas you’re working with—from its permanent structures to its hidden infrastructure.
This all starts with a simple, essential tool: the tape measure. Seriously, don’t just trust old or estimated blueprints. You need to walk the floor and physically measure the entire space to create an accurate, up-to-date plan. This isn’t just about wall-to-wall dimensions. It’s about mapping every single element that will shape your final design.
Charting the Unchangeable Elements
Before you can dream up a flexible, modern workspace, you have to account for the parts of the building that aren’t going anywhere. These are the non-negotiable features that your entire layout must flow around. Trying to ignore them is a surefire way to create a plan that looks brilliant on a screen but completely fails in reality.
Your first pass should be to meticulously document these fixed features:
- Structural Columns: Pinpoint their exact location and dimensions. These will directly impact where you can place furniture and how people will move through the space.
- Windows and Doors: Measure their size and placement. Don’t forget to note which way the doors swing—it’s a small detail that makes a huge difference in ensuring proper clearance.
- Load-Bearing Walls: Identify these critical structures. They cannot be moved or altered, period.
- Ceiling Height Variations: Take note of any areas with lower ceilings, often due to ductwork or other utilities. This can affect everything from acoustics to lighting choices.
This detailed map of fixed elements becomes the foundational layer of your plan. It stops you from designing around spaces that simply don’t exist.
Identifying Your Office’s Nervous System
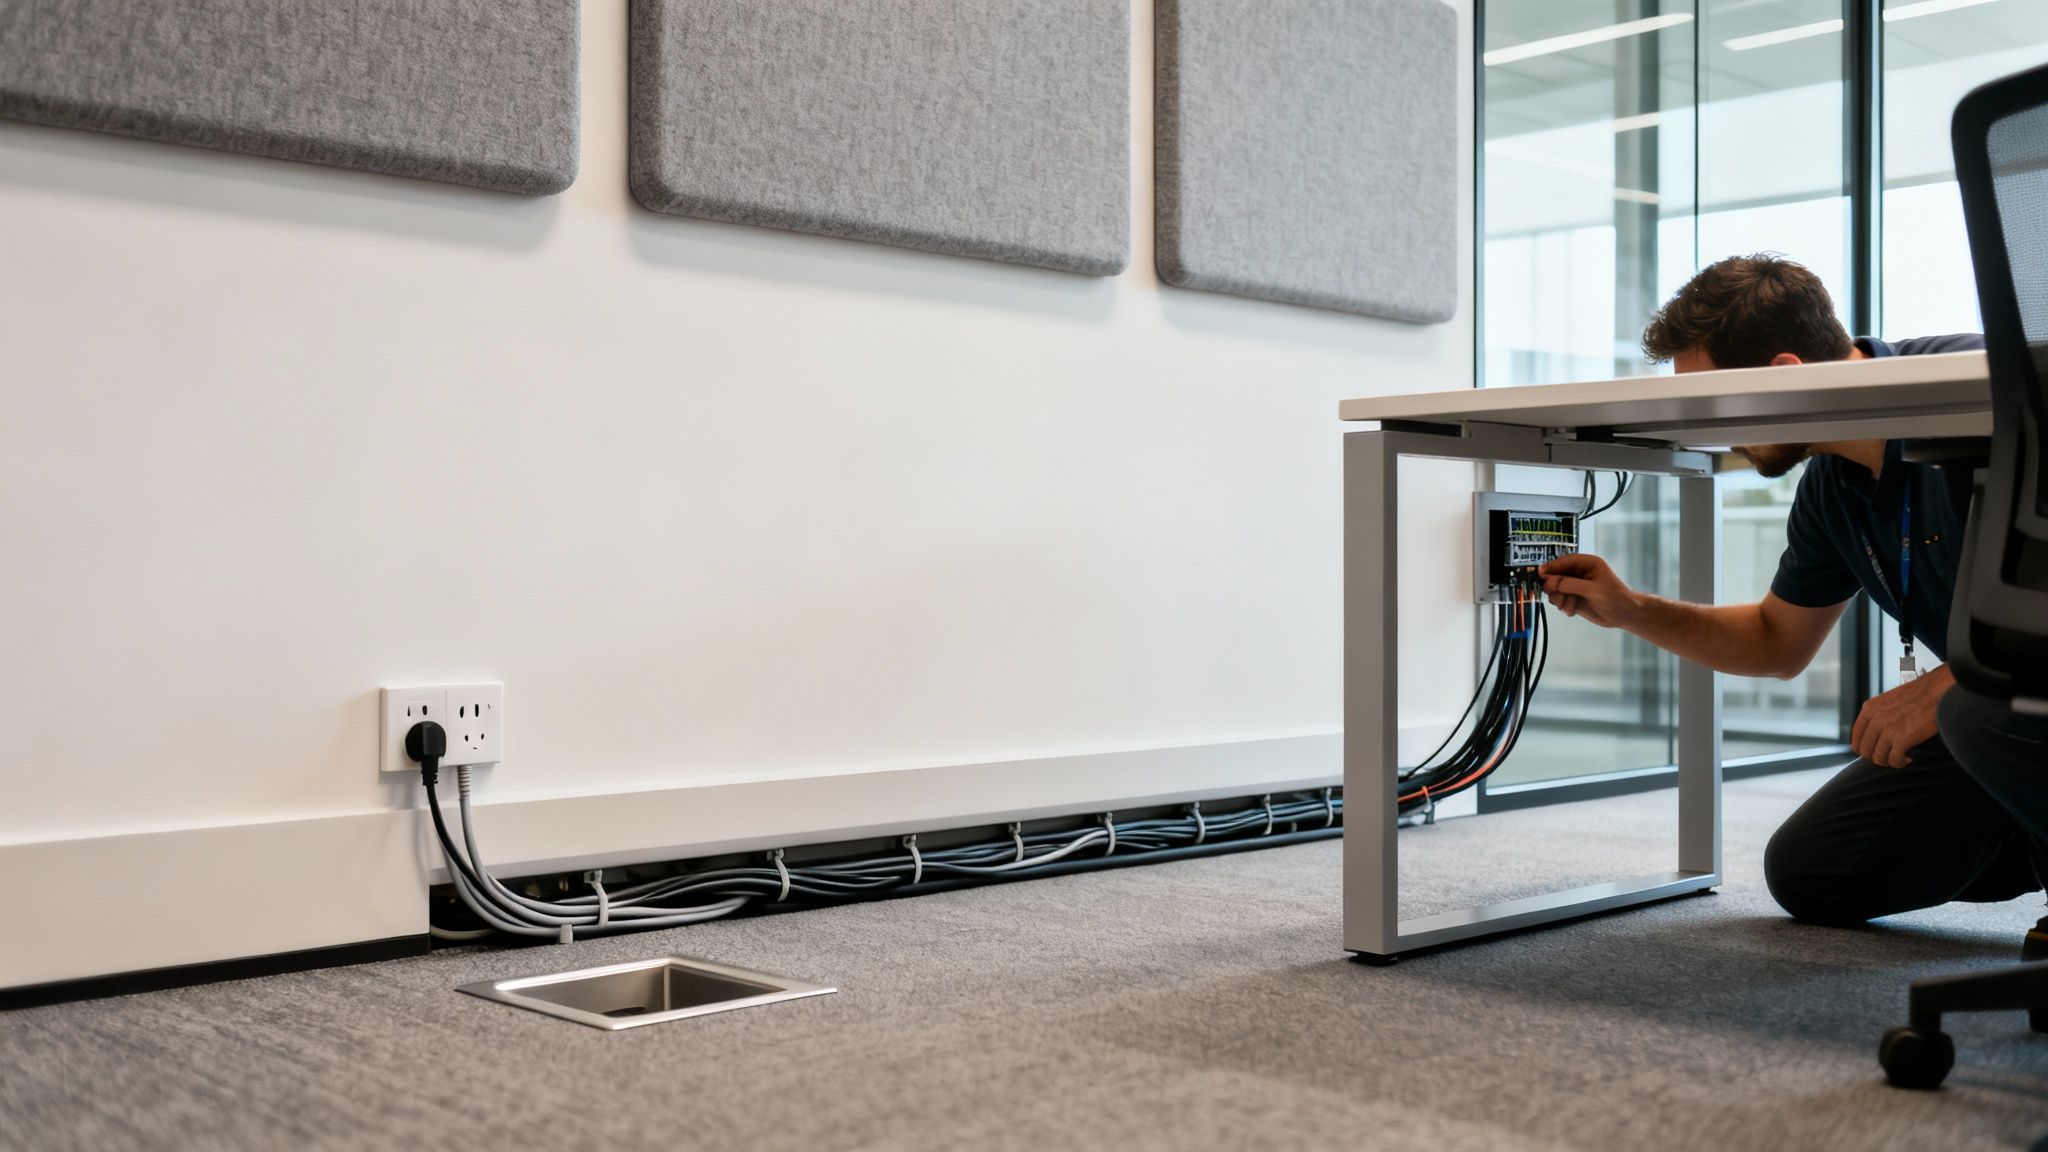
With the structural skeleton mapped out, the next critical step is to find the building’s infrastructure—its “nervous system.” Forgetting to map power outlets, data ports, and HVAC units is one of the most common and frustrating mistakes in office planning. It almost always leads to a tangled mess of extension cords and forces costly, last-minute electrical work.
Planning where your teams will sit without knowing where they can plug in is like designing a car without an engine. Your infrastructure map dictates the functional zones of your office long before any furniture arrives.
Walk the space and mark the precise location of every single power outlet and data jack. This information is non-negotiable and will heavily influence where you can place individual workstations, tech-heavy collaboration hubs, or even the office coffee machine. While you’re at it, find the thermostats and HVAC vents to avoid placing someone’s desk directly under a constant blast of cold air.
Bringing Your Vision to Life with Digital Tools
With your measurements and infrastructure map in hand, you can finally move from a static blueprint to a dynamic digital model. This is where the real fun begins.
Using a tool like the Cubicle By Design cubicle designer lets you build a 2D and 3D version of your space. This isn’t just for a pretty picture; it’s about practical, real-world testing.
A digital model lets you experiment with different furniture arrangements without moving a single heavy object. You can drop in various workstation cubicles to see how they fit or configure a block of private office cubicles for the management team. This process, often called a “test fit,” helps you immediately see how different layouts affect foot traffic, sightlines, and the overall feeling of spaciousness. It also helps you understand how different furniture sizes will work; for a deeper dive, check out our guide on standard cubicle dimensions.
This digital sandbox is where your raw data transforms into a workable, intelligent vision for your office, ensuring the final layout is perfectly aligned with the needs you identified from the start.
Picking a Layout That Actually Works for Your People
The layout of your office is so much more than where you put the desks. It’s the silent communicator of your company culture. It sets the tone for how people collaborate, focus, and interact, and it has a direct line to morale and productivity. Let’s get past the basic pros and cons and really dig into the three main models—open, private, and hybrid—to figure out what’s truly right for your team.
Making this decision is where your needs assessment starts to take physical shape, turning all that data into a real, functional environment.
Understanding the Open Office Concept
The open-plan office gets a lot of hype for a reason. It’s built to knock down walls (literally) and encourage transparency, spontaneous conversations, and team collaboration. For high-energy, fast-moving teams in sales or marketing, this kind of buzz can be exactly what they need to spark new ideas and solve problems on the fly.
Of course, the big elephant in the room is noise and distraction. Without a solid plan, an open office can quickly become a hotbed of frustration for anyone trying to do deep, focused work. The real trick is creating an open space that also has pockets of quiet—something the hybrid model tackles head-on.
This whole process of choosing a layout starts with understanding the space you have. You can’t just pick a style without knowing your physical constraints.
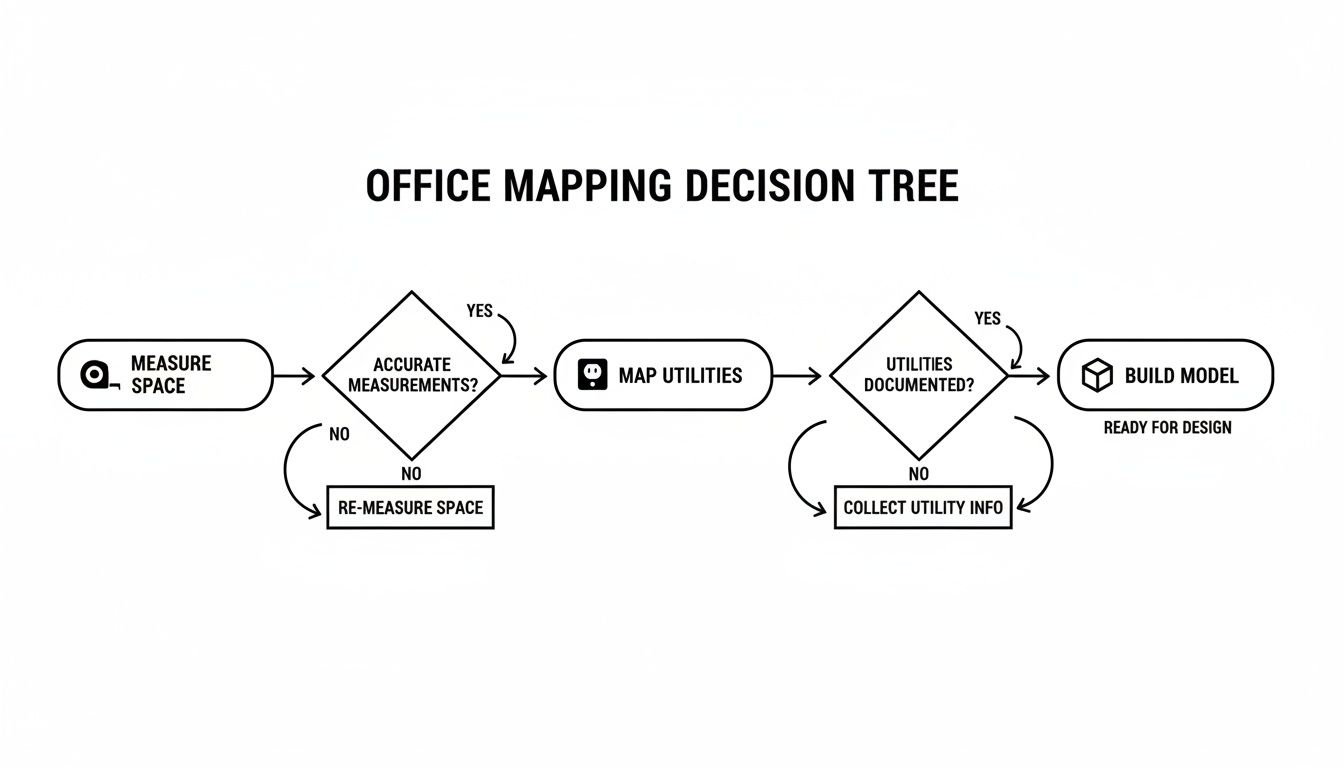
As you can see, everything from measurements to where the outlets are located has to be mapped out before you can seriously start building a model for your layout.
The Case for Private and Semi-Private Workspaces
On the other side of the coin, you have private layouts. These are all about focus, concentration, and confidentiality. This setup is a no-brainer for roles where deep work is the name of the game—think finance, legal, or engineering. Giving someone their own enclosed space cuts down on interruptions and provides a secure spot for handling sensitive information.
But “private” doesn’t have to mean “isolated.” For a detailed breakdown of these classic styles, check out our comparison of open plan offices vs. cubicles.
Embracing the Power of the Hybrid Model
For most companies we work with, the answer isn’t black or white. It’s a blend. The hybrid layout is the most flexible and realistic model because it acknowledges that work isn’t one-size-fits-all. The same person who needs to brainstorm with a team in the morning might need absolute silence to write a report in the afternoon.
This is where you get to be strategic by creating different zones for different kinds of work:
- Collaboration Hubs: Open areas with whiteboards and comfy chairs for team huddles.
- Focus Zones: Clusters of cubicles with higher walls for heads-down tasks.
- Quiet Pods: Small, enclosed spots for private calls or one-on-one video meetings.
- Social Areas: A kitchen or lounge that encourages those casual chats where some of the best ideas happen.
This approach gives your team the freedom to choose the right environment for the task at hand. It’s about empowering them to work smarter.
To help you decide, here’s a quick comparison of how these models stack up against each other.
Comparing Office Layout Models
| Layout Type | Best For | Potential Challenges | Cubicle By Design Solution |
|---|---|---|---|
| Open Plan | Dynamic, collaborative teams (e.g., sales, marketing); fostering transparency and quick communication. | High potential for noise and distractions; lack of privacy for focused tasks or confidential calls. | Low-wall cubicles or benching systems that define personal space without completely isolating teams. |
| Private/Cubicle | Roles requiring deep concentration and confidentiality (e.g., finance, legal, engineering). | Can feel isolating if not designed well; may hinder spontaneous collaboration. | Tall-walled private office cubicles with glass panels to maintain a sense of connection while providing acoustic privacy. |
| Hybrid | Most modern businesses; teams with diverse roles and work styles; activity-based working. | Requires careful planning and zoning; can be more complex to manage space utilization. | A strategic mix of open-plan benching, mid-height workstation cubicles, and full-height glass office walls to create dedicated zones. |
Ultimately, the hybrid model offers the flexibility that most modern teams need to thrive.
Our Takeaway: The best office layouts are designed around activities, not just job titles. When you give people a variety of spaces to choose from, you’re not just giving them furniture—you’re giving them control over their own productivity and building a culture of trust.
Getting the Infrastructure and Acoustics Right
A stunning office design is one thing, but if your team can’t plug in their laptops or hear themselves think on a call, that beautiful layout falls flat. This is where the real nitty-gritty comes in—the technical details of infrastructure and acoustics. They’re the invisible foundation that makes a workspace actually work.
Think about your power and data distribution from the very beginning. You’ll save yourself a future tangled in extension cords and plagued by dead Wi-Fi zones. In the same way, getting a handle on sound from the start ensures your office is a hub of productivity, not a den of distraction.
Plan for Power and Seamless Connectivity
Let’s face it, every modern workstation runs on power and data. Your layout has to reflect that reality with easy, accessible connectivity for every single employee. Skipping this step often leads to costly retrofitting down the road and ruins the clean, organized look you worked so hard to create.
When you’re planning the electrical systems, bringing in an experienced commercial electrical contractor is non-negotiable. It’s a matter of safety, efficiency, and meeting building codes. They can help you map out a grid that handles what you need today and what you’ll need tomorrow.
Here are the key things to bake into your infrastructure plan:
- Workstation Power: Make sure every desk or cubicle has multiple outlets and USB ports. Modular furniture, like the systems we offer at Cubicle By Design, often has integrated power solutions to keep cables completely out of sight.
- Meeting Room Tech: Conference rooms are power hogs. They need dedicated juice for big displays, video conferencing gear, and all the laptops your guests will bring. Plan for floor boxes or wall-mounted outlets to keep things clean and trip-free.
- Wi-Fi Coverage: Sit down with your IT team to figure out the best spots for wireless access points. Walls and even large furniture can create frustrating dead zones if you don’t plan the layout carefully.
A rookie mistake is underestimating how many devices one person uses. Think about it: a laptop, a monitor, a phone charger, and other gadgets. A single outlet just doesn’t cut it anymore. Plan for at least four to six power access points per person.
By mapping your power and data needs right alongside your furniture layout, you guarantee the office’s infrastructure can actually support your team from day one.
Master Office Acoustics for Focus and Privacy
In an age of endless Zoom calls and collaborative projects, noise is one of the biggest productivity killers out there. Any good office plan has to tackle acoustics head-on, especially in open or hybrid layouts. The goal isn’t to create total silence; it’s to control the sound.
You’ll need to attack this from a few different angles to create an acoustically comfortable space. Start by thinking about how sound travels through your office and pinpointing where the main noise sources are.
From there, you can bring in solutions that absorb, block, or mask distracting sounds.
- Absorption: Use soft materials that literally soak up sound waves. Think acoustic wall panels, ceiling baffles, carpeting, and even furniture with sound-dampening fabric.
- Blocking: Put up physical barriers to stop sound in its tracks. Strategically placed private office cubicles with high walls or glass partitions can create quiet zones for deep work without completely closing off teams.
- Masking: Introduce a subtle, low-level ambient sound (like airflow) to make human speech less intelligible and, therefore, way less distracting. Sound masking systems are fantastic for open-plan areas.
When you blend these strategies, you can dial down the ambient noise and create an environment where people can actually concentrate. If you’re looking for more ways to boost focus, our article on achieving office cubicle privacy has some great insights. This thoughtful approach to sound ensures your office isn’t just a pretty space—it’s a comfortable, productive, and distraction-free place to get work done.
Managing Budgets, Timelines, and Installation
You’ve nailed down the perfect layout and figured out all the infrastructure details. Now comes the real test: execution. This is the part of the project where blueprints and plans become a physical reality, and it all comes down to sharp project management.
Getting this final phase right is all about mastering your budget, timeline, and installation. These are the three pillars that hold up a successful project. Without a firm grip on these practical details, even the most brilliant office designs can get completely derailed by surprise costs, frustrating delays, and logistical nightmares.
Building a Budget That Bends But Doesn’t Break
The first step toward a stress-free project? A realistic budget. The secret is to think beyond the obvious big-ticket items like desks and chairs. You have to account for all those smaller, easy-to-forget expenses that can sneak up on you and wreck your numbers.
A truly comprehensive budget is your best defense against scope creep. Your checklist should have detailed line items for everything:
- Furniture and Fixtures: This is the core of it—all your desks, chairs, storage, and specialized pieces like cubicles.
- Technology and Equipment: Think about any new computers, monitors, video conferencing systems, or network hardware you’ll need.
- Labor and Installation: Don’t forget the pros. This includes installers, electricians, data cable technicians, and painters.
- Shipping and Delivery: Freight charges can be a significant cost, especially for large furniture orders. Factor them in from the start.
- Permits and Fees: A quick call to your local municipality can tell you if you need building or electrical permits.
- Contingency Fund: This one is non-negotiable. Set aside at least 10-15% of your total budget for the unexpected. Trust us, something always comes up, and this buffer will save you from having to make painful compromises down the road.
A well-planned budget isn’t just a spending limit; it’s a strategic tool. It forces you to prioritize what’s most important and make smart trade-offs that align with your company’s goals without sacrificing quality.
When you break down costs this granularly, you get a crystal-clear financial picture from day one. It’s what empowers you to make smart, informed decisions as the project moves forward.
Mapping Out a Realistic Project Timeline
A detailed timeline is just as crucial as your budget. It’s the roadmap that keeps everyone—from your internal team to outside vendors—on the same page and helps manage expectations. The best timelines are built around clear, sequential milestones that create a logical flow from start to finish.
A solid project timeline should map out these key phases:
- Final Design Approval: Get that final sign-off before a single dollar is spent on furniture.
- Order Placement: Place all furniture and equipment orders and get firm lead times from every single vendor.
- Site Prep: This is for any painting, electrical work, or flooring updates that have to happen before the furniture arrives.
- Delivery and Staging: Coordinate a specific delivery window and have a designated area ready to stage the items for installation.
- Installation: The main event! This is when the physical build-out happens.
- Final Walkthrough: A thorough inspection to create a “punch list” of any issues that need fixing before you sign off on the project.
It’s also smart to keep an eye on the current office market. Recent indicators show the sector is stabilizing, with 10.3 million square feet of positive net absorption reported in Q4 2024 in the U.S.—the strongest demand we’ve seen in three years. For anyone planning a project, this signals a shifting environment where you might find opportunities to renegotiate a lease or invest in a great location as vacancy rates slowly dip.
Ensuring a Smooth and Compliant Installation
The installation phase is where all the puzzle pieces finally click together. A smooth process here is all about tight coordination and making sure you’re compliant with all the necessary standards.
Before a single box is opened, double-check that your plan meets key requirements:
- ADA Compliance: Your layout must be accessible. This means proper clearances in walkways, at doorways, and around every workstation.
- Fire Codes: Make sure your plan adheres to local fire safety regulations, which includes clear egress paths and proper clearance for sprinkler systems.
Once you’re ready for the build-out, communication is everything. Stay in close contact with your vendors, especially your furniture installation team. For more complex projects involving modular systems like workstation cubicles or private office cubicles, using professional assemblers is a must.
At Cubicle By Design, we know how critical this final step is. We’ve seen it all. That’s why we provide end-to-end support, including expert guidance on office furniture installation to ensure everything is put together correctly, safely, and exactly as you envisioned.
The very last step is the walkthrough. With your layout blueprint in hand, inspect every single detail. Test every outlet, check every drawer, and look for any scuffs or damage. This meticulous final check is what guarantees your new space is perfect from day one.
Common Questions We Hear About Office Planning
Jumping into an office redesign always kicks up a few questions. To help you feel more confident as you get started, we’ve pulled together some of the most common things we hear from facility managers and business leaders in the middle of the planning process.
How Much Space Do I Really Need Per Employee?
The old rule of thumb was a roomy 200-250 square feet per person, but that’s completely changed. With hybrid work and more dynamic layouts, the new target is much closer to 130-170 square feet per employee.
Honestly, the perfect number boils down to the kind of layout you choose. A wide-open floor plan will naturally have a smaller footprint per person than an office filled with private office cubicles. The real secret is to stop thinking about generic formulas and start looking at how your team actually works. People who need quiet for deep focus or have bulky equipment will always need more dedicated space.
What’s the Biggest Mistake People Make in Office Space Planning?
Easy. The most common—and most expensive—mistake is designing for right now with zero thought for what’s next. When you create a rigid plan that can’t handle company growth, new technology, or changing work habits, you’ve built an office that’s already on its way to being obsolete.
The only way to get ahead of this is to build flexibility into your design from day one. Using modular and adaptable furniture means you can reconfigure your layout with minimal fuss as your team evolves. Always plan with growth and change in mind.
How Can I Fix the Noise Problem in My Open Office?
Controlling the acoustics is make-or-break for a successful open-plan office. A little bit of everything is the best strategy for taming the noise and keeping distractions from derailing your team’s focus.
You’ll want to layer a few different tactics:
- Soak up sound with absorptive materials. Think acoustic ceiling tiles, wall panels, and even carpeting.
- Choose furniture that pulls double duty, like high-walled workstation cubicles or felt dividers that physically block sound waves.
- Install a sound-masking system. These systems introduce a subtle, engineered background sound that makes nearby conversations less intelligible and much less distracting.
- Create dedicated quiet zones. Give people an escape hatch with enclosed pods or designated quiet rooms for focused work and private calls.
What’s the Best Way to Get My Team on Board?
Involve them. Early and often. The shift to a new layout goes so much more smoothly when employees feel like they’re part of the conversation, not just having a change dictated to them.
Kick things off with a simple survey to find out what isn’t working for them now and what they need to do their jobs better. As you start mocking up ideas with a tool like our cubicle designer, share the concepts and ask for honest feedback. When your team feels heard—and actually sees their input reflected in the final plan—they’re way more likely to be excited about the new space.
Think of this Cubicle By Design guide as your starting point for creating a workplace that genuinely works for your people. Ready to make it happen? Explore our full range of flexible office solutions at https://cubiclebydesign.com/.