Conference Table with Electrical Outlets | Your 2024 Guide | Cubicle By Design

We’ve all been there. You’re in the middle of a critical presentation, and suddenly you’re staring at a tangled nest of extension cords snaking across the floor. It’s not just messy—it’s a dead stop to productivity and looks completely unprofessional. A conference table with electrical outlets is the answer, turning a chaotic meeting space into a smooth, connected hub. This one upgrade keeps every device powered up, letting your team stay focused on what actually matters. At Cubicle By Design, we help businesses create these efficient, modern workspaces.

Why Your Modern Office Needs a Powered Conference Table

The days of frantically searching for a free wall socket or tripping over cables are over. In today’s workplace, the conference room is the command center for collaboration, client pitches, and big decisions. A conference table with built-in power isn't a perk anymore; it's essential infrastructure for any business that wants to stay competitive.

The market backs this up. The global demand for meeting room power outlets is expected to jump from $850 million in 2025 to $1.5 billion by 2033. What’s driving this? A massive push toward smart office technology, with 72% of businesses now making tech integration a top priority when they upgrade their conference rooms. You can get a closer look at these market shifts in this detailed report.

The Real Cost of Poor Connectivity

Without easy access to power, meeting rooms fall into a familiar, frustrating pattern that quietly kills productivity. Think about the last time a meeting got derailed because someone's laptop was about to die, sending them on a mad dash for a charger. These little interruptions break the creative flow, disrupt the conversation, and make your whole operation look disorganized.

A powered table directly solves these common pain points:

  • Delayed Meetings: No more time wasted untangling cords or hunting for power bricks before a presentation can even start.
  • Safety Hazards: Loose cables on the floor are a major trip hazard and create a cluttered, unprofessional look.
  • Reduced Collaboration: When people are chained to wall outlets scattered around the room, they can't fully engage with the team at the table.
  • Negative Client Impressions: A room full of messy wires can make a client question your company's attention to detail and professionalism.

Investing in a conference table with electrical outlets is really an investment in efficiency. It tells everyone—your team and your clients—that you value smooth collaboration, safety, and a modern, professional environment.

At the end of the day, giving your team the right tools is a fundamental part of smart workplace design. By eliminating these common frustrations, you create a space that genuinely supports productive work. You can explore our insights on other key workplace design trends to see how other small changes can deliver a huge impact.

Understanding Your Power and Connectivity Options

Picking the right power solution for your conference table is a lot like choosing the right tool for a job. You wouldn't bring a tiny screwdriver to a major construction project, right? In the same way, the power modules you select have to match what your team actually does day in and day out. This is about more than just simple charging; it’s about future-proofing your meeting spaces. From versatile workstation cubicles to executive suites, having the right power access is key.

You’ll generally run into a few common options: pop-up outlets, flush-mounted modules, and even slick wireless charging pads built right into the tabletop. Each one strikes a different balance between looks, ease of use, and capability. Some teams might just need a couple of standard electrical outlets, while others will need a whole suite of modern ports to stay productive.

This decision tree really boils it down to a simple choice between a modern, efficient setup and an outdated, frustrating one.

Decision tree illustrating office setup efficiency: meeting room with a conference table with electrical outlets is efficient, while a room without one is inefficient, leading to wasted time.

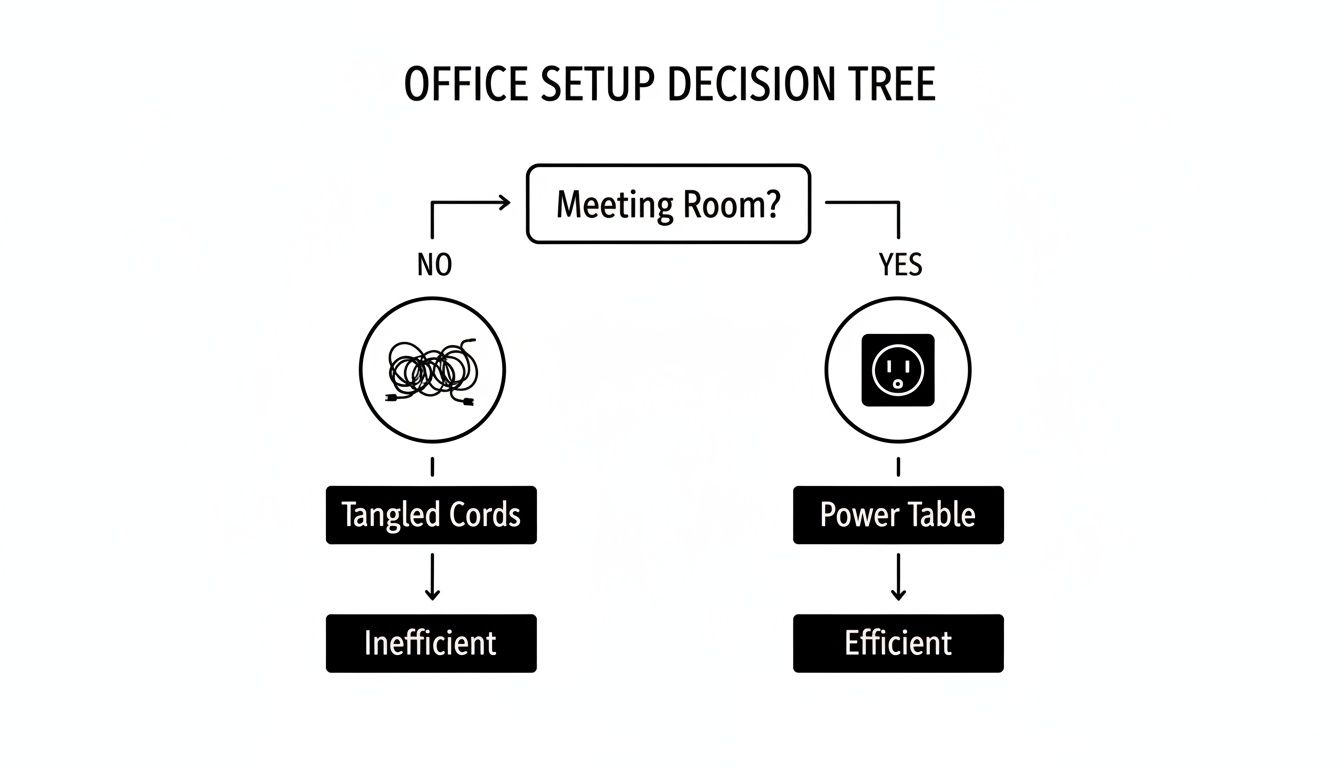
As you can see, building power directly into your conference table is the clearest path to a meeting room that works for you, not against you.

Differentiating Power Modules

Not all power units are created equal. The most basic versions just offer standard electrical outlets, which are great for keeping laptops juiced up during those long planning sessions. But the real game-changer in a modern conference table with electrical outlets is a unit that acts as a full-blown connectivity hub.

These more advanced modules typically pack a mix of ports designed for how we work today:

  • USB-A Ports: Still essential for charging older phones, keyboards, and a ton of other common desk gadgets.
  • USB-C Ports: This is the new standard. It's perfect for fast-charging modern laptops, tablets, and phones, letting people leave their bulky power bricks at their desks.
  • HDMI Ports: A must-have for seamless, plug-and-play screen sharing. No more fumbling with adapters right before a big presentation.
  • Ethernet Ports: When you need a rock-solid internet connection for a critical video conference or a massive file download, nothing beats a hardwired port.

Take a minute to think about your team’s daily grind. Are they constantly sharing their screens in meetings? An HDMI port isn't a luxury; it's a necessity. Do they live on video calls? An Ethernet port will give them the reliability they need. Matching the ports to how your team actually works saves you from paying for features that will just collect dust. For simpler needs, you can always explore how an under-desk power strip can supplement your main power hub without cluttering the tabletop.

Aesthetics and Accessibility

How the power module looks and feels is just as important as what it does. A sleek, flush-mounted unit keeps the tabletop clean and uninterrupted, which is perfect for a minimalist office design. On the other hand, a pop-up unit stays completely hidden until someone needs it—a "now you see it, now you don't" feature that many teams love for its tidiness.

The goal is to provide power that is both easily accessible and visually unobtrusive. The best solutions blend seamlessly into the table's design, enhancing functionality without creating clutter.

The demand for these integrated features is absolutely taking off. The global conference table market was valued at a whopping $1,018.28 million in 2024 and is expected to climb to $1,481.06 million by 2032. A huge driver of that growth is the demand for smart features like built-in power. It’s also no surprise that rectangular tables, which are ideal for adding these long power modules, currently make up 50% of the market share in exports.

How to Plan Your Room Layout and Sizing

A conference table with integrated power is more than just furniture; it's the functional heart of your meeting space. Getting the size and placement just right is the first step toward a room that actually works for your team. A table that’s too big will make the room feel cramped and impossible to navigate. Go too small, and you've got a table that can't handle your team's needs. The goal is to hit that sweet spot between seating capacity and comfortable movement.

Start by getting out the tape measure and sizing up your room's total dimensions. A critical rule of thumb here is to leave at least 48 to 60 inches of clear space on all sides of the table. This isn't just for walking past. It's about giving people enough room to pull out their chairs and move around without bumping into walls or each other—a key consideration for ADA compliance.

An aerial view of a modern conference table with beige chairs and built-in power outlets, showing dimensions for proper room layout.

To make sure your new powered table fits perfectly, it pays to understand how to measure furniture accurately. Taking a few minutes to do this properly can save you from a massive headache down the line.

Strategic Placement of Power Modules

Once you've nailed down the right table size, it's time to think about where people will plug in. You don't want your team members awkwardly stretching across the table just to find an outlet. The whole point is to make power access completely effortless for everyone at the table.

A simple guideline to follow is to place one power module for every four to six feet of table length. This spacing ensures nobody is ever more than an arm's reach from a port. For instance, on a 12-foot table, two or three evenly spaced modules would provide fantastic coverage for the whole team. This kind of strategic placement also keeps the tabletop clean and prevents that dreaded tangle of charging cables from taking over your meeting.

If you want to dig deeper into table sizes, our complete guide on conference tables dimensions has all the details you’ll need.

When you're planning the layout, think about how your team actually works together. Placing power modules thoughtfully helps technology support the natural flow of a meeting, rather than getting in the way of it.

Visualizing Your Final Layout

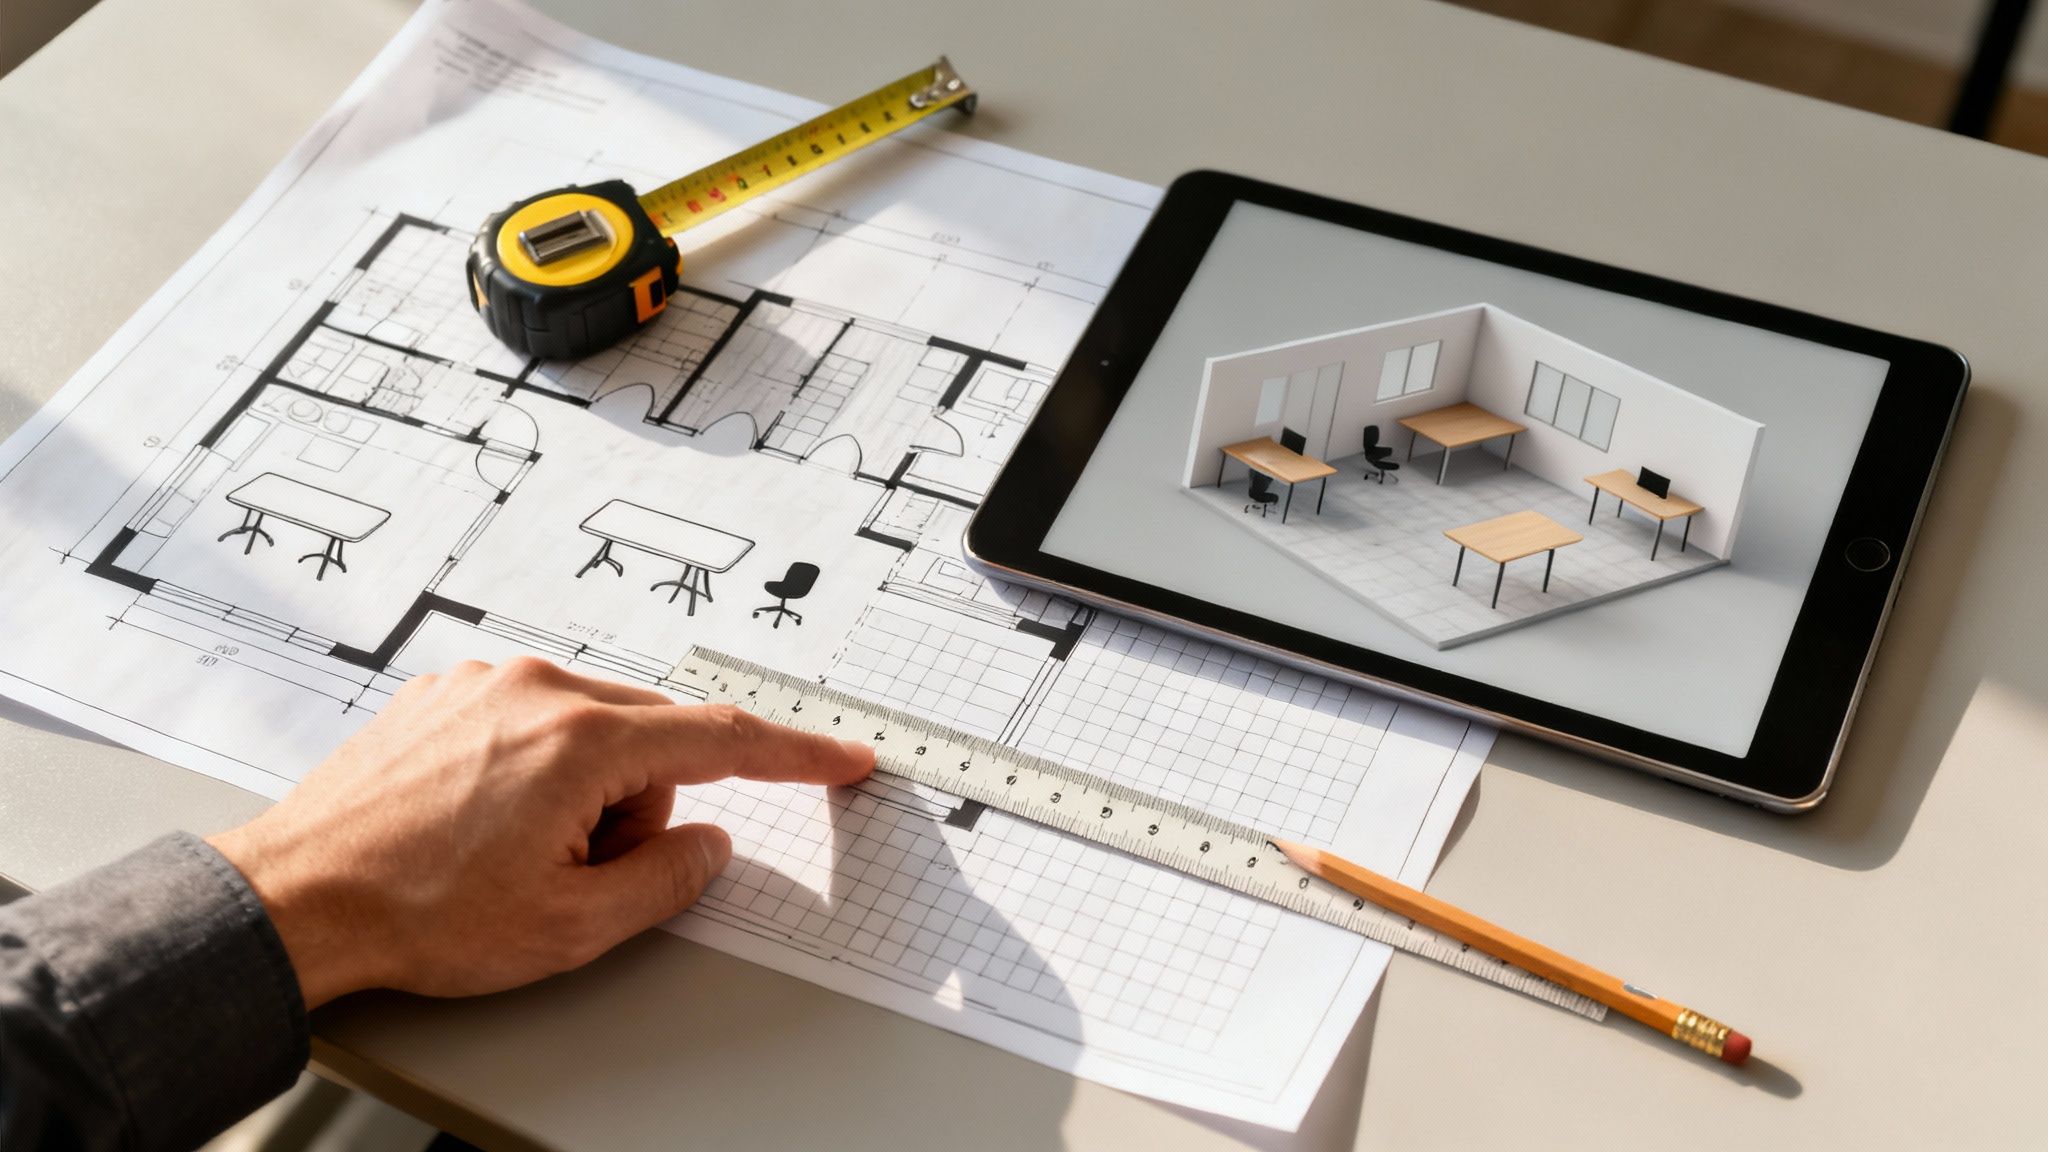
Trying to picture how your conference room will look can be tough. It's one thing to have measurements on paper, but another to see it come to life. This is where planning tools are a game-changer, helping you turn those abstract ideas into a solid visual plan.

Using a digital design tool lets you play around with different table sizes, seating arrangements, and clearances before you make any final decisions. You can experiment risk-free.

While it’s designed for workstations, a tool like the Cubicle By Design Cubicle Designer can be a great asset. The principles of space planning are the same, and it’s perfect for mocking up your conference room. You can arrange all the elements to see how traffic will flow and ensure your chosen conference table with electrical outlets fits perfectly within your larger office design, creating a space that feels cohesive and intentional.

Getting the Installation and Code Compliance Right

The technical side of installing a conference table with electrical outlets can feel a bit daunting, but getting the basics right is absolutely critical for a safe, functional setup. You're generally looking at two paths: a hardwired system or a plug-and-play solution. Each has its own pros and cons when it comes to installation, cost, and how you might use the room down the road.

A hardwired setup is exactly what it sounds like—the table’s power modules get connected directly into your building’s electrical wiring. You'll need a licensed electrician for this, but the result is a totally seamless look with zero cords running to a wall outlet. On the other hand, plug-and-play systems gather all the table's power into a single cord that you just plug into a nearby floor or wall outlet. It’s a much more flexible option if you think you might reconfigure the room someday.

Don't Skimp on Electrical and Safety Codes

No matter which way you go, safety and code compliance are non-negotiable. Every commercial installation has to meet local building and electrical codes to prevent fire hazards and keep everyone safe. This is a huge reason why bringing in professionals is a must.

Beyond the general codes, installers need to follow the NFPA 70E electrical safety standards. Think of this as the rulebook for working safely around electrical equipment. Following these standards protects the installation crew, but it also protects your employees long after the job is done.

A professional installation isn't just about plugging things in. It’s about building a system that’s safe, reliable, and 100% compliant with every regulation. It’s about protecting your investment and, most importantly, your people.

This is exactly where a full-service partner like Cubicle By Design makes all the difference. Our teams are experts at handling these complexities, ensuring every piece is integrated correctly and safely. You can see how we manage these projects by exploring our professional office furniture installations process.

Smart Cable Management is a Must

A powered table is only as slick as its cable management. The whole point is to hide every wire, keeping the look clean and professional while getting rid of any trip hazards. Thankfully, there are some great solutions to make this happen.

  • Under-Table Trays and Channels: These are the hidden highways for your cords, guiding them neatly from the power modules down to the table's base.
  • Grommets and Cutouts: These are the clean, finished openings in the tabletop that let cords pass through, preventing that dreaded "spaghetti mess" on the surface.
  • Cable Spines and Conduits: If you have a height-adjustable or standing conference table, flexible spines are essential. They protect the cables and allow them to move smoothly as the table goes up and down.

This kind of attention to the hidden details is what sets modern office design apart. In fact, the market for boardroom table power outlets is expected to grow at a 6.8% CAGR, hitting $1.2 billion by 2030. A big driver for this is that large companies—which make up over 60% of the market—are all-in on hidden, integrated power for that sleek, high-end look.

Customizing Your Table Beyond the Power Outlets

A conference table wired for power is a functional workhorse, but let's be honest—it also needs to be a statement piece that fits your company's vibe and office design. The best tables don't just have outlets; they merge technology and aesthetics so seamlessly that the table becomes a centerpiece that's as beautiful as it is useful. Once you've figured out the tech, you can customize nearly every other aspect of the table to bring your vision to life.

The material and finish you choose really set the tone for the entire room. Your options run the gamut from durable, budget-friendly laminates—which come in countless colors and patterns—to the timeless warmth of real wood veneer or the undeniable presence of solid wood. If you're going for a more industrial or minimalist look, you might even consider metal or glass. Each material has a completely different feel, giving you the flexibility to align the table perfectly with your brand.

Three modern wooden conference tables with integrated power outlets and various wood finish samples on a white background, demonstrating customization options.

Harmonizing Form and Function

The shape of your conference table plays a surprisingly big role in both the room's dynamics and its day-to-day functionality. It directly influences how people interact and, just as importantly, how power can be distributed.

  • Rectangular Tables: This is the classic choice for formal boardrooms. It offers clear sightlines and makes it dead simple to run power modules down the center for uniform access.
  • Boat-Shaped Tables: With slightly curved sides, these tables are a game-changer for sightlines, especially for people seated further down the line. It just feels more collaborative.
  • Racetrack or Oval Tables: These shapes soften the feel of a room and encourage a more fluid, less hierarchical conversation. They're fantastic for creative brainstorming sessions.

The real magic happens when you connect these design choices back to the technology. Imagine a dark walnut veneer table paired with power grommets in a brushed bronze or matte black finish—it creates a cohesive, high-end look. The goal is a seamless integration where the tech feels like a natural part of the table’s design, not a clumsy add-on.

A well-designed conference table is where your company's culture meets its workflow. Every detail, from the wood grain to the finish on the outlets, contributes to a space that feels intentional, professional, and ready for business.

Integrating Advanced Technology

True customization goes beyond aesthetics and dives into advanced audiovisual (A/V) equipment. Your conference table can become the central hub for all your communication needs by integrating features right into the surface:

  • Built-in, flush-mounted microphones for crystal-clear audio during video calls.
  • Integrated touch-panel controls for managing the room’s lighting, displays, and audio systems.
  • Cable cubbies and pass-throughs designed specifically for bulky A/V wiring.

By planning for these integrations from the start, you’re not just buying a table; you're creating a powerful, self-contained collaboration station. This transforms your conference table with electrical outlets from a simple piece of furniture into the heart of a high-tech, fully functional modern workspace, ready for any presentation or global meeting you can throw at it.

Your Checklist for Buying the Perfect Powered Table

Ready to pull the trigger on a new conference table with built-in power? It can feel like a big decision, but this final checklist breaks it all down. Think of it as your step-by-step roadmap to make sure you’ve covered all the bases. Whether you need standard cubicles or a high-tech conference room, planning is everything.

We'll walk through everything from initial planning to the final details, so you can feel completely confident in your purchase. This isn’t just about buying a table; it’s about creating a truly functional and productive meeting space.

The Essential Purchasing Steps

Before you even think about placing an order, run through these key checkpoints. Getting this right from the start ensures the table you pick will actually work for your team for years to come.

  1. Figure Out Your Team’s Real Connectivity Needs: Start by talking to the people who will actually use the table. Are they just charging laptops, or do they need USB-C, HDMI, and Ethernet ports to get their work done? Don't guess—ask.

  2. Measure Twice, Buy Once: Get the exact dimensions of your room and sketch out where the table will go. You absolutely need to leave at least 48 inches of clearance on all sides. This isn't just for comfort; it's a key part of ADA compliance.

  3. Choose the Right Number of Power Modules: Based on what your team needs and how long the table is, decide on the right mix and quantity of power modules. A good rule of thumb is to have one module for every four to six feet of table length.

  4. Get Your Electrical and Code Ducks in a Row: Is a simple plug-and-play solution enough, or will you need to hardwire the table? This is the point where you should plan on looping in a licensed electrician to make sure everything is up to local safety and building codes.

  5. Pick Finishes That Match Your Brand: This is the fun part. Select the tabletop material, shape, and finish that fit your office vibe. Don’t forget to coordinate the finish on the power module grommets—it’s a small detail that makes a huge difference in creating a polished, professional look.

This checklist turns a complicated decision into a simple, manageable process. It makes sure your investment in a powered conference table actually supports your goals for a safer, more efficient, and modern office.

Working through these steps methodically is the surest way to a great result. For a deeper dive into outfitting your entire office, check out our comprehensive office furniture buying guide.

Ultimately, the goal is a seamless experience from start to finish. The team at Cubicle By Design is here to help you navigate every step, from laying out your space with our Custom Cubicle Designer to professional installation. Reach out today, and let's start designing a meeting space that truly works.

Common Questions We Hear

Finalizing your decision on a conference table with integrated power can bring up a few last-minute questions. It's totally normal. Getting clear, straightforward answers is the best way to make a confident choice that will perfectly suit your office for years to come. Here are some of the most common questions we hear from clients just like you.

How Many Outlets Do I Actually Need?

This is probably the number one question we get. A good rule of thumb is to plan for at least one power outlet and one USB port for every person at the table. So for a 10-person table, you'd want to install four or five dual-power modules, spaced out evenly so nobody has to stretch or ask a coworker to plug something in for them.

If your team is constantly hosting client presentations or everyone's running a laptop, a tablet, and a phone, you might want to increase that number. The goal is to guarantee everyone stays connected without a second thought.

Can I Just Add Electrical Outlets to My Existing Conference Table?

Yes, you often can. Retrofitting an existing table with pop-up or under-mount power modules is definitely possible. However, this isn't a simple weekend DIY project. It requires precise cutting and careful installation to avoid damaging the table's surface and, more importantly, to ensure it's completely safe.

Our strong recommendation? Talk to a professional installer or a company like Cubicle By Design first. We can assess your table's suitability and make sure any modification is handled correctly and meets all safety standards. It’s just not worth the risk otherwise.

What’s the Real Difference Between Hardwired and Plug-In Power?

The main difference boils down to installation and how permanent you want the solution to be.

  • Plug-in solutions offer fantastic flexibility. They have a single cord that connects to a standard wall or floor outlet, just like a lamp. This makes them much easier and less expensive to install.
  • Hardwired solutions are connected directly into the building's electrical system by a licensed electrician. This gives you a cleaner, more permanent setup with no visible cords running to a wall. It's often required by building codes for larger tables or in certain commercial spaces.

Choosing between them really depends on your long-term plans for the room and what your local building codes require. We can help you find solutions for everything from private office cubicles to large conference rooms.


Ready to create a modern, productive meeting space where everyone can stay powered up? The team at Cubicle By Design specializes in designing workspaces that make collaboration and efficiency happen. From the first sketch in our Custom Cubicle Designer to the final professional installation, we're here to help.

Read More

Mastering Conference Room Table Size for Productive Meetings

Picking the right conference room table size is a classic balancing act. You want to fit as many people as comfortably as possible, but you also need to leave enough room for people to actually move around. It’s a common mistake to get a table so big it completely chokes the room's flow, making the whole space feel cramped and awkward.

The secret isn’t just the table itself; it’s the breathing room—the negative space around it—that truly makes a conference room functional.

What to Consider Before Choosing Your Table Size

Deciding on the perfect conference table goes way beyond just picking a style you like. It's a strategic move that shapes the entire feel and function of your meeting space. Before you even think about pulling out a tape measure, you need to nail down the core factors that will drive your decision. Getting this right ensures your investment pays off for years to come.

A great table can turn a simple room into a powerhouse of productivity. A poor choice? It's just a source of daily frustration. Thinking through these key elements first lays the groundwork for a space that actually works. And if you're looking for a wider view on furnishing your entire workspace, our comprehensive office furniture buying guide is a great place to start.

Defining Your Room's Primary Purpose

First thing's first: what is this room really for?

  • Formal Board Meetings: Is this where you'll host high-stakes client presentations or executive pow-wows?
  • Collaborative Team Sessions: Will it be a creative hub for brainstorming, daily stand-ups, and project work?
  • Hybrid Meetings: Does it need to be wired for sound and video to seamlessly connect in-person and remote team members?

The room's main job dictates everything—not just the size, but the shape and features you'll need. A formal boardroom often calls for a large, commanding table, while a creative war room thrives on a more flexible, open setup.

Modern meeting room featuring a light wood conference table, several beige chairs, and a bright window.

Factoring in Materials and Aesthetics

Beyond just the footprint, the materials you choose have a huge impact on the room's vibe. Exploring options like different wood finishes, laminates, or even specialty glass styles can completely elevate the design. The right material should echo your company's brand and the atmosphere you're trying to create.

For a bit of context, a standard conference table built for 10 people usually measures around 120 inches long by 48 inches wide. This size gives everyone enough elbow room. It's this popular sizing that has really pushed manufacturers to offer more customizable tables with built-in power and data ports, a trend that’s become almost a necessity in today's tech-driven offices.

Matching Table Shape to Your Meeting Style

The shape of your conference table does more than just fill a room; it’s the silent moderator in every meeting, directing the flow of conversation and collaboration. Getting the shape right is just as important as figuring out the correct conference room table size because it sets the psychological stage for every interaction.

A table's geometry can create a formal sense of hierarchy or foster an atmosphere where everyone participates equally. This choice should directly reflect what you actually do in your meeting space.

The Classic Rectangular Table

When most people picture a conference room, they picture a rectangular table. Its long, straight lines create a clear structure, which is perfect for formal presentations, board meetings, and any situation where there’s a distinct head of the table. This shape is a real workhorse, especially for maximizing seating in long, narrow rooms.

The downside? Its formal nature can sometimes feel a bit rigid. People at opposite ends might struggle to see and hear each other, which can stifle the open dialogue you want in more collaborative sessions. A typical boardroom table for 8-10 executives usually runs between 96 to 120 inches long and 42-48 inches wide.

Recent numbers show that 60% of new office furniture installations still lean towards rectangular shapes. Their popularity is boosted by how well they support modern AV tech, a critical feature now that an estimated 70% of meetings involve video conferencing.

The Collaborative Boat-Shaped Table

A boat-shaped table is a subtle but powerful twist on the classic rectangle. It’s wider in the middle and gently tapers toward the ends—a simple design tweak that dramatically improves sightlines for everyone at the table.

That gentle curve makes a huge difference in fostering a more collaborative vibe. By bringing the edges inward, this shape ensures no one feels too far removed from the conversation. It's an excellent choice for teams that need to have dynamic discussions and review presentations together, striking a great balance between formal structure and inclusive dialogue.

Round and Square Tables for Equal Footing

When every voice needs to be heard equally, round and square tables are the undisputed champs. With no designated "head," these shapes are a physical representation of a flat hierarchy, naturally encouraging open conversation and teamwork. They are absolutely perfect for smaller, agile teams and brainstorming sessions.

These tables are ideal for:

  • Small team huddles: Fostering quick, informal check-ins and creative problem-solving.
  • Intimate client meetings: Creating a less intimidating, more personal atmosphere.
  • Breakout groups: Helping small groups focus during a larger workshop or training session.

Because they excel at promoting face-to-face interaction, round tables are particularly effective at building rapport and making sure everyone feels included. To see how different table shapes can anchor your broader office layout, you can explore our full range of office furniture designs.

Key Takeaway: No matter the shape, the fundamental rule for seating capacity is to allow 24 to 30 inches of personal space per person along the table's edge. This is the magic number that ensures attendees have enough elbow room to comfortably take notes, use a laptop, and engage without feeling squeezed. It's the simple principle you can use as a starting point, whether you're seating six people for a creative session or twenty for a formal board review.

Planning Your Room Layout for Flow and Function

You can pick the most beautiful, perfectly sized conference table in the world, but if you drop it into a poorly planned room, it’s going to fail. The real secret to a functional meeting space isn’t just the furniture—it’s the negative space around it. This clearance is what allows people to move naturally, ensures accessibility, and creates a feeling of comfortable productivity instead of frustrating confinement.

Think of the walkways in your conference room like arteries; they have to stay clear to keep the room’s energy alive and flowing. When pathways are too narrow or blocked, a meeting can feel stagnant. It becomes a hassle for people to get up, present at a whiteboard, or even just shift in their seats without bumping into everyone else. Good planning gets rid of these bottlenecks before they ever become a problem.

The shape of your table plays a big role in this, as different shapes encourage different kinds of meetings and, therefore, different kinds of movement.

A flowchart diagram explaining three meeting styles: Hierarchical, Egalitarian, and Collaborative, detailing their processes and outcomes.

As you can see, a long rectangular table works well for top-down, hierarchical meetings, while a round table promotes a more egalitarian discussion. Each one demands a unique approach to the surrounding space.

The Gold Standard for Clearance

When you start mapping out the room, there's a magic number to keep in your head: 48 inches. This is the gold standard for clearance in your main traffic paths—the space between the edge of the table and the walls or other big items like credenzas.

Why 48 inches? It’s wide enough for two people to pass by each other without doing that awkward sideways shuffle. It also gives someone enough room to pull their chair out and stand up while another person walks behind them without issue. That generous spacing is what makes a room feel professional and accommodating.

For spots with less foot traffic, like the space between the table and a wall that isn't a primary walkway, you can shrink that clearance down to a minimum of 36 inches. It’s functional, but this tighter spacing is best kept to low-traffic zones to avoid creating pinch points in your layout.

Mapping Your Entire Room Footprint

A great layout goes way beyond just the conference table. Before you lock in that table size, you need to account for every other piece of the puzzle that will live in that room.

Start by measuring and mapping out the location of things like:

  • Credenzas and Cabinets: These are staples in most conference rooms, but they eat up a surprising amount of floor space.
  • Whiteboards or Presentation Screens: You need to leave enough room for someone to stand at the screen and present without feeling crammed against the table or chairs.
  • Door Swings: Don't forget about the arc of the door opening into the room! A classic mistake is putting a chair right where the door needs to swing open.
  • Structural Elements: Beams, support columns, radiators, or any other permanent fixtures have to be included in your clearance math.

If you want to see how all these pieces come together in the real world, check out some of our finished spaces in our office design project gallery.

Pro Tip: Grab a roll of painter's tape and mark the dimensions of your future table and other furniture directly on the floor. This simple trick lets you physically walk around the "furniture" and get a true feel for the flow before you spend a dime.

Ensuring ADA Accessibility

Beyond just comfort and flow, your room layout is a matter of compliance and inclusivity. The Americans with Disabilities Act (ADA) has specific standards to make sure workspaces are accessible for everyone.

For conference rooms, that means providing clear, unobstructed pathways wide enough for a wheelchair to navigate easily. The 36-inch minimum clearance is often cited in ADA guidelines for accessible routes, but honestly, providing more generous pathways—closer to that 48-inch ideal—is always the better move. A thoughtfully designed room allows every single team member, regardless of their mobility, to navigate the space with dignity and ease. Good planning makes your meeting space not just functional, but truly welcoming to all.

Integrating Technology, Power, and Cabling

These days, a conference table is more than just a place to set down notepads and coffee cups—it's the command center for your entire meeting. If you don't plan for technology, you'll end up with a tangled mess of wires, creating trip hazards and an unprofessional vibe. The trick is to think about power and data right from the start, making sure your table is sized not just for people, but for their devices too.

Thinking about cabling isn't just an IT problem; it's a core part of the room's design. When tech is woven in seamlessly, it makes hybrid meetings a breeze, keeps everyone's laptops charged, and lets your team focus on the discussion—not on hunting for an open outlet.

Modern conference table with built-in power outlets, cable management, laptop, and remote control.

Smart Cable Management Solutions

The goal here is to make power and data access totally effortless without cluttering up the beautiful table you just picked out. Thankfully, modern tables come with some slick built-in solutions that hide the mess while keeping connectivity right at your fingertips.

A few popular options include:

  • Built-in Power Modules: These are set right into the tabletop, often with a mix of standard outlets, USB-A and USB-C ports, and maybe an HDMI hookup. Many pop up when you need them and retract back down for a clean, flush look.
  • Under-Table Cable Trays: A simple but brilliant solution. These are basically nets or trays mounted underneath the tabletop to wrangle power strips and extra cords, keeping them neatly tucked away and off the floor.
  • Hollow Legs or Pedestals: Some of the savviest designs use hollow legs or a central base to run cables discreetly from the floor straight up to the power modules on the surface.

The right choice really depends on how you meet. For quick team huddles, a few USB ports might be all you need. But for those all-day workshops or big presentations, a full suite of power, data, and AV connections is a must-have. For a deeper dive, check out our guide on the essentials of a safe and efficient cubicle electrical setup.

Planning Your Power and Data Pathways

Once you’ve picked your in-table tech, you need a solid plan to get power and data from the wall to the table. This is where a little foresight saves a ton of headaches later, because trying to add this stuff after the fact can be expensive and disruptive.

Your table's fancy tech is only as good as its connection to the building's wiring. Think through the entire journey—from the wall socket to the tabletop port—to avoid last-minute scrambles and ugly extension cords snaking across the floor.

It’s no surprise that high-tech tables with built-in charging are catching on, grabbing 15% of the market share in 2023. They’re a productivity booster, making sure no one’s device dies mid-meeting. For a truly professional setup, looking into structured cabling systems is a smart move to keep things neat, efficient, and ready for whatever tech comes next.

Here are a few common ways to route those cables:

  1. Floor-Mounted Outlets: This is the cleanest look. A floor box, or "poke-thru," is installed directly under the table, allowing power and data to connect out of sight. It's the gold standard, especially for new builds or major renovations.
  2. Cable Covers and Raceways: If you’re working with an existing room that doesn’t have floor outlets, low-profile cable covers can run from the wall to the table base. They’re not quite as invisible as a floor box, but they manage the wires safely and keep people from tripping.
  3. Power Poles: A power pole is a vertical channel that drops from the ceiling down to the conference table, hiding all the wiring inside. It's a fantastic solution for open-plan offices where the table is nowhere near a wall.

A Step-By-Step Checklist for Measuring Your Room

Accurate measurements are the absolute bedrock of good room design. Before you even think about choosing the perfect conference room table size, you need a precise blueprint of the space you’re working with. This goes way beyond just jotting down the length and width; it's about capturing every little detail that could throw a wrench in your final layout.

Getting this right from the very beginning saves you from the headache (and cost) of ordering a beautiful table that simply won’t fit. Think of this checklist as your treasure map—follow it, and 'X' will mark the spot for your ideal table.

1. Measure the Core Dimensions

First things first, let's get the basics down to understand the room's total footprint. Grab a reliable tape measure and a notepad, or your tablet, and let's get to it.

  • Length: Measure the longest wall from one corner clean to the other.
  • Width: Now do the same for the shorter wall, corner to corner.
  • Ceiling Height: Measure straight up from the floor to the ceiling. Most standard ceilings are around 8 feet, but if you have higher ceilings, that can make the room feel much more open and might influence your lighting or even acoustic panel choices.

2. Identify and Map All Obstructions

Okay, now for the tricky part. It's time to account for everything that isn't empty floor space. These are the permanent fixtures that will directly impact where your table can (and can't) go.

  • Doors: Measure the width of the door, sure, but more importantly, you need to map its swing arc. Make a note of which way the door opens and exactly how far it swings into the room.
  • Windows: Jot down the location and width of every window. Don't forget to measure their height from the floor (the sill height), as this will determine where you can place things like credenzas or whiteboards.
  • Columns and Pillars: If you have any structural columns, measure their dimensions and their exact distance from the nearest walls. You have to work around these.
  • Built-in Features: Document the location and size of anything else that's fixed to the walls or floor—radiators, built-in cabinets, thermostats, light switches, you name it.

3. Locate Power and Data Ports

In any modern meeting room, technology is king. Knowing precisely where your power and data sources are is absolutely crucial for planning a space that’s actually functional.

A table's final position is often dictated by connectivity. Mapping out your outlets early on prevents a situation where ugly extension cords become a permanent part of your room's decor.

On a quick sketch of your room, mark the exact location of every single one of these:

  • Electrical outlet
  • Ethernet/data port
  • AV connection point (like wall-mounted HDMI ports)

This info is what will help you decide if you need a table with built-in power modules or if you need to think about floor-based cable management solutions.

Once you've picked out the perfect table, having professional teams handle the final placement is a game-changer. You can learn more about office furniture installation and disposal to see how the pros ensure a smooth, perfect setup from start to finish.

Tying It All Together with Cubicle By Design

Your conference table is a huge piece of the puzzle, but it doesn't exist in a vacuum. A truly great meeting space flows naturally with the rest of your office, creating a workspace that just works. This is where we need to stop thinking about just one room and start planning for a cohesive, professional environment that feels unified from the moment someone walks in.

At Cubicle By Design, this is our specialty. We don't just sell furniture; we help build connected, harmonious workplaces. Your new conference room should feel like it belongs, complementing the function and feel of your entire office, from the reception desk right down to individual workstations.

Defining Spaces with Modern Solutions

One of the trickiest parts of office design today is creating separate, functional zones without building a bunch of walls that kill the open, airy vibe. Our Series 7 Glass Walls are the perfect answer. They let you carve out a sleek, modern conference area that feels private but still very much a part of the larger space.

These modular glass walls are fantastic for acoustic separation—keeping confidential meetings private—while letting all that great natural light flow through. No more stuffy, claustrophobic meeting rooms. They look incredible paired with our flexible cubicle systems, creating a consistent design language. Imagine a well-placed conference room right near your collaborative workstation cubicles, making it easy for teams to pop in for a quick huddle.

See Your Whole Office Come to Life

It's a lot easier to nail down the perfect conference room table size when you can actually see how it fits with everything else. That's exactly why we built the Custom Cubicle Designer tool. It lets you map out your entire office, not just a single room.

You can play around with different setups, dropping your new conference room next to various arrangements of our versatile cubicles. This bird's-eye view is a game-changer. It helps you make sure walkways are clear, sightlines are good, and the overall office flow feels natural, not forced.

This big-picture approach is becoming essential. As businesses adapt, we're seeing a 40% rise in multi-purpose rooms that need to be flexible. For our clients, that means having modular designs that can scale from an 84-inch table for a small huddle to a 144-inch table for an all-hands meeting. To see how market trends are shaping office furniture, you can read the full research from HTF Market Insights.

Creating a Unified Design Language

A cohesive workspace isn't just about the layout; it's about the look and feel. Your conference room should be a natural extension of your company's brand and culture. By pairing our modular solutions, you can create that seamless aesthetic.

Think about how these combinations could work:

  • Executive Hubs: Pair a large, formal conference room enclosed by our Series 7 Glass Walls with nearby private office cubicles. The result is a sophisticated, high-end executive wing.
  • Collaborative Zones: Drop smaller, open-plan meeting areas with round tables near clusters of low-walled workstations. This setup encourages teamwork and spontaneous brainstorming.

When you think of your workspace as a complete system, choosing a conference table becomes much simpler. You can pick a size that not only fits the room but also perfectly supports its role in the productivity and design of your entire office. At Cubicle By Design, we give you the tools and solutions to strike that perfect balance.

Common Questions About Conference Room Tables

Picking out the right conference room table can feel surprisingly complicated, but it really just boils down to a few key principles. To wrap things up and make sure the core ideas from this guide stick, we’ve put together some straightforward answers to the questions we hear most often from our clients.

Think of this as a final gut check. Getting these details right—from clearance and height to whether a table will actually fit—is what separates a functional, inviting meeting space from one that's just frustrating to be in.

How Much Space Do You Need Around a Conference Table?

This is probably the most important question, and here’s the rule of thumb: aim for at least 48 inches (4 feet) of clearance between the edge of your table and the walls or any other furniture. That might sound like a lot, but it creates a comfortable walkway that allows two people to pass by each other easily, even when chairs are pulled out.

If a particular side of the table isn't a main traffic path, you can sometimes get away with a minimum of 36 inches. But honestly, sticking to the 48-inch rule is your best bet for a room that feels open and accessible, not cramped.

What Is the Standard Height of a Conference Table?

You’ll find that nearly every standard conference table is between 29 and 30 inches high. There's a good reason for this specific range—it's ergonomically designed to work perfectly with standard office chairs, which usually have a seat height between 16 and 21 inches.

This consistency ensures everyone at the table can sit with good posture, which makes a big difference in comfort during those longer strategy sessions.

Will a 10-Person Table Fit in a 12'x16' Foot Room?

Putting a 10-person table in a 12'x16' room is a classic mistake. It's technically possible, but it will be so tight that it’s completely impractical. A typical rectangular table for 10 people is about 10 feet long. In a 16-foot room, you’re left with only 3 feet (36 inches) of clearance on each end, which is already below the minimum we’d recommend for comfortable movement.

And that's before you even consider the 12-foot width, which would feel even more squeezed. For a room this size, an 8-person table is a much smarter choice. It will give you the breathing room you need for a functional, professional space.

Should I Choose a Rectangular or Boat-Shaped Table?

The right shape really depends on the kind of meetings you have. Neither is better than the other, they just serve different purposes.

  • Rectangular Tables: This is the traditional, go-to choice for formal boardrooms. They’re great for maximizing seating, especially in long, narrow rooms, and they establish a very clear head of the table for a more hierarchical feel.

  • Boat-Shaped Tables: These tables are a fantastic alternative, with a design that's wider in the middle and tapers at the ends. That subtle curve dramatically improves sightlines, making it easier for everyone to see the person speaking or view a presentation. It naturally creates a more collaborative, less formal atmosphere.


Ready to design a workspace that perfectly balances form and function? The team at Cubicle By Design provides end-to-end support to help you plan, procure, and install a workspace that enhances productivity and collaboration. Explore our solutions and see how our modular systems can create a cohesive, professional environment for your entire office. https://cubiclebydesign.com/

Read More

Panel Privacy Screens: Transform Your Office with the Right Setup | Cubicle By Design

More than just simple dividers, panel privacy screens are a secret weapon for crafting a productive, modern office. They tackle the biggest challenge of open-plan layouts head-on: how to keep the collaborative buzz while giving people the space they need to actually focus. Think of them as the adjustable walls of your workspace, delivering both visual privacy and a much-needed break from the noise.

Defining Your Space With Panel Privacy Screens

In any bustling office, that constant hum of activity can be a double-edged sword. It’s great for energy, but terrible for deep work. Open offices are fantastic for collaboration, but they often leave employees desperate for a quiet corner to concentrate. This is exactly where panel privacy screens come in.

They create a physical and psychological barrier. A screen signals to coworkers that you're in the zone, while also muffling some of that distracting background chatter.

Unlike permanent walls, these panels are incredibly adaptable. You can reconfigure them as your teams grow, new projects kick off, or work styles evolve. This kind of flexibility is a game-changer in today's fast-moving business world, letting you create effective layouts without the headache and expense of a full-blown renovation.

The Growing Demand for Office Privacy

The move to hybrid and flexible work has put adaptable privacy solutions front and center. As companies rethink their office footprint, creating specific zones for different types of work—quiet zones, collaborative hubs, meeting spots—has become a top priority.

The market is taking notice. It's projected to jump from USD 250 million in 2025 to USD 443.5 million by 2035. That’s a massive leap, and it clearly shows how critical these solutions have become.

This isn't just about putting up walls; it's about empowering people. When employees have a sense of control over their immediate environment and their level of privacy, studies consistently show it has a direct, positive impact on their concentration and overall job satisfaction.

Balancing Collaboration and Concentration

The real magic of panel privacy screens lies in finding that sweet spot between interaction and isolation. It’s not about walling everyone off.

By strategically placing panels, you can design quiet nooks for heads-down tasks, create collaborative pods for team huddles, and still maintain open, high-traffic areas. This kind of thoughtful approach to office cubicle privacy ensures you get all the benefits of an open layout without the downsides.

By putting these versatile systems to work, you can build a workspace that truly supports everyone's needs, paving the way for a more focused and productive team.

Choosing the Right Materials for Performance and Style

Deciding on the material for your panel privacy screens is one of the most critical calls you'll make. It’s a choice that directly shapes everything from the office's soundscape to its overall aesthetic. Think of it like picking the right tires for a car—the material dictates performance, how long it will last, and how well it suits the environment.

Let's break down the most popular options.

This simple diagram really gets to the heart of what a modern office needs: a balance between individual focus and team collaboration.

As you can see, focused work and collaborative efforts are the two pillars holding up a successful modern office. Your choice of panel material is a powerful tool to support one, the other, or both.

Fabric and Acoustic Panels

In any space where noise is public enemy number one, fabric-wrapped acoustic panels are the undisputed champs. They’re basically sound sponges, soaking up ambient chatter and dialing down distractions. This makes them a go-to solution for call centers, busy sales floors, or any area where phone calls are a constant hum.

On top of that, sustainability is a huge factor for many businesses now. Eco-friendly materials are on the rise, with panels made from sustainable fabrics tapping into the 30% consumer demand for green interiors. It's a trend that's reshaping how we think about office design.

Glass and Polycarbonate Panels

If you want to keep your office feeling bright and open, glass is a fantastic choice. Using frosted or patterned glass panels allows you to define personal spaces and create visual privacy without killing the natural light. This helps the office feel airy and connected, avoiding that boxed-in feeling that solid walls can sometimes cause.

For a deeper dive into how glass can transform a workspace, our guide on glass partition walls for offices is a great resource.

Polycarbonate is a durable, lightweight alternative that offers a lot of the same perks. It's usually a bit more budget-friendly and is highly shatter-resistant, making it a smart pick for high-traffic zones. Both materials are a breeze to clean and maintain a sleek, modern look.

Laminate and Metal Panels

Laminate panels are the chameleons of office design. They come in a massive array of colors, patterns, and wood-grain finishes, so you can match them to virtually any decor. They’re tough, easy to wipe down, and provide a solid visual barrier, making them a great fit for private office cubicles or for marking out different departmental areas.

When you’re thinking about durability with a modern edge, it's worth exploring different metal options. Metal panels, usually aluminum, bring an industrial-chic vibe to the space and are built to last.

To help you visualize the trade-offs, here’s a quick comparison of the materials we've covered.

Panel Privacy Screen Material Comparison

Material Type Acoustic Performance Visual Privacy Light Transmission Best For
Fabric/Acoustic High High None Call centers, open offices needing noise reduction.
Glass (Frosted/Patterned) Low Medium to High High Collaborative spaces, areas needing natural light.
Polycarbonate Low Medium to High Medium to High High-traffic areas, budget-conscious modern designs.
Laminate Medium High None Private cubicles, branding and custom aesthetics.
Metal Low High None Modern industrial designs, high-durability needs.

Each material brings its own unique strengths to the table, and seeing them side-by-side makes it easier to pinpoint what will work best for your specific needs.

The key is to match the material to the function of the space. An acoustically sensitive area has different needs than a collaborative hub, and the right panel material makes all the difference in achieving your desired outcome.

Ultimately, choosing the right material is more than a practical decision; it’s a design statement that directly impacts how your team works and feels. By understanding the balance between acoustic performance, light, and style, you can select the perfect panel privacy screens to build a productive and beautiful workspace.

Essential Factors for Selecting Your Panels

Once you've zeroed in on the right material, a few other key decisions will make or break how well your new panel privacy screens work in your space. This is the practical side of things—the nuts and bolts that turn a good idea into a great investment. Getting these details right is the difference between panels that just exist and panels that truly elevate your office.

Nailing these elements means your panels will fit right in, support your team's day-to-day work, and actually solve the privacy and noise headaches you're trying to fix. It's all about fine-tuning your choices for the biggest impact.

Finding the Right Panel Height

The height of your panels is one of the most powerful tools you have for shaping a space. There's no single "correct" answer here; the best height is all about what you're trying to achieve in a specific area.

  • Low Dividers (Around 48 inches): Think of these as perfect for creating team pods. They're just high enough to cut down on visual clutter at desk level but low enough that they don't kill collaboration or block all the natural light.
  • Full Seated Privacy (66 inches or higher): For anyone who needs to do deep-focus work or spends a lot of time on the phone, taller is better. These screens create a genuine sense of personal space, seriously cutting down on noise and interruptions for employees while they're seated.

We saw a massive spike in demand for this kind of separation after 45% of offices reconfigured for hybrid work in the wake of the remote boom. Suddenly, having clearly defined, individual workstations became more important than ever.

Understanding Acoustic Performance

Visual privacy is only half the story. If you don't manage sound, you're only solving part of the problem. This is where the Noise Reduction Coefficient (NRC) comes in, and it's simpler than it sounds. Basically, an NRC rating tells you how much sound a material soaks up instead of bouncing back.

An NRC rating is a scale from 0 to 1. A score of 0 means the material reflects all sound (like a concrete wall), while a 1 means it absorbs everything. So, a panel with an NRC of 0.75 absorbs 75% of the sound that hits it.

For a busy, open-plan office, you'll want to look for panels with a higher NRC rating—ideally 0.60 or more—to really make a dent in that background chatter. In quieter zones where sound isn't the main issue, a lower rating might be all you need.

Choosing Your Mounting Style

Finally, you need to think about how these panels will actually connect to your office furniture and layout. The mounting style you choose impacts both how stable the panels are and the overall aesthetic of the space.

Freestanding screens give you the ultimate flexibility; you can move them around and reconfigure your layout on a whim. On the other hand, integrated panels that connect directly to your cubicle system offer a more permanent, built-in look. For a closer look at options that attach right onto your desks, our guide on desk divider panels has some fantastic examples. This approach ensures a clean, cohesive appearance that makes the screens feel like they were always part of the furniture.

Integrating Panels with Your Office Furniture

The best privacy screens don't just sit in your office; they become a natural, seamless part of the entire workspace. It's about more than just plopping down a divider. When you thoughtfully merge panels with your furniture, you create a layout that looks unified and works smarter, avoiding that disjointed, thrown-together feel.

Think of it this way: instead of a random collection of dividers, a well-integrated system feels intentional. Every piece, from the desks to the panels, works in harmony to support your team.

The Power of Modular and Integrated Systems

This is where modular systems really come into their own. Furniture solutions are often designed with this kind of integration in mind from day one. Many of these systems have built-in power and data management, letting you run all your electrical and network cables directly through the panel framework itself.

The result? An incredibly clean, wire-free setup that’s a must for any modern, professional office. No more tripping hazards or a tangled mess of cables snaking across the floor. Everything is neatly tucked away, making the whole workspace safer and way more attractive.

Retrofitting for Enhanced Privacy

But what if you're not starting from scratch? Good news. Many offices can get a huge boost by retrofitting panels onto their existing furniture. It’s a smart, cost-effective way to add privacy and cut down on noise without having to rip everything out and start over.

You can easily add panels to:

  • Existing Desks: Clamp-on or freestanding screens are a quick fix for creating personal zones at individual workstations.
  • Low-Walled Cubicles: Panel extenders or stackers can be added on top of existing cubicles to give people more seated privacy.
  • Benching Systems: Spine screens running right down the center of a benching system can effectively divide the space and give everyone their own bubble.

This flexibility is a lifesaver for adapting a space as your team’s needs change over time.

Creating Varied Work Environments

True integration also means you can mix and match different elements to support all the different ways people work. You could combine solid, sound-absorbing panels with sleek glass walls to create a whole spectrum of environments within the same office.

For instance, you might set up focused private office cubicles with high, fabric-wrapped walls for deep work. Just a few feet away, collaborative workstation cubicles could use lower, semi-transparent panels that still allow for easy conversation and teamwork.

By thinking about integration from the start, you can build a dynamic and responsive workspace. This thoughtful planning transforms simple dividers into strategic assets that improve workflow and employee satisfaction.

The goal is to build an environment that feels like it was custom-designed for your team. If you're looking for some fresh ideas, our guide on how to revamp your workstations has practical tips for upgrading your current setup. At the end of the day, a well-integrated system ensures your office isn't just furnished—it's truly designed for productivity.

Panel Solutions for Common Office Scenarios

Theory is great, but seeing panel privacy screens in action is where their real value clicks. The right panel setup isn't just a piece of furniture; it's a tool that can solve the specific, day-to-day challenges your office is facing. When you tailor the solution to the environment, you can seriously boost both workflow and employee comfort.

Let's walk through a few common office scenarios and figure out the perfect panel setup for each one.

The High-Energy Sales Floor

Picture a sales floor buzzing with activity—phones ringing, deals being closed. That energy is fantastic for motivation, but the wall of sound can be a huge problem, making it tough for anyone to hear their own clients clearly.

  • The Challenge: High ambient noise and constant cross-talk create a ton of distractions.
  • Recommended Solution: Go with 66-inch or higher fabric-wrapped acoustic panels. These taller dividers offer excellent seated privacy, but more importantly, they soak up sound. This setup helps contain conversations, letting each salesperson focus on their own call without getting derailed by their neighbor's. A layout of private office cubicles can give each team member that much-needed dedicated, quieter space.

The Quiet Creative Studio

Now, shift gears to a design or content studio. Here, the name of the game is deep, uninterrupted focus. But you still need team members to be able to bounce ideas off each other without a fuss. The goal is a space that feels open and inspiring, not closed-off and isolating.

  • The Challenge: Striking a balance between individual concentration and the need for easy, spontaneous collaboration.
  • Recommended Solution: Use lower, semi-transparent polycarbonate or frosted glass panels. These screens do a great job of defining individual workstations, giving each creative their own personal bubble. At the same time, their height and material let natural light pour in and make it easy for someone to just pop their head up to ask a quick question. It’s the perfect way to foster a connected, yet focused, atmosphere.

The Flexible Hot-Desking Area

Finally, think about a flexible space built for hybrid workers and hot-desking. This area has to be incredibly adaptable, providing a functional and welcoming spot for employees who might only be in the office a couple of days a week.

Remember, these screens are more than just barriers; they are powerful productivity tools. In fact, workers with enhanced visual privacy consistently report 15-20% higher focus levels, a significant boost in any professional setting. Discover more insights about this on Factmr.com.

For this kind of setup, freestanding or clamp-on desk dividers are a perfect fit. They can be moved around or reconfigured in minutes as your team's needs change. They offer instant privacy for any workstation cubicles without needing a permanent installation. This approach keeps the space fluid and ready for whatever the day brings.

You can even take it a step further and design your own custom setup with our Cubicle Designer tool to see exactly what’s possible.

Design Your Ideal Workspace Layout

You've gotten a solid handle on the different materials, weighed the pros and cons, and seen how these screens work in the real world. Now it's time for the fun part: moving from ideas to action and actually bringing your vision to life. This is where careful space planning turns a good concept into a great, functional workspace that truly supports your team.

Figuring out exactly how panel privacy screens will fit into your existing office is a critical step. Getting the measurements and layout right from the start saves you from costly headaches down the road and ensures the final result is what you pictured. Thankfully, modern tools make this part of the process a whole lot easier.

Bring Your Vision to Life

Instead of relying on rough sketches and a bit of guesswork, you can build a virtual model of your office using interactive software. This lets you play around with different setups, panel heights, and materials without committing a single dollar.

That’s exactly what the Custom Cubicle Designer tool from Cubicle By Design was built for. It puts the design power right in your hands, allowing you to:

  • Experiment with dimensions: See how different layouts impact traffic flow and personal space before you build anything.
  • Select materials and finishes: Get a real feel for how fabric, glass, or laminate panels will look alongside your current decor.
  • Configure cubicles: Build out everything from fully enclosed private office cubicles to more open, collaborative workstation cubicles.

This hands-on approach helps you dial in every last detail, making sure the final installation is absolutely perfect.

A well-planned layout is the foundation of a productive office. It ensures every square foot is used effectively, creating an environment where employees can thrive. Taking the time to design your space carefully is an investment in your team’s success.

Your Next Steps to a Better Workplace

Ready to get started? Whether you have a detailed blueprint in mind or just a few initial ideas, we're here to help you move forward.

If you want to dig deeper into the principles of what makes a great layout, our guide on office space planning and design is packed with valuable insights.

From there, you can easily request a quote for your project or connect with our team of experts at Cubicle By Design for personalized assistance. We're committed to making your journey from concept to a fully functional, private workspace as smooth and successful as possible. Your ideal office is just a few clicks away.

We Hear You: Your Top Questions Answered

When you're diving into the details of office design, a few key questions always seem to pop up. We've been there, and we've helped countless businesses figure out these exact same things. Here are the practical answers to what we're asked most often.

How High Should Panels Be for Real Seated Privacy?

If you're looking for true "head-down, get-it-done" focus, the magic number is 66 inches or taller. At this height, a seated employee is fully shielded from the visual chatter of the office. It creates that personal bubble needed for concentration.

Think of lower panels, like those around 48 inches, as more of a suggestion of space. They're great for defining a team's zone without completely blocking sightlines for quick collaboration.

Can I Just Add These Panels to the Desks I Already Have?

You absolutely can. In fact, it's one of the smartest and most budget-friendly ways to upgrade your space. You don't have to rip everything out and start over.

We often recommend clamp-on dividers that attach right to the desk surface, or freestanding screens that can be placed between workstations. It's a fantastic way to boost privacy and quiet down the office without the headache and cost of a total furniture overhaul.

What's the Best Way to Clean and Care for Different Panels?

Keeping your panels looking sharp is pretty straightforward, but the method changes a bit depending on the material. Here’s a quick guide:

  • Fabric Panels: Your best friend here is a vacuum with a brush attachment for routine dusting. If you get a spot, grab a mild fabric cleaner, but always test it on a hidden area first just to be safe.
  • Glass and Polycarbonate: Nothing fancy needed. A simple mix of mild soap and water or your favorite glass cleaner will keep them crystal clear and streak-free.
  • Laminate and Metal: These are the tough ones. Just wipe them down with a damp cloth and a gentle, non-abrasive cleaner. They're built to be low-maintenance.

As you piece together your ideal workspace, it helps to keep the bigger picture in mind. Applying some core principles for designing a functional and inspiring home office can make sure every part of your office—from panels to lighting—works together perfectly.


Ready to build a workspace that's less distracting and more productive? At Cubicle By Design, we're experts at creating custom solutions that fit your team and your budget. Take a look at our complete range of cubicles or try our free Cubicle Designer to see what’s possible for your office.

Read More

A Complete Guide to Typical Cubicle Size and Dimensions | Cubicle By Design

What if the secret to a more productive, efficient office has been hiding in plain sight for decades? When it comes to laying out an office, the go-to starting point is almost always the 6-foot by 6-foot cubicle. It's become the industry standard for a reason, striking that perfect balance between personal workspace and a smart floor plan.

But don't think of this 36-square-foot footprint as a rigid rule. It's more like a versatile foundation you can build on.

The Standard Cubicle Footprint

Think of the 6'x6' cubicle as the most fundamental piece in your office design toolkit—it's flexible, efficient, and surprisingly adaptable. This size didn't just appear out of thin air; it evolved from a real need to give people their own focus zones without putting up expensive, permanent walls.

Its popularity really boils down to providing just enough room for a desk, a chair, and some basic storage. This makes it a super practical choice for all sorts of different roles.

The real genius of this standard is its modularity. A 6'x6' footprint can handle different desk setups, from a simple straight surface to a more spacious L-shaped desk, all within that neat, contained area. That's why it's such a great solution for businesses trying to get the most out of every square foot. If you're looking for more general information on dimensions for various products, that resource can be a helpful starting point. At the end of the day, the goal is to create a functional workspace that supports your team without wasting valuable space.

Why Did 6×6 Become the Standard?

The 6'x6' cubicle has been the gold standard for a long time. You can trace its roots all the way back to the Action Office II system from 1968, which was all about boosting productivity with flexible designs. Then, as companies got more cost-conscious in the 1980s, this size really took over. It was the perfect compromise between those dense "cube farms" and roomy private offices.

Today, it’s still a popular choice because it fits so well into common layouts while giving employees enough personal space to actually focus—a huge factor in any good office design.

Here’s a quick breakdown of the most common sizes you'll encounter and what they're best used for.

Quick Guide to Common Cubicle Footprints

Cubicle Size (ft) Total Area (sq ft) Best For Configuration Type
5' x 5' 25 Call centers, data entry, high-density areas. Compact, Benching
6' x 6' 36 Standard individual workstations, all roles. L-Shape, U-Shape
6' x 8' 48 Mid-level staff needing more storage space. L-Shape, U-Shape
8' x 8' 64 Managers, staff needing meeting space. U-Shape
8' x 12' 96 Executive offices, collaborative pods. Private Office

As you can see, there's a footprint for just about every need, from the most compact setups to something more expansive.

A well-planned office layout is more than just arranging furniture; it’s about creating an environment that fosters productivity, collaboration, and employee well-being. The typical cubicle size serves as the cornerstone of this strategic process.

Ultimately, picking the right cubicle size is just the first step in a much bigger puzzle. The real work involves mapping out your entire floor plan, thinking about how people will move through the space, and making sure everything is up to code.

This whole process is what we call space planning. You can check out our guide on what is space planning to get a better handle on how all these pieces fit together to create an office that actually works. With this foundational knowledge, you can confidently move toward creating a space that your team will love.

Matching Cubicle Dimensions to Workplace Roles

Sure, the 6'x6' cubicle is a solid, reliable starting point, but it's far from your only option. Honestly, picking the right cubicle size isn't about chasing some universal standard. It’s about matching the workspace to what the job actually demands. You wouldn't use a smart car for a construction job, right? Same logic applies here—you don't cram an employee who needs to spread out blueprints or focus on complex projects into a tiny box.

When you start thinking this way, you move past the "one-size-fits-all" trap and start building an office that genuinely works. By aligning each workstation's footprint with the daily grind of the employee using it, you can seriously boost productivity, improve comfort, and get the most out of every square foot. It's the kind of strategic thinking that lies at the heart of smart office design.

This little balancing act between efficiency, comfort, and your overall goals is everything.

Concept map illustrating how standard cubicle size impacts balance, efficiency, and comfort, influencing space, productivity, and well-being.

As you can see, the dimensions you choose have a direct impact on your team's day-to-day productivity and well-being.

Compact Cubicles for High-Density Roles

For jobs that are heavy on phone calls or repetitive computer tasks, a smaller footprint is almost always the most practical way to go. Think call centers or data entry departments—environments where density and efficiency are the names of the game.

  • 4'x4' or 5'x5' Cubicles: These compact stations give you just enough room for a computer, a phone, and a few personal items. Their small size is perfect for maximizing the number of employees you can fit into one area, which is a must-have for large teams working in close quarters.

  • Benching Systems: Another go-to for these roles is a benching system. Imagine long, shared tables with low (or no) dividers. They're incredibly space-efficient and tend to foster a high-energy, collaborative vibe.

These smaller setups are all about function. They provide a no-frills workspace that gets the job done. If you're looking to optimize this kind of space, you can learn more about upgrading your workspace with call center cubicles.

Standard Workstations for Everyday Tasks

Now let's talk about the backbone of most offices: the administrative staff, marketing coordinators, and all the other roles that need a balanced environment. This is where the standard 6'x6' and the slightly roomier 6'x8' workstation cubicles really shine.

These sizes typically feature a versatile L-shaped work surface, giving employees plenty of room for a multi-monitor setup, paperwork, and personal touches without feeling hemmed in. That extra space in a 6'x8' layout is a great fit for people who need a bit more surface area or extra storage like pedestal files and overhead bins. It's the perfect middle ground between personal space and an efficient floor plan.

For these roles, the goal is to create a "home base" that feels both functional and personal. A well-proportioned standard cubicle gives employees a sense of ownership, which can lead to better focus and higher job satisfaction.

Spacious Layouts for Management and Focus Work

Finally, some roles just demand more. More space, more privacy, and more room for those little impromptu meetings. We're talking about managers, executives, designers, and engineers—people whose workflow requires a bigger footprint.

Spacious options like 8'x8' or 8'x12' configurations are ideal here. These dimensions can easily accommodate a U-shaped desk, guest chairs, and plenty of storage. The larger area creates a clear sense of separation and provides the privacy needed for confidential conversations or deep, uninterrupted concentration.

These bigger setups essentially act as private office cubicles without the cost and hassle of building permanent walls. Throw in some taller panels, and you've created a secluded environment that supports leadership and high-focus work. At Cubicle By Design, we help you find the perfect match for every single role on your team.

How Cubicle Layouts Shape Your Office Environment

A cubicle's dimensions are only half the story. The real magic happens when you start arranging them together to create a functional, flowing office. Think of it less like placing a single piece of furniture and more like city planning for your workspace. The way you cluster workstations—in tight-knit pods or long, orderly rows—has a huge impact on everything from foot traffic to team dynamics and even your company culture.

A smart layout does more than just cram people into a room. It can intentionally build bridges between collaborators or carve out quiet zones for deep, focused work. By understanding the most common configurations, you can turn a basic floor plan into a genuine productivity tool.

An aerial view of a modern open-plan office with various cubicle layouts and silhouetted workers.

The right arrangement can make all the difference in how your teams connect and perform every single day.

Fostering Teamwork with Collaborative Pods

When the goal is to get specific teams talking, arranging cubicles into pods or clusters is a fantastic strategy. This setup groups employees who need to work together into a shared zone, making those quick, spontaneous problem-solving chats completely effortless.

  • Pinwheel Layouts: Picture four L-shaped desks joined at the corners. From above, it looks just like a pinwheel. This gives each person their own defined area while keeping them just an arm's length away from their three closest teammates.
  • 4-Pod Clusters: This is a classic for a reason. It places four cubicles together in a simple square, which helps build a strong team identity and makes sharing resources feel natural and intuitive.

These clustered designs are ideal for departments like marketing, engineering, or project management, where constant communication is the name of the game. They transform a set of individual workstations into a team's unified command center.

Maximizing Efficiency with Linear Configurations

For roles that require more independent focus—or in offices where you just need to maximize your headcount—linear layouts offer a clean and highly efficient solution. These configurations line up cubicles in straight rows, creating obvious traffic paths and a structured, orderly environment.

The most popular linear style is the back-to-back row. This setup has employees facing away from each other, which cuts down on visual distractions while keeping shared aisles clear and accessible. It’s particularly effective for roles in accounting, administration, or any job where individual concentration is key.

Another option is a benching system, which is basically a long, shared desk with low or no dividers. You sacrifice some privacy, but the space-saving design is unbeatable for high-density offices. For a closer look at these and other layouts, check out our overview of common cubicle configurations.

Designing for Specific Workflows

Ultimately, the best layout is one that supports how your team actually works. A sales or telemarketing team, for instance, might thrive in a specialized "telemarketing pod." This design typically uses higher panels and a smaller footprint to create better acoustic separation, cutting down on background noise so they can hear clients on the phone.

For a more tailored approach, don't be afraid to mix and match. You could build collaborative pods for your creative teams, set up back-to-back rows for the finance department, and drop in a few standalone private office cubicles for managers who need them. This kind of hybrid model lets you fine-tune the environment for each department's unique needs.

Planning Your Aisles for Safety and ADA Compliance

Choosing the right cubicle size is a huge step, but the job isn't done until you've thought about the space between them. The pathways, aisles, and walkways are the arteries of your office, guiding traffic, ensuring safety in an emergency, and making sure every single employee can get around easily.

If you don't plan your aisles well, you're not just creating an inefficient office; you're creating a potentially dangerous one that could be a legal liability. A bad layout leads to frustrating bottlenecks, creates a fire hazard, and can fail to meet critical accessibility laws. A well-thought-out floor plan, on the other hand, makes for a safe, inclusive, and productive environment for everyone on your team.

A person in a wheelchair at an adjustable, accessible desk in a modern hospital hallway with large windows.

This commitment to smart design is fundamental to creating a workplace that truly works for all employees.

Aisle Widths for Fire Safety and Flow

The first rule of thumb for aisle planning is making sure there's a clear path out. Local fire codes are very specific about the minimum width for walkways to allow for a quick, orderly evacuation. While the exact rules can vary by location, a few general standards are a great place to start.

  • Main Aisles: Think of these as the highways of your office—they connect major areas like entrances, exits, and break rooms. They need to be at least 44 inches wide to handle heavy foot traffic and emergency crews.
  • Secondary Aisles: These are the smaller side streets that lead to individual cubicles. A minimum width of 36 inches is usually required, which is enough for one person to walk through comfortably.

It’s just like planning roads in a town. You need wide main streets for lots of cars and smaller side streets to get to individual houses. And, of course, keeping these paths clear of obstructions like boxes, chairs, or equipment is absolutely non-negotiable for safety.

Understanding ADA Requirements for an Inclusive Office

Beyond basic safety, your office layout must comply with the Americans with Disabilities Act (ADA). These federal guidelines are in place to ensure people with disabilities can access and navigate the workplace just like everyone else. For office layouts, that often boils down to providing enough clearance for wheelchair users.

"An accessible route must provide a clear width of at least 36 inches for a single wheelchair and 60 inches for two wheelchairs to pass. A T-shaped or 60-inch diameter circle is needed for a 180-degree turn."

This is one of the most critical ADA rules to remember. You absolutely have to provide a 60-inch (5-foot) diameter turning circle or a T-shaped intersection within your cubicle clusters so a wheelchair user can turn around. This space is mandatory and needs to be baked into your layout from day one.

The ADA guidelines also apply to the workstations themselves.

  • Desk Height: Surfaces need to provide at least 27 inches of knee clearance from the floor.
  • Reach Ranges: Controls, outlets, and storage have to be within easy reach from a seated position.

Building an ADA-compliant office isn't just about following the rules; it's about creating a space where every employee feels valued and can do their best work. As you map out your floor plan, carefully consider every detail, from door widths to desk heights. For a deeper look at these factors, our comprehensive office space planning guide offers valuable insights to help you get it right. At Cubicle By Design, we help you create a layout that’s efficient, safe, and welcoming for every member of your team.

Customizing the Perfect Workstation for Your Team

Knowing the standard cubicle sizes is a great starting point, but the real magic happens when you start tailoring workstations to how your team actually works. Moving beyond the pre-set dimensions is how you create an environment that actively helps your people succeed, rather than just giving them a place to sit. It’s like the difference between a suit off the rack and one that’s been custom-fitted; they both do the job, but one is a whole lot more comfortable and effective.

This is where you stop thinking about generic setups and start designing a truly high-functioning workspace. By focusing on the elements you can actually change—from panel heights that control privacy to built-in storage that keeps essentials close by—you can build a workstation from the ground up that becomes a real asset.

Key Elements of Customization

To build the perfect workstation, you need to think beyond its footprint. A few key components come together to define how a cubicle actually looks, feels, and functions for the person using it. Getting these details right is what turns a standard space into a powerhouse of productivity.

Here are the main dials you can turn:

  • Panel Height: This is your number one tool for managing privacy and noise. Low panels, around 42 inches, keep things open and make it easy for team members to collaborate. Mid-height panels, from 53 to 65 inches, give you seated privacy, which is perfect for focused work. For roles that demand deep concentration, full-height panels at 65+ inches create the quietest, most secluded spaces.
  • Storage Solutions: You can’t have an efficient workspace without good, integrated storage. Options run the gamut from mobile pedestal files that slide neatly under a desk to overhead bins that keep less-used items out of the way. Picking the right mix ensures an employee has everything they need without their desk becoming a mess.
  • Power and Data Integration: Let's face it, a modern workstation runs on power and data. Customizable cubicles let you build in electrical raceways to keep all those cords and cables organized and hidden. Not only does it look a whole lot better, but it also gets rid of dangerous tripping hazards.

Bring Your Vision to Life with Our Custom Designer

The idea of designing a whole office layout might sound intimidating, but today's tools make it surprisingly simple. You don't need to be an architect to map out a workspace that actually works for your team. You just need a tool that lets you see what you’re doing.

The best office designs come from a real understanding of daily workflows. When you customize, you can build workstations that solve the actual problems your team faces, whether it's not enough storage or too many distractions.

At Cubicle By Design, we want to empower you to create that ideal office. Our online Cubicle Designer tool is a powerful but straightforward platform that puts you in the driver's seat. You can play around with every aspect of your workstation, from the basic dimensions to the final touches.

With just a few clicks, you can:

  1. Pick a starting layout, whether you need a compact station or a spacious private office cubicle.
  2. Adjust panel heights to find that sweet spot between privacy and teamwork.
  3. Try out different fabrics and finishes to match your company’s vibe.
  4. Add the right storage and power options to build a complete workstation cubicle.

Once you have a design you love, you can send it right to our team for a detailed quote. This takes your plan from an idea to a real, tangible project you can move forward with. Stop settling for a one-size-fits-all solution and start building the exact workspace your team deserves with Cubicle By Design.

Start Your Office Transformation with Cubicle By Design

So, feeling ready to build a smarter, more productive workspace? You've journeyed through the essentials—from picking the right cubicle size to designing layouts that are efficient, safe, and up to code. Now, it’s time to turn all that great knowledge into action.

At Cubicle By Design, we're more than just a furniture company. Think of us as your partner in creating a better office, from that first spark of an idea all the way to a fully realized, functional workspace that just works.

Your Partner from Planning to Completion

Our expert team is here to jump in at any stage of your project. We can help with the initial space planning to make the most of every square foot, guide you in selecting the perfect workstation cubicles, and stick with you until the project is wrapped up successfully. We sweat the details so you can focus on running your business.

Ready to see what's possible? Take a look through our full range of cubicles to get some inspiration flowing.

The best workspaces are born from a clear vision and the right tools. We're here to provide the expertise and resources to bridge that gap between your concept and a finished, productive office.

If you're the hands-on type, you can start building your ideal setup right now. Learn how to transform your office with our interactive cubicle designer and begin tweaking every detail to fit your team's unique needs.

Whether you need a single private office cubicle or an entire floor of workstations, our goal is simple: to help you create a workplace that truly supports your team. Let's build a better office, together.

Got Questions About Cubicle Sizes? We've Got Answers.

Even after you’ve spent hours planning your office layout, a few specific questions always seem to pop up right when you think you're done. It's completely normal. We hear the same great questions from clients all the time, so we’ve put together some straightforward answers to help you lock in those final details with confidence.

What's the Smallest Cubicle Size That Actually Works?

You might see some ultra-compact stations out there, some as small as 4'x2', but for most day-to-day roles, the smallest you want to go is 5'x5'. This gives you a 25-square-foot space, which is just enough room for a desk, a proper office chair, and a bit of personal storage without making your team feel like they're working in a closet.

A 5'x5' footprint is a go-to choice for high-density setups where the main goal is fitting in as many people as possible. Think call centers, data entry departments, or even temporary "touchdown" spots for visiting employees—anywhere efficiency and a repeatable layout are key.

How Much Does Panel Height Really Matter for Privacy?

Panel height is a bigger deal than most people think. It’s one of the most critical levers you can pull to control the entire vibe of your office, dictating both visual privacy and how much noise bounces around the room.

  • Low Panels (around 42 inches): These are great for keeping things open and encouraging chatter. They create an airy, collaborative feel but don’t do much to block sound or sightlines.
  • Mid-Height Panels (53-65 inches): This is the sweet spot for a lot of companies. They offer "seated privacy," so when an employee is sitting down, they can focus without visual distractions. This height also does a decent job of soaking up ambient office noise.
  • High Panels (65+ inches): When you need to create quiet, heads-down workstations, this is the way to go. Tall panels provide maximum visual privacy and the best sound absorption, perfect for roles that require deep, uninterrupted concentration.

Ultimately, picking the right height comes down to balancing your company's culture with the need for individual focus.

What's the Best Way to Measure a Room for Cubicles?

Getting your measurements right is the foundation of a good layout. Don't rush this part—a small mistake here can turn into a huge headache (and a costly one) when the furniture arrives and doesn't fit.

First, get the big picture by measuring the total length and width of the room to calculate your overall square footage. Then, grab a notepad or tablet and sketch a basic floor plan. Walk the room and carefully mark the exact locations of every permanent fixture: columns, support beams, doors (and which way they swing!), windows, and, of course, where your power and data outlets are.

With this master plan in hand, you can start sketching out different cubicle runs and aisle placements. This forces you to think about traffic flow and ADA-compliant clearances long before you even think about placing an order.

Taking the time to be precise upfront is the surest way to guarantee your final layout is functional, compliant, and looks fantastic.


At Cubicle By Design, our team lives and breathes these details so you don't have to. We offer expert space planning to make sure your new workstations fit your office and your workflow perfectly. Take a look at our complete range of customizable cubicles or jump right in and start building your own layout with our online Cubicle Designer tool.

Read More

Finding the Best Office Furniture Dealers Near Me: A Cubicle By Design Guide

Typing "office furniture dealers near me" into a search bar is the easy part. The real work starts when you have to figure out who on that list can actually bring your vision to life.

Finding a true partner means looking past the simple retailers to identify specialists like Cubicle By Design—folks who offer the whole package, from initial design concepts to the final installation. This guide will help you turn that overwhelming list of names into a curated shortlist of qualified experts ready to build your ideal workspace.

Starting Your Search for Local Furniture Partners

Kicking off the hunt for the right office furniture dealer is a huge first step. You’re not just buying desks and chairs; you're making a serious investment in your company's culture and your team's daily well-being. A great local partner doesn't just sell you stuff—they act as a consultant, helping you sidestep expensive mistakes and ensuring your new layout works for you today and for your future growth.

The market definitely reflects this shift. The global office furniture market has been valued anywhere from USD 57.51 billion to USD 107.26 billion in recent years. And with projections showing it could climb as high as USD 180.20 billion by 2032, it's clear that companies are putting more stock in their physical environments than ever before.

Moving Beyond a Basic Google Search

A simple search will spit out a list of businesses, but it won’t tell you the most important thing: who can actually deliver on your specific vision? To build a solid list of potential partners, you’ve got to dig a little deeper.

Start by getting more specific with your search terms. Instead of something generic, try queries like:

  • "Modular cubicle installers in [Your City]"
  • "Commercial office space planners near me"
  • "Ergonomic office chair showrooms in [Your Area]"

These targeted searches help cut through the noise, pushing general retailers down the list and highlighting dealers with the specialized skills you really need. Once you have a handful of names, the real vetting begins.

Evaluating a Dealer's Digital Footprint

Think of a dealer's website as their digital showroom. It’s your first real peek into what they're capable of. A professional, easy-to-use site is a good start, but you need to look closer.

Dive into their project galleries or case studies. Do their completed projects have the same look and feel you're going for?

A robust project gallery is so much more than a collection of pretty pictures. It's proof of concept. It shows you the dealer's real-world ability to handle projects of different sizes and complexities, not just their sales pitch.

Look for dealers who showcase a wide range of work, from small office refreshes to massive corporate installations. For instance, seeing a map of recent jobs gives you tangible proof of their experience right in your area. That kind of transparency says they're proud of their work and confident you’ll be happy with the results.

Here's a quick checklist to help you size up potential dealers right from the start.

Initial Dealer Vetting Checklist

Evaluation Criteria What to Look For Red Flags to Avoid
Project Gallery Diverse projects, clear before/after photos, relevant industry examples. Stock photos only, very few projects shown, or work that looks dated.
Services Offered In-house space planning, design, installation, and project management. Just "sales" or "delivery." A lack of comprehensive services is a big warning.
About Us/Team Page Details on their history, expertise, and the actual people you'll work with. Vague, generic mission statements with no personal touch or team info.
Website Quality Modern, mobile-friendly design that's easy to navigate and professional. Broken links, outdated information, or a site that's hard to use.

Checking these basics online helps you quickly weed out the duds.

Another critical spot to check is their "About Us" or "Services" page. You're looking for a partner, not just a supplier. A true partner will offer services that go way beyond the sale, including:

  • Space Planning and Design: Do they have designers on staff? A dealer who helps you map out the space from the get-go is invested in making it a success.
  • Installation and Project Management: You want to see mentions of in-house or dedicated installation crews. This signals accountability and a smoother process.
  • Customization Options: The ability to tailor solutions, maybe with something like a Custom Cubicle Designer, shows they can adapt to your unique needs instead of pushing a one-size-fits-all product.

This initial digital vetting is crucial. It saves you a ton of time by eliminating unqualified candidates early on, letting you focus your energy on the local dealers who can genuinely deliver.

Evaluating Showrooms and Product Quality Firsthand

Alright, you’ve done your online homework and have a shortlist of local dealers. Now for the fun part: getting hands-on with the furniture. Online galleries and slick marketing photos are a great starting point, but you can’t truly judge quality through a screen. You need to see it, touch it, and sit in it.

A showroom visit is where the rubber meets the road. It’s your chance to see past the sales pitch and feel the difference between furniture that just looks good and furniture that’s built to last. This is a critical step in making sure your investment pays off for years to come.

Person adjusting a modern grey office chair next to a desk in a furniture showroom.

What to Look for in Build Quality

Let’s be clear: commercial-grade office furniture is a different beast entirely from what you’d buy for your home office. It’s engineered to withstand 8-10 hours of daily use, day in and day out. When you're in the showroom, put on your detective hat and look for the details that signal real quality.

Start with the desks and tables. Give them a gentle shake. Do they wobble or feel flimsy? Look closely at the joints and where the legs connect—everything should be tight and seamless. Run your hand over the laminate or wood veneer. A quality surface feels solid and should be finished to resist the inevitable scratches and coffee cup rings.

Next, find the chairs and start testing. Sit down, lean back, and play with every lever and knob you can find. The adjustments for height, tilt, and armrests should feel smooth and secure, not clunky or loose. Check the base—a five-point base is the standard for stability—and give the casters a roll. They should glide effortlessly.

Pay close attention to the fabric and upholstery. High-quality commercial fabrics are designed for durability and cleanability. Ask about the "double rub" count—a rating that measures a fabric's abrasion resistance. For a typical office, a rating of 30,000 double rubs is a good benchmark for longevity.

Finally, give the workstation cubicles and private office cubicles a once-over. Are the panels stable? Do the connectors that hold them together look and feel robust? Open and close every drawer and cabinet door. They should move smoothly on their tracks and feel solid, not tinny. These are the little things your team will notice every single day.

Engaging With the Sales Team

Your interaction with the showroom staff is as telling as the furniture itself. You’re not looking for a pushy salesperson; you’re looking for a knowledgeable consultant. A great one will ask you questions first—about your company culture, how your teams work, and what problems you’re trying to solve.

Use this time to pick their brain. A true expert can explain why one laminate is better than another for a high-traffic area, or how the ergonomics of a specific chair can reduce back strain. They should be guiding you to the right solutions for your needs and budget, not just the most expensive items on the floor.

Key Questions to Ask During Your Visit

To make sure you get all the info you need for an apples-to-apples comparison later, go in with a list of questions. It keeps the conversation focused and ensures you don't forget anything important.

Here are a few essentials to have on your list:

  • Warranty Details: What exactly does the warranty cover on chairs versus desks? How long is it for, and what’s the process if we need to make a claim?
  • Lead Times: What are the real-world lead times for the items we’re interested in? Do you have any "quick ship" programs if we’re in a time crunch?
  • Customization Options: How much can we customize? Can we specify fabrics, finishes, or even dimensions?
  • Delivery and Installation: Is your installation team in-house or subcontracted? What does the whole delivery and setup process look like from start to finish?

Walking out of the showroom with solid answers to these questions means you're ready to confidently compare your options and make a final decision.

How to Nail Your Office Space Planning

Finding beautiful, high-quality furniture is one thing. Making sure it actually fits your space and supports how your team works? That’s an entirely different challenge. This is where the search for "office furniture dealers near me" moves beyond picking out chairs and becomes about finding a strategic partner like Cubicle By Design.

Let's be honest, even the most amazing desks will be a disaster if they block a fire exit or don't fit the flow of your office. Getting the space plan right from the start is what prevents those costly, headache-inducing mistakes and ensures your investment pays off.

A hand points at architectural blueprints on a desk with a tablet showing a 3D office design.

Measuring Your Space with Precision

Before you can plan a single thing, you need good data. And I don’t just mean the basic length and width of the room. A truly functional layout is built on the details—the little quirks and features of your physical space.

So, grab a measuring tape, a notepad, and your phone's camera. Your mission is to create a detailed map that accounts for every potential obstacle and opportunity.

Be sure to document the exact location and dimensions of:

  • Structural Elements: Note every single support pillar, column, or permanent fixture that isn't going anywhere.
  • Access and Egress: Measure all doorways, windows, and hallways. You'll also want to note which way the doors swing and how far windows open.
  • Utility Access: Mark the location of all power outlets, data ports, and light switches. This is a big one—it dictates where your tech-heavy workstations can realistically go.
  • Vertical Space: Don't forget about ceiling height! This becomes critical if you're looking at taller partitions or certain storage solutions.

This isn’t busywork. This detailed map is the foundation for everything that comes next. It prevents the nightmare scenario of furniture arriving on-site only to discover it blocks a key doorway or can't reach a power source.

Translating Measurements into a Functional Layout

With your measurements in hand, the real design work can begin. This is where a skilled dealer proves their worth, helping translate those raw numbers into a layout that considers how people actually move and work throughout the day.

A true space planning expert will dig into a few key areas:

  • Workflow and Adjacency: They'll ask which teams collaborate the most and then arrange their spaces to make that seamless, cutting down on disruptions.
  • Traffic Flow: A good layout has clear, logical pathways. It prevents those awkward bottlenecks and ensures everyone can move around easily and safely.
  • Compliance and Accessibility: Every plan must adhere to ADA (Americans with Disabilities Act) requirements, ensuring proper clearance in walkways and around desks.

A professional layout isn't just about cramming in as many desks as possible. It's a strategic plan that balances individual focus areas with collaborative zones and the natural flow of a busy workday. It's about creating an environment that just works.

For a deeper dive, our comprehensive office space planning guide offers more detailed insights to help you prepare for those initial conversations with a dealer.

The Power of Visualization with 2D and 3D Renderings

All this planning comes together in one of the most valuable tools a dealer can offer: professional renderings. It's one thing to look at a floor plan, but it’s nearly impossible to truly imagine the finished space from a simple drawing. This is where visualizations change the game.

A 2D rendering gives you that top-down, blueprint-style view. It’s perfect for confirming clearances, seeing traffic patterns, and getting the overall spatial arrangement just right.

A 3D rendering is where the magic happens. It provides a realistic, photo-like preview of your future office. You can see how different fabrics and finishes will actually look together, understand the sightlines from various desks, and get a genuine feel for the room's atmosphere.

These visualizations are your best defense against buyer's remorse. They allow you to make confident decisions and request changes before a single piece of furniture is ordered, saving you time, money, and a whole lot of stress.

You’ve done the legwork, talked to a few dealers, and now the proposals are rolling in. This is where the real work begins. Getting quotes from different office furniture dealers is one thing, but figuring out what they actually mean is another. The goal isn't just to find the lowest number—it's to find the best partner.

A great proposal is clear, comprehensive, and leaves no room for doubt. It's on you to make sure you're comparing apples to apples.

Let's be honest: the cheapest quote is almost never the best deal. That super-low price can look tempting, but it’s often a red flag. It probably means critical services like delivery, installation, or project management have been left out. Those are costs you'll end up paying for later, and they always come as a nasty surprise. A real pro gives you the full picture upfront.

Breaking Down the Bid

To get a true comparison, you have to dissect each proposal, line by line. Don't even consider a dealer who just gives you a single lump-sum number. A professional bid will itemize everything.

When you're comparing quotes, you need to be a detective. Look for these key details:

  • Product Specifications: Are the quotes for the exact same products? Check the model numbers, the dimensions, and especially the finishes and fabric grades. A dealer might substitute a "similar" chair, but a lower-grade fabric won't last as long. Those small details make a big difference in both price and durability.
  • Service Inclusions: Is delivery included? What about professional installation and trash removal? These are essential services, not optional add-ons. If they aren't listed, assume they'll cost you extra.
  • Project Management: A dedicated project manager is your lifeline. They coordinate every moving part and make sure the entire process runs smoothly. Make sure this service is included in the package, not billed as an afterthought.

If a quote is vague or missing this information, push back. Ask for a revised, fully itemized version before you move forward. Any dealer worth their salt will be happy to provide it.

Office Furniture Bid Comparison Checklist

To make this easier, we've put together a checklist. Use this to line up the bids side-by-side and see how they really stack up. It’s the only way to get a true, unbiased view of what you're being offered.

Checklist Item Dealer A Details Dealer B Details Dealer C Details
Product Match (Model, Size, Finish)
Delivery & Freight Costs
Professional Installation Fees
Debris & Trash Removal
Dedicated Project Manager
State & Local Taxes
Payment Terms & Schedule
Proposed Project Timeline
Installation Crew (In-House vs. Sub)
Product Warranty Details
Post-Installation Support Plan

Once you’ve filled this out, the right choice often becomes much clearer. The proposal with the most "included" or "in-house" checkmarks is usually the one that offers the most long-term value.

Identifying Hidden Costs and Understanding Terms

Beyond the big items, you have to sweat the small stuff. The fine print is where hidden fees love to hide, and they can completely blow up your budget.

The most transparent quotes clearly outline every potential charge, from delivery fees to taxes. A dealer who hides costs in the fine print is not a partner you can trust for a long-term relationship.

Always check the payment terms. What’s the deposit requirement? When are the other payments due? A clear schedule for delivery and installation shows the dealer has a real plan. It's not just a guess. And while you're thinking about the financials, it's worth exploring all your options. For some companies, understanding the financial implications of leasing versus buying can be a smart move for managing cash flow.

Weighing the Non-Monetary Factors

Finally, value is about more than just money. The intangibles often tell you the most about the kind of experience you’re going to have. And if you want to get a better feel for what specific furniture systems should cost, our cubicle price guide is a great place to start.

Look at the dealer’s proposed timeline. Is it realistic? Does it work with your own deadlines? Dig into their installation process, too. Do they use their own experienced, in-house team, or do they just subcontract it out to the lowest bidder? An in-house crew almost always means more accountability and better quality work.

Don't forget to review the warranty and support details. A strong warranty shows that a dealer stands behind their products. And what happens after the project is done? The best partners are there for you down the road, ready to help with reconfigurations, repairs, or additions. That’s where the true value is.

What to Expect During Installation and Beyond

You’ve vetted the dealers, toured the showrooms, and finally signed on the dotted line. It feels like a huge accomplishment, but the real work is just beginning. The installation is where all that planning becomes a physical reality, and a smooth, professional install is every bit as important as the quality of the furniture itself.

Knowing what’s coming can turn a potentially chaotic day into an exciting one. A top-notch dealer doesn’t just dump boxes on your curb; they orchestrate the entire process to bring your new office to life with as little disruption as possible. This is the final, make-or-break step.

The Pre-Installation Checklist

A successful install day starts long before the trucks ever pull up. Any professional dealer worth their salt will work with you to nail down the pre-arrival logistics so everything is ready to go.

Your dealer’s project manager should be in touch to coordinate a few key things:

  • Site Access and Logistics: This means confirming building hours, figuring out loading dock access, and navigating any specific rules for using the elevator.
  • Insurance and Permits: They should handle providing your building management with a Certificate of Insurance (COI) and securing any necessary work permits on their end.
  • Site Protection: This is a big one. They should have a plan to protect your space, like laying down floor coverings and using corner guards to prevent scuffs and dings.

This kind of proactive communication is the sign of a team that’s done this a thousand times. It heads off last-minute headaches and lets the crew work efficiently from the moment they walk in the door.

Timeline graphic illustrating the quote process: receive, compare costs, and sign a deal with dates.

This process just gets you to the starting line—the installation phase is where the real race begins.

During the Installation Process

When the big day arrives, you should see a uniformed, professional crew led by an on-site supervisor. This person is your go-to, the single point of contact for updates and any questions that pop up. Beyond just getting the furniture in the door, it’s worth using experienced crews for professional furniture assembly services to ensure everything is built correctly and safely.

The team will usually start by staging all the components according to the approved floor plan. Then, the assembly begins. You can get a detailed look at what a streamlined process looks like by exploring Cubicle By Design's office furniture installation process.

Once everything is built, the crew should wipe down every surface, haul away all the cardboard and packaging, and leave your new space truly move-in ready.

The final step before the crew packs up is the walkthrough. This is your chance to walk the entire space with the project manager, point out any issues, and create a "punch list" of anything that needs a tweak or correction.

This punch list ensures every detail is perfect, whether it's a misaligned drawer or a tiny scratch on a desk. A reputable dealer will jump on these items and fix them right away, no questions asked.

After the Work Is Done

A great furniture dealer doesn't disappear the second the last screw is tightened. Real long-term support is what separates a true partner from a one-time vendor.

This ongoing relationship should include:

  • Warranty Management: If a product fails or has a defect down the line, your dealer should handle the warranty claim for you, coordinating repairs or replacements directly with the manufacturer.
  • Day-Two Services: Once your team moves in, you might notice small things that need adjusting. A good partner will be available to help with ergonomic tweaks or minor reconfigurations.
  • Future Growth Planning: The best dealers, like Cubicle By Design, stick with you. When it's time to grow, they can help you reconfigure your existing furniture or add new pieces that perfectly match what you already have.

This kind of long-term partnership ensures your office can evolve right alongside your business, making your initial investment that much smarter for years to come.

Common Questions About Choosing a Furniture Dealer

Navigating the world of commercial furniture can bring up a lot of questions, especially if it’s your first major office project. When you start searching for "office furniture dealers near me," knowing what to ask can save you a world of time, money, and stress down the line.

These are the real-world concerns we hear from business owners and office managers every day. Getting clear answers to these questions is the first step in finding a true partner, not just another vendor.

How Far in Advance Should I Start Looking for an Office Furniture Dealer?

The sweet spot is 3-6 months before you absolutely need everything in place. I know, that probably sounds like a ton of time, but building in that buffer is one of the smartest moves you can make.

This timeframe gives you the breathing room to do things right. You'll have enough time for proper research, a few showroom visits, detailed space planning, and making thoughtful product selections. Most importantly, it accounts for manufacturing lead times, which can sometimes stretch for several weeks on custom orders.

Rushing the process is the fastest way to make compromises you'll regret later. Starting early gives you the leverage to negotiate better, evaluate all your options, and make sure every last detail aligns with what your company actually needs.

What Is the Difference Between a Dealer and a Retail Store?

This is a critical distinction that trips a lot of people up. A retail store is where you go to buy a pre-made desk or chair off the floor. The products are usually residential-grade, the services are limited, and the relationship pretty much ends when you walk out the door.

An office furniture dealer, on the other hand, is a full-service business partner. Dealers like Cubicle By Design offer durable, commercial-grade products built to handle the wear and tear of a busy office for years. But the furniture is just one piece of the puzzle. The real value is in the complete solution they provide.

A good dealer brings a whole team to the table:

  • Expert Space Planning: They'll take your floor plans and create a layout that’s efficient, compliant with codes, and actually works for your team.
  • Professional Design Services: They help you pick finishes, fabrics, and styles that build a cohesive, professional environment that reflects your brand.
  • Project Management: A dedicated person coordinates everything, from placing the order to scheduling the final installation.
  • Professional Installation: Experienced crews—not just delivery guys—assemble and install everything correctly and safely.
  • Ongoing Support: Need to file a warranty claim, reconfigure a department, or add more workstations next year? Your dealer is who you call.

Simply put, a dealer understands workplace dynamics, ergonomics, and building codes in a way a typical retailer just doesn't.

Can I Mix and Match Furniture From Different Brands?

Absolutely! In fact, it's a fantastic way to get a custom look and make your budget go further. A skilled dealer is your best guide for pulling this off successfully.

When it comes to systems furniture like cubicles, it’s almost always best to stick with one manufacturer. This ensures all the panels, connectors, and surfaces are compatible. But for things like task chairs, lounge seating, or conference tables, you can easily pull from other brands to add personality and visual interest.

An experienced designer will be your secret weapon here. They know how to match styles, scale, and finishes across different product lines so the final space looks intentionally curated, not like it was pieced together from a catalog.

What Are the Most Common Mistakes to Avoid?

Knowing where others have gone wrong is the best way to get it right. From our years of experience, we've seen a few common missteps that can derail a project:

  • Choosing a dealer on price alone. The lowest bid often comes with hidden costs for essential services like project management, installation, or even trash removal.
  • Skipping the showroom visit. You just can't judge the true quality, comfort, and feel of furniture from a picture on a website. You have to sit in the chair.
  • Forgetting to check references. Talking to past clients is the single best way to learn about a dealer's real-world performance and follow-through.
  • Underestimating the power of space planning. A bad layout can make even the most beautiful furniture a daily frustration, tanking productivity and morale.

Steering clear of these traps is half the battle. When you partner with a knowledgeable dealer who has your back, you can create a workspace that truly supports your team and your business for years to come.


Ready to turn your office vision into a reality with a partner you can trust? The team at Cubicle By Design is here to guide you through every step, from initial space planning with our Custom Cubicle Designer to professional installation and beyond.

Read More

Office Temporary Walls: Create Flexible, Productive Workspaces | Cubicle By Design

Think of office temporary walls as the quick, clever solution for dividing up your workspace. They’re modular, non-permanent structures that let you create private offices, meeting rooms, or quiet workstations without the headache and high cost of traditional construction. It's the fast, flexible, and affordable way for businesses to keep their space in sync with shifting team sizes and work styles—a must for any company trying to stay agile. At Cubicle By Design, we specialize in crafting these adaptable environments.

The Shift to Flexible Office Environments

The old-school office—that static landscape of drywall and permanent desks—is quickly becoming a thing of the past. Today's most effective workspaces are living, breathing environments designed to evolve right alongside the businesses they support. This isn't just a minor tweak; it's a fundamental shift driven by a perfect storm of factors demanding more from our offices than ever before.

With hybrid work, fluctuating team sizes, and project-based teams, a layout that’s perfect today could be a productivity killer tomorrow. Companies just can't afford to be locked into a single, rigid floor plan anymore. What they really need are spaces that can be reconfigured on the fly, supporting a noisy brainstorming session one day and deep, focused work the next. This whole idea lines up perfectly with the core principles of modern commercial interior design, which are all about making spaces both functional and adaptable.

Why Adaptability Is the New Standard

This need for flexibility isn't just a passing trend; it's a strategic business imperative. The proof is in the numbers: the global market for movable walls is already valued at USD 4.5 billion and is expected to balloon to USD 8.3 billion by 2033. This surge is fueled by the real-world needs of modern businesses, with over 2.5 million flexible workspaces now operating worldwide—a massive jump from just a few years ago.

This growth points to a simple truth: agile space management is a game-changer. It delivers:

  • Cost Efficiency: You get to sidestep expensive, time-consuming construction projects every time your needs change.
  • Improved Productivity: You can create purpose-built zones for different tasks, from quiet corners for concentration to open hubs for collaboration.
  • Enhanced Employee Satisfaction: When you give your team the right kinds of spaces to do their best work, they’re happier and more effective.

The Role of Office Temporary Walls

Office temporary walls are the key that unlocks all this potential. Unlike drywall, which is a permanent, dusty, and disruptive mess to install, these systems are built for change. It’s better to think of them not as simple dividers, but as strategic tools for building a smarter, more responsive workplace.

At Cubicle By Design, we see these solutions as the secret to unlocking an office's true potential. They empower businesses to craft productive, inspiring, and cost-effective environments that can pivot as quickly as their strategies do.

Whether you're a startup that’s rapidly scaling, reconfiguring your floor plan for a new project team, or just trying to carve out some private offices in an open-plan space, these structures offer a practical and surprisingly elegant solution. They give you the power to define your space without being trapped by it.

To really get a feel for how these systems work, take a look at our guide to modular office walls. They are, without a doubt, the foundation of a modern, resilient workplace.

Comparing Your Temporary Wall Options

Picking the right office temporary walls is a lot like choosing the right tool for a job. You wouldn't use a sledgehammer for a finishing nail, right? Each option has a specific purpose and really shines in different situations. Not all temporary solutions are built the same, so getting to know the fundamental differences is the first step toward building a workspace that actually works for you.

We can really break the market down into three main camps: the versatile modular panel systems, the elegant demountable glass walls, and the ultra-mobile freestanding partitions. Each one offers a unique mix of privacy, style, cost, and flexibility.

The way we work is changing, and our spaces have to keep up. This map really shows how everything—from hybrid schedules to the needs of dynamic teams—is pushing us toward smarter, more flexible use of our office real estate.

As you can see, all these factors are interconnected, which is exactly why adaptable solutions like temporary walls have become so crucial for businesses.

Modular Panel Systems

Think of modular panel systems as the reliable all-rounders of the temporary wall world. These are your classic cubicle-style walls, usually built with fabric-covered panels, laminates, and sometimes glass accents. They are the true workhorses of office division, valued for their great balance of features.

Their biggest strength is their structural integrity and built-in practicality. They're designed from the ground up to support desks, storage, and even run power and data right through the panels themselves. This creates fully-contained, highly functional workstations perfect for everything from call centers to administrative teams. Our selection of cubicles showcases the versatility of these systems.

Best for:

  • Creating dedicated workstations with integrated power and data.
  • Getting a solid level of acoustic control for focused work.
  • Building durable, semi-permanent private offices or team pods.

Modular systems are also incredibly adaptable. Our own Series 7 line, for example, lets you customize everything from height and finish to the overall layout, making them a fantastic, flexible choice.

Demountable Glass Walls

When you want to prioritize aesthetics and bring in as much natural light as possible, demountable glass walls are the answer. These systems use full or partial glass panes set in sleek, minimal frames to create a feeling of openness while still providing real physical and acoustic separation. They're the go-to for crafting a modern, high-end look.

Unlike solid panels, glass lets light pour through a space, making even smaller offices feel larger and more welcoming. They're perfect for conference rooms, executive offices, and any client-facing area where you want to make a strong impression without walling everyone off.

These are the walls that bridge the gap between open-concept layouts and the genuine need for private, quiet spaces. You really get the best of both worlds: a bright, collaborative vibe with the boundaries you need for focused work and confidential meetings.

Freestanding Partitions

Freestanding partitions are all about maximum flexibility. These are lightweight, easily movable dividers that don't need to be attached to the floor, ceiling, or any existing walls. You can have them set up in minutes, making them perfect for managing your space on the fly.

People often use these to create quick privacy screens, mark out a breakout zone, or divide a large room for a single event or project. While they won't give you the acoustic privacy or structural muscle of a modular or demountable system, their value is in their unmatched portability and low cost. They’re a fantastic solution for startups or any business that wants to experiment with different layouts without any real commitment.

Temporary Wall Solutions at a Glance

To help you see the trade-offs at a glance, we've put together a quick comparison of how these three main types of office temporary walls stack up.

Feature Modular Panel Systems Demountable Glass Walls Freestanding Partitions
Primary Use Creating structured workstations and private offices. Building stylish meeting rooms and executive offices. Quick, temporary space division and privacy screening.
Acoustics Good to excellent, with sound-dampening materials. Fair to good, depending on glass thickness and seals. Low, primarily for visual separation.
Flexibility Reconfigurable, but requires some planning and effort. Reconfigurable, but often needs professional help. Extremely high; can be moved by anyone at any time.
Cost Mid-range, offering a great balance of features. Higher initial investment for a premium aesthetic. Low-cost and budget-friendly.
Power/Data Excellent for built-in integration. Limited routing through frames. None; they are standalone dividers.

At the end of the day, the best choice really boils down to your specific goals. If you need robust, functional workspaces, modular systems are a smart investment. For a modern, light-filled office, demountable glass is in a class of its own. And for maximum agility on a tight budget, freestanding partitions are the way to go.

Making the Right Choice for Your Workspace

So, you've figured out the general type of temporary wall that seems right for your office. Now comes the real work: zeroing in on the specific solution that will make your space truly effective. This is where you move beyond broad categories and start looking at the four factors that separate a merely functional space from a high-performing one.

Getting these details right isn't just about minor tweaks. By digging into acoustic performance, aesthetics, long-term flexibility, and the installation process, you're ensuring your investment actually pays off for years to come. These are the elements that create an environment that not only looks great but also helps your team thrive.

Achieving True Acoustic Performance

In any office, sound control is everything. It's the key to focus and confidentiality. While a simple freestanding screen provides some visual privacy, let's be honest—it does next to nothing to stop noise. If you're serious about creating a quiet space where sensitive conversations can happen, you need a system built for acoustics.

This is where modular panel systems, like the ones we use for our private office cubicles, really shine. They're specifically engineered with sound-dampening materials that absorb chatter and reduce distractions. A well-designed modular wall can cut noise by up to 20 decibels, turning a corner of a chaotic open-plan office into a peaceful, productive zone.

A key goal is to create "speech privacy," where conversations are unintelligible from a distance. This is crucial for roles in HR, finance, and management, or any team that handles sensitive information.

Matching Aesthetics and Integration

Your office design says a lot about your brand. The last thing you want is for your new walls to look like a clunky afterthought. They should blend in so seamlessly with your existing decor that they look like they were part of the original plan.

Customization is your best friend here. You can choose from a massive range of finishes—professional fabrics, modern laminates, even elegant glass accents—to match your company's vibe. As project timelines get shorter, expectations have gone up; people want polished, permanent-looking solutions, not something that screams "temporary." You can learn more about how temporary wall trends are evolving. At Cubicle By Design, we're all about helping you create a cohesive look that reinforces who you are as a company.

Planning for Flexibility and Reconfigurability

One of the biggest wins with temporary office walls is their adaptability. Business isn't static, and your office shouldn't be either. The right system lets you easily reconfigure your layout as teams grow, projects change, or new departments pop up.

Think about how easily a system can be changed down the line:

  • Modular Systems: These are fantastic for reconfigurability. You can add, remove, or rearrange panels to build bigger or smaller workstation cubicles without a huge hassle.
  • Demountable Walls: They're also movable, but their structural nature often means you'll need to call in professionals to reconfigure them.
  • Freestanding Partitions: These offer maximum flexibility. Anyone on the team can move them around for daily adjustments.

Picture your company in five years. Will you need to add ten more people? Carve out a new project room? A truly flexible system will save you a ton of time and money compared to calling the drywall contractors every time you need to make a change.

Understanding the Installation Process

Finally, you need to have a realistic idea of what installation looks like. Forget the weeks of dust, noise, and disruption that come with traditional construction. Most temporary wall systems go up quickly and cleanly. Our professional teams can typically assemble several cubicles or an entire private office in just a day or two.

This minimal downtime is a huge advantage for any operating business. Your team can head home for the weekend and come back on Monday to a completely transformed, ready-to-use workspace. To get a head start, you can use our Custom Cubicle Designer tool to plan your layout before we even show up, guaranteeing the whole process is as smooth as possible.

Designing a Custom Solution for Your Needs

Your office isn’t a cookie-cutter space, so why would your walls be? When you move beyond the standard, off-the-shelf options, you get to turn a merely functional area into a high-performance environment that’s genuinely built for your team. A custom approach lets you dial in every last detail of your office temporary walls to fit your specific workflow, your brand, and all the practical day-to-day needs of your people.

This is all about creating a solution that feels like it was always meant to be there. Instead of asking your team to squeeze into a pre-set layout, you’re designing a layout that adapts to them. It's the difference between a quick fix and a smart, long-term investment in your workplace.

Tailoring Panels to Your Exact Specifications

The heart of any custom design begins with the physical dimensions of the walls. You get complete control over panel height and width, which is a game-changer for both visual and acoustic privacy. Do you need lower walls to keep collaborative teams connected, or full-height partitions for departments handling confidential work?

Beyond size, the real personality of your workspace shines through in the finishes you select. This is where you can make sure the walls don't just divide a room, but actually enhance its look and feel.

  • Fabric Options: Choose from a huge palette of colors and textures to add warmth, help absorb sound, and echo your company's branding.
  • Laminate Surfaces: For a sleek, modern look, durable and easy-to-clean laminates are perfect. They come in all sorts of wood grains or solid colors.
  • Glass Elements: You can integrate frosted or clear glass panels to keep the office feeling open and full of light, while still giving people their own defined space.

This level of detail means your new walls will do more than just divide space—they'll elevate it.

Integrating Power and Functionality

A truly custom solution is about more than just good looks; it's about embedding function right into the structure. Modern office temporary walls are engineered to be more than just barriers. They're active parts of a productive workspace, ready to support the tech your team uses every single day.

The most effective temporary wall systems seamlessly integrate power and data raceways directly into the base of the panels. This eliminates cord clutter and provides convenient access to outlets and network ports right where they are needed, creating clean and efficient workstations.

You can also build in functional elements like shelving, overhead storage bins, and even whiteboards directly into the panel system. This transforms a simple divider into a multi-purpose tool that boosts organization and collaboration without eating up another square foot of floor space.

Bringing Your Vision to Life with Design Tools

Trying to picture how all these custom pieces will come together can be tough. That's where modern design tools come in to take out all the guesswork. Here at Cubicle By Design, we built the Custom Cubicle Designer tool to put you in the driver's seat.

This interactive tool lets you play around with different layouts, finishes, and features in real-time. You can tweak dimensions, drag and drop components, and get an accurate picture of your design before you commit. It even provides an immediate quote, so you can be sure your custom solution fits both your vision and your budget. This kind of detailed office space planning and design is absolutely critical for a successful project. It’s a low-risk way to test-drive configurations and make sure the final result is exactly what your team needs to do their best work.

Navigating Installation Codes and Compliance

The mere mention of "building codes" and "permits" can make any facilities manager a little nervous. But when it comes to office temporary walls, the process is almost always simpler than you’d imagine. It all boils down to one critical distinction: most modular systems, including cubicles, are legally classified as furniture, not permanent construction.

That one fact changes everything. Instead of getting tangled in the red tape that comes with building new drywall or making structural changes, you're essentially just setting up furniture. This means you can sidestep the lengthy permit applications and inspections that bog down traditional construction projects, saving you a massive amount of time and headaches.

It’s this classification that gives you the speed and flexibility to reconfigure your workspace without the usual construction pains.

Key Compliance Areas to Consider

Even though they're considered furniture, you still need to be mindful of a few important safety and accessibility codes. An experienced partner like Cubicle By Design will manage all these details for you, but knowing the basics can give you valuable peace of mind.

  • Egress and Pathways: Local fire codes are strict about clear, unobstructed pathways for a safe exit during an emergency. Your new layout has to maintain the required aisle widths so everyone can get out quickly.
  • Sprinkler and HVAC Access: You can't just put a wall anywhere. Its placement can't block the function of ceiling sprinklers or HVAC vents. Panels have to be positioned to allow for proper water distribution in case of a fire.
  • Electrical Safety: If your cubicles have built-in power, the installation has to be done right to prevent electrical hazards. This involves using UL-listed components and making sure all connections are safe and secure.

These rules aren’t there to slow you down; they’re there to keep your team safe. A professional installation plan accounts for all of this right from the start.

When Are Permits Actually Needed?

While the vast majority of cubicle installations don't need a permit, there are a few scenarios where you might have to file some paperwork. For instance, if you're thinking about full-height partitions that completely close off a space, you should check out our detailed guide on glass partition walls for offices to see how their requirements can differ.

Generally, you might need a permit if your project involves:

  1. High-Piled Storage: If your setup includes storage units that go above certain height limits, it could trigger fire safety code reviews.
  2. Significant Electrical Work: Tapping directly into the building's main electrical panel is a different beast than just plugging into existing wall outlets. This usually requires a permit and a licensed electrician.
  3. Floor-to-Ceiling Walls: Partitions that physically attach to the building's structure—like the floor and the ceiling grid—are more likely to be seen as minor construction, which could require a permit.

The vast majority of standard office temporary wall and cubicle projects fall squarely into the "furniture" category. This is one of the biggest advantages of choosing modular systems for office division.

A Typical Installation Timeline

One of the best things about temporary wall systems is how fast they go up. Compared to the weeks—or even months—of dust, noise, and disruption from traditional construction, a modular installation is incredibly quick and clean.

Here’s what a typical project timeline looks like:

  • Day 1: The professional installation crew shows up with all the components. They’ll start by staging the materials and assembling the main framework based on the approved design plan.
  • Day 2: The panels, work surfaces, and storage units get installed. If your system includes power, the team will connect all the integrated electrical components.
  • Day 3: The crew makes final adjustments, cleans up the site, and does a thorough quality inspection. Your new, fully functional workspace is ready for your team to move right in.

This efficient process means you can completely transform your office over a long weekend, keeping downtime to an absolute minimum so your business can continue without missing a beat.

Your Partner in Building a Better Workplace

We’ve covered a lot of ground in this guide, and by now it’s clear that office temporary walls are much more than simple dividers. Think of them as the building blocks for a workplace that’s resilient, productive, and ready for whatever the future holds. Making the right call comes down to balancing acoustic needs, your company’s aesthetic, long-term flexibility, and of course, the budget. Now it's time to put all that knowledge into action.

The journey to a better workspace doesn't have to be complicated. When you partner with experts who really get the nuances of space planning and modular furniture, you can transform your office efficiently and effectively. This is where we come in—not just as a supplier, but as a strategic partner invested in your success.

From Vision to Reality

Our goal at Cubicle By Design is to make creating a functional, inspiring office as seamless as possible. We’ve seen firsthand how a well-designed layout can directly boost team morale and productivity. It all starts with us taking the time to understand your unique challenges and turning your vision into a practical, powerful floor plan.

The best office solutions are born from a deep understanding of how a team works. We believe in designing spaces that support workflows, not hinder them, ensuring every square foot is optimized for performance and comfort.

We handle the complexities so you can stay focused on your business. From the initial design to the final installation, our team manages every detail with precision. Curious about how we do it? You can learn more about why so many businesses rely on Cubicle By Design for their office furniture needs.

Take the Next Step Today

Whether you need to carve out quiet zones for focused work, build energetic hubs for collaboration, or design a whole series of private offices, the right temporary wall solution is well within reach. Our huge range of cubicles offers versatile options for just about any need you can imagine.

Explore our durable workstation cubicles for team-based setups or our sound-dampening private office cubicles when confidentiality is key. If you’re ready to start playing with ideas, our interactive Custom Cubicle Designer tool lets you experiment with layouts and get an instant quote.

Don't wait to build the adaptable, high-performance workplace your team deserves. Contact our design experts for a personalized consultation, and let’s start designing a better workplace together.

Answering Your Questions About Office Temporary Walls

When you're thinking about reshaping your workspace, it's natural to have a few questions. We get it. Below are some straightforward answers to the most common things people ask about office temporary walls. We want to clear up the practical stuff so you can move forward with total confidence.

How Much Do Temporary Walls Cost?

This is usually the first question on everyone's mind, and the honest answer is: it depends. The cost can swing quite a bit based on the system you choose, the materials you want, and how big your project is.

Here's a quick breakdown:

  • Freestanding Partitions: These are your most budget-friendly option. Think a few hundred to maybe a thousand dollars per panel. They're perfect for creating a quick visual break in a room.
  • Modular Panel Systems: This is the sweet spot for many businesses. The price is influenced by things like panel height, the finish you choose (fabric or laminate), and whether you need power built-in. It’s a great, balanced choice for creating functional workstation cubicles.
  • Demountable Glass Walls: These carry a higher initial investment, mainly because of the materials and the precision needed for installation. But what you get in return is a high-end look and fantastic natural light throughout the space.

For a number that's actually useful for your project, your best bet is always a custom quote. Our Custom Cubicle Designer tool can give you a solid estimate right away, based on the layout you have in mind.

How Long Does Installation Take?

This is where temporary walls really shine. Traditional construction can throw your office into chaos for weeks, but a modular wall installation is incredibly quick.

Most of our projects—whether it's a couple of private offices or a whole department of cubicles—are finished in just one to three days. Your team can literally leave for the weekend on a Friday and walk back in on Monday to a completely transformed, ready-to-use workspace. Minimal downtime is a huge win.

Are Temporary Walls Soundproof?

While "soundproof" isn't technically possible outside of a recording studio, high-quality office temporary walls do an excellent job of managing noise. Modular panel systems are engineered with sound-dampening cores that can cut down on ambient chatter by as much as 20 decibels.

This creates what we call "speech privacy," where you can tell someone is talking next door, but you can't make out the words. It’s ideal for creating quiet zones for focused work or meeting rooms where confidentiality matters. Freestanding partitions, on the other hand, are really just for visual privacy and don't do much for sound.

Can I Reconfigure the Walls Later?

Absolutely. That's one of their biggest selling points! Modular systems are built for change. As your team grows or your needs shift, you can easily add, remove, or rearrange panels to create a new layout.

This flexibility makes them a smart, sustainable investment for the long haul. You're not stuck paying for expensive renovations every few years. At Cubicle By Design, we always help you think through a layout that works for you today and can easily adapt for tomorrow.

Do I Need a Permit to Install Office Temporary Walls?

In most situations, no. The vast majority of modular cubicles and panel systems are classified as furniture, not permanent construction. This is a huge advantage, as it means you typically don't have to deal with building permits, saving you a ton of time, money, and paperwork.

The exception is if your project involves true floor-to-ceiling walls that physically attach to the building's structure, or if you're doing extensive new electrical work. In those cases, a permit might be needed. We walk all our clients through the local requirements to make sure every installation of cubicles and private office cubicles is smooth and fully compliant.


Ready to create a more flexible and productive workspace? The team at Cubicle By Design is here to help you plan, design, and install the perfect office temporary wall solution for your needs.

Contact us today for a free consultation!

Read More

A Guide to Flawless Office Furniture Installations | Cubicle By Design

A successful office furniture installation is more than just building desks; it’s a carefully orchestrated project that turns an empty space into a place where your team can thrive. It’s all about detailed planning, precise execution, and a clear understanding of the logistics needed to bring a new office layout to life with minimal disruption.

Your Blueprint for a Seamless Installation

Staring at a bare office floor can feel a little daunting. But a successful installation really just boils down to a clear, logical plan.

Think of it less as a single, massive event and more as a series of connected steps, where each one builds on the last. From the initial layout sketches to the final walkthrough, having a solid blueprint is your best defense against common headaches like blown budgets, missed deadlines, and logistical chaos. A well-managed installation means your new workspace is ready for action from day one.

This guide is your step-by-step playbook, breaking down the entire process. We’ll walk through how to transform that blank canvas into an inspiring workplace, covering everything from initial scope to post-installation support. At Cubicle By Design, we’ve seen it all, and we believe a prepared client is a successful client.

Key Stages of a Successful Project

The journey from an empty room to a fully furnished office pretty much breaks down into three main phases. Knowing what they are helps demystify the process and makes it easier to manage time, money, and expectations.

  • Planning and Design: This is where it all begins. You'll define your needs, set a realistic budget, and lock in the final layout. It’s the stage where you decide on the right mix of private office cubicles for focused work and collaborative workstation cubicles for team projects.
  • Site Preparation and Logistics: Before a single box of furniture arrives, the site has to be ready. This means coordinating with building management, making sure electrical and data ports are exactly where they need to be, and clearing the entire area for the installation crew.
  • Installation and Execution: This is the hands-on part. The professional crew arrives to assemble and place your furniture according to the plan you approved. It wraps up with a final inspection to make sure every single detail is perfect.

When you're building out that initial plan, don't forget the broader logistics. For more on that, check out these resources on finding the right business moving companies.

Why a Professional Blueprint Matters

Trying to wing a large-scale installation without a professional framework is a recipe for expensive mistakes. A real pro’s approach makes sure every dependency is covered, from power requirements for each desk to building access schedules for the crew. It turns a potentially chaotic job into a predictable, smooth operation.

A detailed installation plan acts as the single source of truth for all stakeholders—including your team, the installers, and building managers—preventing miscommunication and ensuring everyone is aligned on the project's goals and timeline.

Using tools like a Custom Cubicle Designer during the planning phase lets you see exactly what the final space will look like. This gives you a chance to make tweaks before they turn into costly on-site changes. Ultimately, this detailed blueprint is what protects your investment and guarantees the final workspace actually helps your team do their best work. Partnering with experts in cubicles and office systems is the surest way to get a seamless transition into your new environment.

Building Your Project Foundation with Smart Planning

Every successful office furniture installation begins long before the first box is delivered. Think of it as creating the architectural blueprint for your new workspace; a small error here can lead to major structural problems later. A solid foundation built on smart planning is the single best way to avoid stressful delays and costly budget overruns.

This initial stage is all about nailing down the true scope of your project, setting a realistic budget that covers all the bases, and establishing a clear timeline. It’s about moving from a general idea to a concrete, actionable plan. Rushing this step is a common mistake that can jeopardize the entire project.

Defining Your Project Scope

Before you can budget or schedule anything, you have to understand exactly what you’re trying to accomplish. A thorough needs assessment is the first order of business. This means talking to department heads, surveying employees, and analyzing workflows to figure out what kind of furniture will actually support how your team works day-to-day.

The goal is to answer some critical questions:

  • How many private office cubicles are needed for focused work versus open workstation cubicles for collaboration?
  • What are the specific storage requirements for each department?
  • Are there plans for future growth that need to be accommodated?
  • What are the technical needs for power and data at each workstation?

Answering these questions clarifies your scope and prevents "scope creep"—that gradual expansion of project requirements that can absolutely derail timelines and budgets. This is also the perfect time to use a visualization tool like our Custom Cubicle Designer to help translate abstract needs into a tangible layout, preventing expensive miscalculations down the line.

Budgeting for Reality, Not Just Furniture

Your budget is way more than just the sticker price of the desks and chairs. A realistic financial plan for an office furniture installation has to account for a whole range of associated costs. Forgetting these can quickly lead to painful budget shortfalls.

A well-structured budget should allocate funds not only for furniture but also for installation labor, shipping and freight, site preparation, potential electrical work, and a contingency fund of 10-15% for unexpected issues.

As you build this foundation, mastering managing risk in project management is key to success. A detailed budget that anticipates these variables is a core part of that risk management strategy, ensuring your project stays on solid financial ground. For a deeper dive into laying out your space, check out our guide on office space planning and design.

Setting an Achievable Timeline

A detailed project timeline gives everyone involved—from your internal team to the installation crew—a clear roadmap. It should be broken down into distinct phases with clear milestones and deadlines. This lets you track progress and spot potential bottlenecks before they become serious problems.

Modern office trends are also shaping how we plan installations. The global office furniture market, valued at USD 101.46 billion in 2024, is projected to grow significantly as companies adapt to new ways of working. Flexible, collaborative setups now make up a large portion of new installations, supporting the hybrid models that most large firms have adopted.

To help you visualize the process, here’s what a sample timeline might look like for a mid-sized project.

Sample Installation Timeline for a 100-Workstation Office

This table breaks down the key phases and estimated durations for a typical mid-sized office furniture installation project. It's a great starting point for understanding how the different pieces fit together.

Phase Key Activities Estimated Duration
1. Planning & Design Needs assessment, layout finalization, furniture selection, quote approval. 2–4 Weeks
2. Procurement Order placement, manufacturing lead time, scheduling delivery. 4–8 Weeks
3. Site Preparation Clearing old furniture, floor protection, electrical/data verification. 3–5 Days
4. Installation Delivery, staging of components, assembly, and placement. 5–7 Days
5. Finalization Punch list walkthrough, final adjustments, site cleanup. 1–2 Days

This structured approach ensures that every step of your office furniture installation is accounted for. It creates a clear and predictable path to a successful, stress-free outcome.

Preparing Your Site for a Smooth Installation Day

A chaotic installation day is almost always the result of one thing: poor site preparation. Think of it like a stage crew setting up for a big performance. Everything has to be in its exact place before the actors—or in this case, the installers—arrive. This section is your practical checklist for turning what could be a stressful, hectic day into a well-orchestrated event.

When you prep your site properly for office furniture installations, you're ensuring the crew can work safely, efficiently, and without those costly delays that throw a wrench in the whole project. It’s all about clearing the space, protecting what’s already there, and coordinating the logistics. A little foresight here pays off big time when the trucks roll up.

The flow chart below breaks down the core planning phases. You can see how getting the scope, budget, and timeline right from the start builds the foundation for a seamless installation day.

Each of these steps—scope, budget, and timeline—is a building block for a smooth on-site execution.

The Essential Logistics Checklist

Before the installation team even thinks about showing up, your main job is to create a totally clear and safe environment for them to work in. This goes way beyond just moving a few old desks out of the way. A thorough approach is what prevents accidental damage, keeps workers safe, and holds the project to its schedule.

Your pre-installation checklist should cover these bases:

  • Clearing the Space: Get everything out. All old furniture, equipment, and any lingering debris needs to be completely removed from the installation area. The crew needs a blank canvas.
  • Protecting Surfaces: If you’re keeping the existing flooring or wall finishes, make sure they are fully protected. Think Masonite for floors and corner guards for high-traffic walls. Don't skip this.
  • Coordinating Building Access: Book those loading docks and service elevators well ahead of time. You'll need to confirm the hours they're available and get a clear list of any building rules for large deliveries and contractor work.
  • Staging Area: Designate a specific, secure spot for the crew to stage all the components as they come off the truck. This keeps the main installation area clear and lets the team work systematically instead of tripping over boxes.

A common mistake we see is people forgetting to reserve elevator access for the entire day, not just for the morning delivery. An installation crew that can't move materials when they need to is a project that's already falling behind schedule.

Verifying Power and Data Locations

Here’s one of the most critical pre-installation steps: walk the site with your final, approved floor plan in hand. You have to physically verify that every single electrical outlet and data port on the floor matches its location on your blueprint.

It’s a simple check, but it’s absolutely crucial. Discovering on installation day that the outlets are three feet from where a whole pod of workstations is supposed to go can cause massive delays and force expensive, last-minute electrical work. It’s a five-minute walk-through that prevents a five-thousand-dollar headache. For a deeper dive into managing all these moving parts, you can explore our insights on comprehensive project management.

Communicating the Plan to Your Team

Finally, don’t forget to keep your own team in the loop. This is key to minimizing disruption to your actual business operations. Let everyone know which areas will be off-limits and for how long. Give them a clear schedule so they understand the flow of the day.

Good communication prevents employees from accidentally wandering into a construction zone and helps manage everyone's expectations about when their new space will actually be ready to use.

Navigating Power, Data, and Code Compliance

Let’s be honest, the technical side of an office furniture installation—all the power and data talk—can feel a little overwhelming. But it’s one of those things you absolutely have to get right. When power and data are integrated correctly into your new furniture, your team can walk in, plug in, and get to work on day one. No delays, no headaches.

Today’s workstations are tech hubs. We’re talking laptops, multiple monitors, phones, and all sorts of specialized gadgets. Just having an outlet on a nearby wall doesn't cut it anymore. You need safe, efficient power delivered right to where the work happens.

Understanding the Basics of Cubicle Power

When installers start throwing around terms for power, it can sound like a foreign language. Let’s break down the two most common concepts. Think of them as the electrical highways and on-ramps for your office.

  • Raceways: These are the hidden channels running along the base of cubicle panels. They’re like a protected highway, letting all the electrical wiring and data cables travel safely and out of sight through a whole row of workstations.
  • Base-In Feeds: This is the on-ramp to that highway. A base-in feed is what connects the building's main power—whether it’s from a wall outlet or a port in the floor—directly into the cubicle’s raceway, bringing the whole system to life.

Getting a handle on these two parts helps you see how the whole system fits together. For a deeper dive, our guide on cubicle electrical setup walks you through exactly how these systems work.

Planning for Your Team's Tech Needs

Not all power demands are the same. A call center running dual monitors for every employee has totally different electrical needs than a design team with power-hungry computers. This is where planning ahead is a game-changer.

You need to map out exactly what each workstation requires. Will certain teams need dedicated circuits to avoid tripping breakers? This is super common for departments using heavy-duty equipment. Figuring this out early with your installation partner and a licensed electrician ensures your power grid can handle the load, preventing frustrating outages and lost productivity.

A classic mistake is underestimating how many outlets people need. As a rule of thumb, plan for at least four outlets per user. That covers a computer, monitor, phone, and a spot for charging personal devices without resorting to a tangle of unsafe power strips.

Adhering to Building Codes and ADA Requirements

Beyond just making things work, every installation has to follow local building codes and federal laws like the Americans with Disabilities Act (ADA). These aren't just suggestions; they are legal requirements designed to keep everyone safe and ensure the space is accessible.

Here’s what that usually involves:

  • Clearance Requirements: ADA rules are very specific about how wide walkways need to be for wheelchair accessibility. Your final layout has to respect these clearances, which is typically a minimum of 36 inches for pathways.
  • Electrical Codes: All the wiring inside the furniture has to be installed to meet local and national electrical codes. This is non-negotiable. Professional installers know how to make sure every connection is secure, properly grounded, and up to code.
  • Accessibility: Some furniture, like reception counters or certain desks, may need to meet specific height and clearance standards to accommodate employees and visitors with disabilities.

Ignoring these standards can lead to failed inspections, hefty fines, and the nightmare of having to tear everything out and start over. Working with an experienced dealer like Cubicle By Design means your layout is designed to be fully compliant from the get-go, creating a workspace that’s not just productive, but safe and inclusive for your entire team.

What to Expect on Installation Day

After weeks of planning, the big day is finally here. An office furniture installation can feel a bit like controlled chaos from the outside, but for a professional crew, it’s a well-oiled machine. Knowing how the day will flow helps you understand what's happening and how you can support the team transforming your space.

The day kicks off when the installation crew and delivery trucks arrive. Your main point of contact will be the lead installer or project manager. They'll do a quick walkthrough of the prepped site with you, just to confirm the layout and iron out any last-minute details before a single box is unloaded.

From Staging to Assembly

Once the walkthrough is done, the crew’s first job is staging. This is a crucial step. Instead of just piling parts randomly, they unload and organize every boxed component in a designated area, all laid out according to the floor plan. Think of it as creating a logical inventory, with pieces for specific workstations or offices grouped together.

With everything staged and ready, the assembly process kicks into high gear. You’ll be amazed at how quickly the skeleton of your new office starts to take shape.

  • Panel Assembly: The crew starts by building the foundational walls of the cubicles, locking them together to create the basic grid of your new layout.
  • Surface and Storage Installation: Next, desktops, overhead bins, and filing pedestals are expertly secured into place within each workstation.
  • Power Integration: Finally, electricians or specially trained installers run the electrical components through the panel raceways, hooking everything up to the building’s power feeds.

This systematic approach makes the build-out not just fast, but incredibly accurate. Every piece is installed exactly to the manufacturer's specs. To get a feel for what the end result looks like, check out the finished spaces in our project gallery.

The Critical Punch List Walkthrough

The final—and arguably most important—step of installation day is the punch list walkthrough. After the crew has finished assembling everything and cleaned up the site, you and the project manager will meticulously inspect every single component together.

This isn't just a casual glance. You'll check for any little imperfection—a scratch on a desk, a misaligned drawer, a missing part, or a finicky electrical outlet. Each issue is carefully documented on the "punch list."

The punch list is your quality assurance guarantee. It creates a formal, agreed-upon record of any outstanding issues that need to be resolved before the project is officially considered complete.

This process ensures the final product meets your exact standards and that you are 100% satisfied with your new workspace from Cubicle By Design. It’s the final check that protects your investment and guarantees quality.

The demand for well-planned, flexible workspaces is fueling major growth in the office furniture market. Valued at USD 57.51 billion in 2024, the market is projected to hit USD 99.58 billion by 2032. This expansion is what helps make customizable, efficient installations a reality for businesses of all sizes. You can discover more insights from Fortune Business Insights on these industry trends.

Protecting Your Investment After Installation

The installation crew has packed up their tools and the dust has settled, but the job isn't quite finished. Think of your new office furniture as a serious investment in your company’s future and your team’s day-to-day happiness. The best way to protect that investment is to focus on long-term care right from the start, ensuring your workspace looks and functions beautifully for years.

This is where the project shifts from a one-time event to a long-term relationship. It’s all about knowing what’s covered, performing a little routine maintenance, and having a go-to contact for whatever comes next. A little care goes a long way in preserving the value of every desk, chair, and panel.

Understanding Your Warranty Coverage

Not all warranties are created equal—far from it. You'll often find that different parts of your furniture have different coverage periods. For instance, the structural steel frames of a workstation might have a lifetime warranty, while high-wear components like fabrics, laminates, and drawer slides will typically have shorter terms.

It’s really important to know what’s covered. Keep all your project paperwork in a folder somewhere safe and easy to find. If a service issue pops up down the road, you’ll be glad you did. Getting familiar with the manufacturer’s guarantee is step one in protecting your assets.

Your warranty is more than just a piece of paper; it’s your assurance of quality and durability. Familiarizing yourself with the terms ensures you can act quickly and correctly if you ever need to make a claim, preventing small issues from becoming big problems.

Filing a service claim should be a painless process. All you need to do is get in touch with your furniture partner, explain the issue, and provide any helpful details like photos or serial numbers. From there, they’ll handle the coordination for the repair or replacement, making it simple on your end.

Practical Tips for Long-Term Maintenance

Just like a new car needs an oil change, your office furniture will benefit from some regular TLC to stay in prime condition. A few simple, routine habits can dramatically extend its lifespan and keep it looking professional, protecting the capital you’ve put into it.

Here are a few easy tips to get you started:

  • Regular Cleaning: Stick to manufacturer-approved cleaning products for all your surfaces, fabrics, and metals. A quick wipe-down of desks and dusting of panels can prevent the buildup that causes wear and tear.
  • Inspect Moving Parts: Every so often, do a quick check on chair casters, drawer slides, and cabinet hinges to make sure they're moving smoothly. It’s always best to tighten any loose hardware before it becomes a real headache.
  • Educate Your Team: A little teamwork goes a long way. Encourage your employees to report any damage or malfunctions as soon as they spot them. Catching things early can often mean the difference between a minor fix and a costly replacement.

For a detailed look at what’s covered, you can review our warranty policies to see exactly how we stand behind our products.

At Cubicle By Design, we see the end of an installation as the beginning of our relationship. Whether you need to reconfigure your layout in a few years, expand your space, or just need a quick service call, we’re here to be your dedicated partner for the long haul.

Common Questions About Office Furniture Installations

Even with the most buttoned-up plan, a few questions always pop up when it comes to the actual office furniture installation. We get it. We’ve answered these questions hundreds of times, so we’ve put together some straight answers to the most common things clients ask about.

Think of this as your go-to guide for the practical side of bringing your new workspace to life. Knowing the answers ahead of time makes the whole process feel a lot less daunting and a lot more exciting.

How Long Does a Typical Installation Take?

There’s really no single answer here—it all comes down to the scale and complexity of your project. A small office with 10-15 workstations? We can usually knock that out in a day or two. But if we're talking about a full floor with over 100 cubicles, you're likely looking at a week or more.

A few things can really influence the schedule. Is the site truly ready for us? What are the building’s rules for using the loading dock and service elevators? How intricate are the furniture systems you picked? When you plan your project with Cubicle By Design, we build a detailed schedule from day one, so you get a clear, reliable timeline you can count on.

What Is the Best Way to Handle Our Old Furniture?

When it’s out with the old and in with the new, you’ve got a few great options. One of the cleanest, most efficient routes is to work with a decommissioning service. These pros come in, handle all the heavy lifting, and will often purchase your used furniture right from you.

Another popular choice is donating items to local charities or non-profits, which is a fantastic way to support the community. As part of our project management, we can help line up these removal services to make sure the transition from your old setup to the new one is completely seamless.

The most successful projects integrate the removal of old furniture directly into the main installation timeline. This prevents a logistical bottleneck where the old items are still on-site when the new ones are scheduled for delivery, ensuring a smooth, uninterrupted workflow for the installation crew.

Can We Save Money by Assembling Furniture Ourselves?

On paper, a DIY approach seems like a smart way to cut costs, but for commercial-grade office furniture, we strongly advise against it. Professional installers have the specialized tools, the right training, and the hands-on experience to build everything safely and exactly to the manufacturer's specs.

When assembly goes wrong, it creates a whole cascade of problems. You could void your product warranties, create serious safety hazards for your team, and even cause expensive damage to the brand-new furniture. Investing in a professional team like ours ensures the job is done right the first time, protecting your investment in high-quality private office cubicles and workstation cubicles and saving you a major headache.

What Is a Punch List and Why Is It Important?

The punch list is one of the most critical steps in the whole process. It’s a document we create together during the final project walkthrough. After the last desk is in place, you and the project manager will walk the entire space and meticulously inspect every single piece.

Anything that needs a final touch-up—a minor scratch on a tabletop, a missing screw cover, a slightly crooked panel—gets noted on this list. It becomes our official to-do list for ironing out every last detail. This is the final quality check that guarantees you are 100% satisfied with the result and that the job is done to the highest possible standard.


Ready to transform your workspace with a flawless installation? The experts at Cubicle By Design are here to help you plan, design, and execute your project perfectly from start to finish.

Explore our innovative solutions and start building your ideal office today with our Custom Cubicle Designer.

Read More

Average Cubicle Dimensions: A Planner’s Guide for Efficient Office Layouts | Cubicle By Design

When you start planning an office layout, one of the first questions that always comes up is about the average cubicle dimensions. The most common size you'll run into is the classic 6'x6' workstation. It's the go-to for a reason, offering a respectable 36 square feet of personal space without eating up your entire floor plan. Think of it as the versatile default setting for office design, but it's really just the beginning of what's possible at Cubicle By Design.

Decoding Standard Cubicle Sizes

Picking the right cubicle size is a lot like choosing the right tool for a job—it has to be a perfect fit for the task, the person using it, and the overall environment. While there’s no magical, one-size-fits-all dimension, a few standard footprints have become industry benchmarks simply because they work so well for so many different business needs. Getting a handle on these common sizes is your first step toward creating a workspace that’s both functional and comfortable.

For decades, the 6'x6' cubicle has pretty much reigned supreme. It hits that sweet spot between giving an employee enough personal elbow room and keeping the office layout efficient. This 36-square-foot standard has proven its worth time and time again, which is why so many office managers and designers rely on it as their foundation. You can get a closer look at the specifics by exploring these standard office cubicle dimensions on Cubiclebydesign.com.

The Most Common Dimensions Explained

Of course, the classic 6'x6' isn't your only option. Other standard sizes have emerged to handle specific roles and space constraints, giving you the flexibility to fine-tune your office layout with real precision. Each one presents a different trade-off between individual space, office density, and employee comfort.

Here’s a quick rundown of the main options you’ll encounter.

To make things easier, here’s a quick-reference table that breaks down the most popular cubicle footprints and what they're best used for.

Common Cubicle Footprints at a Glance

Dimension (Feet) Square Footage Primary Use Case
5'x5' 25 sq. ft. High-density environments like call centers or touch-down stations.
6'x6' 36 sq. ft. The all-around industry standard for most administrative and tech roles.
6'x8' 48 sq. ft. For staff needing extra desk space for multiple monitors or paperwork.
8'x8' 64 sq. ft. Managerial roles or employees who need space for small, informal meetings.

As you can see, matching the footprint to the job function is key. A smaller, more compact station is perfect for some roles, while others genuinely need the extra real estate to be productive.

Here’s a little more detail on how these play out:

  • Compact (5'x5'): With a 25-square-foot footprint, this size is the champion of high-density layouts. It’s the perfect solution for call centers, data entry teams, or co-working spaces where maximizing headcount is the name of the game.
  • Standard (6'x6'): This is the industry workhorse. It provides just enough room for a comfortable L-shaped desk, a good chair, and some personal storage. It's suitable for an incredibly wide range of roles, which you can see in our versatile workstation cubicles.
  • Spacious (6'x8' or 8'x8'): Bumping up to 48 or even 64 square feet, these larger cubicles are a great fit for employees who juggle a lot of paperwork, use multiple large monitors, or need to occasionally host a colleague for a quick chat. For jobs that require intense focus, our private office cubicles can offer even more seclusion.

Ultimately, understanding these average cubicle dimensions is what empowers you to make a smart, informed decision that sets your office up for success.

At Cubicle By Design, we offer a full range of cubicles to fit any floor plan imaginable. And when you’re ready to see how it all comes together, our free Cubicle Designer tool makes it simple to visualize your perfect layout.

How Cubicle Size Shapes Your Office Floor Plan

Picking the right cubicle size is about so much more than just the individual workstation. It's the decision that sets the entire blueprint for your office environment. Think of your floor plan like a puzzle—each cubicle is a piece, and the size you choose dictates everything from density and workflow to the very culture of your company.

Smaller pieces, like a compact 5'x5' cubicle, let you fit more people into the same square footage. For high-density operations like call centers or startups paying sky-high urban rents, this can be a game-changer, sometimes boosting headcount capacity by up to 40%. On the flip side, larger 6'x8' or 8'x8' pieces create a more spacious, focused atmosphere that can go a long way in boosting employee satisfaction and cutting down on workplace stress.

This isn't a new concept. We've seen cubicle sizes shrink over the years as offices chased density and open-plan concepts. The old standard of a roomy 90 square feet per person has given way to today's more common 36-73 square feet, a direct result of trying to pack more people in. If you're building a new space, it's worth checking out some essential office renovation tips to get it right from the start.

The Math of Movement and Flow

Just as important as the cubicles themselves is the "negative space"—the walkways and common areas that connect them. This is the circulation system of your office. Get it wrong, and you'll have traffic jams, bottlenecks, and a general feeling of chaos.

A few solid rules of thumb can keep things moving smoothly.

  • Primary Walkways: These are your main arteries. Think of the main path from the entrance to the breakroom. It needs to be at least 48 inches wide so two people can pass each other without doing a sideways shuffle.
  • Secondary Aisles: The smaller paths between rows of cubicles should be a minimum of 36 inches wide.
  • ADA Compliance: This is non-negotiable. Key areas must meet Americans with Disabilities Act (ADA) standards for wheelchair accessibility, which is fundamental to creating an inclusive and functional workplace.

Your floor plan is a direct reflection of your company’s priorities. A layout that maximizes density sends a different message than one that prioritizes personal space and quiet zones.

At the end of the day, your layout needs to serve your business goals. Are you trying to maximize headcount per square foot, or is your top priority to build a calm, highly productive culture? Answering that question is the first real step in effective office space planning and design.

Finding The Right Panel Height For Privacy And Focus

Once you’ve settled on the perfect footprint for your cubicles, it’s time to look up. While the floor plan gets a lot of attention, the panel height is the secret ingredient that truly defines a workstation's atmosphere. Think of it like choosing a fence for a yard—the height you select sends a clear message about collaboration, privacy, and focus.

Panel height has a huge impact on how employees interact with each other and their work. Choosing the right one is less about picking a number and more about matching the physical barrier to the specific demands of a job. For some teams, constant chatter is key; for others, quiet concentration is the only way to get things done.

Low Panels For Open Collaboration

Low panels, typically in the 39 to 42-inch range, are the picket fences of the office world. They’re designed to create a visual boundary without actually cutting off communication. This height is perfect for dynamic, collaborative teams like sales or creative departments where spontaneous conversations and bouncing ideas off each other are part of the daily grind.

These panels let employees easily see and speak to one another while seated, which really helps build a sense of community and teamwork. They keep the office feeling open and bright but can definitely be a source of distraction for roles that require deep, uninterrupted thought.

Mid Height Panels For Seated Privacy

Stepping up to mid-height panels, usually around 53 inches, offers the best of both worlds. This is easily the most popular choice for general office use because it provides what’s known as “seated privacy.” When an employee is sitting down, they are shielded from visual distractions, letting them focus on their tasks.

But, the moment they stand up, they can easily see over the wall to ask a quick question or collaborate with a neighbor. This balance makes 53-inch panels incredibly versatile, supporting both individual work and team cohesion. For a deeper dive, our guide on achieving office cubicle privacy explores this concept in much more detail.

High Panels For Maximum Focus

For roles that demand a library-like level of quiet and concentration, high panels are the only way to go. At 65 inches or taller, these walls act as true privacy fences, seriously cutting down on both visual and acoustic distractions. They create self-contained workstations that are ideal for accountants, writers, programmers, or anyone handling sensitive information.

These taller setups signal that an employee needs to be "in the zone" and shouldn't be disturbed. While they are fantastic for heads-down work, they can make an office feel more segmented. If you're looking for the ultimate in seclusion, our dedicated private office cubicles are designed to provide a quiet, fully enclosed workspace.

Matching Cubicle Layouts To Different Work Roles

A cubicle's footprint and panel height set the stage, but the layout inside—the shape of the work surface—is what really drives the day-to-day workflow. The goal is to match the desk shape to the employee's actual tasks. When you get this right, a simple cubicle transforms into a high-performance workspace designed for a specific job.

The most straightforward option is the I-shaped layout. Think of it as a single, straight work surface. You'll often find this design in smaller footprints, like 2'x5' or 3'x6', and it’s a perfect match for linear, focused jobs. It’s the ideal no-frills setup for call center agents or data entry clerks who spend their day on a screen and keyboard, giving them exactly what they need without any wasted space.

The L-Shape For Everyday Versatility

By far, the most common setup you’ll see in any office is the L-shaped layout. Typically found inside a standard 6'x6' or 6'x8' cubicle, it gives an employee a primary surface for their computer and a secondary one for paperwork, reference materials, or spreading out a bit.

This versatility is its superpower. It gives your general staff enough room to organize their work without feeling boxed in. Because it supports a wider range of activities, it's an excellent all-around choice for administrative assistants, project coordinators, and most typical corporate roles.

Of course, the layout is just one part of the equation. You also have to decide between fostering collaboration or promoting deep focus. This decision tree is a great visual guide for figuring out which panel height makes the most sense for your team's work style.

As you can see, it’s a simple trade-off: if teamwork is the priority, lower panels are the way to go. If individual concentration is key, higher walls provide that necessary privacy.

The U-Shape For Command And Control

For managers, executives, or anyone juggling multiple complex projects at once, the U-shaped layout is the ultimate command center. You'll find this configuration in larger footprints like 8'x8' or even bigger custom sizes, wrapping the work surface around the user on three sides.

This layout provides an enormous amount of surface area, allowing you to create separate zones for computer work, paperwork, and even small meetings. It has a cockpit-like feel, putting everything an employee needs right within arm's reach. It's the perfect setup for roles that demand serious organization and multitasking.

Choosing the right layout isn't just about furniture; it's about understanding how your team works. A well-matched cubicle shape can make a huge difference in productivity and job satisfaction.

To help you visualize these options, here’s a quick breakdown of how different layouts align with common job functions.

Matching Cubicle Layouts to Job Functions

Layout Shape Typical Dimensions Ideal For Key Benefit
I-Shape 2'x5', 3'x6' Call Center Agents, Data Entry Clerks, Task-Based Roles Simplicity and space-efficiency for focused, linear work.
L-Shape 6'x6', 6'x8' Administrative Staff, Project Coordinators, General Office Roles Versatility; provides a primary and secondary work surface for organization.
U-Shape 8'x8', 8'x12' Managers, Executives, Designers, Accountants Maximum surface area; creates distinct zones for multitasking and high-focus projects.

By carefully thinking through the daily demands of each role, you can select a layout that truly empowers your employees to do their best work.

If you want to dive deeper into all the possibilities, you can explore our detailed overview of cubicle configurations and their benefits.

Planning For Power, Data, And Accessibility

A truly effective office plan goes way beyond just picking out cubicle sizes. It’s about creating a space that actually works—for today's tech, for every single employee, and for whatever comes next. It’s these nitty-gritty details, often left to the last minute, that really make or break a workspace.

First up, and arguably most important, is accessibility. Following the Americans with Disabilities Act (ADA) isn't just about checking a compliance box; it's about building an environment where everyone can move around freely and work without barriers. This means paying close attention to walkway widths, turning spaces, and ensuring individual workstations are designed with proper clearance for wheelchair access.

Ergonomics And Employee Wellness

Right alongside accessibility is the science of ergonomics—designing the workspace to fit the person, not forcing the person to fit the workspace. You can't just ignore this stuff. Good ergonomics are non-negotiable for keeping your team healthy, focused, and happy in the long run. A poorly set up desk can quickly lead to physical strain, nagging discomfort, and a noticeable dip in productivity.

Here’s what to focus on:

  • Adjustable Surfaces: Desks that can move up and down are a game-changer. They accommodate people of all heights and give everyone the option to switch between sitting and standing throughout the day.
  • Adequate Legroom: It sounds basic, but you need to ensure there’s enough clear space under the desk. No one should feel cramped or have to contort themselves to sit comfortably.
  • Proper Reach Zones: The things people use most often—their mouse, keyboard, phone—should be within an easy arm’s reach. This simple step prevents the repetitive twisting and straining that leads to injuries.

A thoughtfully designed, ergonomic workstation isn't a cost; it's a direct investment in your team's health and productivity. It cuts down on sick days tied to aches and pains and sends a clear message that you care about their well-being.

Integrating Power And Data Management

Okay, let's talk about the cable spaghetti. In any modern office, you need a clean, safe, and logical way to handle power and data. Everyone has laptops, multiple monitors, phones, and other gadgets that need juice and a network connection. A nest of cords under the desk is more than just ugly—it’s a major trip hazard.

Luckily, modern cubicle systems are built for this. Power and data ports are often built right into the base of the panels or even the desktops themselves. This brilliant design keeps all the cables tucked away and organized, creating a clean, professional look while eliminating safety risks.

Planning your cubicle electrical setup from day one is critical. It ensures every single workstation has the connectivity it needs without turning your office floor into a mess of extension cords. When you consider power, accessibility, and ergonomics right alongside your layout dimensions, you’re not just building an office—you’re creating a high-performance workspace.

Bring Your Perfect Office Layout To Life

You’ve done the homework—you've weighed the pros and cons of different cubicle sizes, panel heights, and common layouts. Now for the fun part: turning those abstract ideas into something you can actually see and touch. This is where your vision for a smarter, more comfortable workspace really starts to come together. It's time to stop just planning and start building.

The best way to bridge that gap between a floor plan sketch and a final order is to get your hands dirty with an interactive tool. That's exactly why we built our free Cubicle By Design Custom Cubicle Designer. It puts you in the architect's seat, letting you apply everything you’ve just learned in a simple, visual playground.

Build Your Ideal Workstation

Think of our designer tool as your digital sandbox. It’s a place where you can experiment without any commitment, moving walls and swapping components until you've landed on something that perfectly fits your team's real-world needs.

With just a few clicks, you can:

  • Select Dimensions: Try out different footprints on for size. See how a compact 5'x5' feels compared to a roomier 8'x8'.
  • Choose Panel Heights: Toggle between low, mid, and high panels to strike that perfect balance between privacy and an open, collaborative vibe.
  • Configure Components: Drag and drop the essentials. Add drawers, pop in some overhead bins for storage, pick a work surface, and make sure you've got power right where you need it.
  • Pick Finishes: Play around with different fabric and laminate colors to make sure your new workstations feel like a natural part of your brand.

This hands-on process is incredibly empowering. You’re not just picking from a catalog; you’re building a completely tailored solution from the ground up, making informed decisions and seeing the results instantly.

Once your layout is dialed in, the next step is making it a reality. Larger projects that involve moving walls or updating infrastructure often benefit from a specialist's touch. Partnering with a professional firm like Aldridge Construction can be a smart move to ensure the installation phase is seamless.

By taking your requirements and plugging them into a tool that gives you a concrete design, you can move forward with total confidence. You'll know the workspace you're creating isn't just a guess—it's a perfect fit for your team.

Common Questions About Cubicle Planning

Even with the best blueprints in hand, specific questions always seem to pop up when you're laying out an office. Getting those nagging details sorted out is the key to finalizing your design with confidence. Let's walk through some of the most common queries we hear from clients.

How Much Space Should I Leave Between Cubicles?

This is a big one. The most critical rule of thumb is planning for people to move around easily. Your main walkways—the high-traffic arteries of your office—need to be 48 inches wide. This gives two people enough room to pass each other comfortably and keeps everything compliant with ADA requirements.

For the smaller, secondary aisles between rows of workstation cubicles, you can tighten things up a bit, but aim for a minimum of 36 inches wide. Don't get so focused on the cubicle footprint that you forget about the "negative space." That's what makes an office feel functional and frustration-free.

What Is The Best All-Around Cubicle Size?

If there's one size that reigns supreme for general office work, it's the 6'x6' cubicle. Its 36-square-foot area hits the sweet spot between providing a good amount of personal workspace and being efficient with your floor plan. It's the go-to for a reason.

A 6'x6' is large enough to comfortably fit an L-shaped desk and some basic storage without making an employee feel boxed in. Think of it as the perfect starting point for most office layouts.

Of course, the "best" size is always the one that fits the job. A 6'x6' is a safe bet, but a bustling call center might find 5'x5' stations are perfect, while a department manager might need the extra room of an 8'x8' footprint.

Can I Mix Different Cubicle Sizes In One Office?

Not only can you, but you absolutely should! Mixing and matching sizes is a smart strategy for creating a dynamic and efficient office. You can deploy smaller cubicles for high-density teams, stick with standard sizes for your general staff, and use larger private office cubicles for roles that demand more space and privacy.

This approach lets you create specialized zones perfectly tailored to what different teams actually do, which helps you get the most out of your space and your people.


Ready to put these ideas into action? At Cubicle By Design, we help you navigate every step of the planning process. Feel free to explore our full range of cubicles or start bringing your vision to life with our free Cubicle Designer tool today.

Read More

Boosting Workplace Productivity with Smart Office Design

If you want to boost productivity, telling people to just work harder is a losing game. The real secret is creating an environment that helps them work smarter. It all comes down to a strategic office layout—one that’s designed around how your teams actually get things done. When you move beyond just rows of desks, you can build a space that cuts down on distractions and actively supports focus, collaboration, and your company's unique culture.

Your Office Layout Is Your Productivity Engine

The connection between your office's floor plan and your team's output is impossible to ignore. Too many businesses see furniture as just a line item expense. The smart ones see it for what it is: a powerful tool for improving workplace productivity. The way you arrange desks, meeting rooms, and quiet zones has a direct and daily impact on communication, concentration, and even morale.

A poorly planned office is a breeding ground for constant interruptions. Think about it: placing a loud, collaborative team right next to a group that needs quiet, deep focus is a recipe for frustration and wasted time. This is where thoughtful design becomes a real competitive advantage. At Cubicle By Design, we help businesses create these optimized environments.

Designing for Different Work Styles

Modern work isn't one-size-fits-all, so why should your office be? The most effective workplaces I've seen are adopting a "zoned" approach. They create distinct areas tailored to specific activities, recognizing that an employee's needs can change multiple times throughout the day.

This might look like:

  • Focus Zones: Quiet areas built for heads-down, concentrated work. These are perfect for private office cubicles that minimize visual and auditory distractions.
  • Collaboration Hubs: Open, energetic spaces with whiteboards, flexible seating, and room for spontaneous brainstorming sessions.
  • Social Nooks: Comfortable lounge areas designed for informal chats, building rapport, and giving people a place to recharge.

This strategy empowers your team. It gives them the autonomy to choose the setting that best fits their task at that moment, putting them in control of their own productivity.

From Blueprint to Bottom Line

Getting this right starts with truly understanding your team's workflow. You have to map out movement patterns, who interacts with whom, and what each department really needs to succeed. This isn't just about arranging furniture; it's about optimizing your entire office footprint. If you're new to this, our guide on what is space planning is a great starting point for analyzing your space.

The whole point is to create a physical environment that removes friction. You want to make it easier for people to do their best work. When the layout aligns with your workflow and culture, you're not just buying furniture—you're investing in a more engaged and effective team.

Ultimately, a strategic layout transforms your office from just a container for people into a dynamic engine for success. By carefully considering how your space is organized, you can directly influence your team's ability to focus, collaborate, and innovate. Our selection of cubicles can help you get started.

Designing a Hybrid Office That Actually Works

The whole idea of "going to work" has changed for good. The hybrid model isn't some passing trend; it's how modern businesses operate now. This shift means we have to completely rethink the office itself, moving away from those endless rows of desks built for a rigid 9-to-5 world.

These days, when employees decide to come into the office, they have a reason. It's intentional. That means the physical workspace has to be more than just a place to park a laptop. It needs to be a dynamic, supportive environment for specific tasks—everything from deep, focused work to high-energy team brainstorming. If you want to see productivity climb in a hybrid setup, you've got to create a space that can flex to meet all these different needs.

Embracing Activity-Based Working

The most successful hybrid offices I've seen are all built around one core idea: activity-based working (ABW). This isn't just about hot-desking; it's a philosophy that gives people the freedom to choose the right environment for the task at hand. Think of it as providing a menu of work settings, not a one-size-fits-all floor plan.

Picture this: an employee starts her day tucked away in a quiet pod for a crucial client call. An hour later, she’s at a collaborative hub with whiteboards, hashing out a new project with her team. This kind of agility is only possible when you have flexible, modular furniture that can adapt on the fly.

The core idea is simple: the work should dictate the space, not the other way around. By giving your team this choice, you're empowering them to manage their own focus and energy, which naturally leads to better results and higher engagement.

This fluid approach demands a strategic mix of different work settings. For example, one of our clients made the leap from assigned seating to a "hoteling" model. By bringing in our versatile workstation cubicles, they boosted their space utilization by a whopping 40% and gave their team the autonomy they were looking for.

Furniture That Fuels Flexibility

Let's be honest: rigid, fixed furniture is a dead end in a hybrid model. The real key is to invest in modular systems you can easily reconfigure as your team's needs change over time. This is where a well-designed cubicle system becomes your best friend. Forget the monolithic boxes of the past; modern cubicles are adaptable tools for creating functional zones.

Think about a mix of these options:

  • Private Pods: For tasks that demand serious concentration or confidentiality, private office cubicles are the perfect answer. They give you acoustic and visual separation without the cost and permanence of building new walls.
  • Collaborative Clusters: You can group low-partition workstations together to create team "neighborhoods." This encourages easy communication while still giving everyone a defined personal workspace.
  • Touchdown Spaces: For employees who are just popping in for a few hours, open, unassigned desks are ideal. They provide a simple, temporary spot to plug in and get to work.

This strategic blend of open and private spaces is what supports all the different activities happening in a lively hybrid office. If you're not sure where to start with mapping out these zones, our Custom Cubicle Designer is a great tool for visualizing a layout that actually fits your team's workflow.

Making Hybrid Work Intentional

The data on hybrid work tells a fascinating story. Recent workplace stats show that even though the average workday has gotten a bit shorter, productivity is actually up. This is backed by a 33% global increase in desk bookings, which tells us that companies are getting much smarter about how they use their physical space. With people working remotely more often, it just makes sense to invest in flexible, multipurpose workstations that make those in-office days really count. The 2025 workplace statistics report has some great insights on these trends.

This all points back to the importance of being intentional. To really get the most out of your hybrid setup, you need clear guidelines and protocols. For a deep dive into setting up an effective model, it's worth checking out these hybrid work model best practices.

A successful hybrid office isn't just about the furniture. It's a carefully orchestrated ecosystem designed to support how people work today. By embracing activity-based working and investing in adaptable solutions from Cubicle By Design, you can build a workspace that not only functions but actively drives productivity and keeps your team happy. For a deeper look into this, you might be interested in our article on how office trends boost employee productivity.

How Acoustics and Lighting Impact Daily Focus

You know that low, constant hum of office chatter? Or the relentless glare from the fluorescent lights overhead? They might seem like minor annoyances, but they're genuine productivity killers. These background factors quietly sap mental energy, making it nearly impossible for people to get into a state of deep focus. Tackling them is one of the most direct ways to create a space where great work can actually happen.

This isn't about quick fixes like adding a few decorative plants. Real improvement comes from thinking strategically about sound and light. You have to consider how noise travels through your space and how different kinds of light affect mood and energy levels throughout the day. A well-designed office doesn't just look good—it actively helps people think better.

Taming the Office Soundscape

Unwanted noise is probably the number one reason for lost concentration. Study after study shows that constant auditory interruptions lead to higher stress and a serious dip in output. The goal isn't total silence—that can be just as unnerving. It's about controlling how sound moves and gets absorbed.

  • Varying Cubicle Heights: Who says all cubicles have to be the same height? Using taller panels for teams that need to do heads-down work is a fantastic way to create acoustic privacy without the cost of building out new walls.
  • Strategic Sound Absorption: Get smart about where you place sound-absorbing materials. Putting acoustic panels on walls near high-traffic hallways or busy collaborative zones can work wonders. They grab that ambient noise and stop it from bouncing all over the room and distracting everyone else.

A key term to know is the Noise Reduction Coefficient (NRC). It’s a simple rating that tells you how much sound a material can absorb. For instance, a material with an NRC of 0.75 absorbs 75% of the sound that hits it. Knowing this helps you pick the right finishes and furniture instead of just guessing.

The shift to hybrid work really underscores why getting these environmental factors right is so critical. People are coming into the office for specific reasons, and the space has to support those needs.

As you can see, the modern workplace has to be intentional. It needs to be a flexible, modular space that can handle all kinds of different tasks, and managing sound is a huge part of that.

Illuminating the Path to Productivity

Just as critical as sound is the quality of your lighting. I've seen so many offices where poor lighting causes eye strain, headaches, and just general sluggishness—all things that directly torpedo focus and efficiency. A thoughtful lighting strategy can completely transform the energy of a room.

The best place to start is always with natural light. If you can, position workstations to take full advantage of windows. It's been proven time and again that exposure to natural light boosts mood and helps regulate sleep cycles. Where that's not possible, the goal should be to mimic its positive effects with a layered lighting plan.

If you want to go deeper on this, we've put together a guide specifically on how to handle office cubicle lighting.


Acoustic Solutions For Different Office Zones

Choosing the right acoustic materials can feel overwhelming. This table breaks down common challenges in different office zones and pairs them with effective, practical solutions.

Office Zone Primary Challenge Recommended Solution Key Benefit
Open-Plan Areas Echo and noise bleed from conversations Ceiling baffles and acoustic clouds Absorbs sound from all directions, reducing overall ambient noise.
Focus Pods/Booths Soundproofing for privacy High-density acoustic foam panels inside Creates a true "cone of silence" for confidential calls or deep work.
Conference Rooms Poor speech clarity and reverb Wall-mounted acoustic panels and fabric-wrapped boards Improves sound quality for both in-person and virtual attendees.
High-Traffic Hallways Footstep noise and traveling conversations Acoustic flooring underlayment or carpet tiles Dampens impact noise and absorbs sound at the source.

By matching the solution to the specific problem in each zone, you can create a much more functional and less distracting environment for everyone.


Creating a Human-Centric Environment

The most effective lighting plans actually work with our natural biological rhythms. This is where circadian-friendly lighting systems come in. These systems change their color temperature and brightness throughout the day—shifting from a cooler, energizing light in the morning to a warmer, calmer light in the afternoon. It sounds futuristic, but it's becoming more common.

A much simpler but incredibly powerful upgrade is providing individual task lighting. A small lamp at each desk gives employees control over the light in their immediate area. This little bit of control makes a huge difference in reducing eye strain, especially for detailed work.

Beyond just lighting and sound, you have to consider the overall health of the building itself. Things like poor air quality can also drain focus and productivity. It's worth looking into topics like understanding and addressing Sick Building Syndrome as part of a holistic approach.

When you invest in better acoustics and lighting, you’re doing more than just a cosmetic upgrade. You’re making a fundamental investment in your team’s health, well-being, and ability to do their absolute best work.

Connecting Ergonomics to Employee Engagement

Ergonomic furniture often gets written off as a trendy office perk, but it's a direct investment in the health, focus, and genuine engagement of your team. While the link between physical comfort and productivity is pretty clear, we often miss its massive impact on morale.

Think about it: when an employee spends their day constantly shifting in a bad chair or craning their neck to see a monitor, it does more than just cause pain. It sends a subtle message that their well-being isn’t a priority.

That nagging discomfort is a huge contributor to burnout, absenteeism, and a general dip in morale. It’s a low-grade, persistent stressor that drains mental energy, making it nearly impossible to do deep, focused work. Investing in a properly designed ergonomic environment is one of the most powerful things you can do to boost productivity because it tackles these problems at the source.

Beyond Back Support: An Ergonomic Engagement Strategy

When you start looking at ergonomics through the lens of employee engagement, the whole conversation changes. It’s no longer just about preventing injuries; it’s about creating an environment where people feel valued and can actually perform at their best.

When a company provides the right tools for physical well-being, employees notice. That simple gesture builds loyalty and trust in a way few other things can. Minor aches and pains from a poorly designed workstation can quickly escalate into chronic issues, leading to more sick days and a total loss of focus. This is where smart furniture choices, like those from our collection of workstation cubicles, become absolutely essential.

Investing in your team's physical environment is one of the most visible ways to show you care. An adjustable chair or a standing desk is a daily reminder that the company is committed to their health, which is a cornerstone of genuine employee engagement.

It's no secret that global employee engagement has seen a steep decline—it currently sits at just 21%. That slump costs the global economy an estimated $438 billion in lost productivity. The data is clear: employees in great workplaces are far more likely to stick around and feel satisfied with their jobs. This highlights the immense value of designing spaces that truly support well-being.

The Core Components of an Ergonomic Workstation

Getting an ergonomic setup right involves more than just buying one fancy chair. You need a holistic approach where all the different elements work together to support the person using them. A great workspace should adapt to the individual, not the other way around. For a deeper dive, check out our full guide on how to maximize the ergonomics of your office.

Here are the key pieces to focus on:

  • The Task Chair: This is the foundation. Look for chairs with adjustable lumbar support, armrests, seat height, and tilt. The goal is to support the spine's natural curve and allow the user's feet to rest flat on the floor with their knees at a 90-degree angle.
  • Adjustable-Height Desks: The ability to switch between sitting and standing is a game-changer for energy levels. Standing desks encourage better posture, improve blood flow, and can seriously reduce the health risks of sitting all day.
  • Monitor Arms and Positioning: The top of the screen should be at or slightly below eye level and about an arm's length away. Adjustable monitor arms are crucial for getting this right, preventing the neck strain and eye fatigue that kill focus.

These elements create a personalized environment that cuts down on physical stress, freeing up mental energy for the work that matters.

Customizing Solutions for Your Team

Every team is different, which is why a one-size-fits-all approach to office furniture just doesn't work. A programmer who needs hours of deep focus has completely different needs than a project manager who is constantly on the move. This is where modular and customizable furniture systems really shine.

For instance, you can configure workstation cubicles with different desk heights and storage options to suit specific roles. In the same vein, private office cubicles can provide the quiet, ergonomic setup needed for tasks that require intense concentration.

A great first step is to see how these pieces could fit into your own space. Using a tool like our Cubicle Designer lets you play with layouts and components to build a workspace that puts your team’s well-being front and center.

By offering choices and tailoring the environment to your people, you move beyond basic comfort and into the realm of strategic engagement. That's how you build a truly productive and supportive workplace.

Future-Proofing Your Office for New Technology

As technology like AI weaves its way into our daily work, your office layout can either be a launchpad for innovation or a major roadblock. Thinking about how your workspace can evolve with technology isn't just a nice-to-have anymore; it's a core strategy for keeping your team productive and staying ahead.

While new software tools promise to make us all more efficient, the physical environment is often the missing piece of the puzzle. An office that wasn't designed to support modern workflows can easily sabotage any potential gains from that fancy new software.

The Surprising Truth About AI and Productivity

There are a lot of conflicting reports out there about AI's real-world impact. We hear about massive productivity boosts, but the story on the ground can be quite different. A recent study revealed something shocking: 77% of employees say that AI has lowered their productivity, with that same percentage claiming their workload has actually increased.

When you consider that the average worker gets interrupted every three minutes, the data suggests a huge disconnect between the promise of technology and the reality of the workplace. You can discover more insights about these employee productivity statistics to get the full picture.

This gap highlights a crucial point: you can't just drop a new tool into an old environment and expect magic. Success with new tech hinges on an intentional workplace design that supports focus, collaboration, and seamless integration.

Building an Adaptable Infrastructure

Future-proofing your office starts with the basics: power and data. As teams rely on more and more devices—laptops, tablets, interactive whiteboards, you name it—access to power can become a frustrating bottleneck. A truly forward-thinking office has power and data baked right into its core infrastructure.

This is where flexible furniture systems are an absolute game-changer. For example, our cubicles can be configured with built-in electrical and data ports, making sure power is always within easy reach. This gets rid of the trip-hazard spaghetti of extension cords and lets you reconfigure layouts without having to call an electrician every time.

Your office furniture should be an active part of your technology strategy, not a passive bystander. By embedding power and data access into your workstations, you create an agile foundation that can adapt to whatever comes next.

This approach means that as your tech needs change—whether it’s adding more monitors or adopting new collaborative hardware—your physical space can keep up without a major, costly overhaul.

Designing Tech-Ready Collaboration Hubs

The way we collaborate is also changing fast. Meetings aren't just for traditional conference rooms anymore. Spontaneous brainstorming sessions happen everywhere, and they are increasingly powered by technology. A future-ready office needs dedicated, tech-enabled hubs to support these modern workflows.

Think about creating zones that include:

  • Interactive Displays: Large, touch-screen monitors are fantastic for letting teams work together on digital whiteboards, look at data in real-time, and easily share content.
  • High-Quality AV Equipment: Simple, reliable video conferencing setups are non-negotiable for hybrid teams. This ensures remote participants feel just as included as everyone in the room.
  • Flexible Seating: Movable chairs, tables, and soft seating let teams quickly rearrange a space to fit the specific needs of a meeting or project.

The whole idea is to create spaces where technology supports the creative process instead of getting in the way.

The Power of Modular and Reconfigurable Systems

Maybe the most important piece of a future-proof office is its ability to be reconfigured. Teams grow, shrink, and shift their focus. Your office layout has to be able to adapt quickly and without breaking the bank. Rigid, permanent construction is the enemy of agility.

This is the real strength of modular systems. For instance, private office cubicles can be assembled, taken apart, and moved to create new focus areas as your needs change. Versatile workstation cubicles can be shifted from individual pods into collaborative team clusters in a snap. To really dive into this, you can learn more about what modular furniture is and its benefits in our detailed guide.

By embracing these flexible solutions from Cubicle By Design, you’re building an office that isn't just ready for today's technology, but is prepared for whatever innovations come next. This adaptability is what will set your company apart as a forward-thinking leader, ready to thrive in a constantly changing world.

Common Questions on Boosting Office Productivity

As facility managers, HR leaders, and business owners dive into modern office design, a lot of practical questions pop up. It's one thing to want a more productive workspace; it's another to balance the budget, your team's real needs, and a long-term vision. Let's tackle some of the most common questions we hear from clients.

These answers cut straight to the point, giving you actionable advice on everything from getting started to measuring success and settling the great "open vs. cubicle" debate.

What’s the Very First Step to Improve Productivity Through Office Design?

Before you even think about new furniture, the first step is always to just observe. It’s a classic mistake to assume you know what your team needs without gathering any real-world intel. You have to understand how your people actually work every single day.

Start by watching workflows and sending out simple surveys. You’re looking to identify the main work modes in your company:

  • Is it mostly heads-down, focused work that demands quiet?
  • Do collaborative projects pop up spontaneously throughout the day?
  • Do your teams rely on quick, informal chats to keep work moving?

A quick space audit can reveal which areas are collecting dust and where the obvious productivity bottlenecks are. This data-first approach is the core philosophy at Cubicle By Design—it ensures you're creating a layout that solves actual problems, not just chasing the latest trend.

How Can I Improve Office Productivity on a Tight Budget?

You absolutely don't need a massive, budget-busting overhaul to see a difference. Start with high-impact, low-cost changes that fix the biggest headaches. For example, simply rearranging desks to be closer to windows can maximize natural light—and it costs nothing.

Adding individual task lamps is an inexpensive way to fight eye strain. You can also get creative with noise control by using existing furniture, like bookshelves, to create physical barriers. Or, install a few affordable acoustic panels in high-traffic zones. Sometimes, the best change is just decluttering common areas to foster a calmer, more organized atmosphere.

A phased approach works wonders when you're watching the bottom line. Start by upgrading ergonomic chairs for just one or two key teams. You'll see an immediate return on their focus and well-being, which builds a powerful case for investing more down the line. Budget-friendly modular cubicles are also a smart move, as they can adapt and expand with your business over time.

How Do You Actually Measure the ROI of a New Office Design?

Measuring your return on investment is all about mixing hard numbers with human feedback. Before you move a single desk, you need to benchmark the metrics that matter to your business. This could be anything from project completion rates and error frequency to customer satisfaction scores.

After the new design is in place, track those same metrics and look for improvements. It's also smart to keep an eye on employee absenteeism and turnover rates; a better environment almost always leads to better retention. On the qualitative side, use simple surveys to ask employees how they feel about their ability to focus, collaborate, and their overall job satisfaction. This blend of data and real-world feedback will paint a clear picture of the value of your investment.

Are Open-Plan Offices or Cubicles Better for Productivity?

Honestly, this debate is a bit outdated. The real answer is that the most productive offices today use a strategic mix of both. A truly effective modern workspace gives people choices and empowers them to pick the right environment for the task at hand.

Open areas are fantastic for sparking team energy and spontaneous brainstorming. But there’s no denying that people also need acoustically and visually private spaces for deep, concentrated work. The best designs use a hybrid, or "best of both worlds," approach.

  • Low-partition workstation cubicles can create team "neighborhoods" that still encourage easy communication.
  • Full-height private office cubicles offer the quiet and seclusion people need to really zero in on complex tasks.
  • Open lounge areas with comfortable seating provide a great spot for casual meetings and collaborative chats.

The secret is giving employees control over their environment. You can start playing with these ideas yourself using our Custom Cubicle Designer to see what a balanced approach could look like in your space.


Ready to create a workspace that drives real results? At Cubicle By Design, we specialize in flexible, modular office furniture that enhances productivity and fits your budget. Start designing your better workplace today.

Read More

Standard Office Cubicle Dimensions: A Practical Guide | Cubicle By Design

Choosing the right cubicle is one of the most important decisions when designing an office. What are the most common cubicle sizes? In the world of office furniture, the big three are 6'x6', 6'x8', and 8'x12'. You can think of these as the small, medium, and large options that have become industry standards over time. They didn't just become popular by chance; they represent the sweet spot between giving an employee enough personal space and making the most of your office floor plan. At Cubicle By Design, we help businesses find that perfect balance.

Decoding Standard Office Cubicle Dimensions

Picking the right cubicles can feel like a high-stakes game of Tetris, but it gets a lot easier once you understand the logic behind standard office cubicle dimensions. Don’t just see them as numbers on a page; these are the foundational building blocks of a productive, comfortable office. The footprint you choose has a ripple effect on everything, from individual focus to how easily your teams can collaborate.

Each of these standard sizes was designed with a specific type of work in mind. A compact 6'x6' is often perfect for focused, heads-down tasks, while a more spacious 8'x12' might be necessary for a manager who needs a small meeting area within their own space. It all comes down to the day-to-day reality of your team's roles and the gear they need to do their jobs.

(If you ever get stuck on the lingo, our handy guide to cubicle terminology is a great resource to keep in your back pocket.)

The Evolution of the Modern Cubicle

The ubiquitous 6'x6' cubicle is a product of decades of workplace evolution. At 36 square feet, it became the go-to choice because it strikes a practical balance between giving someone their own territory and fitting enough people on a floor.

The whole concept dates back to the 'Action Office II' in 1968, which was a pretty revolutionary idea for flexible, modular workspaces. But by the 1980s, corporate cost-cutting took over. That idealistic vision morphed into the dense "cube farms" many of us picture, with companies shrinking footprints down to 4.5'x4.5' just to pack 30-40% more people in, often at the expense of comfort.

The right cubicle footprint is more than just a measurement; it's a strategic decision that shapes your office culture, workflow, and employee satisfaction. It defines the boundary between personal focus and team interaction.

Visualizing Your Options

To make this a bit clearer, the diagram below breaks down the three core cubicle types and what they're best used for, from solo workstations to more team-focused setups.

Diagram illustrating standard office cubicle typologies, showing sizes and their intended uses for individual and team work.

As you can see, each step up in size is meant to accommodate more complex work styles and more equipment. This simple visual guide can help you start pointing toward the best fit for your team, whether that’s a bank of individual workstation cubicles or a few larger private office cubicles for your senior staff.

How to Choose the Right Cubicle Footprint

Picking the right cubicle footprint isn't about just filling up floor space—it's about setting your team up to win. The dimensions you choose should directly support what each person does all day. Think of it like a perfectly tailored suit: a great fit makes everything feel effortless and efficient, while a bad one just causes friction. Each of the standard office cubicle dimensions has a job to do, whether it's for heads-down focused work or for leading a team.

When you match the size of the workstation to the demands of the job, you’re building an environment where people have exactly what they need to do their best work. This is more than just buying furniture; it's a strategic part of your office design. To get a better handle on this whole process, our guide on professional office space planning and design is a great place to start.

Three storage cubicles of different sizes: Small (6'x6'), Medium (6'x8'), and Large (8'x12').

The Versatile 6'x6' Footprint

The 6'x6' cubicle is the tried-and-true workhorse of the modern office. Clocking in at 36 square feet, it’s the perfect size for roles that require a high degree of focus, like call center agents or administrative staff.

This compact footprint gives you enough room for a monitor, keyboard, and your essential papers without ever feeling claustrophobic. It’s an awesome choice for creating high-density work zones where individual productivity is the name of the game.

The Spacious 6'x8' Footprint

Sometimes, a job just needs more elbow room. When you've got dual monitors, piles of documents, or specialized equipment, the 6'x8' cubicle is the perfect step up. This size really came into its own in the '70s and '80s as computers and all their peripherals started demanding more desk space.

This footprint is ideal for people like accountants, graphic designers, or engineers who need to spread out with blueprints or reference materials. That extra bit of space, totaling 48 square feet, makes a huge difference in keeping a workflow smooth and organized.

The Commanding 8'x12' Footprint

For your team leads, supervisors, and managers, the 8'x12' cubicle is more than just a desk—it’s practically a mini-office. With a generous 96 square feet of space, it can easily handle a larger desk, personal storage, and even a couple of guest chairs for those quick one-on-one chats.

This size gives managers a private space to get their own work done while still being right there on the floor with their team. It projects a sense of leadership and provides the privacy needed for sensitive conversations or strategic planning.

Choosing the right footprint is one of the most fundamental decisions in workspace design. By matching cubicle dimensions to job functions, you invest directly in your team's ability to perform at their best.

Whatever your team needs, we at Cubicle By Design can help you find the perfect solution. From standard sizes to completely custom layouts, our team is here to help you plan a workplace that actually works. You can even play around with different setups yourself using our online Cubicle Designer tool.

Finding the Right Cubicle Panel Height

While a cubicle’s footprint sets the stage for your office layout, its wall height directs the action.

Think of the walls as the volume knob for your office culture. You can turn them up for intense, heads-down focus or dial them back to encourage teamwork and conversation. Getting the height right is a huge part of designing a workspace that actually supports how your team needs to work.

Panel height directly impacts privacy, noise levels, and the overall feeling of openness in your office. It's a delicate balance. Go too low, and distractions can easily derail productivity. Go too high, and you might accidentally create isolated silos where collaboration goes to die. The goal is to find that sweet spot for each team's specific function.

This is where the flexibility of modular systems from Cubicle By Design becomes a real game-changer. You’re not stuck with one-size-fits-all. You can mix and match heights to create distinct zones, crafting an environment that supports every work style.

Low Walls For Collaboration

Low-height panels, typically between 39 to 42 inches, act like friendly neighborhood fences. They do a great job of defining each person's workspace without completely blocking sightlines, making them perfect for teams that thrive on constant communication and quick collaboration.

These walls are just high enough to provide a sense of personal territory while seated, but low enough for team members to easily make eye contact and chat without even leaving their chairs. This setup is a home run for creative departments, sales teams, or any group where spontaneous conversations spark the best ideas.

Mid-Height Walls For Balanced Focus

Mid-height walls, usually hovering around 53 inches, offer the best of both worlds. This is an incredibly popular choice for standard office cubicle dimensions because it provides what's known as "seated privacy." When an employee is sitting down, the walls are high enough to block most visual distractions, allowing for focused, productive work.

Yet, the moment they stand up, they can see across the office, ask a colleague a question, or join a nearby discussion. This height strikes a fantastic balance, fostering concentration without sacrificing the open, connected feel of a modern office.

Cubicle wall height is a powerful tool for shaping behavior. By strategically choosing different panel heights, you can architect an office environment that naturally guides employees toward the right balance of focus and interaction.

High Walls For Maximum Privacy

When the job demands confidentiality and minimal interruptions, high walls are the only way to go. Panels that are 65 inches or taller create a true private sanctuary, significantly cutting down on both noise and visual distractions. For a deeper dive, check out our guide on achieving office cubicle privacy.

These taller setups are essential for roles in HR, finance, or legal departments where sensitive information is handled every day. They’re also a key feature of larger managerial cubicles, like the 8’x12’ footprint, which actually evolved from early flexible office concepts. While the original 1960s designs got a bad rap during the "cube farm" era, the backlash in the 1990s led 60% of Fortune 500 firms to adopt these larger, more private spaces for supervisors. You can learn more about this fascinating journey from the history of office layouts at ROSIinc.com.


To make it even clearer, let's break down how each panel height changes the dynamic of your workspace.

Cubicle Panel Height Comparison

Panel Height Privacy Level Best For Collaboration Ideal Work Style
39" – 42" Low Excellent Open-plan, high-interaction roles (e.g., sales, creative teams).
53" Medium Good Balanced roles needing both focus and team access (e.g., marketing, project management).
65"+ High Limited Heads-down, confidential work (e.g., HR, finance, legal, programmers).

Ultimately, choosing the right height isn't about picking one number for the entire office. It's about understanding the unique needs of your teams and creating tailored zones that help everyone do their best work.

Planning Your Office Flow and Layout

Picking out the right standard office cubicle dimensions is a huge part of the puzzle, but it's the space between the cubicles that really brings an office to life. You can have the best workstations in the world, but if getting to them is a nightmare, you’ve got a problem.

Think of your office layout like a city map. The cubicles are the buildings, sure. But the walkways and main aisles are the streets and avenues that let people get where they need to go without causing a five o'clock traffic jam by the printer. A great layout feels natural and intuitive, guiding people from their desk to the breakroom or a meeting without a second thought. This is the secret to a well-functioning office.

Three office cubicles demonstrating low, mid-height, and high privacy wall options with people.

Establishing Clear and Safe Pathways

The number one rule of thumb for office layout? Give people room to move. Cramped, narrow aisles are more than just an annoyance; they create bottlenecks and can be a genuine safety hazard in an emergency.

As a starting point, stick to these minimums:

  • Secondary Walkways: For the aisles between individual rows of cubicles, aim for at least 36 inches of clear space.
  • Main Thoroughfares: For the major arteries leading to exits, conference rooms, or the kitchen, you'll want 44 inches or more.

These numbers aren't pulled out of a hat. They’re the sweet spot that allows two people to pass by each other without doing an awkward shuffle, ensuring the flow of traffic stays smooth all day long.

ADA Compliance and Accessibility

Beyond simple convenience, your layout absolutely must comply with the Americans with Disabilities Act (ADA). This isn't optional—it's the law. But more than that, it's about creating a workspace that’s truly accessible to everyone on your team, including those who use wheelchairs or other mobility aids.

A truly functional office is an inclusive one. Planning for ADA compliance from the start isn't just about following rules—it’s about creating a workspace where every team member can navigate safely and independently.

This means thinking about details like turning radius in aisles and ensuring every workstation is approachable. It can feel like a lot to juggle, but at Cubicle By Design, we bake these considerations into the planning process. We'll help you design a layout that is not just efficient but fully code-compliant, taking all the guesswork out of these critical requirements.

To see how this fits into the bigger picture, it helps to review essential facilities management best practices, which cover how space utilization impacts the entire operation. By putting clear pathways and accessibility at the top of your list, you’re not just arranging furniture—you’re building an office that is safe, efficient, and welcoming for your whole team.

Design Your Perfect Cubicle Layout Online

Reading about standard office cubicle dimensions is one thing, but actually bringing your vision to life is where the real fun begins. It can feel like a huge leap going from abstract concepts like footprints and panel heights to a concrete floor plan. This is the moment you translate what your team needs into a tangible, functional design you can see and tweak.

Instead of messing around with rough sketches and guesswork, you can use powerful online tools to build a virtual model of your future office. It’s the perfect way to bridge the gap between theory and reality, helping you make smart decisions before you spend a dime. You get to play with different setups and make sure every last square foot is pulling its weight.

An aerial view of a modern office with rows of cubicles and a central aisle measuring 36-44 inches.

From Blueprint to Reality

Here at Cubicle By Design, we’ve made this whole process dead simple. We created our online Cubicle Designer tool to put you in the driver’s seat, letting you build, customize, and visualize your ideal office layout from the ground up.

The tool guides you through each step of the process. You can:

  • Select a Footprint: Kick things off with standard sizes like 6'x6' or 6'x8', or plug in custom dimensions for a truly unique fit.
  • Adjust Panel Heights: Dial in the perfect balance of privacy and collaboration by choosing between low, mid-height, and high walls. You can even pop in some glass panels for a more modern, open vibe.
  • Choose Finishes: Pick from a massive range of fabrics, laminates, and trim colors to make sure everything matches your company's brand and style.
  • Add Components: Easily drag and drop essentials like overhead storage bins, locking pedestals, and electrical outlets right where you need them.

Seeing your layout before you buy is the single best way to avoid expensive mistakes and guarantee the final design nails every one of your requirements—from workflow to employee comfort.

This hands-on approach really demystifies the design process. You can experiment with clustering workstations together or creating separate zones with private office cubicles. As you build, you get a crystal-clear picture of how each choice affects the flow and feel of your space.

Take Control of Your Office Design

Using an interactive designer turns space planning from a headache into an engaging, creative project. It cuts out the uncertainty by giving you a realistic preview of your finished office, which helps you line up your vision with your budget. You can learn more about how to transform your office with our interactive cubicle designer.

Ready to get your hands dirty? Dive in and see what’s possible.

Common Questions About Cubicle Dimensions

When you start planning a new office layout, the little details can really pile up. Even after you get a handle on footprints and panel heights, the practical questions always seem to find their way to the surface. We get it.

So, we've gathered some of the most common questions we hear from office managers and facility planners just like you. Think of this as getting a head start—we’re here to give you clear, straightforward answers based on years of helping businesses sort out their perfect space.

What Is the Most Common Office Cubicle Size?

Hands down, the 6'x6' footprint is the king of the cubicle world. It's the most popular and versatile size you'll find, offering a solid 36 square feet of personal space. This is the sweet spot for most general office work.

Why is it so popular? Because it gives an employee enough room for a computer, a bit of paperwork, and their own personal items without feeling boxed in. At the same time, it’s efficient, allowing you to create a functional office without eating up all your valuable square footage. It’s that perfect balance of employee comfort and smart use of space.

How Much Space Should Be Between Cubicle Rows?

Giving people room to move is essential for a safe and functional office. You don't want people bumping into each other just to get to their desk.

As a general rule of thumb, make sure your main walkways are at least 44 inches wide. For the secondary paths between rows of cubicles, a minimum of 36 inches is a good starting point. This keeps foot traffic flowing smoothly and avoids annoying bottlenecks.

But—and this is a big one—you absolutely must check your local building codes and the Americans with Disabilities Act (ADA) guidelines. These rules have very specific requirements to ensure the entire office is accessible, especially for individuals using wheelchairs. Working with a professional space planner is the best way to make sure your layout is both efficient and fully compliant.

Can I Mix Different Cubicle Sizes in One Office?

Absolutely! In fact, we highly recommend it. A modern, dynamic office isn't about a sea of identical boxes. It’s about creating an environment that supports different kinds of work.

For example, you could have a block of 6'x6' cubicles with mid-height walls for your main team, giving them a nice balance of focus and the ability to collaborate. In another area, you might place 6'x8' workstations for employees who need more surface area for things like dual monitors or large drawings.

And for managers who need space for private conversations? A larger private office cubicle, maybe an 8'x12' with high panels, gives them the room and privacy they need. Today’s modular systems are built for this kind of flexibility.

"A well-planned office isn't about uniformity; it's about providing the right tool for the job. Mixing cubicle dimensions allows you to create specialized zones for collaboration, deep focus, and leadership, all within a cohesive and efficient layout."

How Do I Plan for Power and Data in My Layout?

This is a step you can't afford to treat as an afterthought. Power and data need to be part of the plan from day one.

Modern cubicles are designed with this in mind. They have built-in raceways—hollow channels, usually along the base of the panels—that let you run all your electrical wiring and data cables right to the workstation. It's a clean, safe solution that keeps cords hidden and eliminates tripping hazards.

When you're designing the layout, you’ll need to map out where your power sources are coming from, whether that’s outlets in the floor, on the walls, or from power poles dropped from the ceiling. Here at Cubicle By Design, our team helps you with this every step of the way. We’ll work with you to make sure your power plan fits perfectly with your cubicle layout, so your new space is ready to go from the moment you move in.


Ready to stop guessing and start designing? The team at Cubicle By Design can help you navigate every aspect of your office layout, from choosing the right standard office cubicle dimensions to ensuring a flawless installation. Explore our full range of cubicles or visit us at https://cubiclebydesign.com/.

Read More