

Expert Guide to Office Furniture Installation
Any seasoned installer will tell you the same thing: a successful office furniture installation is won long before the first box is ever opened. This initial planning phase is all about foresight and meticulous preparation. Get this part right, and you’ll avoid the costly delays and last-minute scrambles that can derail even a simple project.
Your Pre-Installation Planning Checklist
The entire project really hinges on the quality of your pre-installation plan. Think of it like the foundation of a house—if it’s not solid, everything you build on top of it is at risk. This stage goes way beyond just taking a few measurements; it gets into the nitty-gritty operational details that separate a chaotic installation from a seamless one.
A solid plan anticipates the unique challenges of your building and layout. The goal is to solve problems on paper before they become expensive headaches on-site.
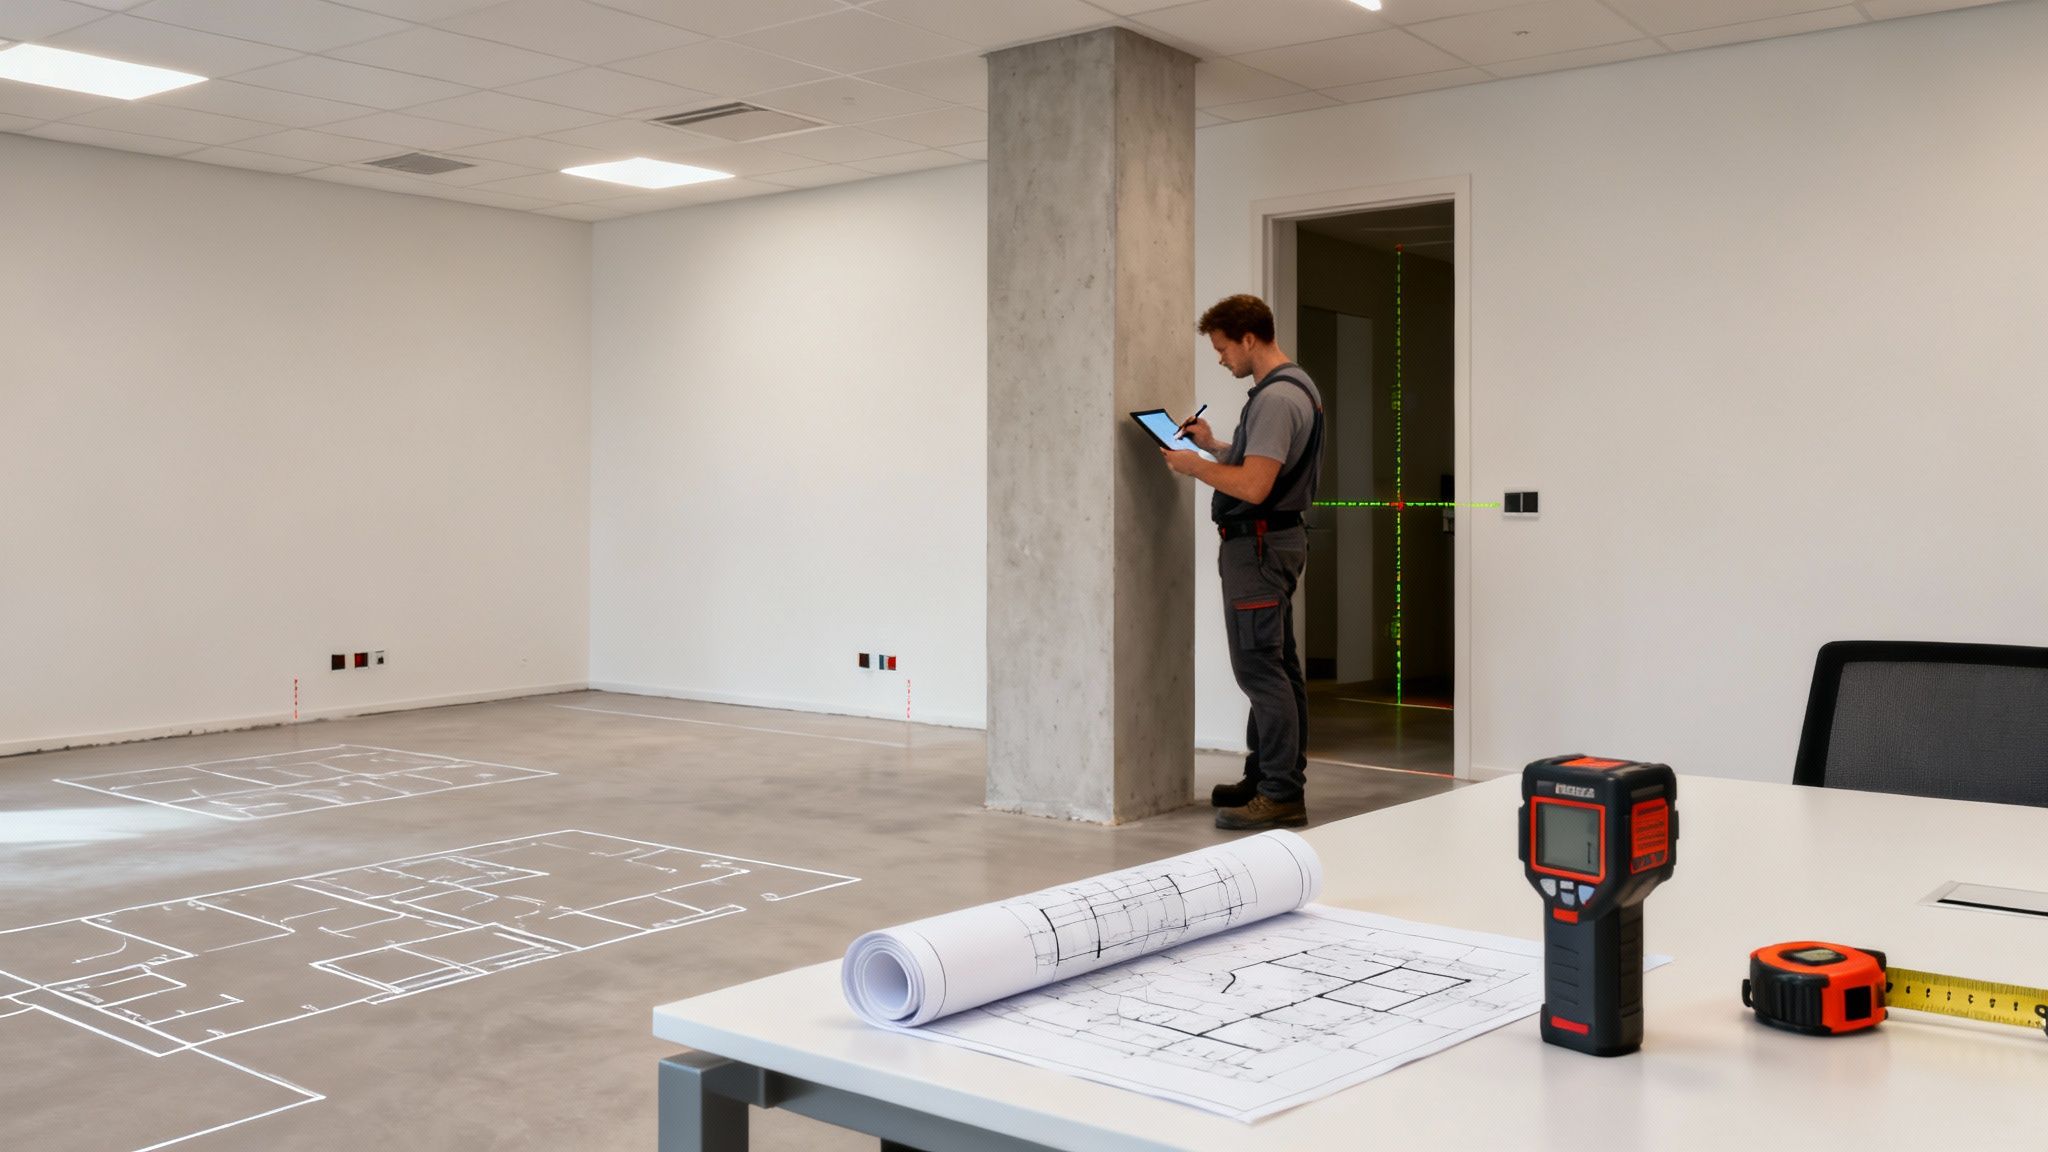
The Critical Site Assessment
First things first: you have to understand the canvas you’re working with. A thorough site assessment is non-negotiable and should be your absolute starting point. This is much more than just checking the square footage.
Your assessment should document:
- Precise Measurements: Get the dimensions of every room, but don’t forget ceiling heights, window placements, and the exact location of columns or other permanent fixtures.
- Architectural Quirks: Look for the hidden problems. Uneven flooring, oddly angled walls, or low-hanging ductwork can all interfere with furniture placement and assembly.
- Access Routes: Map out the entire journey, from the loading dock to the final installation spot. You need to measure every doorway, hallway, and elevator interior to make sure all the components will actually fit through.
A classic mistake we see all the time is forgetting to check the service elevator’s weight capacity or its reservation policy. Finding out on delivery day that your biggest items won’t fit—or that another tenant has it booked—can bring your entire project to a screeching halt.
Crafting a Realistic Project Plan
Once you have a detailed site assessment in your hands, you can build a realistic project plan. This document is your roadmap, outlining every single phase. It’s also a huge part of our approach to effective office space planning and design.
This plan needs to clearly define roles and responsibilities for everyone involved, from your internal team to the installation crew. It’s also where you’ll coordinate with building management to lock down permissions, reserve those elevators, and understand any building-specific rules for contractors.
The demand for this kind of detailed planning is growing. The contract furniture market, which directly fuels these projects, was valued at USD 154.10 billion and is projected to hit USD 209.48 billion by 2030. This boom is driven by commercial development in major markets, underscoring the global need for expert installation. You can discover more insights about contract furniture market growth at Grand View Research.
Setting up clear communication channels from day one is what keeps a project on track. A well-documented plan gives everyone the information they need to work together toward the same goal.
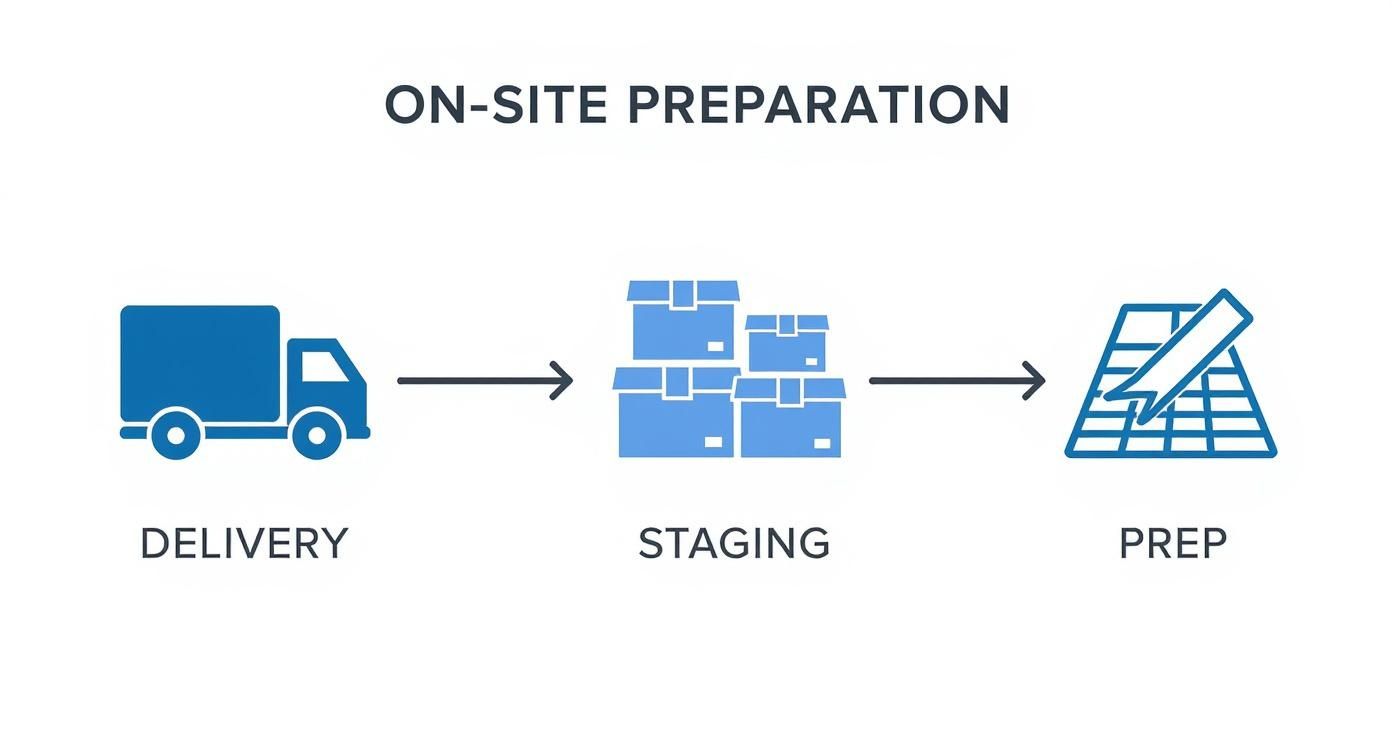
With your floor plan finalized, the action moves from paper to the physical world. This is where logistics and site prep take center stage, and getting it right is the secret to a headache-free office furniture installation. It’s all about wrangling the controlled chaos of delivery day and making sure your space is 100% ready for the assembly crew.
Think of it like this: if you don’t prep the kitchen, the chef can’t cook. A little groundwork here is what lets your installation team fly through the assembly process without hitting expensive snags or frustrating delays.
Coordinating Furniture Delivery
The first big hurdle is simply getting the furniture into your building. We’re not talking about a simple package from Amazon; you’re dealing with massive freight trucks, hundreds of boxes, and tight delivery windows. You have to be proactive.
Get in touch with your freight carrier early to lock down arrival times. You’ll also need to iron out the critical access details for your building:
- Loading Dock Access: Can a full-size tractor-trailer actually get to your dock? Double-check for any weird height restrictions or tight corners.
- Elevator Capacity: Know the weight limits and, just as importantly, the inside dimensions of your service elevator. The last thing you want is to discover a 10-foot tabletop doesn’t fit in a 9-foot elevator.
- Building Rules: Does your property manager require you to book the loading dock or service elevator? Get those reservations on the calendar the moment you have a delivery date.
Here’s a pro tip that saves a lot of grief: don’t assume the driver will help unload. Standard freight service is almost always “curbside delivery,” which means their job is done once they open the truck doors. You must confirm you have “inside delivery” if you need the items brought into your actual suite.
Smart Staging for Maximum Efficiency
Once all those boxes are inside, where you put them is a game-changer. Just piling everything in the middle of the floor creates a maze that will drive your installers crazy. A smart staging strategy is the single best way to keep the project on track.
The whole point is to sort and place every component so the assembly is intuitive. Instead of a mountain of mystery parts, the crew finds exactly what they need, right where they’ll be building. That floor plan you spent so much time on? It’s your map for this phase.
This is how the pros handle staging:
- Group by Zone: All the pieces for the “Marketing Pod” go in one area. Everything for “Conference Room A” goes in another. Keep it organized.
- Label Everything: Use your floor plan’s workstation numbers or room names to clearly mark every pallet or stack of boxes.
- Unbox as You Go: The crew should only unbox the parts for the station they are actively building. This keeps pathways clear and avoids a sea of cardboard.
This kind of methodical approach means installers aren’t wasting an hour hunting down a specific drawer pedestal or a lost bag of screws. It turns what could be a chaotic mess into a smooth, repeatable workflow.
Preparing the Site for Installation
The final piece of the logistics puzzle is prepping the physical space itself. Your installation area has to be clean, safe, and ready to go. Skipping this step can lead to damaged floors, scratched walls, or painful delays while your crew waits for an electrician to finish up.
Before the install team even shows up, do a final walkthrough. The space needs to be completely empty of old furniture and any leftover construction debris. This is absolutely non-negotiable, especially if you’re in the middle of a larger renovation or move. For anyone juggling a full-scale move, our guide on seamless office relocations dives much deeper into how to coordinate all these moving parts.
While you’re at it, confirm that all the power and data ports are live and in the right spots according to your plan. It’s a whole lot easier for an electrician to move an outlet before a 500-pound cubicle is built right in front of it. Lastly, protect your investment—lay down floor coverings and put up corner guards on walls in high-traffic areas to prevent dings and scuffs.
The Professional Assembly and Installation Sequence
With all the planning and logistics out of the way, it’s finally time to see the space come together. This is where a methodical, proven sequence separates a professional crew from a chaotic one. Following a specific order of operations is what makes an office furniture installation efficient, preventing bottlenecks and ensuring each piece goes in correctly without getting in the way of the next step.
The process is all about transforming an empty room into a defined, functional space. We build the skeleton of the office first, then layer in all the elements that bring it to life. It’s a structured approach that saves a ton of time and seriously cuts down on the risk of damaging brand-new furniture.
Before the first screw is even turned, a few foundational steps have to happen on-site.
As you can see, a successful build day starts with organized logistics, not just raw assembly.
Building the Architectural Foundation First
The installation sequence almost always kicks off with the biggest, most structural elements. This means any modular or architectural walls go up first. These are the components—like glass partitions or solid panel walls—that create private offices, conference rooms, and defined team zones.
Putting them in at the start serves two key purposes:
- It establishes the fixed boundaries of the floor plan, which then guides the placement of every other piece of furniture.
- It avoids the logistical nightmare of trying to maneuver huge, heavy wall panels around desks and chairs that have already been put together.
Think of it like building the rooms before you furnish them. This approach makes sure everything that comes next fits cleanly and precisely.
Assembling Systems Furniture and Cubicles
Once the main walls are in place, the focus shifts to the heart of the layout: the systems furniture. This is your interconnected workstations and cubicles that will form the main work areas for your team. A pro installation team will tackle this phase systematically, usually working in zones or rows based on the floor plan.
A critical pro tip here is constant measurement and leveling. Even a tiny error in the first workstation of a row can get bigger and bigger down the line, resulting in some serious misalignments by the end. Installers are always checking for levelness and squareness to guarantee a perfect fit.
Putting these systems together is a specialized skill. For a closer look at what goes into it, our guide on office furniture and cubicle assembly offers more detail on the techniques and tools the pros use.
Placing Freestanding Furniture and Casegoods
With the cubicles and workstations built, the space is really starting to feel like an office. The next logical step is to bring in all the freestanding pieces. This includes executive desks, conference tables, reception stations, and storage units like filing cabinets and credenzas.
These items get placed according to the final floor plan. Because the main systems furniture is already in, positioning these pieces is pretty straightforward. The crew can easily get them into their designated spots without having to work around piles of parts waiting to be assembled.
Final Placement of Seating
The very last step in the physical installation is placing the chairs. This covers everything from ergonomic task chairs at each workstation to guest chairs in private offices and the soft seating in lounge or collaboration areas. We save this for last on purpose to keep chairs from getting in the way or being scuffed up during the assembly of heavier items.
This final touch completes the workspace and gets it ready for the team. The growing popularity of these projects reflects bigger trends in office design. According to Fortune Business Insights, the main drivers of market expansion include a bigger emphasis on ergonomic seating, the shift toward flexible work environments, and corporate investments in modernization.
Integrating Power and Data for a Functional Workspace
Beautifully assembled furniture doesn’t mean much if your team can’t plug in. A modern workspace absolutely runs on connectivity, making power and data integration a critical stage of any office furniture installation. This isn’t just an afterthought; it’s a foundational step that needs to be planned long before the first desk is even built.
Skipping this phase will almost certainly lead to a messy, hazardous, and unproductive environment. But when it’s managed correctly, you get a seamless, functional space where technology and furniture work together perfectly.
The Power of Early Coordination
The single biggest mistake we see businesses make is waiting too long to coordinate with their IT pros and electricians. Your furniture layout has to align perfectly with your building’s existing power and data infrastructure, which means getting the right people to the table during the space planning phase.
Bring in your IT team to map out data port requirements for every single workstation and common area. At the same time, loop in your electricians to make sure the power plan won’t overload circuits and that outlets are placed exactly where they’re needed. This proactive approach saves you from costly and disruptive changes later, like having to drill into new furniture or run ugly extension cords across walkways.
We’ve seen it happen time and again: a project where furniture is placed before power and data are verified. It forces teams to work backward, sometimes drilling into brand-new surfaces or compromising the entire aesthetic. Getting your technical teams and furniture installers to review the plan together is the best way to avoid this headache.
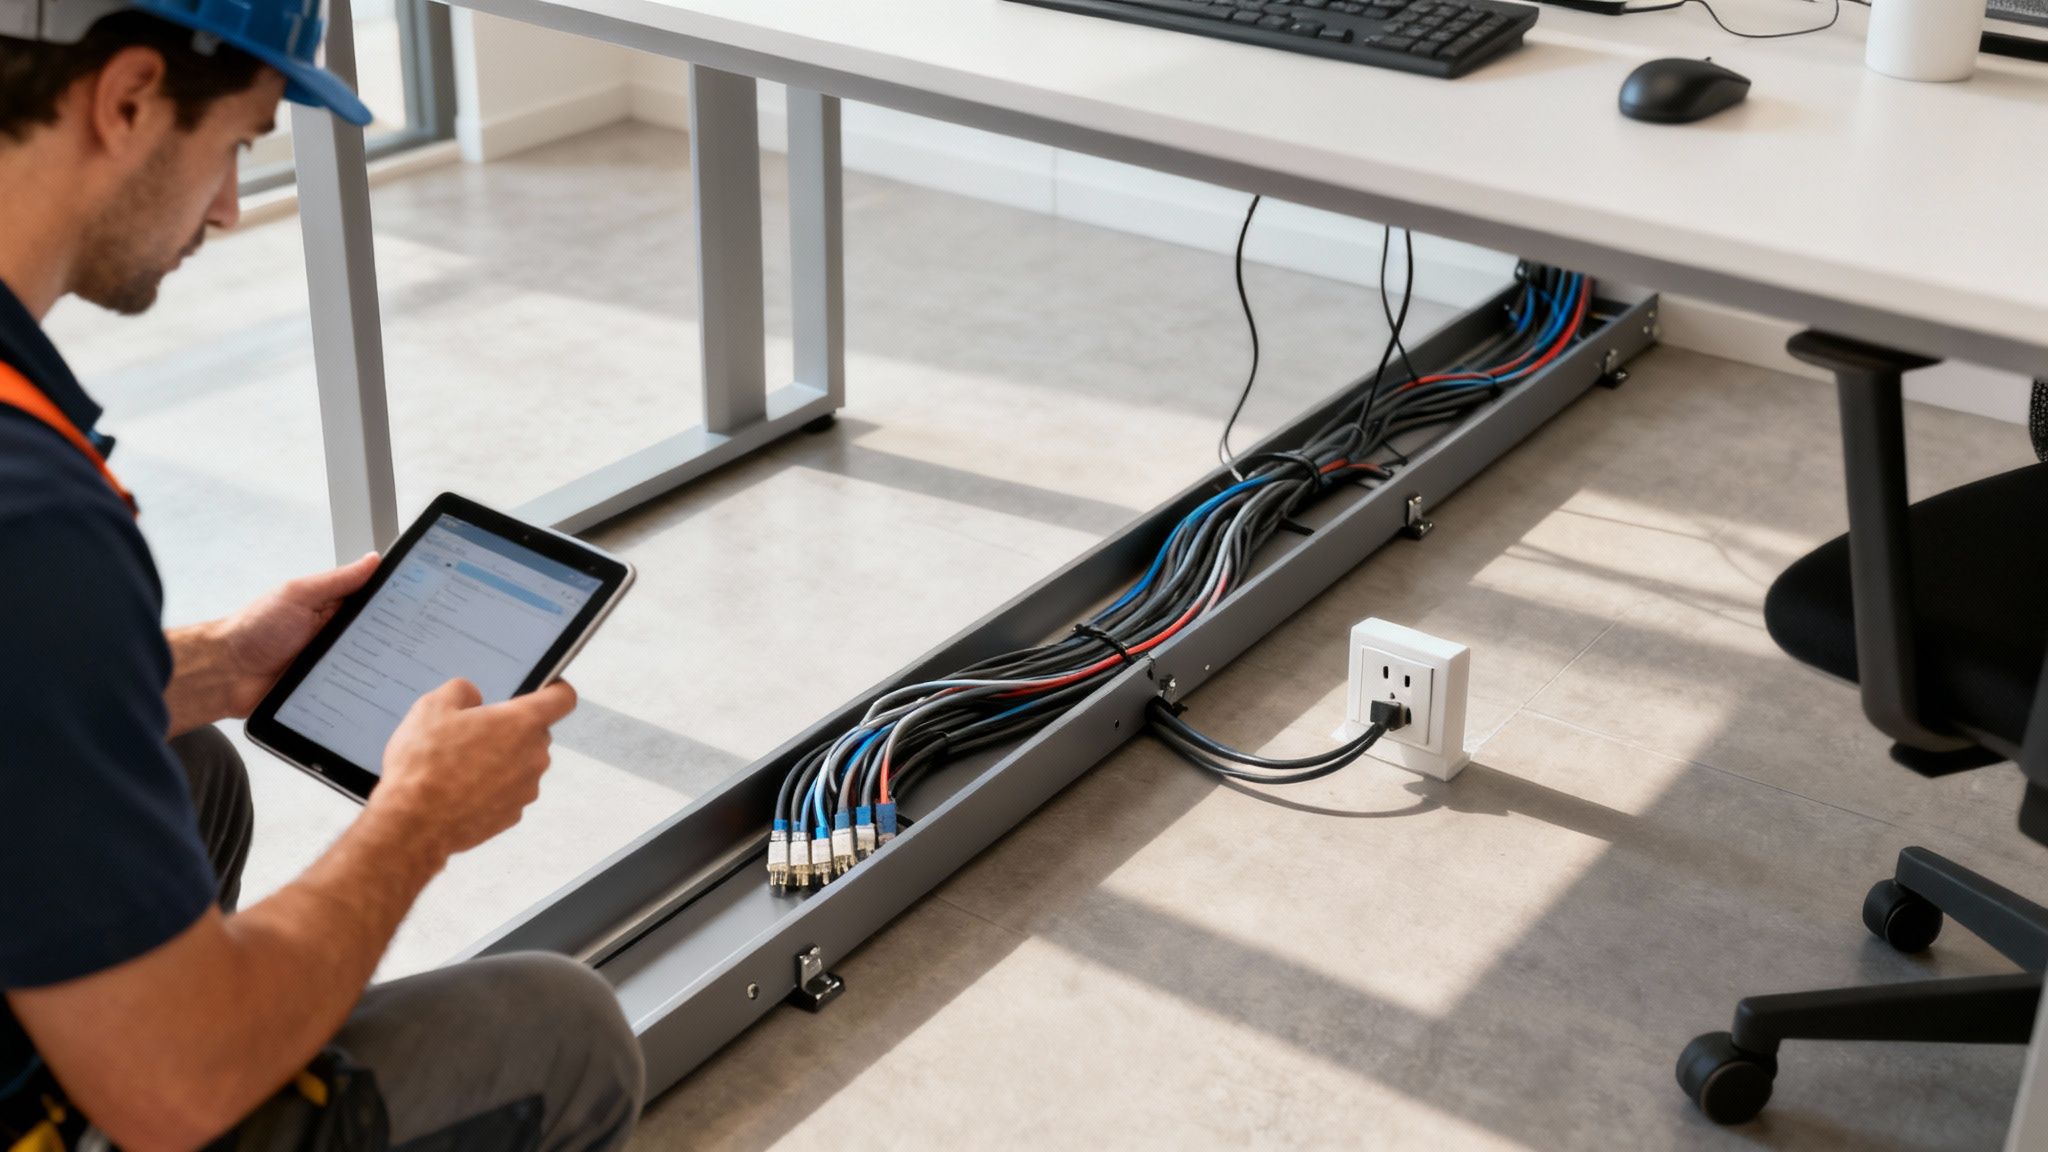
Choosing Your Cable Management Solutions
A clean, organized workspace is a productive one, and that means taming the inevitable “cable spaghetti.” Luckily, modern office furniture offers all sorts of built-in and add-on solutions to keep wires hidden, organized, and safe from damage.
Effective cable management is about more than just looks—it’s a critical safety measure. The U.S. Bureau of Labor Statistics has highlighted that falls, slips, and trips are a leading cause of nonfatal workplace injuries, with loose cords being a common and completely avoidable culprit.
Here are a few popular options to consider:
- Raceways and Power Poles: These are channels, often built right into cubicle panels or run vertically from the ceiling to the workstation, that neatly hide bundles of cables.
- Under-Desk Trays and Baskets: A simple but incredibly effective solution. These mount to the underside of a desk to hold power strips and excess cable slack, keeping everything up off the floor.
- Grommets and Cutouts: These are clean openings in the desktop that allow cables to pass through neatly, preventing them from being draped messily over the edges.
For a deeper dive into the technical side of wiring, check out our detailed guide on the fundamentals of a proper cubicle electrical setup.
Navigating Compliance and Safety Codes
Beyond simple organization, integrating power and data correctly is a matter of legal compliance and workplace safety. This is a non-negotiable part of a professional office furniture installation that protects both your people and your business. Several key standards have to be met.
First off, the Americans with Disabilities Act (ADA) requires clear, unobstructed pathways. This means no cables can cross walkways where they could create a tripping hazard for anyone, especially individuals with mobility or vision impairments.
On top of that, all electrical work must follow local building and fire safety codes. Using non-compliant parts or overloading circuits can create serious fire risks and will absolutely cause you to fail a building inspection. Always, always use a licensed electrician to ensure all power integration meets these strict standards, creating a workspace that is safe, accessible, and fully compliant for every member of your team.
Nailing the Final Punch List and Project Handover
The installation crew has packed up their tools, and your new office is really starting to take shape. It looks just like the floor plan you signed off on months ago. But hold on—the office furniture installation isn’t quite over yet.
This final phase, the punch list and official handover, is what separates a good project from a great one. It’s your last, best chance to make sure every single detail is perfect before you give the final sign-off.
This isn’t a casual stroll through the space; it’s a methodical inspection. You’ll want to do this with the installation project manager right by your side. They can answer questions on the spot and, more importantly, document any issues as you find them. The goal here is simple: catch any and all deficiencies, big or small, while the crew is still on hand to fix them quickly.
Conducting a Meticulous Final Walkthrough
Come prepared. You’ll need the final floor plan, your phone’s camera, and a critical eye. Plan to inspect every single piece of furniture, one by one. Don’t just glance at the big picture; get up close. Open drawers, test locks, and sit in chairs. You’re confirming that what you paid for is exactly what was delivered and installed correctly.
Your inspection should zero in on a few key areas:
- Aesthetic Flaws: Look for any cosmetic damage that might have happened in transit or during assembly. We’re talking scratches on desktops, dings in filing cabinets, or small tears in chair fabric.
- Functional Issues: This is huge. Open every single drawer and cabinet. Test the height-adjustment on every sit-stand desk. Sit in each chair to make sure the casters roll smoothly and all the ergonomic controls are working as they should.
- Stability and Alignment: Give every desk and table a firm (but gentle) push. Does it wobble? Look down the rows of cubicles—are they perfectly aligned? Are all the panels level and connected securely?
Think of yourself as a detective looking for clues. A slightly crooked cubicle panel or a drawer that sticks might seem minor now, but those little things become daily annoyances for your team. It’s so much easier to get these fixed now than to chase them down weeks or months later.
Creating an Actionable Punch List
As you spot issues, you need to document them on a formal punch list. A vague list like “desk in corner broken” is useless. To get things fixed without a ton of back-and-forth, you have to be incredibly specific.
A truly effective punch list entry includes:
- A unique item number for easy reference.
- The exact location (e.g., “Workstation 12-B, left pedestal cabinet”).
- A clear, concise description of the problem (“Top drawer doesn’t close flush with the frame”).
- A photograph of the issue. A picture is worth a thousand words here.
This level of detail cuts through any potential confusion and gives the installation team a clear, actionable checklist. It turns what could be a frustrating process into collaborative problem-solving.
The Official Project Handover
Once every last item on your punch list has been resolved to your satisfaction, it’s time for the official handover. This is the moment the project formally concludes, and the responsibility for all the new furniture transfers to you.
During the handover meeting, the project manager will give you a package of essential documents. This should include all the manufacturer warranty information, care and maintenance guides for various finishes, and any spare parts, extra hardware, or keys for locking storage. This is a vital part of the comprehensive project management that ensures a successful outcome from start to finish.
With the handover complete, the installation is officially closed out. You’re left with a beautiful, functional, and move-in-ready workspace.
What About Home Office Furniture Installation?
The shift to remote and hybrid work isn’t just a trend; it’s a permanent part of how we do business. And with it, the demand for truly professional home office setups has gone through the roof. This isn’t just about putting a desk in a spare room anymore. We’re now dealing with office furniture installation that starts on a residential doorstep, not a commercial loading dock.
This brings a whole different set of challenges. We’re seeing more complex, highly ergonomic pieces in home offices. Think high-end sit-stand desks or task chairs with a dozen different adjustments. Assembling these correctly requires real precision. If it’s done wrong, you don’t just miss out on the health benefits—you can end up with a wobbly desk, a chair that causes back pain, or even damage to the intricate internal mechanisms.
Adapting to Residential Spaces
The logistics are a world apart from a typical office build-out. Forget freight elevators and wide-open corridors. At home, installers have to skillfully navigate tight hallways, tricky staircases, and standard-sized doorways, all without scratching a wall or dinging the furniture. It takes a different kind of planning and a lot more finesse.
Then there’s the challenge of fitting everything into a smaller residential space. Trying to integrate modular storage or a compact workstation requires a smart, strategic approach. A professional installer’s job is to make sure every piece fits perfectly and is anchored safely, creating a functional workspace that doesn’t completely overwhelm the room.
An investment in professional assembly for your home office goes way beyond convenience. It’s really an investment in your own safety, proper ergonomics, and the longevity of the furniture itself. It’s how you guarantee your workspace will support you for years to come.
The growth here is no joke. The home office furniture market is already a massive industry, and some projections show it could balloon to USD 72.19 billion by 2034. That’s a clear signal that people are serious about creating better, more permanent workspaces at home. You can read the full research on the home office furniture market from GM Insights for a deeper dive.
So, whether you’re an individual finally building out that dream home office or a company looking to equip your remote team, professional installation is the key. It’s what ensures every component—every desk, chair, and cabinet—performs exactly the way it was designed to. It’s how you make sure the money you spent on quality furniture pays off in both comfort and durability.
Your Office Furniture Installation Questions, Answered
Even the most buttoned-up installation plan can leave a few questions lingering. It’s completely normal. Here are some straightforward answers to the questions we hear most often, designed to give you clarity and confidence as you head into your project.
How Long Will This Actually Take?
This is the big one, and the honest answer is: it depends. There’s just no single timeline that fits every project.
Think of it this way: a small setup for a team of 5-10 people with straightforward desks? We could have that wrapped up in a day or two. But if we’re talking about a full corporate floor—over 100 cubicles, private glass-walled offices, conference rooms, and lounge areas—you’re likely looking at a week or more of dedicated work.
A few things really move the needle on timing:
- The Complexity of the Furniture: Freestanding desks go together quickly. An interconnected systems furniture layout with integrated power is a different beast entirely and takes much more time.
- Site Readiness: Is the floor clear, clean, and ready for us? Or are we navigating around other trades or leftover debris? A prepped site makes a world of difference.
- Coordinating with Other Trades: We have to sync up our work with your electricians and IT technicians, which can influence the overall schedule.
Your best bet is to ask your installation partner for a detailed project schedule. That’s the only way to get a realistic completion date you can actually plan around.
What’s the Ballpark Cost for Professional Installation?
Installation costs are usually handled one of two ways: a flat rate based on the project scope or an hourly rate per installer. As a general rule of thumb, you can budget somewhere between 5% to 15% of your total furniture purchase price for the installation.
Now, several factors can push that number to the lower or higher end of the range. Your location, whether the job requires union or non-union labor, and tricky site conditions—like multiple flights of stairs with no freight elevator—all play a part. Needing the work done after hours or on a weekend will also affect the final price.
Always, always get a detailed, itemized quote before work begins. It’s the best way to avoid any surprises when the final invoice arrives.
Here’s a pro tip: Ask if the quote includes a “final clean.” This means the crew will break down and haul away all the cardboard and packaging, and wipe down every surface. You don’t want your own team stuck with that job.
Can You Get Rid of Our Old Furniture?
Absolutely. Most full-service installation companies, including us, offer decommissioning services. It’s a huge weight off your shoulders. The process involves systematically dismantling all your old furniture, carefully removing it from the building, and making sure it’s handled responsibly.
We always try to be as sustainable as possible. That often means:
- Recycling all the metal, wood, and plastic components.
- Donating items that are still in good shape to local non-profits.
- Finding a new home for pieces on the secondary market.
Just be sure to bring this up during the planning phase. That way, it can be properly quoted and built right into the project timeline.
How Do I Get My Office Ready for the Install Crew?
Getting your space prepped is single-handedly the best thing you can do to guarantee a smooth, fast installation. The goal is to give the crew a completely blank slate to work with.
Before they show up, make sure the area is totally clear of old furniture, stray boxes, and any other clutter.
If you’ve just had new paint or flooring put in, check that it’s had enough time to fully cure—we don’t want to scuff fresh work. It’s also a good idea to double-check that your electrical outlets and data ports are live and exactly where they need to be according to the furniture plan. A little bit of prep goes a long way.
At Cubicle By Design, we thrive on the details. Our seasoned project managers and professional installation crews are here to make sure your new office is built to spec, on schedule, and ready to empower your team from day one. Design your ideal workspace today.