Cubicle Size Standards: A Guide to Modern Office Layouts | Cubicle By Design

When laying out an office, understanding standard cubicle dimensions is the first and most critical step. These common footprints—like the classic 6'x6', 6'x8', and 8'x8' sizes—are the essential building blocks for smart, effective space planning. Starting with these cubicle size standards helps ensure your floor plan truly works for your team while making the most of your square footage.

Choosing the right cubicle size is about so much more than just the numbers. It has a direct impact on how productive, private, and collaborative your employees can be. A well-planned layout that uses established dimensions avoids that cramped, frustrating feeling or, on the flip side, a wasteful, empty-looking space. Getting this right from the start makes everything from budgeting for furniture to planning for future growth a whole lot easier.

If you're not sure where to begin, the team at Cubicle By Design can offer expert guidance to help you find the perfect fit for your specific needs.

Common Cubicle Sizes and Their Uses

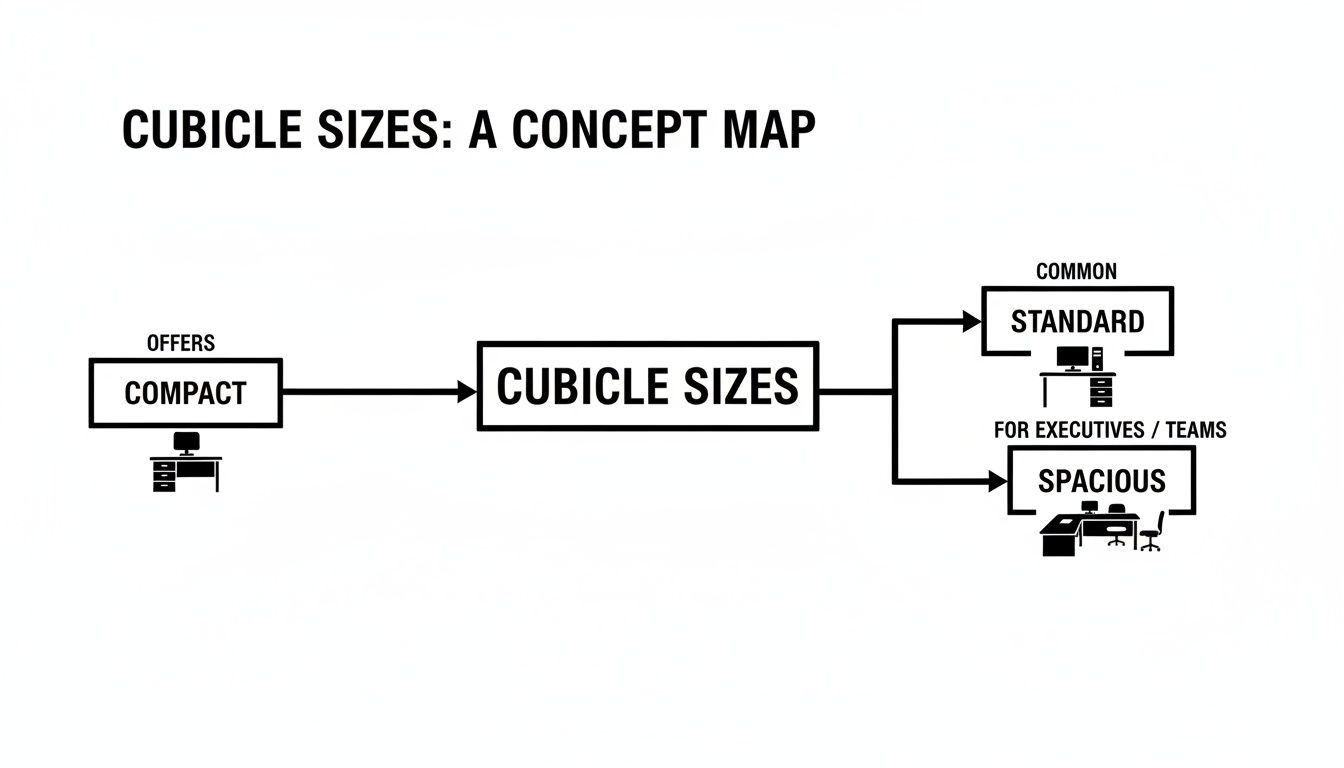
The ideal cubicle footprint really depends on the job function. For example, people in task-oriented roles often do best in smaller, more focused environments. On the other hand, managers usually need extra space for one-on-one meetings or storing team materials.

This chart quickly breaks down the most common sizes and the roles they're typically best suited for.

As you can see, the square footage tends to increase along with managerial responsibility, which makes sense given the need for more workspace and storage.

A Pro Tip From Experience: Sticking to a few core cubicle sizes across your office simplifies everything. It makes the initial space planning and purchasing phases a breeze, and when it's time to reconfigure things down the road, managing moves and inventory is far more straightforward. Plus, it creates a clean, cohesive look.

Standard Cubicle Dimensions at a Glance

To make things even clearer, here's a quick-reference table that breaks down these common dimensions, their total area, and their primary applications. You can use this to map specific roles within your organization to the right workstation cubicles or private office setup.

Cubicle Size (L x W) Total Square Footage Primary Use Case Best For
6' x 6' 36 sq ft General Employee Workstation Task-focused work, high-density layouts
6' x 8' 48 sq ft Team Lead or Manager Employees needing extra surface or guest seating
8' x 8' 64 sq ft Supervisor or Executive Private meetings, extensive storage needs

This table is a great starting point for thinking about how to allocate space fairly and effectively, ensuring everyone has the room they need to do their best work.

Understanding How Office Workstations Got Here

The cubicle standards we work with today didn't just pop up out of nowhere. They’re the product of decades of shifting economics, technology, and workplace culture. To really nail a modern office plan, it helps to know how we got here.

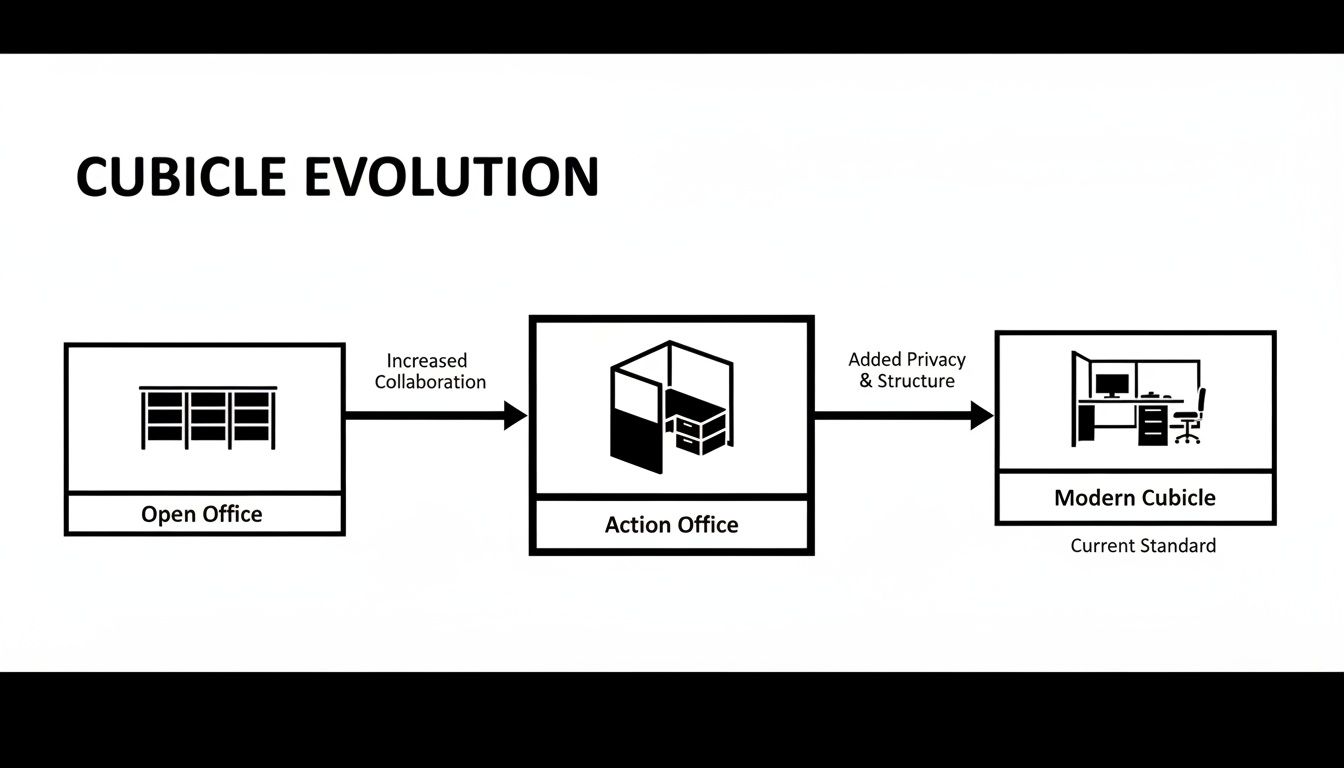
The story starts back in the mid-20th century, a time of big, private offices where hierarchy and status were king. It was all about individual space, not packing people in.

That all started to change with the invention of the cubicle as we know it. In the 1960s, when Robert Propst was developing his "Action Office" for Herman Miller, it wasn't uncommon for workers to have around 250 square feet all to themselves. His new modular systems offered a way to create semi-private spaces much more efficiently. It caught on fast. By 1974, cubicles made up 20% of all new office furniture sales, and that number jumped to nearly 50% by 1980 as businesses looked to get more out of their real estate. You can get the full story on these big changes in our post on the evolution of the office cubicle.

How Technology Shrank the Cubicle

If there's one thing that really drove the shrinking workstation, it's technology. Think about the desks of the past: bulky CRT monitors, massive desktop computers, and stacks upon stacks of paper. All that stuff needed a lot of real estate. A generous 10'x10' cubicle—that's 100 square feet—was pretty standard back in the 1980s.

But as technology got sleeker, the need for all that space just melted away. The move to flat-screen monitors, laptops, and cloud storage freed up a huge amount of desk and floor space. This leap forward really put the pedal to the metal on the office densification trend, and it's a direct line to the cubicle sizes we see as standard today.

The switch from clunky, paper-heavy work to sleek digital tools was the real catalyst here. It let companies shrink down individual footprints without actually hurting anyone's ability to get work done, opening the door for more collaborative and open-plan designs.

From Sprawling Spaces to Smart Footprints

This constant push for efficiency has led to a major drop in the average square footage per employee. Those 10'x10' cubicles from the 80s became 8'x8' in the 90s, and by the 2000s, the average U.S. worker's space had fallen from 250 sq ft to about 190 sq ft.

Today, a 6'x6' footprint is a common sight. That represents a massive 64% reduction from the 90s standard. This history really highlights why smart space planning is more important now than ever. The goal is to find that perfect balance between a high-density layout and keeping your team happy and productive.

A Breakdown of Standard Cubicle Dimensions

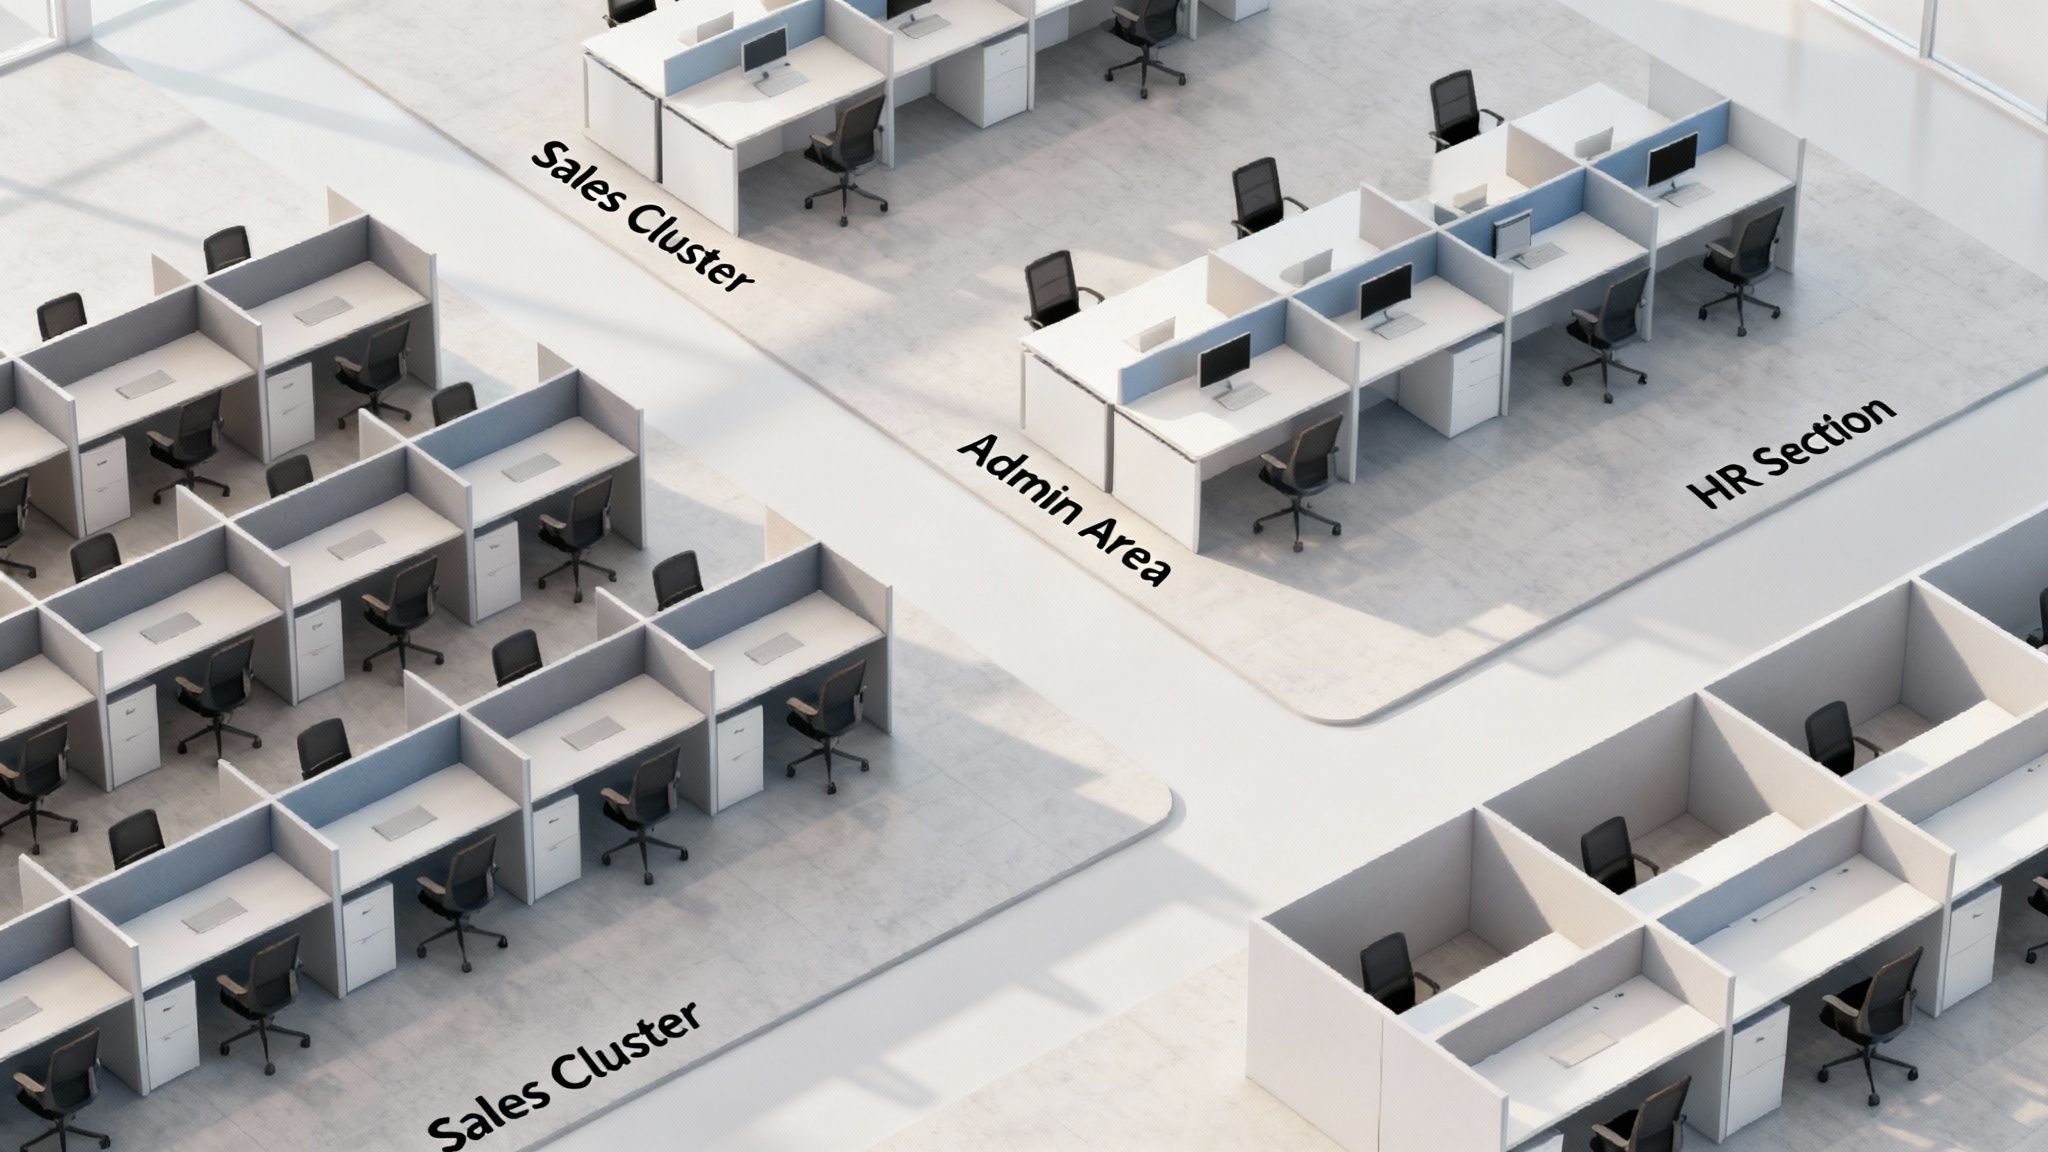
When you're laying out an office, picking the right cubicle size is one of the most important calls you'll make. It’s a decision that hits everything—workflow, how many people you can fit in the space, and frankly, how comfortable your team is going to be day-to-day. While we can build any custom cubicles you can dream up, there's a reason standard dimensions exist. They’ve been tested in the real world and offer a proven starting point for just about any job function.

Getting a feel for what each standard size is good for helps you match the right workstation to the right role. Let's walk through the most common cubicle footprints, from the tight-and-tidy stations perfect for call centers to the roomier setups designed for managers.

Four different sized office cubicles from an aerial view, illustrating various standard dimensions like 5x5' and 6x6' which are central to cubicle size standards.

The Compact 5'x5' Footprint

The 5'x5' cubicle is your most compact, high-efficiency option, giving an employee 25 square feet of personal space. This is the go-to choice when your main goal is to maximize headcount in a given area.

You’ll typically see this size used for:

  • Call Centers, where the job really just requires a computer, a headset, and a spot for a notepad.
  • Telemarketing Teams focused on repetitive tasks who don’t need a sprawling surface or lots of storage.
  • Touchdown Stations for remote or hybrid staff who just need a temporary home base to plug in for a few hours.

A 5'x5' setup is pretty straightforward: a single straight worksurface and maybe a small rolling file pedestal for the essentials. It's a smart, budget-friendly solution for highly focused, task-based roles.

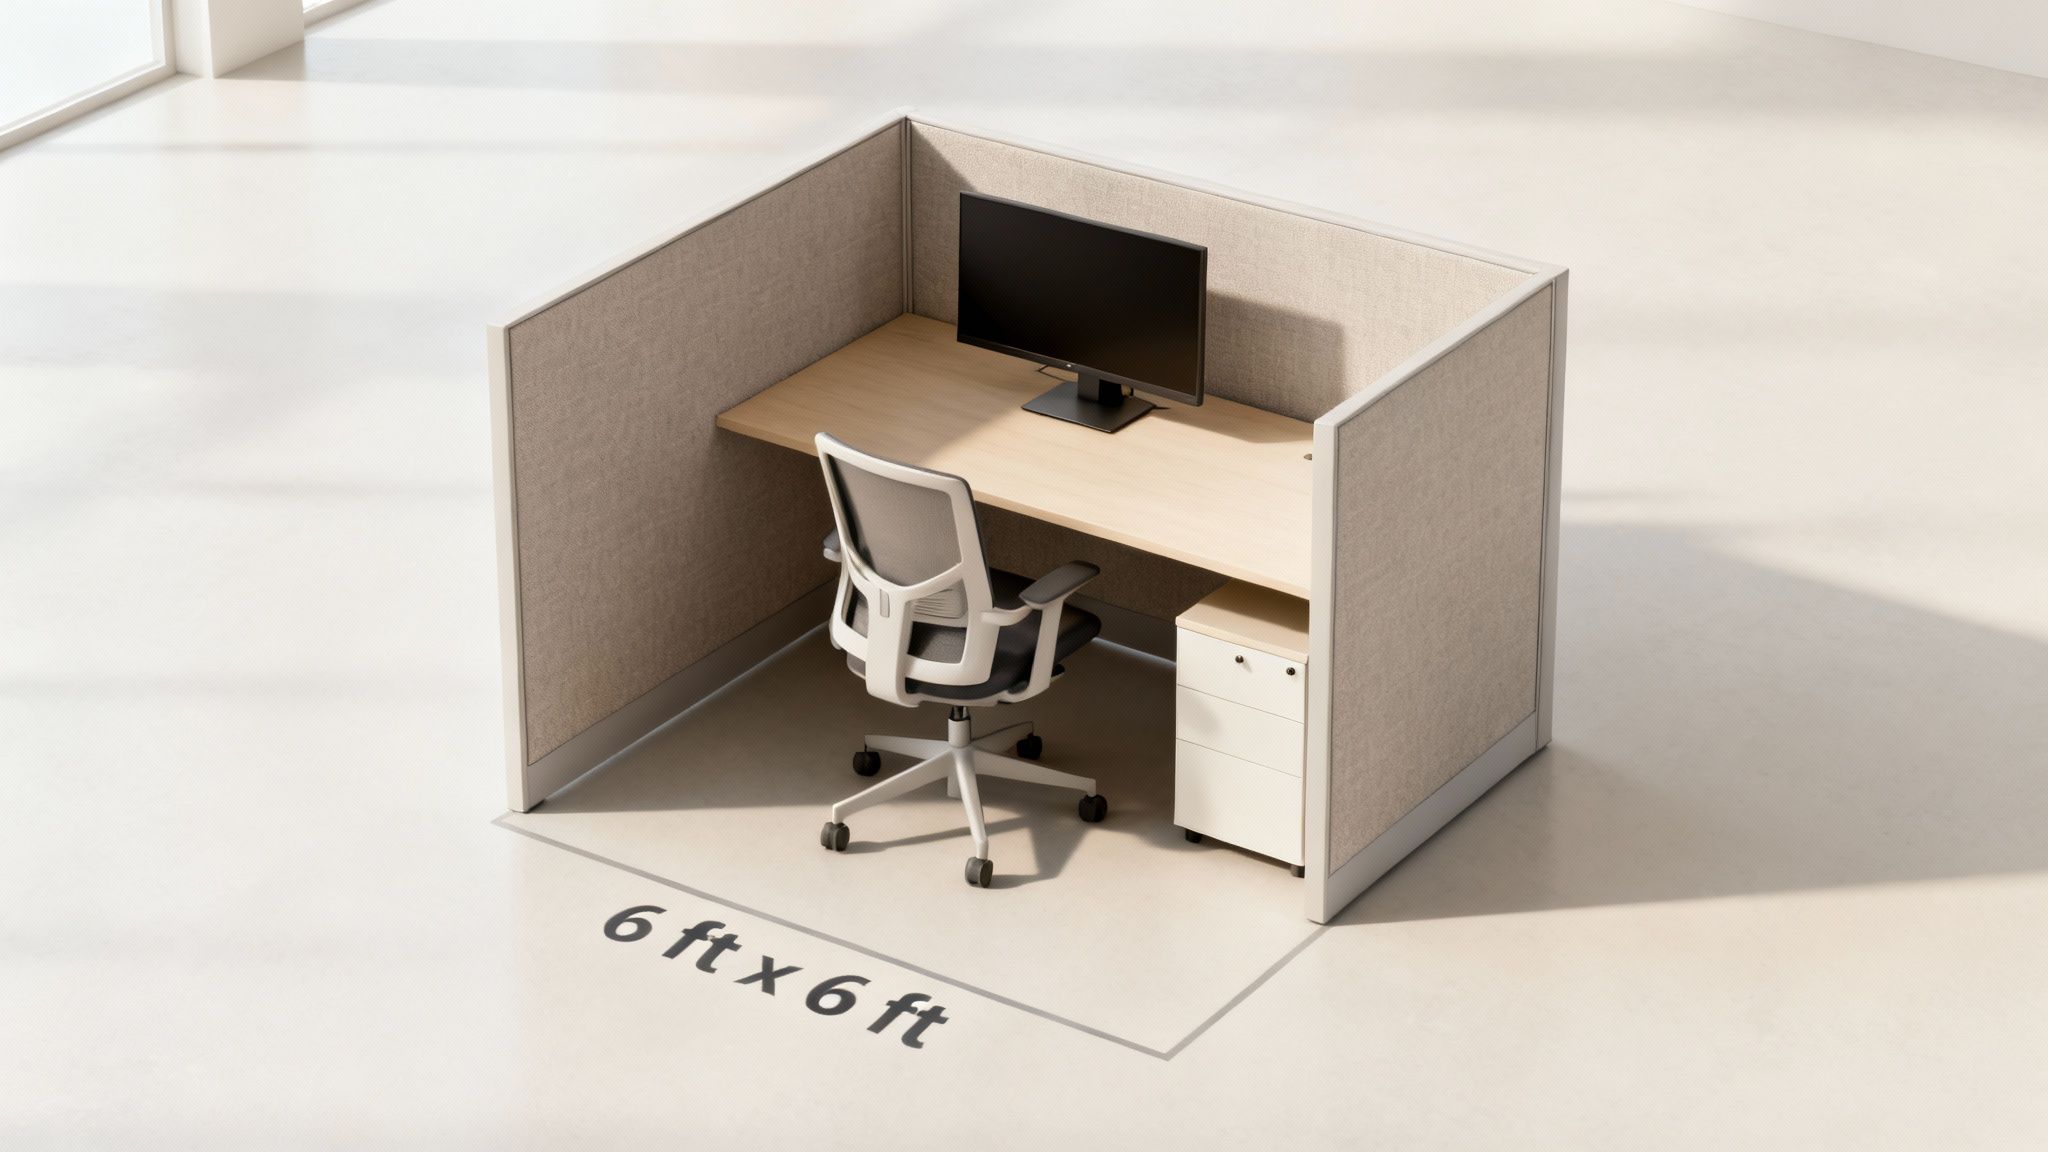
The Modern Standard 6'x6' Footprint

These days, the 6'x6' cubicle is what most people picture for general office work. At 36 square feet, it hits that sweet spot between being space-efficient for the floor plan and comfortable enough for the employee.

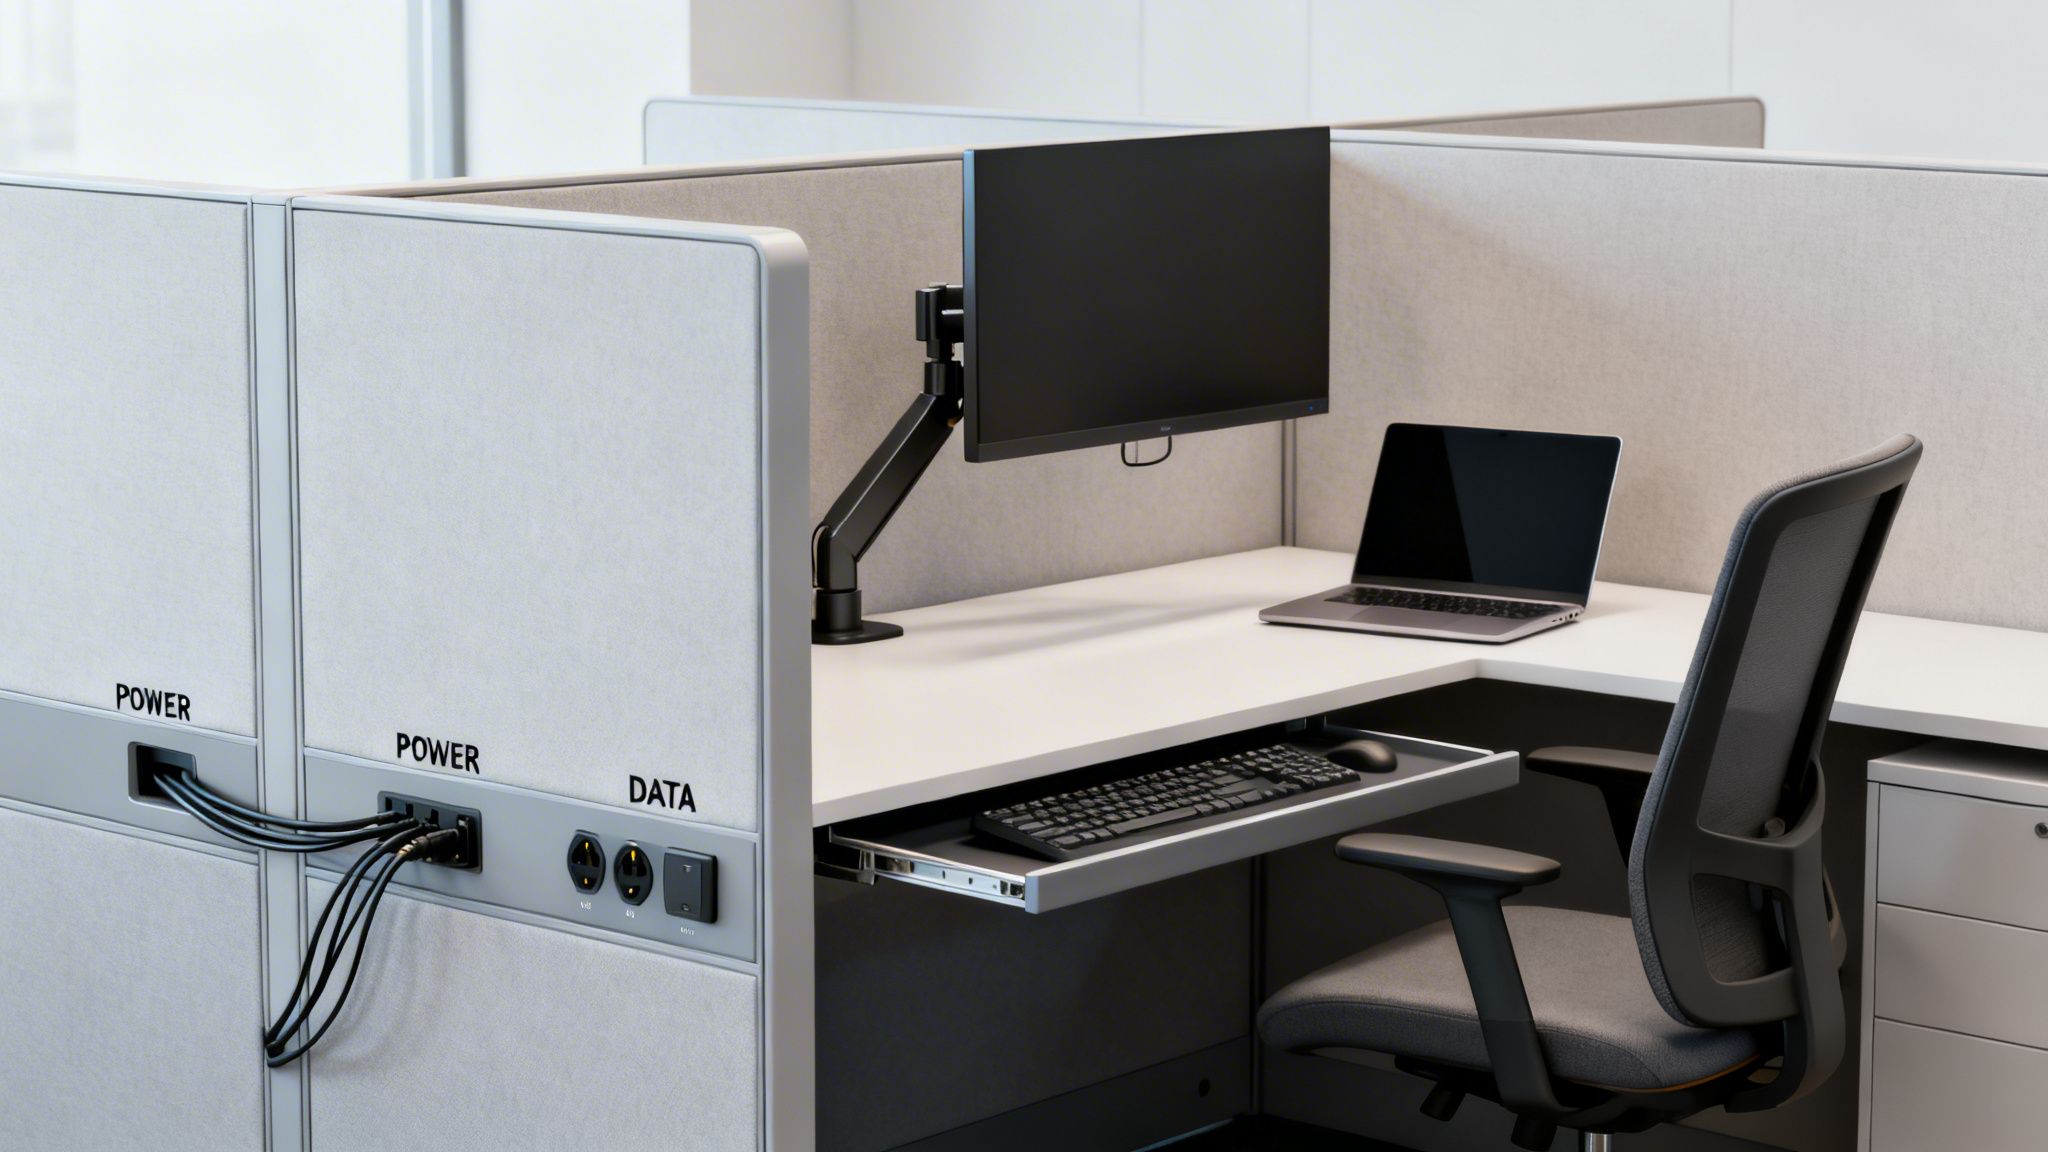
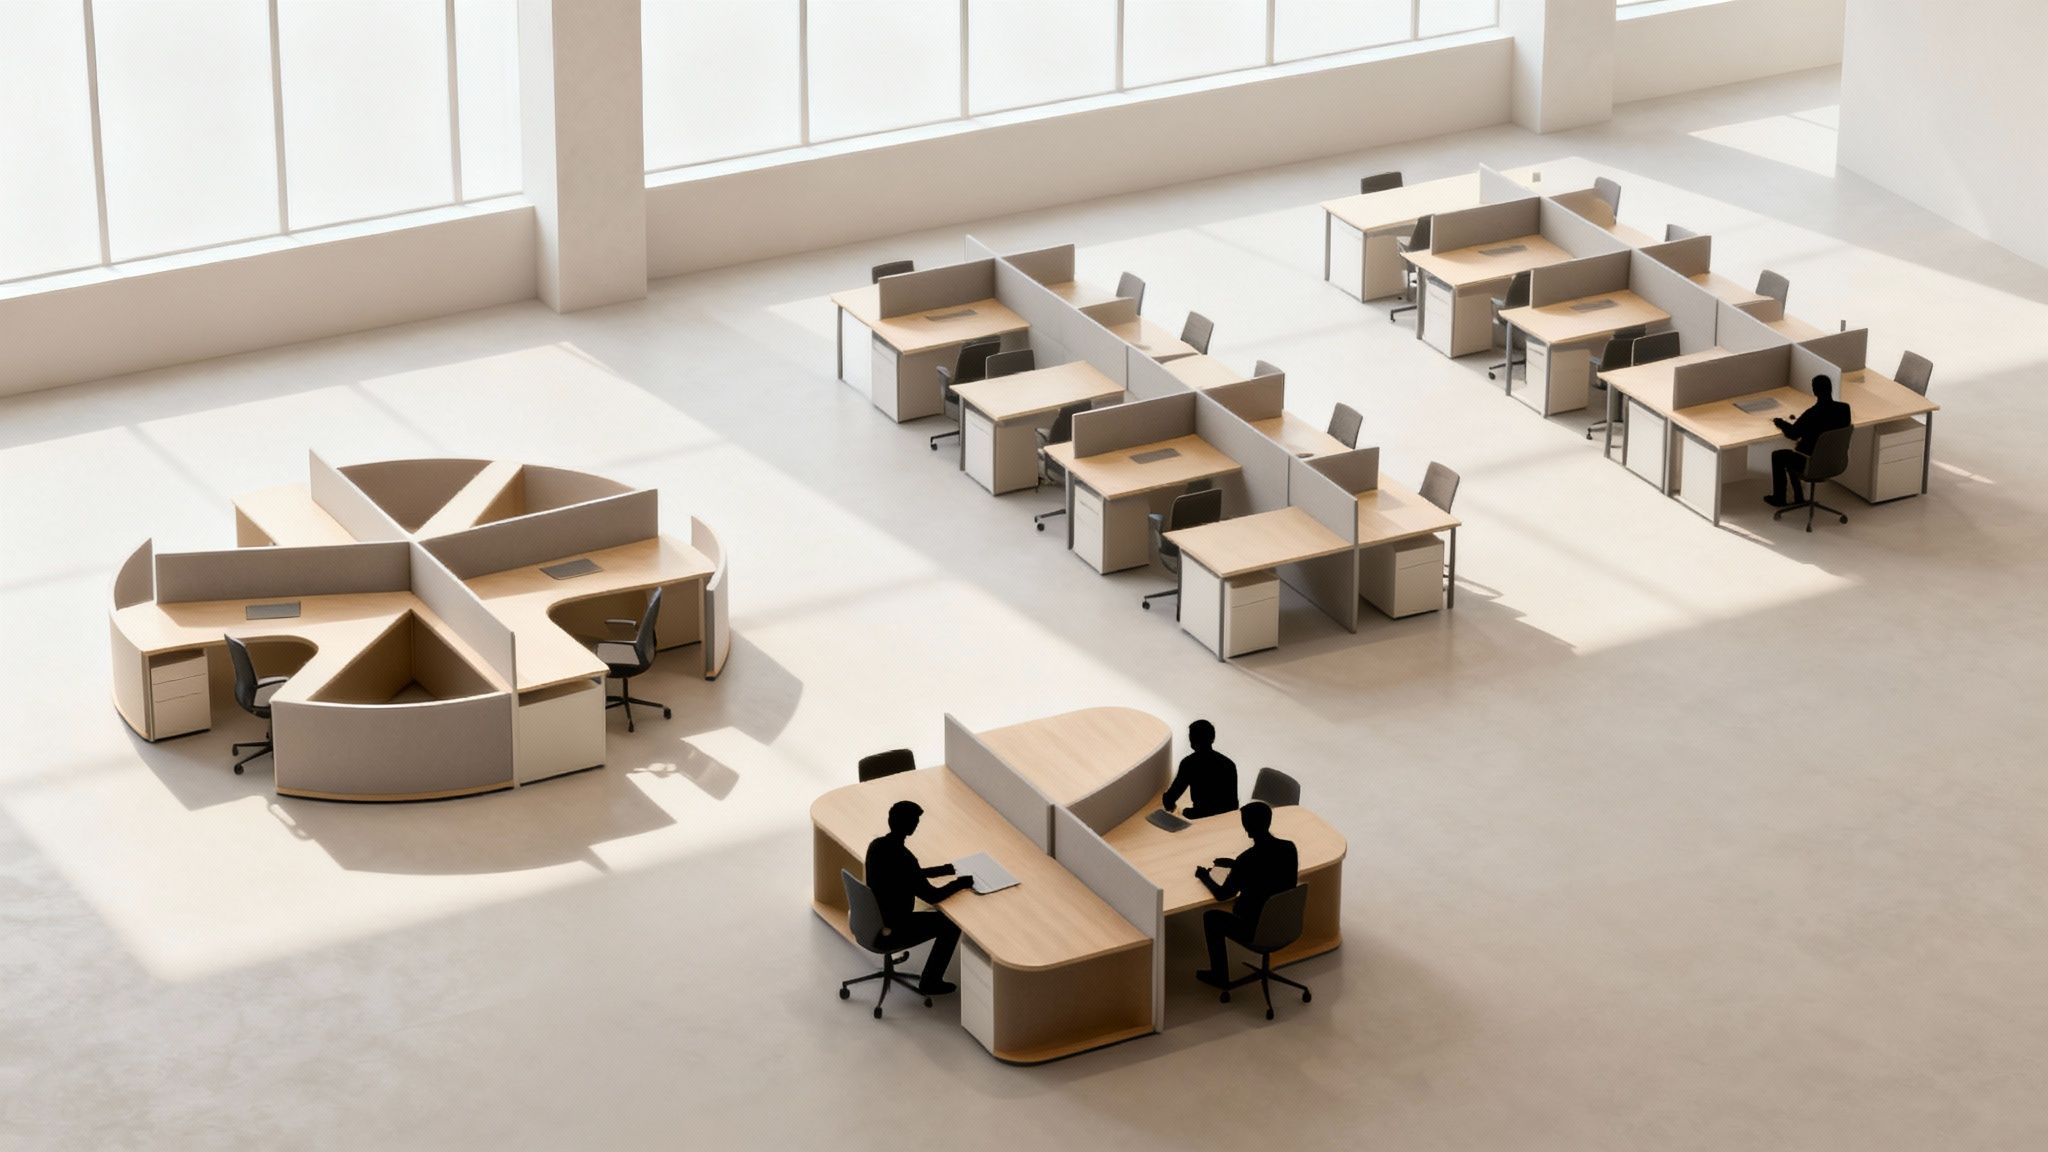
This size is incredibly versatile. It provides plenty of room for a computer with one or two monitors, a keyboard, and still leaves you with enough space to spread out paperwork. It's a noticeable upgrade from the 5'x5' and opens the door for more practical furniture layouts. To see just how many ways you can arrange a station, check out our overview of common cubicle configurations.

Most 6'x6' stations use an L-shaped worksurface, which is a fantastic way to boost desk space without eating up more floor. A file pedestal usually tucks right underneath. It's the workhorse for everyone from administrative staff to developers.

The Managerial 6'x8' Footprint

When someone needs more desktop real estate or a place to sit with a team member, the 6'x8' cubicle is a great step up. Bumping up to 48 square feet makes a real difference, giving you enough room for extra storage or a guest chair without making things feel tight.

This size is a solid fit for:

  • Team Leads and Supervisors who need to lay out project plans or have quick one-on-one meetings.
  • Accountants or HR Professionals who are constantly working with physical files and need a lateral file cabinet within arm's reach.
  • Employees with specialized gear that takes up more space than a simple laptop and monitor.

That extra two feet of depth or width usually allows for a bigger L-shaped desk or even a second surface, creating separate zones for computer work and other tasks.

The Executive 8'x8' Footprint

At the top of the standard size chart, the 8'x8' cubicle offers a generous 64 square feet of space. This footprint starts to feel less like a cubicle and more like a semi-private office, with plenty of room to move.

This setup is ideal for managers, directors, or senior staff who need a serious amount of personal space. An 8'x8' can easily accommodate a full U-shaped desk, multiple storage units like overhead bins or a wardrobe tower, and still have room for two or three guest chairs. It’s built for roles that involve both deep-focus work and frequent small meetings right at the desk.

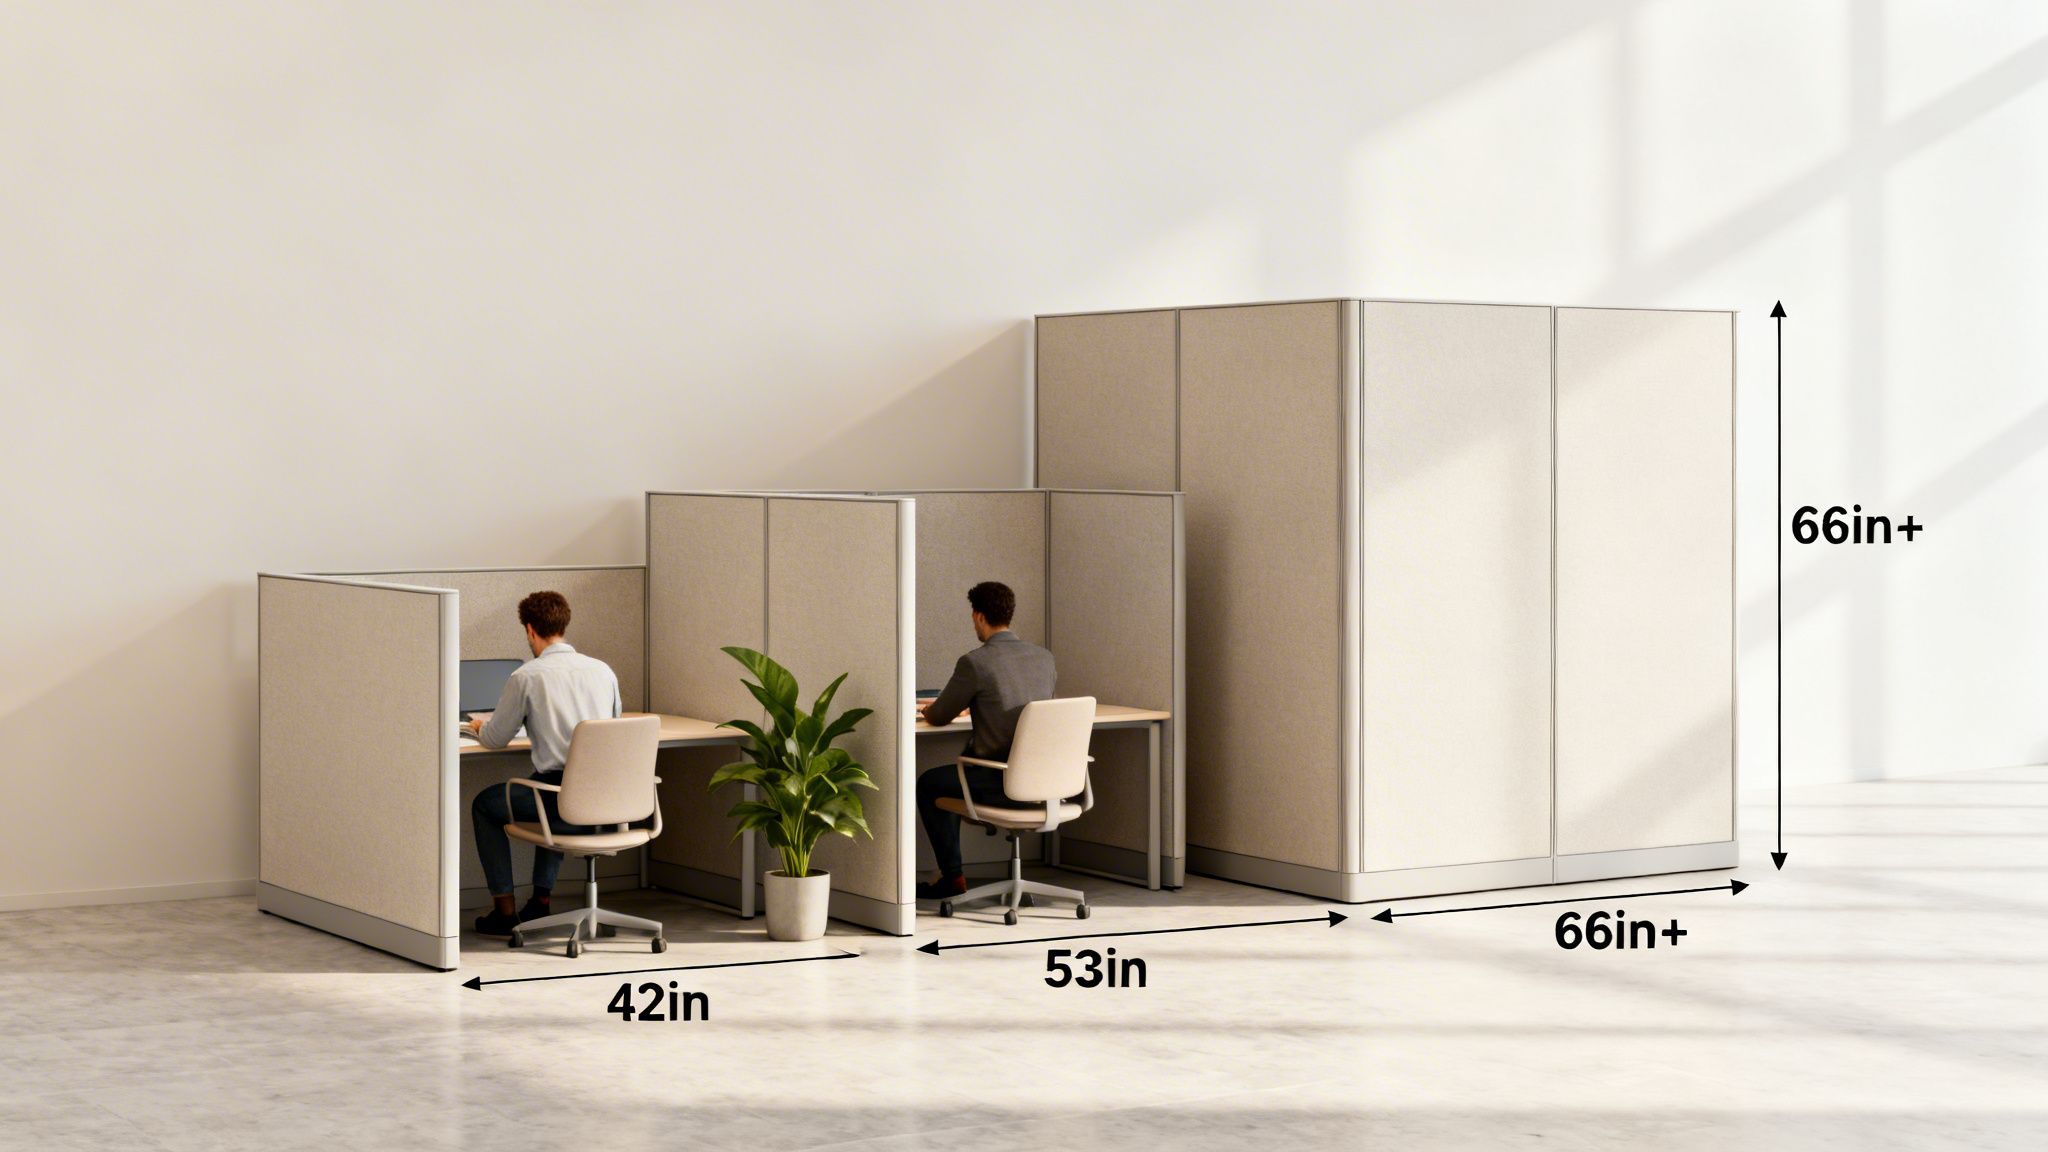
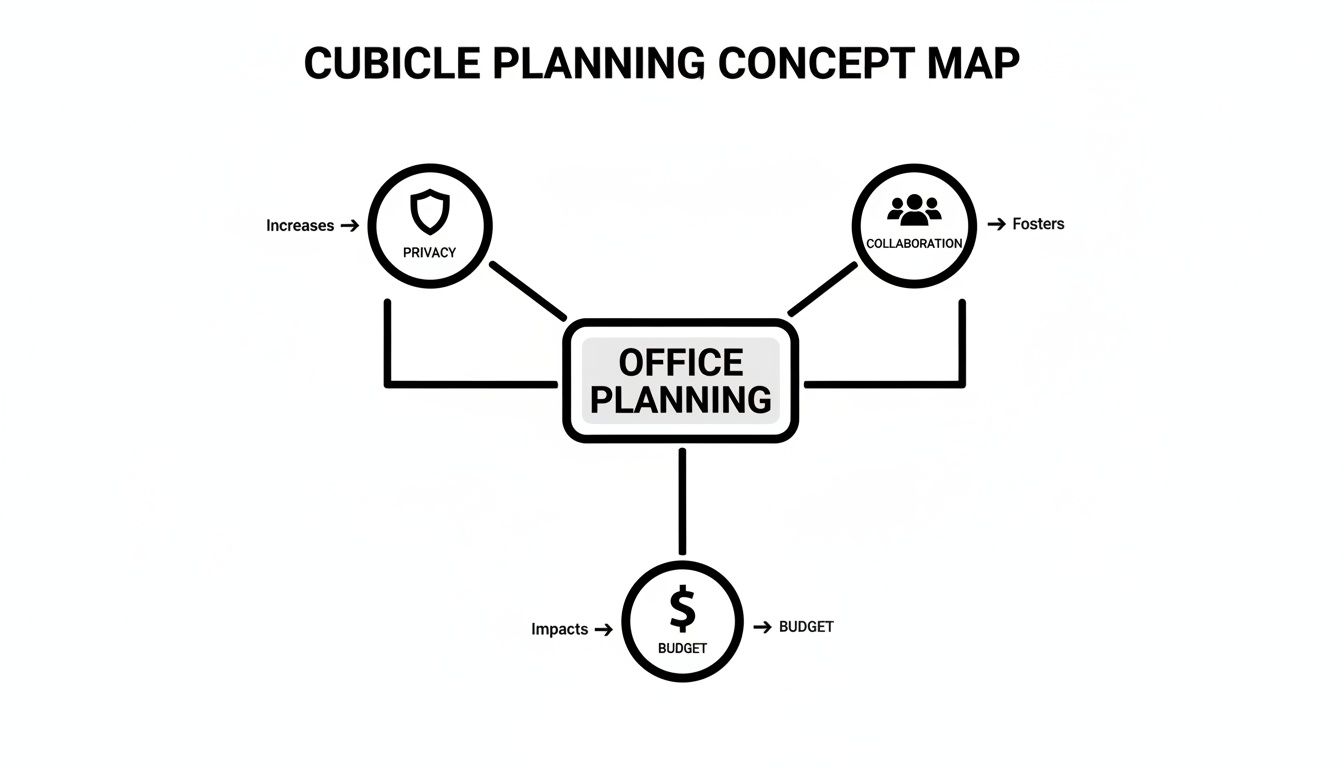
How Panel Height Impacts Privacy and Collaboration

While a cubicle's footprint sets its physical boundaries, the panel height is what really dictates the experience inside. This single dimension is probably the most important factor in striking the right balance between individual privacy and team collaboration. It also directly impacts office acoustics, how natural light flows through the space, and the overall vibe of your workplace.

Choosing the right panel height isn't a one-size-fits-all decision; it’s a strategic choice that shapes how your team works. A low partition naturally encourages a quick chat, while a tall one sends a clear signal that it's time for quiet focus. Getting to know the standard ranges helps you create distinct zones that support the different kinds of work happening in your office.

Three office cubicles demonstrating low (open), mid (seated), and tall (private) workstation heights and functionalities in line with cubicle size standards.

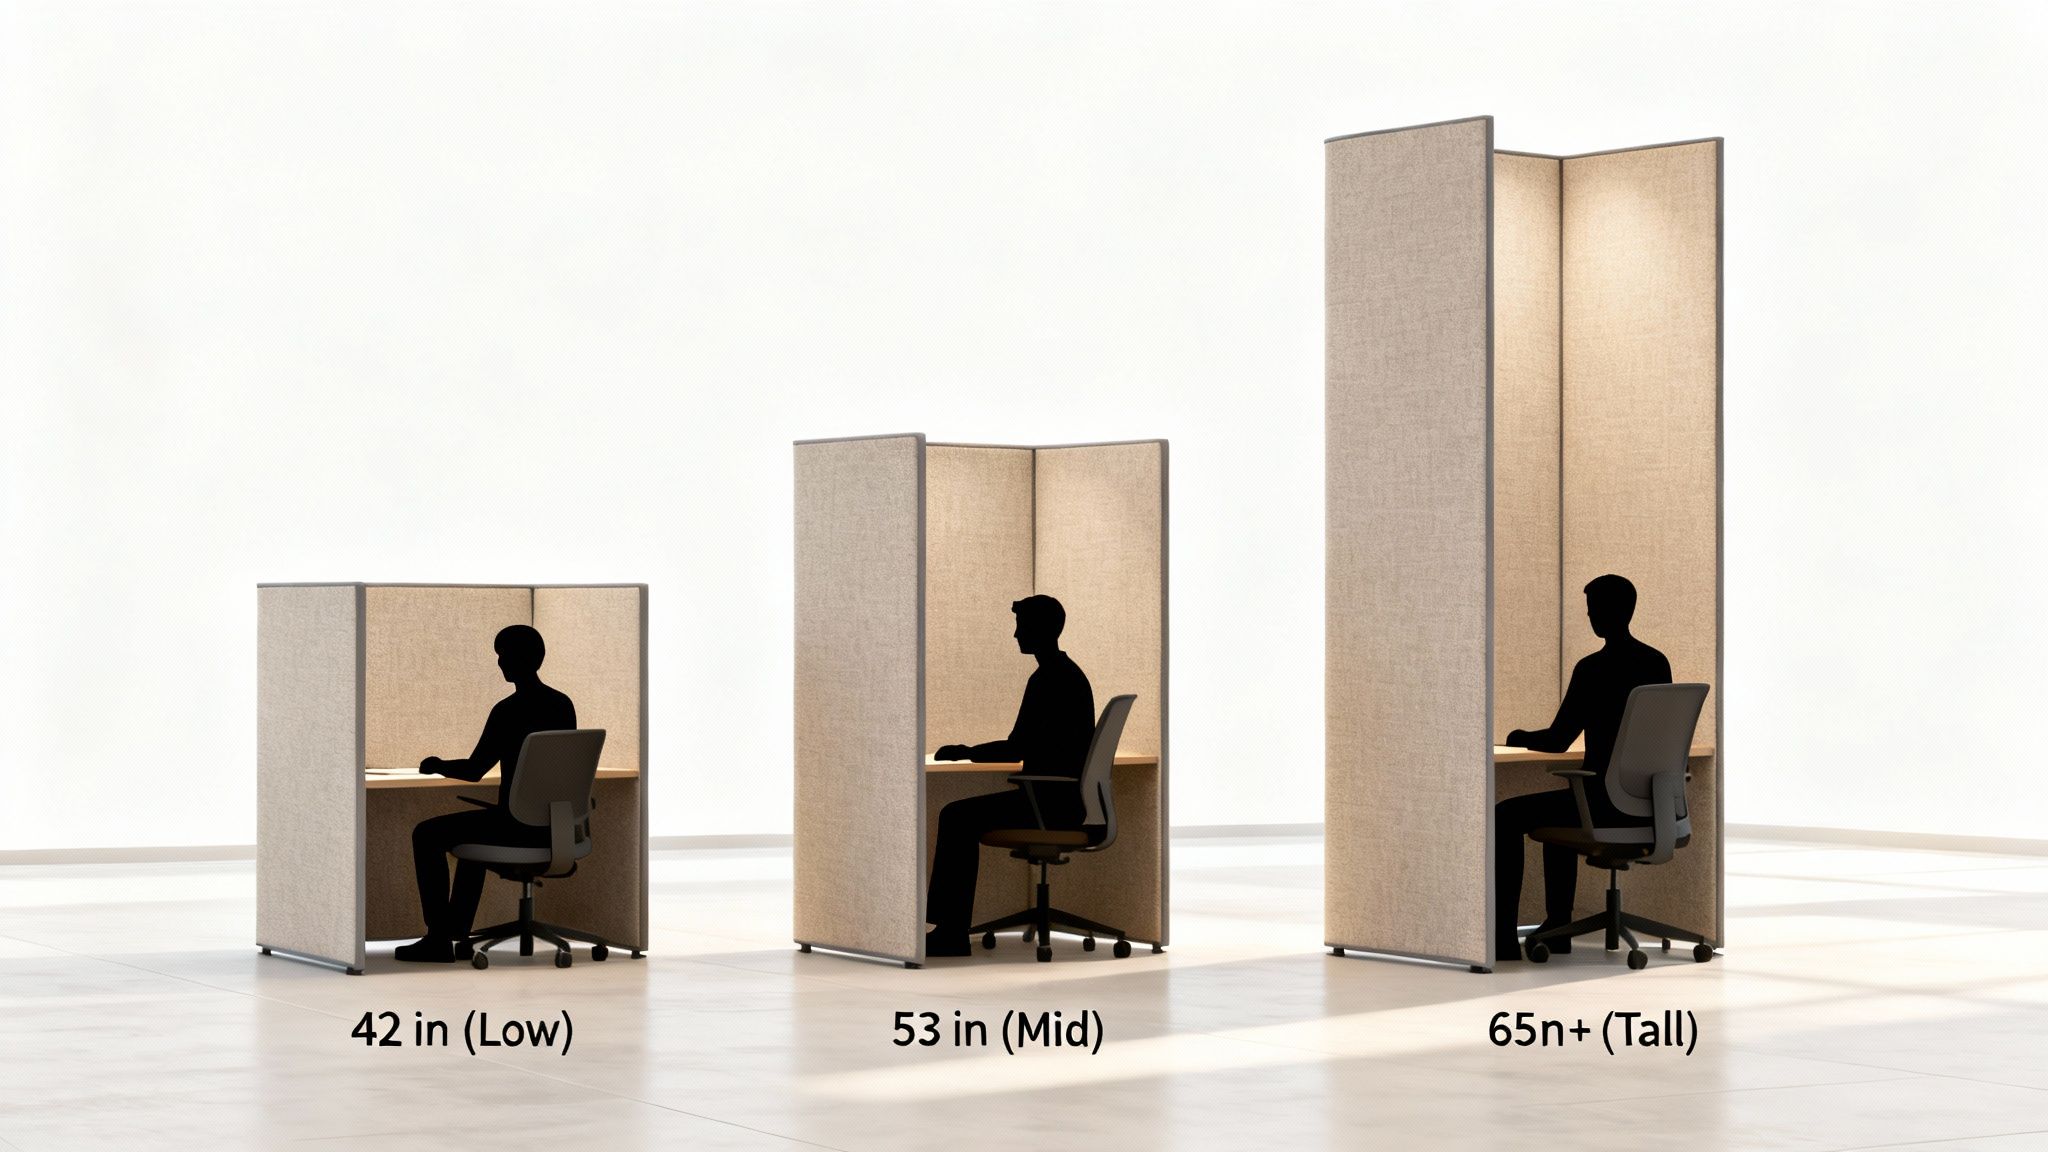
Low-Height Panels For Open Collaboration

Low-height panels, which are typically between 36 and 42 inches, create the most open and connected environment you can get. At this height, the partitions sit below a seated employee’s eye level, which keeps sightlines clear across the entire office.

This setup is a perfect match for:

  • Creative and design teams that thrive on frequent, informal brainstorming.
  • Sales or marketing groups where a lively, high-energy atmosphere and quick communication are key.
  • Open-plan offices looking to maximize natural light and build a strong sense of community.

The biggest win here is that it encourages interaction. It’s easy for colleagues to ask questions, toss ideas around, and feel like they're part of a cohesive team. The trade-off, of course, is a lack of visual privacy and acoustic control, making this setup less than ideal for roles that demand deep concentration.

Mid-Height Panels For Seated Privacy

The most common choice for general office workstations, and for good reason, is the mid-height panel. These usually stand between 48 and 53 inches tall. We often call this "seated privacy" because it shields an employee from view while they're sitting down but allows for easy conversation and visibility when they stand up.

It’s a balanced approach that works well for a huge range of roles. It gives employees a sense of personal space and cuts down on visual distractions without making them feel totally isolated. They can focus on their tasks but still feel plugged into the wider office environment. If you want to customize this even further, you can learn more about how panel privacy screens can be used to add another layer of focus.

Tall Panels For Maximum Privacy

For any job that demands high levels of concentration or confidentiality, tall panels of 60 inches or more are the way to go. These high walls create a true sense of a personal office, doing a great job of dampening ambient noise and eliminating visual distractions.

These taller setups are absolutely essential in environments where controlling sound is non-negotiable. For example, some studies have found that office noise can slash employee productivity by as much as 66%, which makes sound-absorbing tall panels a smart investment for focus-driven departments.

Tall panels are ideal for:

  • Call centers where agents need to hear clients clearly and keep conversations from bleeding into each other.
  • HR or legal departments that handle sensitive information on a daily basis.
  • Developers, writers, or accountants who need long, uninterrupted stretches for deep work.

Our Private Office Cubicles are a great example of how these high-panel systems can be configured for maximum privacy and acoustic comfort, effectively creating a secluded office right within an open floor plan.

Designing for ADA Compliance and Accessibility

When you’re mapping out your new office, it’s easy to get caught up in footprints and panel heights. But getting the layout right involves more than just efficiency—it's about creating a safe, accessible space for every employee. This isn't just a good idea; it's a legal and ethical responsibility.

The Americans with Disabilities Act (ADA) lays out specific cubicle size standards and spatial guidelines to ensure that workspaces are fully usable by individuals with disabilities. Thinking about these rules from the very beginning of your space planning saves you from expensive and disruptive changes down the road. It’s about more than just avoiding fines; it’s about building an inclusive culture where everyone has the environment they need to succeed.

Key ADA Requirements for Walkways

One of the first things to consider is how people will move through the office. The ADA is very specific about the requirements for these "circulation paths."

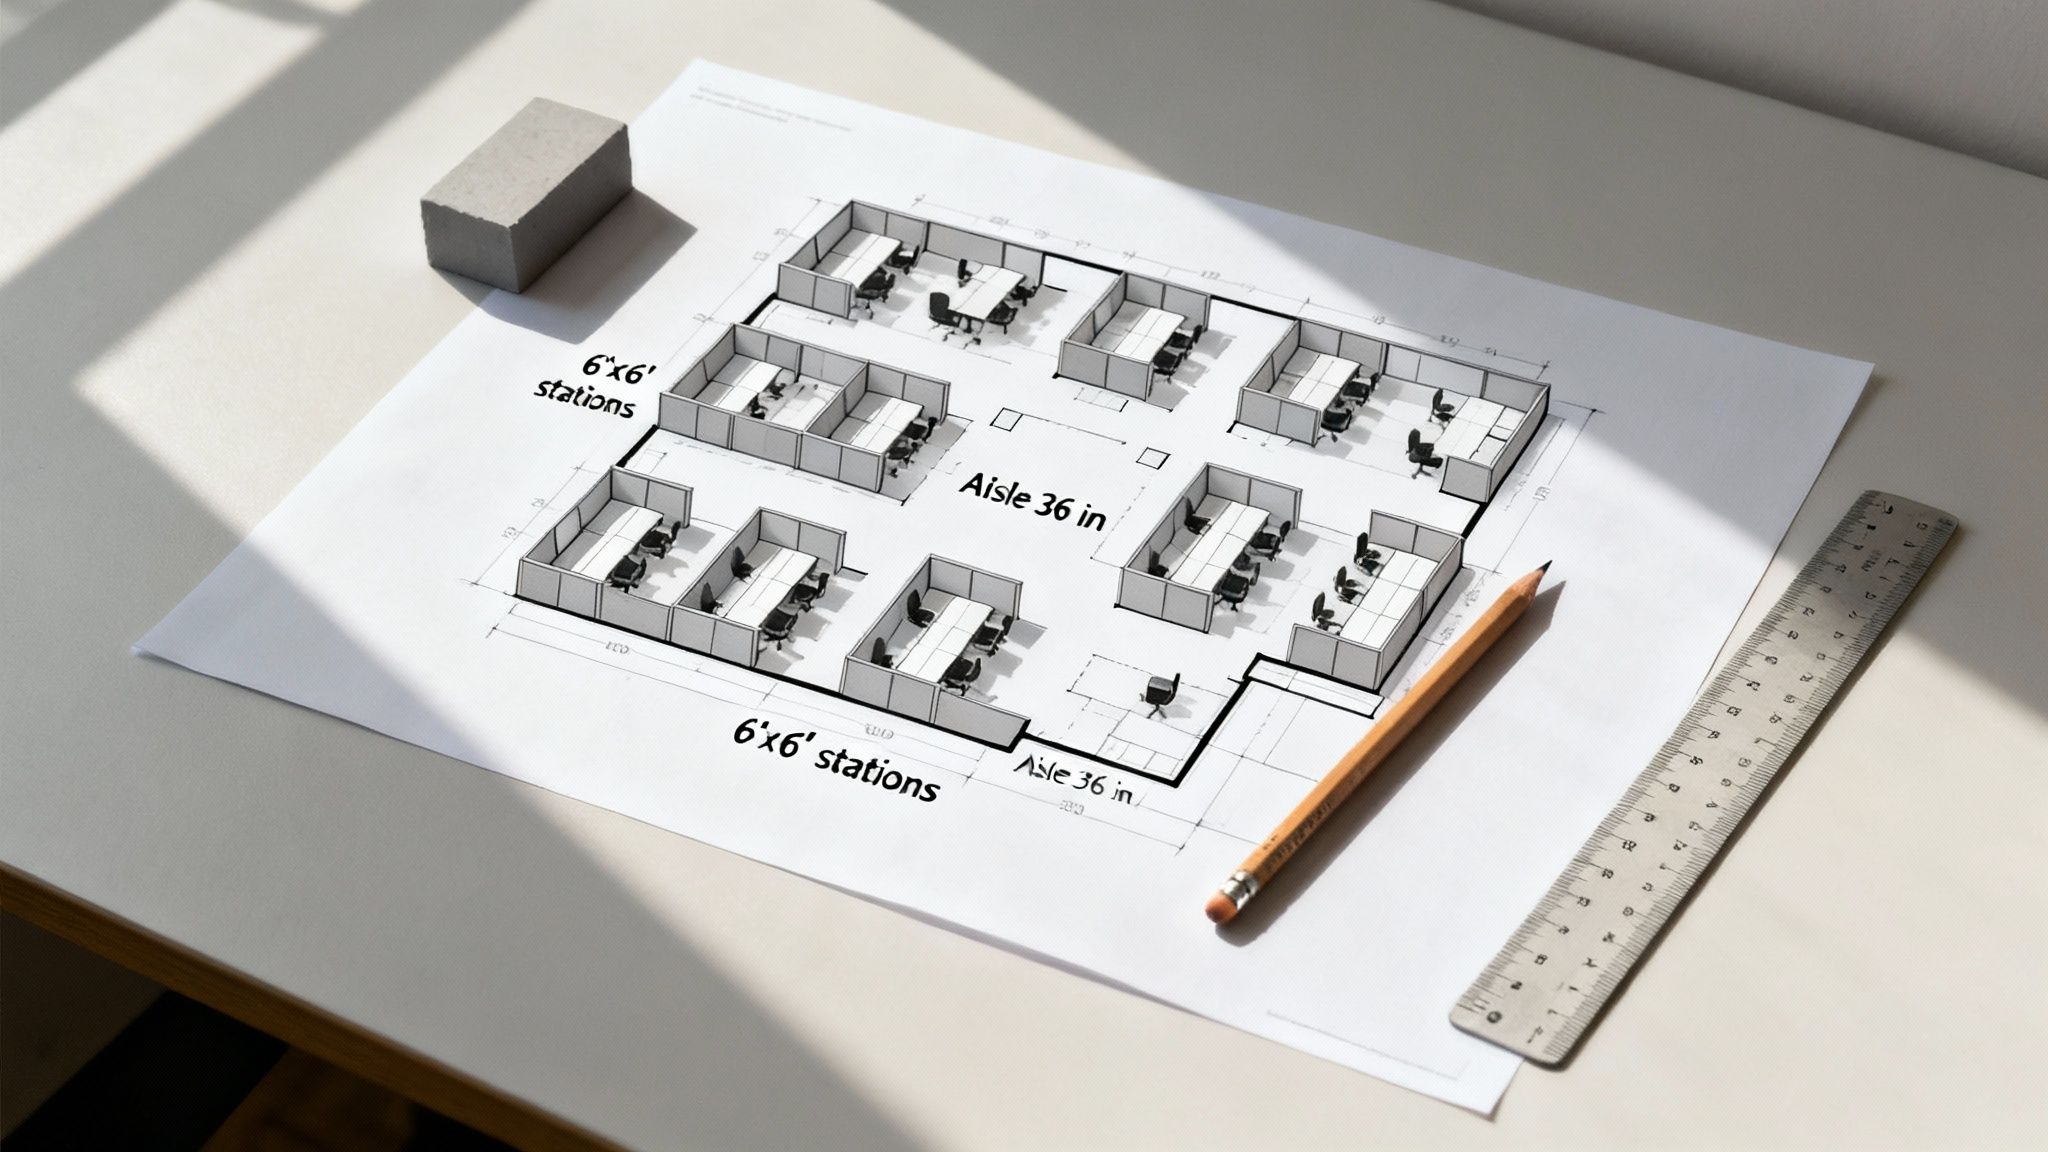
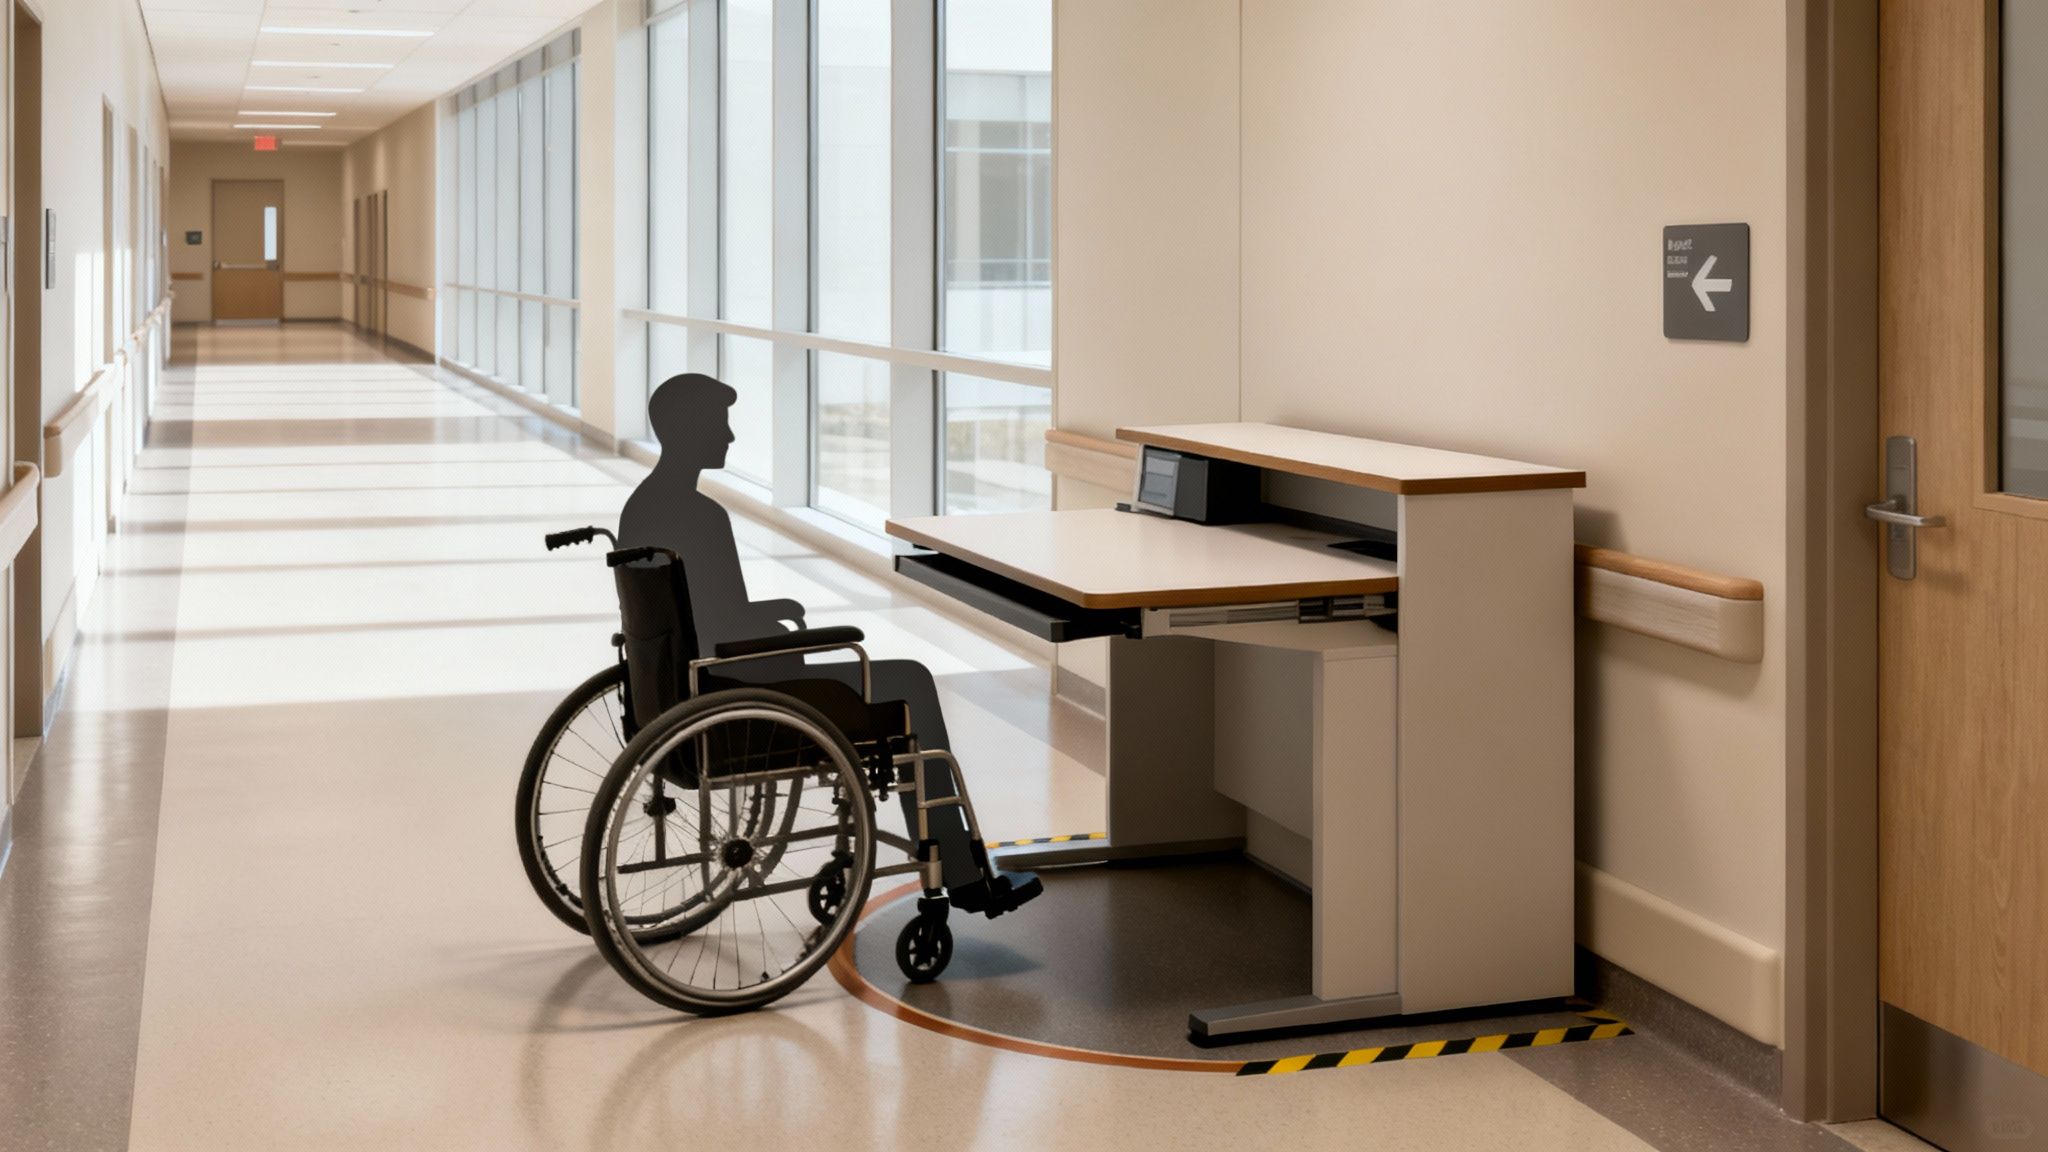
  • Minimum Clear Width: Every accessible route, including the main walkways between rows of cubicles, must have a clear width of at least 36 inches. This is non-negotiable and ensures someone using a wheelchair or other mobility aid can pass through easily.
  • Passing Spaces: If you have a long, straight walkway that runs for more than 200 feet, you need to build in a passing space. This needs to be an area of at least 60 inches by 60 inches to allow for two people in wheelchairs to pass each other.
  • Protruding Objects: Keep an eye out for anything that sticks out into the walkways, like wall-mounted fire extinguishers or shelving units. These items can't jut out in a way that reduces the required clear width of the path.

Nailing down these basics creates a solid foundation for an accessible layout, ensuring everyone can navigate the office safely and without hassle.

Turning Space and Workstation Access

Beyond the main thoroughfares, the space in and around individual cubicles needs to allow for easy maneuverability. This is where the concept of a turning radius is critical.

Your office layout has to include a 60-inch diameter clear circle (or an equivalent T-shaped space) to allow a wheelchair user to complete a 180-degree turn. You can plan for this in wider aisles, at intersections, or within larger, dedicated accessible workstations.

Additionally, the path to each workstation must be clear. Desk surfaces should be set at an accessible height, typically between 28 and 34 inches from the floor, with enough knee clearance underneath.

A good rule of thumb is that at least 5% of the workstations in your office should be fully ADA-compliant. This often means including features like adjustable-height desks and easy-to-reach storage to serve a wide range of employee needs.

Getting all these details right can seem a bit overwhelming, but you don't have to figure it all out on your own. Our comprehensive office space planning guide offers more in-depth tips to help you create a layout that is both functional and fully compliant. When you prioritize accessibility from the start, you build a workplace that truly supports every single member of your team.

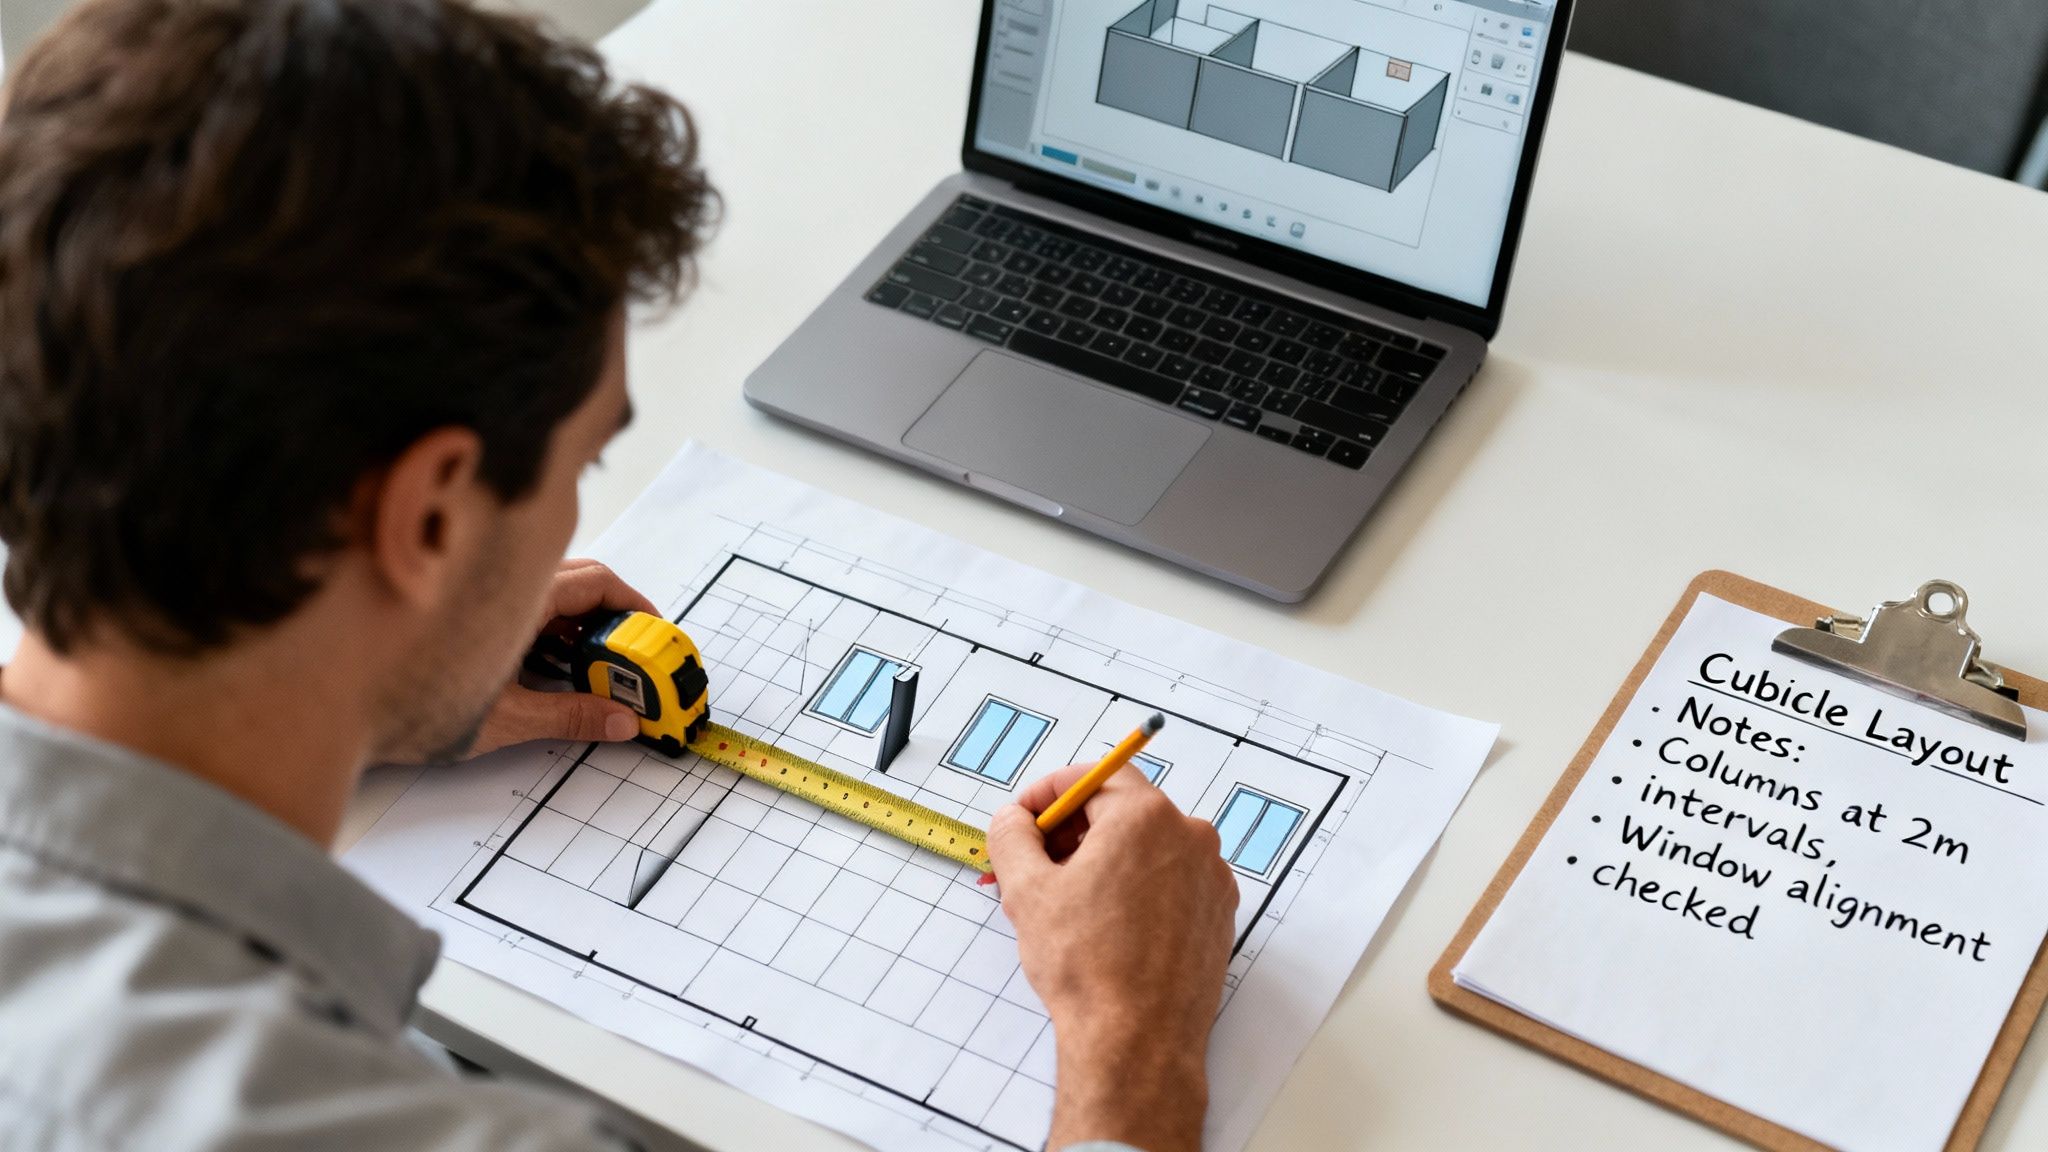
How to Measure and Plan Your Office Footprint

Designing a truly effective office layout doesn't start with picking out cubicles. It starts with a tape measure. The very first—and most critical—step is getting an accurate measurement of your physical space. This grounds your entire plan in reality, helping you avoid expensive mistakes and make every square foot count.

Think of it as the foundation for your entire project. Getting this right from the beginning is what allows you to build a layout that respects cubicle size standards and actually supports how your team works.

The process kicks off by figuring out your office's total square footage. Just grab a tape measure and get the length and width of the entire area you’re planning to furnish. If you've got a simple rectangular room, multiply those two numbers, and you've got your gross square footage.

Of course, not all of that space is actually usable. The next step is to account for all the permanent obstacles that will dictate where your furniture can—and can't—go.

A man measures floor markings in an office while reviewing a floor plan on a tablet, an essential step in planning around cubicle size standards.

Calculating Your Usable Area

Your usable square footage is what’s left after you subtract all the fixed elements in the room. You’ll need to carefully measure and map out every one of them:

  • Structural Columns: These are often the biggest constraints you’ll face in an open-plan office.
  • Doorways and Entrance Paths: Don't forget to account for the full swing of each door and the clearance needed around it.
  • Windows and Radiators: These can limit where you place desks because of issues like light, glare, or heat.
  • Support Walls and Built-in Cabinetry: Any structure that isn't moving has to be on your plan.

Once you have these measurements, subtract their area from your gross total. What you're left with is your true "usable" space—the canvas for your cubicle layout. For a deeper dive, check out our guide on how to create a proper floor plan of the office.

Applying Space Planning Metrics

With your usable area calculated, you can start to think about density. The key metric here is square feet per person. This number helps you figure out how many employees you can comfortably fit into the space. Industry benchmarks can vary a lot, but a common range for offices with open workstations and shared areas is 125 to 225 square feet per person.

When you're trying to maximize your footprint, it can be helpful to look at how other industries approach efficiency. For instance, these smart shop layout ideas, while meant for workshops, share the same core principles of optimizing workflow and station placement.

Let's say you have 5,000 usable square feet. If you're aiming for a moderately dense layout at 175 sq ft per person, you can do the math: 5000 divided by 175 gives you space for about 28 employees. This simple calculation becomes your guide for choosing the right workstation cubicles and striking the right balance between individual space and overall office capacity.

Key Takeaway: Start by measuring your total space precisely. Then, subtract all obstructions to find your usable square footage. Finally, use industry benchmarks for square feet per person to get a realistic estimate of your office’s capacity.

Once you have these core numbers, the fun part begins. You can start bringing your vision to life by playing with different layouts and cubicle sizes. The perfect next step is to plug your dimensions into our free Cubicle Designer tool and start visually mapping out your future workplace.

Your Questions Answered: Cubicle Standards & Space Planning

Digging into the specifics of cubicle size standards often brings up a lot of questions. To help you nail down your office plan with confidence, we've put together answers to the most common queries we hear from office managers and business owners.

What’s the Most Common Cubicle Size for a Modern Office?

Hands down, the 6'x6' (36 sq ft) workstation is the most popular and versatile cubicle size you'll find in offices today. It really hits that sweet spot, giving an employee enough personal space for a computer and multiple monitors while still being efficient for the overall office footprint.

Typically, a 6'x6' setup uses mid-height panels around 53 inches tall. This is what we in the industry call "seated privacy"—it shields a person from view while they're sitting but makes it easy to pop up and collaborate with a neighbor. For companies trying to get the most out of their real estate without making things feel cramped, the 6'x6' is the proven standard for general workstation cubicles.

How Much Space Should I Plan for Per Employee?

The right amount of space per employee really depends on your industry and how your teams work, but a solid benchmark to start with is 125 to 225 square feet per person. That number isn't just the cubicle; it accounts for all the shared spaces like walkways, meeting rooms, and break areas.

A high-density layout, like a call center, might aim for a tighter 100-150 sq ft per person. On the other hand, a more traditional corporate office with a mix of cubicles and private offices could offer a more generous 175-250 sq ft. A good rule of thumb is to pick your ideal cubicle size first, then add in all the common areas to calculate your total square footage needs.

How Do I Make Sure My Cubicle Layout is ADA Compliant?

Great question. ADA compliance is about the entire workspace working together, not just the individual cubicles. The key standards require maintaining at least 36 inches of clear width for all walkways and accessible routes. You also have to plan for a 60-inch diameter clear space in areas where someone in a wheelchair might need to make a 180-degree turn.

Beyond the pathways, at least 5% of your cubicles must be fully accessible. This could mean including features like adjustable-height desks and lower, easier-to-reach storage. It's always best to consult the official ADA guidelines and local building codes, or better yet, partner with an experienced provider like Cubicle By Design to guarantee your layout is fully compliant from day one.


Ready to design a workspace that meets every standard? At Cubicle By Design, we help you create functional, compliant, and productive office layouts. Start visualizing your perfect office today with our free Cubicle Designer tool.

Read More

Your Guide to the Modern Cubicle Size Standard | Cubicle By Design

If you're trying to figure out what a "standard" cubicle size is these days, you're not alone. The simple answer is that the 6'x6' footprint has pretty much become the new go-to. It strikes a great balance between giving an employee enough personal space to work comfortably while still being efficient for the overall office layout.

This size has largely taken over from the much larger, clunkier workstations you might remember from years past, thanks to smaller tech and the need for more flexible floor plans. At Cubicle By Design, we help businesses find the perfect fit for their teams.

Why Today's Standard Cubicle Sizes Exist

The cubicle dimensions we consider normal today didn't just happen overnight. They’re the product of decades of changing office cultures, real estate costs, and the ongoing tug-of-war between employee comfort and bottom-line efficiency.

It all started with a much grander vision. The original cubicle concept, called the 'Action Office', was meant to be spacious and modular, giving workers a private, adaptable area all their own. But as business needs changed and the cost per square foot for office space shot up, that ideal gave way to more practical, space-saving designs.

The Shift to a Standard Footprint

The move from big ideas to standardized sizes happened fast. You can trace the history of the cubicle and see how economic realities and new technology steadily shrunk the average workstation. Back in the 1960s, when Robert Propst at Herman Miller first invented the modern cubicle, offices were huge. It wasn't uncommon for a single worker to have around 250 square feet of space, a standard reflected in U.S. brokerage surveys as late as 2000.

But the tide turned quickly. By 1974, cubicles made up 20% of all new office furniture sales, and that number jumped to nearly 50% by 1980. Why? They were simply more cost-effective and let companies fit more people into a single floor. If you want to dive deeper into this topic, you might be interested in the evolution of the office cubicle.

Knowing this backstory is incredibly helpful. It shows that today's standard sizes aren't just about ergonomics; they’re a direct result of economics.

This historical context shows that today's "standard" sizes are not rigid rules but flexible starting points. They were born from a long history of workplace adaptation, blending the need for individual focus with the realities of commercial real estate.

This understanding allows businesses to make smarter, more practical decisions. You can create a functional workspace that truly supports what your team does, whether it’s a high-density call center that needs compact workstation cubicles or managers who need more room in private office cubicles. Once you understand the "why," it’s much easier to choose the "what."

Let's break down the most common footprints and what they're typically used for.

Common Cubicle Footprints at a Glance

This table gives you a quick snapshot of the standard cubicle sizes you'll see most often and the roles they're best suited for. Think of it as a starting point for planning your own space.

Footprint (Width x Depth) Total Square Feet Best For Common Roles
5' x 5' 25 sq. ft. High-density, task-based work Call center agents, data entry clerks, telemarketers
6' x 6' 36 sq. ft. The all-purpose standard for most roles Administrative staff, accountants, customer service reps
6' x 8' 48 sq. ft. Roles needing extra surface or storage space HR specialists, project managers, technical support
8' x 8' 64 sq. ft. Mid-level management or focused individual work Supervisors, team leads, engineers, developers
8' x 12' 96 sq. ft. Private offices for executives or managers Department heads, directors, executives

Keep in mind that these are just guidelines. The right size for your team will always depend on their specific daily tasks, the equipment they use, and your company's culture.

At Cubicle By Design, we lean on this deep industry knowledge to help companies find the right cubicles for their unique situations. Whether you're designing a new office or just reconfiguring your current one, our online cubicle designer is a great tool for building a workspace that’s both productive and efficient.

Matching Cubicle Dimensions to Team Roles

Picking the right cubicle size isn't just about Tetris-ing your floor plan; it’s about giving your team the right tool for the job. A one-size-fits-all approach is a recipe for frustration. You end up with some employees feeling boxed in while others have more space than they know what to do with. The dimensions you choose should be a direct reflection of what each role actually entails day-to-day.

Think of it like setting up a professional kitchen. The line cook needs a tight, efficient station to move fast, but the pastry chef needs a huge, flat surface for precision work. Your office runs on the same logic: the space has to match the function. This means ditching a single standard and adopting a smarter, role-based strategy for your office layout.

The Compact Footprint for High-Volume Work

For roles that are all about focus and repetition, like in a call center or a data entry department, a smaller footprint is often the most sensible choice. The 5'x5' cubicle is a go-to for these kinds of high-density environments.

At 25 square feet, it gives an employee plenty of room for a computer, a headset, and the essentials without eating up valuable real estate. This compact design lets you maximize your headcount in a specific area while still giving everyone their own defined station. The name of the game here is efficiency and focus, creating a productive hub for task-driven teams.

The chart below shows how the 6'x6' standard is often seen as the sweet spot between efficiency and personal space, which helps put other sizes into context.

Flowchart detailing office cubicle standards, showing efficiency, the 6x6 standard, and personal space considerations.

While different sizes serve specific purposes, this visual makes it clear why the 6'x6' dimension has become such a versatile foundation for general office planning.

The Versatile Standard for General Staff

The 6'x6' cubicle is the industry’s workhorse, and for good reason. Clocking in at 36 square feet, it hits the sweet spot for a huge range of administrative, support, and professional roles. It can comfortably handle a computer, some physical paperwork, and personal items, making it perfect for your HR, accounting, or customer service staff.

This versatile cubicle size standard provides enough room for employees to work without feeling claustrophobic, but it's still efficient from a space-planning angle. It’s the perfect middle ground, supporting both individual work and the occasional chat with a coworker, making it the default choice for most offices.

Upsizing for Specialized and Managerial Roles

Some jobs just demand more surface area, more storage, and more room for equipment. For these roles, bigger footprints aren't a luxury—they're essential for getting the job done.

  • For Technical and Creative Roles: An 8'x8' cubicle delivers 64 square feet, which is ideal for engineers, developers, or designers who are constantly juggling multiple large monitors, blueprints, or even physical prototypes.
  • For Managers and Executives: A spacious 9'x12' setup starts to feel more like a semi-private office. These private office cubicles offer 108 square feet, giving you enough room for a main desk, a small table for one-on-one meetings, and extra storage.

The evolution of technology has had a huge impact on these standards. As we moved from clunky hardware to sleek digital tools, cubicle sizes shrank dramatically. Back in the day, offices needed massive 10'x10' cubicles just to hold a CRT monitor and stacks of paper. The shift to digital in the 90s brought that down to 8'x8'. By the 2000s, space per worker in the U.S. had already dropped from 250 sq ft to 190 sq ft, and the trend has only continued, landing us at today's common 6'x6' footprint—a whopping 64% smaller than its 90s predecessors. You can read more about how cubicle dimensions became standard on our blog.

Key Takeaway: Matching cubicle size to job function is one of the most critical decisions you'll make for your office. It has a direct impact on employee comfort, focus, and productivity, ensuring every square foot is pulling its weight.

When you thoughtfully assign workstation cubicles based on what people actually do, you create a far more effective and dynamic workplace. This strategic approach makes sure that everyone, from call center agents to senior managers, has the right space to do their best work. At Cubicle By Design, we can help you find that perfect mix, and you can even play around with layouts yourself using our interactive cubicle designer.

How Panel Height Shapes Your Office Environment

A cubicle's footprint is just one piece of the puzzle. The real secret to controlling your office's atmosphere lies in the height of its walls. While length and width provide the square footage for someone to work, it’s the panel height that dictates privacy, manages acoustics, and either encourages or discourages collaboration among your team.

Think of it like building a fence in a neighborhood. A low picket fence clearly marks a property line but still invites a casual chat with the neighbors. In contrast, a tall privacy fence creates a secluded sanctuary. This same principle applies directly to your cubicle choices and their wall heights.

Three modern office cubicles of varying sizes, with dimension labels, showing two men working inside them.

Striking the right balance is all about matching your company culture's need for openness with your employees' need for focus.

Low Panels for Open Collaboration

Cubicle panels standing around 42 inches high are purpose-built for open communication. At this height, employees have clear sightlines across the office, making it effortless to ask a quick question or share an idea. This setup is perfect for dynamic, fast-paced environments where constant interaction is a core part of the workflow, not a distraction.

These low-walled workstations promote a sense of community and transparency. They work exceptionally well for sales teams, creative departments, or any group that thrives on spontaneous brainstorming and a lively, energetic atmosphere. The low barrier keeps communication fluid and prevents teams from feeling siloed.

Mid-Height Panels for Seated Privacy

The most popular and versatile option by far is the mid-height panel, typically around 53 inches. This height offers what we call "seated privacy." When an employee is sitting down, they are shielded from most visual distractions, letting them get in the zone for individual tasks. The moment they stand up, they can easily see and speak with colleagues.

This makes it a fantastic middle-ground solution, blending the need for focused work with the desire for accessibility. It’s an ideal choice for a wide range of roles, from administrative staff to project managers, who need to balance heads-down work with frequent team interactions.

This versatile height provides the best of both worlds, fostering individual productivity without sacrificing the collaborative spirit of an open office. It’s the go-to choice for businesses aiming for a balanced and flexible work environment.

Full-Height Panels for Deep Focus

When a role demands deep concentration, confidentiality, or significant acoustic control, full-height panels are the answer. At 66 inches or taller, these panels essentially transform a standard cubicle into a semi-private office. They dramatically reduce both visual and auditory distractions, creating a sanctuary for focused work.

These setups are a smart choice for employees in legal, finance, or HR who handle sensitive information. They are also invaluable for developers, writers, or anyone whose role requires long periods of uninterrupted thought. These more private cubicles provide the quiet and seclusion necessary for high-stakes, detailed work, ensuring privacy and minimizing errors. For an added layer of customization, you can learn more about how different panel privacy screens can further enhance this seclusion.

Matching Panel Height to Your Culture

The panel height you choose sends a powerful, unspoken message about how work gets done at your company. An office filled with low-walled cubicles communicates transparency and teamwork. Conversely, a space dominated by high-walled workstations prioritizes quiet, heads-down performance and individual achievement.

This decision is a strategic one. It's not just about furniture; it's about consciously designing an environment that reinforces your company's core values. Many businesses find that a mixed-height approach works best, allowing them to create different "zones" tailored to specific departments. This lets you build a truly functional layout that supports every single person on your team.

Mastering Your Office Layout and Flow

Once you’ve picked out the right cubicles, the real fun begins: laying them out on your floor plan. This is where an office truly starts to feel like a functional space. Think of it like a bit of miniature city planning. You’re not just dropping desks on a map; you’re creating highways for foot traffic, quiet neighborhoods for focused work, and bustling town squares for team collaboration.

Getting this right means designing an environment that just feels right—intuitive, comfortable, and safe for everyone. The empty space between the cubicles is every bit as important as the workstations themselves. If your walkways are too tight, you’ll create frustrating bottlenecks, a cramped feeling, and even potential safety issues. The goal is to carve out clear, defined pathways so people can move around freely without constantly bumping into their coworkers.

Essential Rules for Walkways and Circulation

To get a functional and compliant office off the ground, there are a few key measurements you absolutely have to nail. These rules of thumb ensure smooth traffic and make the space accessible for every person on your team.

Here are the critical numbers you’ll want to keep in mind:

  • Main Aisles (Major Walkways): These are the superhighways of your office—the primary routes leading from the entrance to different departments. You’ll want these to be 48 to 60 inches wide. This leaves plenty of room for two-way traffic and makes getting around a breeze.
  • Secondary Aisles (Minor Walkways): Think of these as the local streets that lead to individual desks or small clusters of cubicles. A minimum width of 36 inches is the standard here, which is essential for comfortable movement and meets basic ADA (Americans with Disabilities Act) compliance.
  • Chair Clearance: Always, always leave at least 3 feet (36 inches) of clear space between the back of a seated employee's chair and whatever is behind them, whether it's a cubicle wall or another desk. This gives them enough room to push back, stand up, and get out of their workstation without a struggle.

Key Insight: A smart layout with proper clearances does more than just prevent office traffic jams. It smooths out the little frustrations of daily life, makes the entire office feel bigger, and fosters a calmer, more organized atmosphere.

Sticking to these standards isn’t just a suggestion; it's a must for creating a workspace that is safe, accessible, and efficient. An office that feels open and is easy to navigate has a huge impact on employee comfort and productivity.

Before you start moving furniture, it helps to have a checklist. This simple table breaks down the most important spatial considerations to keep top of mind.

Essential Cubicle Space Planning Checklist

Planning Element Recommended Standard Why It Matters
Main Walkways 48-60 inches wide Ensures easy two-way traffic flow and prevents major bottlenecks.
Secondary Walkways Minimum 36 inches wide Meets ADA compliance and allows comfortable passage to individual desks.
Chair Push-Back Space Minimum 36 inches Allows employees to stand up and move without bumping into things.
Fire Code Egress Check local codes (often 44 inches+) Critical for safety, ensuring clear and unobstructed emergency exit paths.
Around Shared Equipment 36-48 inches clearance Prevents crowding around printers, copiers, and other shared resources.

Having these numbers handy during the planning phase will save you a world of headaches down the road. It’s all about creating a space that works with your team, not against them.

Strategic Grouping and Office Zoning

Beyond just walkways, how you group your cubicles can completely shape your office culture. By strategically clustering workstations, you can create distinct zones designed around the way different teams actually work. It’s a much smarter approach than just laying out a uniform grid of identical cubicles.

Try thinking about creating "neighborhoods" within your office. For example:

  • Collaborative Pods: You could arrange four 6'x6' workstation cubicles in a pinwheel layout with low, 42-inch walls. This creates a natural hub for a marketing or creative team, making it easy for them to spin around, share ideas, and work together on the fly.
  • Focus Zones: For departments that need to buckle down and concentrate—like finance, legal, or HR—a dedicated "quiet zone" is a game-changer. Line up rows of private office cubicles with high 66-inch walls to cut down on both visual and acoustic distractions.

This zoning strategy ensures your layout actively helps each team do its best work. It lets your collaborative folks buzz with energy without derailing those who need peace and quiet to concentrate. For a deeper dive, professional office space planning and design services can help you dial in these layouts perfectly.

At the end of the day, mastering your office flow is about being deliberate. From ensuring you have clear exit paths for fire code compliance to designing intuitive department groupings, every decision contributes to the final experience. We help businesses turn these principles into a reality every day.

Integrating Power, Data, and Ergonomics

A modern cubicle is more than just partitions and a desktop—it’s the command center where your team gets things done. But too often, power and data planning gets pushed to the end of the process. The result? A messy, hazardous web of extension cords and power strips snaking across the floor.

To create a space that actually works, you have to think about your electrical and data needs from day one. It’s about building an infrastructure that’s as clean and efficient as the furniture itself. When power is built right into the cubicle panels, you get a seamless, professional environment that’s ready for anything.

A modern office cubicle with a monitor, laptop, ergonomic chair, and easily accessible desktop power and data outlets.

Planning Your Power and Data Needs

First things first: figure out what your team actually needs to plug in. A typical employee setup these days includes a computer, at least one or two monitors, a phone, and a charging port for a mobile device.

To be safe, each station should have a minimum of four to six power outlets. This prevents people from "daisy-chaining" power strips, a dangerous practice that can overload circuits and violate fire codes.

On the data side, plan for at least two data ports per workstation. One is for the computer, and the second is perfect for a VoIP phone or another networked device. This gives you a stable, hardwired connection and some breathing room for future tech without having to tear things apart later.

For a really clean setup, systems with base-in power feeds are a game-changer. They run all the wiring discreetly through the base of the cubicle panels, bringing connections right up to the desktop. Everything stays hidden, organized, and protected. If you're exploring options, you can learn more about installing an office cubicle power pole for a flexible solution.

Connecting Technology to Ergonomic Health

A well-powered cubicle is also a healthier one. When outlets are right there on the desktop, employees don’t have to crawl around on the floor to plug things in, which helps reduce the risk of strains and injuries. It’s a small detail that makes a big difference in workplace wellness.

Properly integrated power and data access is a cornerstone of good ergonomic design. It allows employees to position monitors, lighting, and other tools exactly where they need them for optimal comfort and posture, without being limited by the reach of a power cord.

This freedom is huge for ergonomic health. With power right where they need it, employees can:

  • Position Monitors Correctly: Place screens at the perfect height and distance to prevent neck and eye strain, without being stuck near a wall outlet.
  • Use Ergonomic Accessories: Easily plug in adjustable task lights, sit-stand desk converters, and other wellness tools that need a power source.
  • Maintain a Clear Workspace: Keep the desk surface free of tangled extension cords, creating a more organized and focused environment.

Ultimately, thinking about these technical details from the start is about creating a workspace that is efficient, safe, and comfortable. By planning for power, data, and ergonomics together, you’re building a foundation that truly supports your team's well-being and productivity.

Build Your Ideal Workspace with Our Custom Designer

Alright, you've made it through the nuts and bolts. You know the cubicle size standard, you see how different footprints work for different roles, and you get how panel height can completely change the vibe of an office. Now for the fun part: putting all that theory into practice.

This is where the measurements on a page start to feel real. It can seem like a big jump from planning to actually building, but it doesn't have to be intimidating. With the right tool, you can bridge that gap and see exactly how your ideas will look and function in your space before you commit to anything.

From Informed Reader to Active Designer

The best way to get started is to jump right into our interactive Cubicle Designer. Think of it as your digital sandbox. It’s built to let you apply everything you've just learned, turning you from someone who knows about cubicles into the architect of your own workspace.

Stop trying to picture how a 6'x6' footprint with 53-inch panels will feel next to a manager's private office. Just build it and see for yourself.

In minutes, you can:

  • Play with Dimensions: Set the exact length and width for your workstation cubicles or layout a few private office cubicles.
  • Test Panel Heights: See the real difference between low, social-friendly walls and taller panels built for deep focus.
  • Pick Your Finishes: Experiment with fabrics and surface colors to match the look you're going for.
  • Add the Essentials: Drag and drop in overhead bins, file cabinets, and power outlets to make sure each station is truly functional.

Visualizing Your Perfect Office Layout

This tool takes the guesswork out of space planning. You're not just dropping furniture into a box; you're crafting a blueprint for how your team will work, feel, and collaborate. When putting together a full project, estimating all the furniture, fixtures, and equipment (FFE) is a major step. Tools like Exayard FFE takeoff software are designed for this, and our designer gives you a fantastic visual starting point for that process.

The ability to instantly visualize your layout is a game-changer. It removes the guesswork, allowing you to create a code-compliant and efficient floor plan with confidence, ensuring every piece fits perfectly.

Once you land on a layout that feels right, you can get an instant preview and a solid starting point for a quote. This is the final step in your journey—turning your knowledge of the cubicle size standard into a custom, effective, and perfectly designed workspace.

Ready to give it a shot? You can learn more about how to transform your office with our interactive cubicle designer in our detailed guide.

Common Questions About Cubicle Standards

Even the best-laid plans can hit a snag. Before you pull the trigger on a new office layout, a few practical questions almost always come up. Getting straight answers to these common concerns is the final step to moving forward with confidence and making sure your new workspace is a home run from day one.

What’s the Go-To Cubicle Size for a Typical Office?

The 6'x6' (36 square feet) cubicle is, without a doubt, the most popular and versatile choice out there. It hits that perfect sweet spot, offering enough personal work area for a computer and paperwork without eating up too much of your valuable floor space.

This adaptability makes it the unofficial cubicle size standard for all sorts of roles, from support staff to technical teams. It’s the foundation of an efficient and flexible layout. You can see a bunch of these workhorse stations in our collection of workstation cubicles.

How Much Room Do I Need for Walkways?

You’ll want to plan for a minimum of 36 inches for the smaller aisles between cubicle rows. For the main arteries of your office, we strongly recommend bumping that up to 44 to 48 inches. This isn't just for comfort—it ensures smooth two-way traffic and keeps you in line with ADA (Americans with Disabilities Act) accessibility guidelines.

Proper spacing is more than just a nice-to-have; it's critical for safety, easy navigation, and creating an open, uncrowded feel. Think of it as a non-negotiable part of good space planning.

Getting this right prevents those frustrating traffic jams near the coffee machine and contributes to a much calmer, more organized atmosphere for the whole team.

Is It a Good Idea to Mix and Match Cubicle Sizes?

Absolutely. In fact, mixing sizes and wall heights is a fantastic strategy for creating a dynamic workspace that’s built around what your teams actually do. This approach supports different work styles and seriously boosts overall productivity by making sure every square foot has a clear purpose.

For example, you could set up:

  • Low-wall 6'x6' cubicles for your collaborative teams who need to chat and share ideas easily.
  • Larger 8'x8' workstations with mid-height walls for managers who need a bit more room to spread out.
  • Full-height private office cubicles for departments like HR or finance that are constantly handling sensitive information.

This kind of flexible design is surprisingly easy to pull off with modern modular systems. When you tailor the space to the function, you create a far more effective and supportive environment for every single person on your payroll.


Ready to design a workspace that fits your team like a glove? At Cubicle By Design, we specialize in creating functional, stylish office layouts that respect your budget. From the first sketch to the final installation, we’re here to help bring your vision to life. Start exploring your options today by visiting us at https://cubiclebydesign.com/.

Read More

Your Guide to Standard Cubicle Desk Size by Cubicle By Design

If you're looking for a simple answer, you won't find one—there isn't a single standard cubicle desk size. Instead, a few common dimensions have become the industry go-to: 6'x6', 6'x8', and 8'x8'. Think of these less as rigid rules and more as proven starting points for designing a workspace that actually works.

Decoding Common Cubicle Dimensions

Choosing the right cubicle size is one of the most important calls you'll make in your office design. It has a direct impact on employee comfort, how you use your floor space, and ultimately, how much work gets done. While "standard" makes it sound like a one-size-fits-all deal, the reality is much more flexible.

The best size really comes down to what people will be doing in that space. A bustling call center has completely different requirements than a department of accountants who need quiet focus and room for sensitive documents.

This is why the industry has settled on a few common footprints that just plain work. These sizes are the building blocks for office planning, helping managers and designers put together functional, organized layouts. Seeing them in context helps make the numbers feel real, so it's a good idea to check out different examples of office cubicles to visualize the possibilities.

This concept map is a great way to see the three main categories of cubicle sizes at a glance.

A concept map illustrating different cubicle sizes: compact, standard, and spacious options from Cubicle By Design.

As you can see, each category serves a unique purpose, from saving as much space as possible to giving someone a generous personal workspace.

Quick Reference for Common Cubicle Footprints

To make it easier to see how these standard sizes apply in the real world, here's a quick breakdown of the most common options and where they fit best. This table summarizes the go-to dimensions for modern office layouts.

Cubicle Category Common Dimensions (Width x Depth) Best Use Case
Compact 4'x4' or 5'x5' High-density call centers, touch-down/hot-desking spots
Standard 6'x6' General office tasks, administrative & professional roles
Spacious 6'x8' or 8'x8' Managers, developers, designers, or anyone needing more space

This is just a starting point, of course, but it covers the vast majority of what we see in office design today.

Key Cubicle Categories

The three main buckets you'll hear about are compact, standard, and spacious. Each is built to support different kinds of work and departmental needs, making sure the space fits the job.

  • Compact Workstations: These are all about efficiency. They're perfect for high-density setups like call centers or for temporary "hot desking" roles where you need to fit the maximum number of people into an area.

  • Standard Workstations: The 6'x6' is the undisputed champion for a reason. It's the go-to for most administrative and professional jobs, offering a great balance of space for a computer, monitors, and paperwork without feeling closed in.

  • Spacious Workstations: Often set aside for managers or employees who need extra gear, these larger footprints can comfortably fit a guest chair, more storage, and multiple large work surfaces.

Understanding these categories is the first step toward creating a workspace that truly supports your team. The goal is to match the cubicle's footprint to the employee's workflow, not the other way around.

At the end of the day, it's all about finding the right balance between what your employees need and the square footage you have to work with. Once you get a handle on these common sizes, you can start building a floor plan that’s both efficient and a great place to work.

To take it a step further, check out our guide on how to maximize the ergonomics of your office. This knowledge will come in handy as we dive into panel heights and layout strategies next.

The Story Behind Today’s Cubicle Dimensions

To really get a handle on the common cubicle dimensions we use today, it helps to know how we got here. The cubicle has a pretty interesting backstory, starting as a grand vision for worker freedom and evolving through decades of corporate belt-tightening and shifting ideas about what an office should be. What started as a way to empower employees eventually became a symbol of pure efficiency, for better or worse.

The original concept from the 1960s, called the "Action Office," was meant to give workers a sense of personal space, freedom, and flexibility. The whole idea was to break away from the rigid, factory-like open offices that were common at the time. Those early designs were actually quite spacious and designed to support different work styles.

But that idealism ran head-on into the economic realities of the decades that followed. As companies started looking for ways to pack more people into the same amount of real estate, the cubicle started to shrink. A lot.

The Great Cubicle Squeeze

The 1980s was a turning point that drastically changed the standard cubicle desk size. It was an era of mergers and downsizing, and facility managers were under immense pressure to make every single square foot count. This led to a major cutback in workstation footprints, sometimes chopping them down by as much as 25% to 50%. By 1994, though, companies started to see the fallout from these cramped spaces and began to push the average cubicle size back up to around 90 square feet. You can get the full story in our detailed look at the evolution of the office cubicle.

This is the era that gave us the "cubicle farm" stereotype—those endless seas of tiny, identical boxes that put density way ahead of employee comfort. The focus wasn't on creating a great place to work; it was just about how many bodies you could fit on one floor plan.

Finding a Modern Balance

Thankfully, the pendulum has swung back. Today, businesses get it: employee well-being is directly linked to productivity, and giving people enough room to work is a huge part of that. The modern standard cubicle desk size is a smart compromise, balancing the company's need for efficiency with the employee's need for comfort and focus.

This shift has opened up the huge range of options you see today. Instead of a one-size-fits-all box, companies can now pick from a whole menu of footprints designed for specific jobs and teams.

The dimensions you see today—like the popular 6'x6' workstation—are not arbitrary. They are the result of decades of trial and error, reflecting a learned balance between human needs and business practicalities.

Knowing this history isn't just trivia; it gives you critical context. It explains why just picking the smallest size possible is a recipe for disaster, often leading to tanking morale and productivity. The dimensions of modern cubicles are built for today's work, which often means multiple monitors, collaborative tech, and a mix of heads-down focus and teamwork.

This perspective helps you make smarter choices for your own office. You can build a layout that’s both efficient and genuinely supportive of your team’s best work, whether you need private office cubicles for deep concentration or flexible workstation cubicles for everyday tasks. The next time you look at a floor plan, you'll see more than just numbers—you'll see a long story of adaptation and refinement, a journey you can continue with your own layout using our Cubicle Designer.

Choosing the Right Panel Height for Privacy and Collaboration

While the footprint of a cubicle carves out its physical space, it's the height of the panels that really sets the mood. Panel height is the secret ingredient that balances privacy against collaboration, and focus against open communication. It’s what makes the difference between a high-energy, buzzing team hub and a quiet, heads-down work zone.

Picking the right panel height is far more than an aesthetic choice—it’s a strategic decision that directly shapes your company culture and daily workflow. The industry standards fall into three main camps: low, medium, and high. Each one serves a unique purpose, letting you tailor the environment to what your teams actually need to get their work done.

Low Panels: Creating an Open Vibe

Low panels, which usually stand between 39 and 42 inches high, are all about encouraging interaction. When seated, employees can easily see over the dividers to talk to colleagues, making this height ideal for teams that need to be in constant communication.

This setup gives you that airy, open-plan feel without totally eliminating personal space. It also lets natural light flow through the office and makes it a breeze for managers to check in with their teams.

  • Best For: Sales teams, marketing departments, and any group that thrives on spontaneous collaboration.
  • Key Benefit: Fosters a connected, high-energy atmosphere where ideas can be shared freely.

Medium Panels: The Versatile Standard

Coming in at around 53 inches tall, medium panels are the go-to choice for most general office roles. This height hits the sweet spot for a lot of businesses by offering what’s known as "seated privacy."

When an employee is sitting, the panels are high enough to block visual distractions and help them focus. But if they need to collaborate, all they have to do is stand up to see across the office and chat with a coworker. It’s a balanced approach that works well for both individual tasks and team projects.

This height provides a perfect compromise, giving employees the autonomy to choose between focused work and collaborative interaction. It respects the need for personal space while still keeping teams accessible to one another.

For a closer look at how different setups impact the employee experience, check out our guide on achieving office cubicle privacy. It’ll give you more context to make the right call.

High Panels: For Maximum Focus and Privacy

High panels, which start at 65 inches or taller, are designed for roles that demand serious concentration, confidentiality, or acoustic separation. These walls effectively create a private office within a larger space, cutting down on both visual and auditory distractions.

This level of enclosure is perfect for HR professionals, finance departments, or anyone handling sensitive information. It provides a secure, quiet environment that’s essential for detailed and confidential work. These panels are the cornerstone of truly effective private office cubicles.

It’s interesting to think that these tall walls were once the norm. Back in the 70s, 80s, and early 90s, the average cubicle wall towered between 60 to 84 inches. By the mid-90s, a major shift in workplace philosophy toward more open environments caused panel heights to drop to just 3 or 4 feet. You can read more about this history over at iSpace Environments. It goes to show that today's panel heights aren't just a default setting—they're a deliberate choice.

Matching Cubicle Sizes to Real-World Job Functions

Knowing the theory behind cubicle dimensions is a good start, but the real magic happens when you apply it to an actual office. Let's move away from abstract numbers and look at how different departments really function day-to-day. This is where you can see how a standard cubicle desk size gets adapted to fit the unique rhythm of each team.

An aerial view showing a modern office layout by Cubicle By Design with different sized cubicles for Sales, Admin, and HR departments.

Think of your floor plan like a strategic map. Every department has a mission, and its workspace should be the headquarters that helps them succeed. The whole idea is to match the cubicle's footprint directly to what the job demands—from storage needs to how people talk to each other.

The High-Energy Sales Team

A fast-paced sales or customer service department runs on energy and quick communication. For these roles, compact 5'x5' workstation cubicles are almost always the perfect call. This size gives them enough room for the essentials—a computer, headset, and a notepad—without putting up unnecessary walls between teammates.

That smaller footprint naturally gets people talking and makes it easy for supervisors to jump in with support and guidance. When you pair this layout with low panels, you create a dynamic, buzzing environment where information just flows.

  • Job Requirements: Mostly phone and computer work, with little need for stacks of physical files.
  • Storage Needs: Usually, some simple under-desk storage for personal items is all that's needed.
  • Collaborative Dynamics: High-level team interaction and quick chats are critical for getting the job done.

The Reliable Administrative Team

Your admin staff is the operational backbone of the company, juggling all sorts of tasks that require both focus and easy access. The classic 6'x6' cubicle is the industry standard for these roles, and for good reason. It hits that sweet spot between personal workspace and efficiency.

This size comfortably fits an L-shaped desk, dual monitors, and plenty of storage for paperwork and supplies. It gives employees enough elbow room to work without feeling boxed in, all while fitting neatly into most office layouts. Medium-height panels are a great match here, offering privacy for focused work while seated.

This versatile 6'x6' size is the true workhorse of the modern office. It’s adaptable enough for most general roles, making it a safe and effective starting point for any layout.

Getting a closer look at the different ways this popular size can be configured is incredibly helpful. You might want to check out our guide on 6×6 office cubicles to see exactly why it's such a trusted option.

The Focused HR and Accounting Departments

Departments like Human Resources, finance, and legal deal with sensitive information all day long. They need a higher degree of privacy and the ability to really concentrate. For these teams, a more spacious 8'x8' cubicle is the ideal solution. The larger footprint provides plenty of room for secure, lockable filing cabinets and a bigger work surface for spreading out documents.

That extra space also means you can add a guest chair, which allows for private, one-on-one meetings without having to hunt down a free conference room. When you pair these larger cubicles with high panels of 65 inches or more, you create a true sense of a private office, cutting down on both visual and sound distractions. This setup is crucial for maintaining confidentiality and allowing for the deep focus these jobs demand.

By tying specific cubicle sizes to the daily realities of each department, you build a much more effective and harmonious workspace. This thoughtful approach ensures every team has the right environment to do their best work, turning your office from a simple collection of desks into a purpose-built machine for productivity. The next step is to take these ideas and start applying them to your own physical space.

How to Measure Your Space and Plan a Cubicle Layout

Alright, it's time to roll up our sleeves and move from ideas to a real-life floor plan. A great layout isn't just about picking nice cubicles; it starts with a tape measure and a solid understanding of the room you're working with. Think of this part as drawing the blueprint for your office—get it right, and every piece will fall into place, creating a space that's both productive and safe.

An architect measures a cubicle layout blueprint, with a laptop displaying a 3D model from Cubicle By Design.

Before you fall in love with a particular standard cubicle desk size, you need to know exactly what your canvas is. That means getting to know every nook, cranny, and quirk of your office space. It’s like a pre-flight checklist for office design—nailing these details upfront saves you from some very expensive headaches later on.

Your Measurement Checklist

First things first, measure the total length and width of the room to get your overall square footage. But don't stop there. You have to account for everything that could get in the way of your perfect layout.

  • Map Immovable Objects: Find and note the exact location and size of columns, support beams, windows, and doorways. These are the non-negotiables your entire plan must bend to.
  • Locate Power and Data Ports: Get a sketch of the room and mark every single electrical outlet, ethernet port, and data jack. It’s a massive time and money saver to plan your cubicles around existing hookups.
  • Identify Traffic Flow: Imagine your team walking through the space. Where are the main highways? Pinpoint the major pathways from the entrance to key areas like the break room, restrooms, and meeting rooms.

Once you have these measurements down, you can start to see how different cubicle setups might actually fit. For a deeper dive, our office space planning guide has even more tips.

Complying with Codes and Accessibility

This is one of the most critical parts of the process. Forgetting about walkway clearance isn't just a design mistake; it can be a serious code violation. You absolutely have to plan a layout that meets the legal requirements for safety and accessibility.

Local fire codes and the Americans with Disabilities Act (ADA) have strict rules to make sure everyone can move around the office safely and easily.

A common mistake is packing cubicles too tightly, leaving insufficient room for circulation. This not only creates a cramped environment but also poses significant safety and compliance risks. Always prioritize safe and accessible pathways.

Here are the key minimums to burn into your memory:

  1. Main Aisles: These are your primary walkways. They need to be at least 44 inches wide to allow for comfortable two-way traffic and wheelchair access.
  2. Secondary Aisles: The smaller paths between individual cubicles should have a minimum clearance of 36 inches.

Following these guidelines is non-negotiable for creating a workspace that is functional, compliant, and comfortable for every single person on your team.

Bringing Your Vision to Life

With your measurements in hand and compliance rules in mind, the fun part can begin. This is where you get to play with different layouts and find the absolute best fit for your teams and how they work.

To make this whole process visual and seamless, you can use our interactive Cubicle By Design Custom Cubicle Designer. This tool is a game-changer. You can plug in your room's dimensions and experiment with all sorts of configurations. Test drive different cubicle sizes, arrange them in pods, and see a 3D model of your office before you commit to anything.

Using a tool like this takes the guesswork out of the equation. It transforms your raw measurements into a tangible, workable plan, helping you design a space that's efficient and perfectly suited to your company's needs from day one.

A Few Common Questions About Cubicle Sizes

Even with a great plan in hand, you'll probably still have a few questions as you start to lock in your final office layout. It's totally normal. Trying to nail down the specifics of a standard cubicle desk size, walkway rules, and how to mix and match different setups can feel a bit overwhelming.

To help you move forward with confidence, we’ve put together answers to the most common questions we hear from business owners and facility managers just like you. Think of this as the final checklist to clear up any lingering doubts.

What Is the Most Popular Standard Cubicle Desk Size?

The 6' x 6' workstation is the king of the cubicle world, and for good reason. It's hands-down the most popular and flexible size out there, hitting that perfect sweet spot between giving an employee enough personal space and not eating up your entire floor plan.

This footprint comfortably fits an L-shaped desk, which gives your team members plenty of room for a computer, a couple of monitors, and their daily paperwork without making them feel boxed in. It’s a solid, productive setup for almost any administrative or professional role.

Sure, smaller 5' x 5' workstation cubicles are great when you need to maximize headcount, and larger 8' x 8' spots are better for managers. But the 6' x 6' is the reliable go-to for most office plans. It’s a fantastic—and safe—starting point for any layout design.

How Much Space Do I Need for Walkways Between Cubicles?

This is a big one. Planning for proper walkway clearance isn't just about making the office feel open; it's absolutely critical for safety, accessibility, and legal compliance.

For the smaller aisles that weave between individual cubicles, you need to budget for a minimum width of 36 inches (3 feet). This gives one person enough room to walk by comfortably and allows someone to push their chair back without completely blocking the path.

For your main arteries—the central corridors leading to exits, the break room, or conference rooms—you need to go wider. Aim for 44 to 48 inches (about 4 feet). These wider paths are often required by the Americans with Disabilities Act (ADA) and local fire codes to ensure wheelchair access and a clear escape route in an emergency. Always double-check your local codes, but these numbers are a solid rule of thumb.

Don't make the classic mistake of skimping on walkway space. It’s one of the most common and costly errors in office planning, creating a cramped, frustrating environment that's also a serious safety and legal liability.

Can I Use Different Cubicle Sizes in the Same Office?

Absolutely! In fact, you should. Mixing and matching cubicle sizes is a smart, modern way to create a dynamic office that actually works for how your different teams operate. A one-size-fits-all plan is an outdated approach that rarely meets everyone's needs.

For instance, you could set up a pod of compact cubicles for your high-energy sales team, use standard 6' x 6' stations for marketing and admin, and give larger, more private private office cubicles to departments like HR or finance that handle sensitive information. This hybrid model lets you fine-tune your floor plan for both efficiency and function.

The trick is to use a consistent cubicle system, like the ones from Cubicle By Design, to keep the whole office looking cohesive and professional. Our Cubicle Designer tool makes it easy to play around with different combinations and design a hybrid layout that’s a perfect fit for your team’s workflow.

How Does Desk Depth Impact the Overall Cubicle Size?

Desk depth is one of those details that has a huge impact on how a cubicle actually feels to work in. The two standard depths are 24 inches and 30 inches, and choosing between them really affects employee comfort and what they can get done.

A 24-inch depth is your space-saver. It’s perfect for people who mainly use a laptop or a single monitor, giving them just enough surface area without taking up precious real estate. This is often the go-to choice for higher-density layouts where every square foot counts.

A 30-inch depth, on the other hand, feels much more generous. That extra six inches of space is a game-changer for anyone using multiple large monitors, spreading out blueprints, or working with physical documents. It helps cut down on clutter and gives people more room to set up an ergonomic workstation. When you're looking at a 6' x 6' cubicle, the desk depth is what determines how much of that footprint is truly usable workspace. If you're looking for more ideas on space management, digging into specialized articles on office planning can offer some great insights.


Ready to design a better workplace? At Cubicle By Design, we provide the tools, expertise, and high-quality cubicles you need to create an efficient and comfortable office. Start building your ideal layout today.

Read More

A Complete Guide to Office Cubicle Dimensions | Cubicle By Design

Deciding on the right office cubicle dimensions is one of the first, and most important, steps in designing your workspace. You’ll typically see sizes ranging from a compact 6'x6' for focused, individual tasks all the way up to a roomy 8'x8' for managers who need a bit more space. Hitting that sweet spot between employee comfort and smart use of your floor plan is key. Let’s walk through what you need to know to get it right.

The Foundation of Office Space Planning

Choosing the right cubicle size isn't just about filling a room; it’s one of the most critical decisions you'll make in your workplace design. The dimensions you select directly impact everything from employee comfort and workflow to the final cost of your office fit-out. A well-planned layout can create quiet zones for deep focus or build natural hubs for collaboration. Get it wrong, and you could end up with a cramped, unproductive environment. Understanding the standard measurements is your first step.

The modern cubicle has come a long way. It all started back in 1964 when a designer named Robert Propst, working for Herman Miller, introduced the 'Action Office' system. Over the years, massive 10'x10' stations slowly gave way to more efficient 8'x8' layouts, which were a better fit for the paper-heavy workflows of the time. You can read more about how these sizes evolved over at Cubicle By Design.

Why Dimensions Matter So Much

A cubicle's size is so much more than just a number on a floor plan—it defines an employee’s personal territory for eight hours a day. The right dimensions can feel empowering and spacious, while the wrong ones just feel restrictive.

Think about how cubicle size affects your office:

  • Employee Comfort and Ergonomics: Is there enough room for a proper ergonomic chair, monitor setup, and personal items? Getting this right prevents strain and boosts well-being.
  • Productivity and Focus: A properly sized workstation gives people enough room for their tools and materials without feeling cluttered, which helps minimize distractions.
  • Space Optimization: Using your floor plan efficiently means you can fit your whole team comfortably without wasting expensive real estate.
  • Collaboration vs. Privacy: The cubicle footprint and panel height work together. Low panels and open designs encourage interaction, while taller walls provide necessary seclusion for heads-down work.

Key Terminology for Cubicle Dimensions

Before we dive into the specific sizes, let's get the language straight. When we talk about the "footprint," we’re referring to the cubicle's overall width and depth—like 6'x6' or 8'x8'. The "panel height" or "wall height" is exactly what it sounds like: how tall the partitions are. This is a huge factor in privacy and noise control.

Finally, the "worksurface" is the main desk area. Its depth and width dictate how much equipment and paperwork a person can manage without feeling crowded. Here at Cubicle By Design, we help you put all these pieces together. Once you've got these basic terms down, you’ll be much better equipped to plan a layout that truly fits your company's needs.

Common Cubicle Footprints and Their Uses

Picking the right cubicle footprint is a balancing act. You need to give your employees enough personal space to work comfortably, but you also have to make the most of your office’s square footage. The most common office cubicle dimensions are designed to fit specific roles and work styles, which thankfully makes planning a functional layout a lot easier.

Getting this choice right from the start will define the daily workflow in your office. A smaller footprint might be perfect for a high-density data entry team where focus is key, while a larger space is better suited for a manager who needs room for quick meetings. Let's break down the three industry-standard sizes.

The Compact and Efficient 6'x6' Cubicle

The 6'x6' footprint is the undeniable workhorse of the cubicle world. It's probably the most common and versatile size you'll see. Offering 36 square feet of personal space, it gives a single employee enough room to perform their tasks without feeling boxed in. For companies trying to fit a task-oriented team into a space efficiently, this is usually the go-to dimension.

These cubicles are an excellent choice for:

  • Call Centers: Agents get a dedicated, distraction-free zone for calls and data entry.
  • Data Entry Clerks: It provides just enough surface area for a monitor, keyboard, and the essential paperwork they need on hand.
  • Telemarketers and Sales Reps: They get a focused environment to manage leads and client calls without overhearing their neighbor.

A 6'x6' setup is the smart move when your main goal is getting the maximum number of people into an area while still giving each person a defined, personal workstation.

The Versatile 6'x8' Cubicle

Stepping up a bit, the 6'x8' cubicle gives you 48 square feet to play with. That extra 12 square feet makes a huge difference in practice. It allows for a more generous L-shaped worksurface, opens up the possibility of adding a second filing pedestal for more storage, or simply gives an employee more room to spread out.

This footprint is really well-suited for employees who juggle multiple tasks and need a bit more flexibility. It hits that sweet spot between space efficiency and individual comfort, making it a fantastic option for offices with a mix of different roles.

The Spacious 8'x8' Cubicle

The largest of the standard footprints, the 8'x8' cubicle, provides a generous 64 square feet of personal territory. You typically see this size reserved for managers, supervisors, or senior staff who need enough room for small, informal meetings right at their desk. The ample space can easily fit a U-shaped desk, plenty of storage, and even a guest chair or two.

An 8'x8' footprint is more than just a workstation; it’s a personal office within the larger floor plan. It supports complex workflows by offering enough real estate for multiple monitors, printers, and project layouts without ever feeling cluttered.

This dimension is perfect for:

  • Managers and Supervisors: They get the space they need to review documents with team members.
  • Engineers and Designers: Ideal for professionals who work with large blueprints or need multiple screens.
  • Accountants and HR Professionals: A great fit for roles that handle extensive physical files and require an extra layer of privacy and storage.

To help you visualize these options, here's a quick breakdown of how these footprints compare.

Quick Reference Guide to Standard Cubicle Footprints

This table summarizes the common cubicle sizes and their typical applications, helping you quickly identify the best fit for different roles within your organization.

Cubicle Dimension Total Square Feet Best For Typical Use Case
6'x6' 36 sq ft High-density, task-oriented roles Call center agent, data entry clerk, customer service representative
6'x8' 48 sq ft Professional roles requiring more workspace Administrative staff, project coordinators, IT support, general office workers
8'x8' 64 sq ft Management or specialized roles Supervisor, manager, engineer, accountant, human resources professional

Ultimately, choosing the right footprint is foundational to good office design. To see how these different sizes can be arranged in real-world layouts, be sure to check out our guide on popular cubicle configurations.

Choosing the Right Cubicle Wall Height

More than just the footprint, a cubicle’s wall height is what truly defines its function. The height of the panels has a direct impact on privacy, noise levels, and how easily your team can collaborate. Picking the right wall height isn't just about aesthetics; it's about matching the physical space to the actual work being done.

Think about it: a low wall might be perfect for a sales team that thrives on that constant back-and-forth buzz. But for roles that demand confidentiality, like in HR or finance, taller panels are non-negotiable. By strategically mixing different heights, you can create a dynamic office landscape with dedicated zones for every type of work.

This infographic gives a good breakdown of common cubicle footprints, which often go hand-in-hand with specific wall heights to suit different job functions.

As you can see, a compact 6'x6' station is built for focus, a standard 6'x8' works well for most professionals, and a roomier 8'x8' is great for managers. You’ll often find that as the footprint gets bigger, the wall height increases right along with it.

Low-Height Walls for Collaboration

Low-height cubicle walls, which usually fall between 39 to 47 inches, are all about creating an open, collaborative vibe. These panels are low enough for employees to easily see over while seated, making it a breeze to ask a quick question, bounce an idea off someone, and just generally feel connected to the team.

This setup is ideal for:

  • Creative Teams: Graphic designers, marketers, and writers can pass ideas back and forth without missing a beat.
  • Sales Departments: When quick communication is key to sharing leads and strategies, low walls are a must.
  • Agile Development Teams: This height perfectly supports daily stand-ups and that constant flow of interaction.

While these walls are great for teamwork, they offer very little in the way of acoustic or visual privacy. Their job is to define personal space without isolating people from the group.

Mid-Height Walls for Balanced Focus

Mid-height walls, typically sitting around 53 inches, are the classic compromise between privacy and openness. This is a very popular choice for a reason. This height is tall enough to give a seated employee complete visual privacy, effectively blocking out distractions in their direct line of sight.

At the same time, anyone can still see over the panel just by standing up, allowing for those quick, spontaneous chats with colleagues. This makes the 53-inch panel a super versatile option for general office roles where people need to concentrate but also need to stay accessible. You can dig deeper into how panel height affects seclusion in our guide to improving office cubicle privacy.

We see this balanced approach work really well. It creates what we call "seated privacy"—a key concept where an employee can get into deep focus at their desk but can signal availability or engage with the team just by standing up.

Full-Height Walls for Maximum Privacy

When a job demands serious concentration or confidentiality, full-height cubicle walls are the only way to go. These panels usually measure 65 inches or taller, creating a space that feels much more like a small, private office.

These heights are absolutely essential for cutting down on both visual and auditory distractions, making them the standard for any role that deals with sensitive information. For instance, our private office cubicles are specifically designed with taller panels to deliver exactly this level of seclusion and security.

Definitely consider full-height walls for:

  • Human Resources: Perfect for confidential employee conversations and handling sensitive records.
  • Finance and Accounting: Privacy is crucial when you're managing financial data.
  • Legal Departments: Needed to ensure conversations and documents stay completely confidential.

By thoughtfully choosing your panel heights, you can truly design an office environment that actively supports the unique needs of every single team.

Planning Your Workstation Surface and Storage

Once you've figured out the footprint and wall height, it's time to get into the details that really make a cubicle functional. The worksurface and storage components are where the magic happens—they directly impact an employee's comfort and how efficiently they can get through their day. Getting these elements right ensures the space inside the cubicle works just as hard as the person using it.

A good workstation gives you plenty of room for your gear without making you feel boxed in. This means picking the right desk depth, adding returns to create a smart workflow, and tucking in storage that keeps the clutter under control.

Selecting the Right Worksurface Depth

The depth of a cubicle desk is one of those critical choices that affects both comfort and how you use the space. The two most common depths you'll see are 24 inches and 30 inches, and each one is built for different kinds of work.

A 24-inch deep surface is your go-to for saving space. It’s perfect for people who mostly use a laptop or a single monitor. You still get enough room for a keyboard, mouse, and a few desk items, but without eating up extra square footage. This makes it a really smart pick for higher-density office layouts.

On the other hand, a 30-inch deep surface gives you a lot more real estate to play with. That extra six inches is a game-changer for anyone running multiple large monitors, needing space for paperwork next to their keyboard, or using specialized gear like drawing tablets. This depth also lets you sit at a more comfortable distance from your screens, which can make a big difference in reducing eye strain by the end of the day.

Creating L-Shaped and U-Shaped Desks with Returns

Want to expand the main desk area? You add a return. A return is just another worksurface placed perpendicular to the main one, instantly creating an L-shaped setup. They usually match the desk's depth (24" or 30") and come in common lengths like 36 inches or 48 inches.

  • An L-shaped desk gives you a totally separate secondary surface. It’s ideal for keeping your computer work on one side and your paperwork or reference materials on the other.
  • A U-shaped desk takes it a step further. By adding a "bridge" (a second return), you get a wraparound workspace that keeps absolutely everything within arm's reach. You'll often see this in larger 8'x8' cubicles for managers or specialists who are juggling multiple projects at once.

Integrating Storage Without Sacrificing Space

Smart storage is what keeps a workstation from turning into a mess. The trick is to provide plenty of it without cramping an employee's legroom or taking over the desk. Thankfully, standard storage units are designed to fit perfectly within common cubicle footprints.

The most common piece of storage is the pedestal file cabinet, or "ped" for short. These are typically 15 inches wide and made to slide right under the worksurface. You can get a Box/Box/File (BBF) pedestal, which gives you two smaller drawers for supplies and one large file drawer, or a File/File (FF) pedestal with two big drawers for files.

The real magic happens when you plan your layout in three dimensions. Integrating vertical storage like overhead bins or shelves makes use of the space above the desk, keeping the primary worksurface clear and focused.

For even more organization, think vertically. You can learn more about how to put that space to work in our guide on cubicle hanging shelves. By combining all these elements, you can design a highly functional space that’s personalized for any role. Our interactive Custom Cubicle Designer is a great place to experiment with these internal office cubicle dimensions and build the perfect workstation for every person on your team.

Designing for Aisle Space and ADA Compliance

The space between your cubicles is just as critical as the dimensions of the workstations themselves. When you get the aisle planning right, you create a natural flow of traffic, eliminate frustrating bottlenecks, and build a safe, accessible environment for every single person on your team. This isn't just about good design—it’s a legal requirement under the Americans with Disabilities Act (ADA).

Skimping on aisle space can lead to a workspace that’s a nightmare to navigate and opens you up to serious legal risks. By planning your circulation paths correctly from the get-go, you'll design a layout that's not only efficient and inclusive but also fully compliant with building codes. It’s a foundational step for a safe and productive office.

Primary vs. Secondary Circulation Paths

It's helpful to think of your office walkways like a road system. Not all paths serve the same purpose. We make a key distinction between primary and secondary circulation paths.

Primary paths are the main arteries of your office. Think of them as the major highways that connect the entrance to different departments, conference rooms, and common areas. These are high-traffic routes that need to be wider to easily handle people moving in both directions, often at the same time.

Secondary paths, in contrast, are the smaller local roads. These are the aisles that branch off the main paths and lead to individual cubicles. While they see a lot less foot traffic, they still have to provide clear, easy access for employees to get to their desks. Understanding this difference is key to allocating your floor space effectively.

Aisle Width Requirements

To keep things safe and efficient, there are some standard minimum widths you absolutely need to follow. Sticking to these guidelines is one of the most important parts of creating a truly functional office layout.

  • Primary Paths: For your main corridors, shoot for a width of 44 to 48 inches. This gives two people enough room to pass each other comfortably and makes moving equipment around much easier.
  • Secondary Paths: For the aisles leading to individual workstations, the minimum required width is 36 inches. This ensures a single person can walk through without feeling cramped or squeezed.

Planning for proper circulation is non-negotiable in good office design. It’s about more than just checking a box on a building code form; it’s about creating an environment where people can move freely and without hassle, which has a direct impact on their daily productivity.

Understanding ADA Compliance

The Americans with Disabilities Act (ADA) provides clear, legally binding standards to ensure workspaces are accessible to everyone, including individuals with disabilities. When it comes to cubicle layouts, these rules are not optional. The primary focus is on providing enough clearance for wheelchair users to navigate the office independently.

The most critical ADA requirement is that all accessible routes must have a clear, unobstructed width of at least 36 inches. This rule applies to every walkway, aisle, and doorway an employee might use.

Additionally, you must plan for turning space. A wheelchair needs a clear space of 60 inches in diameter (or a T-shaped space that's 60" x 60") to complete a 180-degree turn. This turning space is typically planned for at the end of cubicle rows or in open intersection areas. For a deeper dive into this subject, our office space planning guide offers even more valuable insights. Getting these dimensions right is how you build a workplace that’s truly welcoming to all.

Visualizing Your Space with Sample Layouts

Numbers and dimensions are one thing, but seeing how they actually come together in a real-world layout? That's when the lightbulb really goes on. To help you bridge that gap between theory and practice, let's walk through a few sample layouts designed for common business functions. Think of these as a practical starting point for your own space planning.

Each of these examples considers not just the cubicle footprint but also the critical aisle spacing and the resulting square footage per employee. If you're planning a full overhaul, remember that a good office relocation checklist can be a lifesaver for organizing the entire process.

High-Density Call Center Layout

Picture a busy call center where you need to maximize your team's headcount while giving each person enough focus to do their job well. This layout typically uses neat rows of compact 6'x6' cubicles, giving every agent their own defined, quiet workspace. It’s all about efficiency.

  • Cubicle Dimensions: 6'x6' (36 sq. ft.)
  • Panel Height: Mid-height (53") walls are the go-to here. They provide crucial seated privacy and help absorb sound, cutting down on the chatter that can be so distracting on calls.
  • Aisle Spacing: To keep things tight but accessible, secondary aisles between the rows are kept at the 36-inch minimum. This meets ADA compliance without eating up valuable floor space.
  • Overall Density: This configuration is a cost-effective powerhouse, letting you fit a high number of employees comfortably.

Collaborative Team Hub Layout

Now, let's switch gears to a creative or marketing team. Here, the goal is to encourage those spontaneous brainstorming sessions and easy teamwork. You'll see clusters of cubicles with lower walls, creating a more open and fluid environment.

To make this collaborative spirit work, the layout might feature:

  • Cubicle Dimensions: A smart mix of 6'x6' and 6'x8' footprints can accommodate different roles and needs within the same team.
  • Panel Height: Lower 47" walls are perfect for this setup. They allow for easy conversation over the top and contribute to a shared, energetic atmosphere.
  • Shared Spaces: Small, open zones are often integrated between the cubicle clusters. These become natural spots for quick team huddles, breaking up the old-school grid and promoting interaction.

With this approach, you're intentionally trading total privacy for better communication, creating a dynamic space where ideas can really take off.

Traditional Corporate Layout

For a more traditional setting, like a finance or legal department, the layout has to strike a careful balance between accessibility and privacy. This floor plan often features larger 8'x8' cubicles for senior staff or managers, giving them ample room for focused work and even small, private meetings.

This kind of layout immediately signals a sense of structure and focus. The bigger footprints and taller panels essentially create individual offices within the open plan, offering the seclusion needed for handling confidential tasks.

These stations often have 65-inch panels to ensure both acoustic and visual separation from the rest of the floor. You'll also see a wider 48-inch primary aisle running through the department, connecting these senior workstations to the main office flow. For more great visual ideas on arrangements like these, our cubicle gallery and look book is full of inspiration.

Your Top Questions About Office Cubicle Dimensions Answered

Figuring out the nitty-gritty details of cubicle dimensions can feel overwhelming. To cut through the confusion and help you finalize your plans with confidence, we’ve put together some clear, straightforward answers to the questions we hear most often about cubicle sizes, spacing, and custom options.

What Is the Most Common Office Cubicle Size?

In our experience, the most popular and versatile footprints are 6'x6' and 6'x8'. A 6'x6' station, giving you 36 square feet, is a real workhorse for task-oriented roles and higher-density floor plans. It hits that sweet spot between providing personal space and maximizing your real estate.

When your team needs a bit more elbow room, the 6'x8' cubicle bumps that up to 48 square feet. That extra space is perfect for people who need to spread out documents or use additional equipment, making it a go-to choice for a huge range of professional roles.

How Much Space Is Needed Between Cubicles?

This is a big one—getting the spacing right is crucial for a smooth workflow, meeting building codes, and basic safety. For your main walkways that will see two-way traffic, you'll want to plan for 44 to 48 inches of width to keep things from getting congested.

For the smaller, secondary aisles that branch off to individual workstations, a minimum of 36 inches is the standard. This isn't just a suggestion for comfort; it's a key requirement for ADA compliance, ensuring everyone can navigate the office easily and safely.

How Do I Choose the Correct Cubicle Wall Height?

Picking the right wall height really comes down to the kind of work your teams are doing. It's all about striking the right balance between privacy and collaboration, and the height you choose has a direct impact on that.

  • Low Walls (around 42”): These are fantastic for collaborative teams who thrive on constant, easy communication. Think creative departments or sales pods.
  • Mid-Height Walls (around 53”): This is by far the most popular option. It gives employees seated privacy to focus on their work but still lets them pop up to have a quick chat with a neighbor.
  • Tall Walls (65”+): If you have departments like HR or finance that handle sensitive information, these taller walls are the way to go. They offer the highest level of concentration and confidentiality by cutting down on both visual and sound distractions.

Can I Get Custom Office Cubicle Dimensions?

Absolutely. While the standard sizes are a great starting point, the beauty of modern modular cubicles is their flexibility. You can tweak almost anything—panel heights, worksurface depths, storage setups, and finishes—to build a solution that perfectly suits your team's unique workflow.

For example, our collections of workstation cubicles and private office cubicles are designed to be adapted to fit specific floor plans and job functions. This kind of adaptability ensures your office layout isn't just functional, but truly efficient.


Ready to take your ideas from the drawing board to reality? At Cubicle By Design, we make it simple to plan and see your space come to life. Explore endless possibilities and get an instant quote with our free Custom Cubicle Designer tool.

Read More

A Guide to Typical Office Cubicle Size: 6×6, 6×8, and 8×8 Layouts | Cubicle By Design

When you start planning a new office layout, the first question that almost always comes up is, "How big should the cubicles be?" For years, the industry has settled on a sweet spot: the typical office cubicle size is 6'x6' (six feet by six feet). This gives each person a solid 36-square-foot personal workspace. It's become the standard for a good reason—it perfectly balances giving an employee enough personal room without eating up the entire floor plan. Here at Cubicle By Design, we help businesses find that perfect balance every day.

Decoding the Standard Office Cubicle Footprint

For decades, the 6'x6' cubicle has been the go-to for office managers setting up spaces for everyone from administrative staff to IT pros and other general office roles. It provides enough room for a desk, a chair, and all the essential tech without making people feel boxed in. At the same time, it allows you to create a pretty dense and efficient layout. This size really took off as businesses began moving away from the much larger 8'x8' or 10'x10' stations that were common in the past.

An empty office cubicle, 6 ft by 6 ft, featuring a desk, chair, and monitor, representing the typical office cubicle size.

What drove this shift to a more compact footprint? Mostly technology. Think about it: the rise of personal computers and digital documents meant we didn't need those huge, bulky filing cabinets and massive desktops for paper storage anymore. As offices went digital, the 6'x6' dimension just made sense.

Of course, a 6'x6' is a fantastic starting point, but it's not the only option. Understanding the different cubicle configurations and their overview can open your eyes to even more possibilities for your workspace, helping you find that perfect mix of comfort and cost-effectiveness. Our full range of cubicles can be tailored to fit any need.

Common Office Cubicle Sizes at a Glance

To give you a clearer picture, we've put together a quick reference guide for the most common cubicle dimensions and what they're best used for. This table should help you match the right footprint to the different roles within your company.

Cubicle Size Square Footage Ideal For Typical Panel Height
5'x5' 25 sq. ft. Call Centers, Telemarketing, Data Entry 42" – 53"
6'x6' 36 sq. ft. General Office, Administrative, IT Support 53" – 65"
6'x8' 48 sq. ft. Developers, Accountants, HR Professionals 53" – 65"
8'x8' 64 sq. ft. Managers, Supervisors, Executive Staff 65" or higher

Think of this as the first step toward creating an office that’s both functional and genuinely productive. Whether you just need a few stations or you're outfitting an entire floor, getting the size right from the start makes all the difference.

Matching Cubicle Dimensions to Job Functions

A one-size-fits-all approach just doesn't cut it in a modern office. While the typical office cubicle size of 6'x6' is a great starting point, the reality is that different roles have vastly different needs. Tailoring the dimensions of a workstation is one of the easiest ways to boost comfort and productivity.

Think about a call center agent. They need a compact, focused station. A 5'x5' cubicle acts like a cockpit, keeping everything—phones, headsets, scripts—within immediate reach for fast, repetitive tasks.

On the other hand, software developers, analysts, and other knowledge workers need room to breathe. A 6'x8' layout gives them the space for multiple monitors, stacks of reference materials, and maybe even a few code printouts. That extra real estate prevents a cramped, frustrating work environment.

Call Center Workstations

For call centers, the name of the game is high density and low distraction. Using smaller footprints is a smart way to manage real estate costs without sacrificing function.

  • Space Efficiency: A 25-square-foot station lets you maximize your headcount per square foot.
  • Acoustic Control: Lower panel heights (42-53 inches) are perfect for dampening background chatter without making agents feel completely isolated.
  • Minimal Storage: A simple under-desk pedestal is usually all that's needed to hold personal items and keep the work surface clear.

Just be sure your layout leaves enough room for people to move. Even in a high-density setup, you have to maintain at least 36 inches of aisle width to meet ADA guidelines and ensure smooth traffic flow.

Now, let's shift gears to the folks who spend their days juggling data, design, and complex problems.

"A developer’s cubicle is like a designer’s studio—it needs room to spread out ideas and tools."

Developer and Knowledge Worker Spaces

Developers and similar knowledge workers often feel most comfortable with 48 square feet of space, typically in a 6'x8' layout. That extra 12 square feet over a standard cubicle makes a world of difference.

  • Dual Monitors: It provides enough width for an ergonomic multi-monitor setup, which means fewer head twists and less neck strain.
  • Document Spread: There's enough desktop area for blueprints, notebooks, and tablets to coexist without feeling cluttered.
  • Personal Touch: It leaves room for a whiteboard, a plant, or other personal items that can foster creativity and focus.

For more inspiration on how to get these layouts just right, check out our guide on Office Cubicle Design Ideas.

Role Cubicle Size Square Footage Panel Height
Call Center Agent 5'x5' 25 sq. ft. 42"-53"
Knowledge Worker 6'x8' 48 sq. ft. 53"-65"
Manager 8'x8' 64 sq. ft. 65"-84"

Manager Cubicles

Managers often need a space that pulls double duty: a private office for focused work and a mini-conference room for small huddles. An 8'x8' cubicle can serve as a command center, with enough space for meetings, storage cabinets, and a guest chair. Our Private Office Cubicles are perfect for this.

  1. Privacy and Presence: Tall panels (65-84 inches) offer the confidentiality needed for sensitive phone calls or one-on-one performance reviews.
  2. Collaboration Zone: The larger footprint easily accommodates two additional chairs, inviting quick brainstorming sessions with team members.
  3. Multi-Use Storage: You can outfit these spaces with overhead bins and lockable pedestals to keep important materials organized and secure.

Practical Planning Tips

When you're mapping out cubicles for different roles, don't just think about the footprint. You also have to consider things like natural light, traffic flow, and access to shared resources like printers.

Always measure from the center of each workstation to ensure you have adequate clearance.

  • Aisle Clearances: Standard aisles require a minimum of 36 inches, but main corridors need 60 inches to be fully ADA compliant.
  • Light Access: Try to place developers and other visually-focused workers near windows to take advantage of daylight, which is proven to help focus.
  • Equipment Zones: Leave at least 2 feet of clearance behind chairs so people can move around safely without bumping into things.

Remember to account for the little things, too, like the space a chair needs to swivel or where all the cables will go. Office chairs typically need a 30-inch turning radius, so make sure your workstations can handle that.

  • Panel Heights: Tailor the walls to the task. Use shorter 42-inch panels to encourage collaboration or taller 65-inch walls for deep-focus privacy.
  • Power Access: Plan your power poles or base feeds so every single cubicle has at least two outlets. Nobody wants to fight over a power strip.
  • Cable Management: Allot about 6 inches of under-desk tray space to neatly tuck away cords and network cables.

Before you order a single panel, sketch everything out on a floor plan. This simple step can save you from a world of headaches and costly reconfigurations down the road. By following these strategies, you'll be able to align your cubicle dimensions perfectly with each role's workflow and your building's codes.

How Cubicle Sizes Have Evolved Over Time

The cubicle sizes we think of as "standard" today didn't just appear overnight. Their dimensions tell a story, reflecting decades of change in how we work, the technology we use, and even our management philosophies. Knowing this backstory helps you understand why a 6'x6' or an 8'x8' footprint isn't just a random measurement—it's a strategic choice.

Think back to the mid-20th century, before the cubicle even existed. Offices were often huge, open rooms packed with identical desks, a scene straight out of Mad Men. It was an era of total transparency and zero privacy, where rows of clerks worked under the constant watch of supervisors.

The Birth of the Action Office

The real game-changer arrived in the mid-1960s with Herman Miller's "Action Office" line. This was the true beginning of the modern cubicle, a concept designed to give employees a little bit of their own turf. These first modular workstations, often 6'x8' and 8'x8', were a direct answer to the cold, impersonal factory-floor style of older offices.

These early designs were surprisingly spacious. They recognized that professional work required room to spread out papers, house equipment, and actually focus. For the first time, an employee’s personal workspace was seen as a tool for getting things done, not just a spot to clock in and out.

The Shrinking Footprint and the Tech Boom

As cubicles caught on in the 70s and 80s, panel heights shot up to an average of 60-84 inches, creating genuine semi-private offices. The workstations themselves were often 66 inches deep to make room for the massive CRT monitors that came with the first personal computers. By the 1990s, nearly 50% of employees were using these early PCs, solidifying the cubicle's place in office life. To dig deeper into this history, you can read more about the evolution of the office cubicle and see how it shaped the way we work.

But the tech boom that made cubicles essential also started their next transformation. As computers got smaller and flatter, the need for huge, deep desks began to fade. Laptops took over, and digital files meant fewer filing cabinets. This drive for efficiency and cost savings is what eventually gave us the standardized 6'x6' cubicle we see everywhere today.

This isn't just a history lesson—it shows that cubicle sizes have always adapted to the tools and workflows of the time. Choosing the right size for your office is about continuing that tradition.

The journey from sprawling 10'x10' stations to modular 6'x8' systems, and finally to the efficient 6'x6' footprint, is a direct reflection of workplace innovation. Each size represents a different era of work, from the paper-and-pencil past to our digital-first present.

Planning Your Office Layout With Standard Cubicles

Knowing the typical office cubicle size is just the first step. The real art is in arranging those individual footprints into a cohesive, functional floor plan that actually works for your team. This is where you transform measurements on paper into a living, breathing workspace that flows efficiently and keeps everyone productive.

Good planning prevents frustrating bottlenecks, ensures safety, and frankly, creates an environment where people can do their best work without feeling cramped.

This infographic really puts the evolution of office design into perspective, showing the shift from chaotic open plans to the more focused, personal workstations we rely on today.

Diagram illustrating the evolution of office spaces from open-plan to modern cubicles, showcasing privacy improvements.

There's a clear trend here: finding that sweet spot between personal space and an efficient layout. That’s pretty much the core principle of modern office design.

When you're knee-deep in planning a new office, it’s easy to get tunnel vision on the cubicles themselves. But a smooth move involves a lot more. For a seamless transition, it's worth following a comprehensive office relocation checklist to make sure no detail gets missed and your layout plan translates perfectly into the new space.

Essential Walkway Clearances

The space between the cubicles is just as critical as the space inside them. Walkways are the arteries of your office, and they need to be wide enough for comfortable movement, wheelchair access, and safe emergency exits. Anything less, and you've got a problem.

Think of your office layout like a small city grid. You’ve got your main streets and your smaller side alleys, and each needs a different amount of clearance.

The table below breaks down the key measurements you'll need to create a layout that is safe, accessible, and easy to navigate.

Office Layout Clearance and Spacing Guidelines

Area Type Minimum Recommended Width (Standard) Minimum ADA Compliant Width Planning Notes
Minor Walkways 36 inches (44" preferred) 36 inches Paths between individual cubicles or small clusters. 44" feels much less cramped.
Major Thoroughfares 44-48 inches 60 inches Main arteries to exits, break rooms, restrooms. 60" is required for two-way traffic and wheelchair turns.
Seated Employee Aisle 36 inches 36 inches The space behind a seated person's chair to allow others to pass by.
Workstation Entrance 32 inches 32 inches The opening into the cubicle itself must be wide enough for clear entry and exit.

Getting these clearances right isn't just about ticking a box for compliance; it's about creating a stress-free environment. No one wants to feel like they're squeezing through a crowded maze just to get to the printer.

Strategic Layout Patterns

Once you've nailed down your clearances, you can start arranging your cubicles into patterns that actually make sense for your workflow. Don't just line them up in boring rows. Consider configurations that encourage teamwork and make the most of your square footage.

  • Quad Clusters: Grouping four cubicles in a square is a classic for a reason. It creates a natural team pod, making it easy for colleagues to communicate while still having their own defined space.
  • Pinwheel Layouts: This is a smart twist on the quad cluster where desks are offset. It creates a more dynamic look and gives each person a bit more privacy. It’s a great way to break up the monotony of a large office floor.
  • Spine-and-Ribs: In this setup, a central "spine" of panels runs down a line, with individual workstations branching off like ribs. This layout is incredibly efficient for organizing power and data cabling.

For a deeper dive into these and other smart setups, our guide to office space planning and design offers expert advice to help you find the perfect fit.

The Role of Panel Height

Panel height is one of the most powerful—and often overlooked—tools you have for shaping your office culture. The height of the walls dictates the level of privacy and collaboration, and you can use different heights to your advantage.

  • Low Panels (42 inches): These are perfect for highly collaborative teams. They create a sense of personal territory without blocking sightlines, so asking a quick question or sharing an idea is effortless. You'll often see these in sales or creative departments.
  • Mid-Height Panels (53 inches): This is the sweet spot for many general office roles. It offers seated privacy, letting employees focus without visual distractions, but they can still easily see and talk to colleagues just by standing up.
  • Tall Panels (65 inches or higher): For roles that demand deep concentration or confidentiality, like HR or finance, tall panels are a must. They create a true semi-private office, blocking both visual and auditory distractions far more effectively.

By mixing and matching panel heights, you can create distinct zones within your office—an open, buzzing area for teamwork alongside quiet, focused sections for individual work. This kind of thoughtful approach ensures every team has the right environment to thrive.

Looking Beyond Dimensions to Essential Features

A truly effective workstation is more than just its footprint. While the typical office cubicle size sets the foundation, the real magic happens when you get the features inside that space right. Planning for these details from the start is what separates a frustrating setup from a productive one.

Modern office cubicle desk with integrated power outlets, cable management trays, and a file cabinet.

The single most common oversight? Power and data. In any modern office, seamless connectivity is completely non-negotiable. Waiting until after the cubicles are installed to figure out wiring is a surefire recipe for messy extension cords, tripping hazards, and a whole lot of headaches.

Planning for Power and Data

Integrating power from day one ensures every employee has the juice they need to stay productive. It’s a make-or-break decision that impacts both the cleanliness of your layout and your final budget.

There are two main ways to get power and data flowing to your cubicle clusters:

  • Power Poles: Think of these as vertical channels that run from the ceiling down to the cubicle panels. They're a fantastic solution for open office plans where wall outlets are nowhere in sight, offering a clean, direct power source.
  • Base-In Feeds: This approach brings power and data in from the wall or floor right through the base of the cubicle panels. It’s often a more discreet option that keeps every wire completely hidden from view for a tidier, more professional look.

Both methods can be configured to support multiple electrical circuits, making sure that power-hungry equipment doesn't trip a breaker. Talking through your team's specific needs with a specialist like Cubicle By Design can help you figure out the most efficient and code-compliant solution for your building.

Maximizing Space with Smart Storage

Even in a roomy 6'x8' workstation, bad storage can make the space feel cluttered and chaotic. The real goal is to build in storage that works with the cubicle's dimensions, not against them.

Think of smart storage as a way to reclaim precious desktop real estate. Instead of letting papers and supplies pile up, integrated solutions keep everything organized and within easy reach.

A well-planned storage system can increase a cubicle's functional workspace by up to 30%, transforming a standard footprint into a highly efficient command center.

Here are some of the most effective storage workhorses for any cubicle size:

  • Pedestals: These under-desk filing cabinets, often called "peds," are the backbone of cubicle storage. A box/box/file setup is perfect for everyday items, while a file/file configuration is better for roles that handle a lot of documents.
  • Overhead Bins: Going vertical with your storage is the smartest move you can make. Overhead bins and shelves get less-used items like binders and manuals off the desk but keep them easily accessible.
  • Wardrobe Towers: For larger cubicles, a wardrobe tower is a great addition. It provides a dedicated spot for coats, bags, and personal items, keeping the main work area free of clutter.

Working these solutions into your initial plan helps create a more organized and productive environment from the get-go. For instance, our Private Office Cubicles and versatile Workstation Cubicles can be fully customized with the perfect mix of storage for any job.

The Impact of Materials and Finishes

Finally, don't underestimate how much your choice of materials can shape the entire atmosphere of your office. The fabrics, laminates, and glass you pick for your cubicle panels do a lot more than just add color—they affect light, sound, and the overall vibe of the workspace.

  • Fabric Panels: Fabric is a champ at sound absorption, helping to muffle ambient noise in a busy office. With a huge range of colors, it’s also an easy way to bring your brand identity into the space.
  • Laminate Surfaces: Durable and a breeze to clean, laminate desktops and panels offer a sleek, modern look. You can add warmth with wood grain finishes or go for a clean, contemporary feel with solid colors.
  • Glass Panels: Adding frosted or clear glass panels to the top of cubicle walls is a game-changer. It lets natural light filter through the office, making the whole space feel brighter and more open without sacrificing privacy.

Visualize Your Perfect Layout with Our Cubicle Designer

Alright, you've done the homework on typical office cubicle sizes. Now for the fun part: bringing your vision to life. Moving from ideas on paper to a concrete plan can feel like a big step, but it doesn't have to be intimidating. This is exactly why we created the free Cubicle Designer tool right here at Cubicle By Design.

Think of our designer as your personal digital sandbox for laying out your office. It’s a completely risk-free environment where you can play around with different workstation footprints, test-drive various configurations, and see exactly how your choices will look and feel—all before spending a dime.

Turn Ideas into Actionable Plans

The real magic of a tool like this is that it completely eliminates guesswork. Instead of just trying to imagine how a pod of 6'x6' workstation cubicles might fit into a corner, you can actually build it out virtually. This hands-on approach helps you dial in your budget, get buy-in from stakeholders, and just feel more confident in your decisions.

As you get into the design phase, it's always a good idea to explore features of office planning tools to see what's possible. Our designer makes it simple by letting you tweak all the important details in real-time.

  • Experiment with Dimensions: Want to see how a standard 6'x6' compares to larger private office cubicles? Drop them into your floor plan and see how it affects traffic flow and overall space.
  • Select Finishes and Materials: Browse through a huge palette of fabrics, laminates, and glass options to find the perfect match for your company's vibe.
  • Configure Storage and Power: Add the practical stuff that makes a workstation actually work, like overhead bins, filing pedestals, and integrated power, with just a few clicks.

This screenshot from our Custom Cubicle Designer gives you a peek at how easy it is to select panel fabrics and worksurface finishes to create a cohesive, professional look.

Seeing these details come together visually ensures the final product is a perfect fit for both your brand and your team's day-to-day needs.

From Visualization to Reality

Once you’ve nailed down the perfect design, turning it into a real-world office is a seamless next step. The tool lets you submit your creation directly to our team, and we'll get a fast, no-obligation quote right back to you. We designed this direct path from learning to creating to save you a ton of time and make the whole process smoother.

Ready to start building? For a deeper dive into getting the most out of this powerful tool, check out our guide on how to transform your office with our interactive cubicle designer.

Common Questions About Office Cubicle Sizes

Even with a solid plan in hand, a few last-minute questions always seem to pop up before you finalize an office layout. Getting these details right is what turns a good design into a great one that's not just efficient, but genuinely functional for the long haul.

We've pulled together the most common queries we hear. These usually revolve around the space between the cubicles, how to encourage teamwork without creating a free-for-all, and whether you can mix and match different sizes. Let's get you the clarity you need to move forward with confidence.

How Much Space Do I Need Between Cubicles?

This is one of the most critical parts of any layout. Walkway clearance isn't just a "nice-to-have"—it's a non-negotiable for safety, accessibility, and the simple comfort of moving around the office. If you skimp here, you'll end up with a cramped, frustrating environment nobody wants to work in.

To keep it simple, just stick to these rules of thumb:

  • Standard Walkways: For the smaller paths between individual workstations or small groups, you need a minimum of 36 to 44 inches. This gives one person enough room to walk by comfortably without bumping into someone who's seated.
  • Main Pathways & ADA: For any main artery—think paths to exits, the break room, or conference areas—you must provide at least 60 inches of clearance. This wider space is an ADA requirement to accommodate wheelchair turning and ensures your office is accessible to everyone.

Planning for generous walkways from the start is one of the smartest (and free-est) investments you can make in your office design. It pays huge dividends in daily comfort and safety.

What's the Best Cubicle Size for Collaboration?

You don't have to tear down all the walls to get people talking. The trick is to find that sweet spot where communication can happen organically, but people can still get their focused work done. The best setups for collaboration are usually a smart mix of the right cubicle size and panel height.

For teams that need to be in constant contact, like a sales or marketing group, a 6'x6' cubicle is often perfect. It gives everyone enough personal space to breathe but keeps them close enough to connect. The real secret weapon, though, is using lower panel walls, typically between 42 and 53 inches high. This height gives you privacy when you're sitting down but makes it easy to pop your head up for a quick, over-the-wall conversation.

Check out our workstation cubicles to see some great examples of these collaborative setups.

Can I Mix Different Cubicle Sizes in the Same Office?

Absolutely! In fact, we highly recommend it. Mixing cubicle sizes is one of the most effective ways to create a dynamic workspace that actually reflects how your company operates. A varied layout lets you match the workstation to the job, which makes for a more efficient and visually interesting office.

For instance, you could line the perimeter with larger 8'x8' private office cubicles for managers who need space for private meetings. Then, in the middle, you could arrange pods of 6'x6' cubicles for teams that work together all day. This approach not only supports different work styles but also helps create a natural flow and hierarchy in the office. Just make sure you keep those walkway clearances consistent to keep the whole floor plan feeling cohesive.


Ready to turn these ideas into a concrete plan? The team at Cubicle By Design is here to help you navigate every step, from the first sketch to the final installation. Get started by exploring our solutions or jump right in and start building your ideal layout.

Design Your Dream Office with Our Free Cubicle Designer Tool

Read More

A Practical Guide to the Standard Size of Cubicle | Cubicle By Design

When you're trying to figure out the most common cubicle size, the industry overwhelmingly points to the 6'x6' (six-foot by six-foot) footprint. This versatile 36-square-foot space hits the sweet spot for most office tasks, giving it a well-earned reputation as the go-to starting point for any layout plan from Cubicle By Design.

Decoding the Language of Cubicle Dimensions

Staring at a blank floor plan can feel like trying to solve a puzzle with half the pieces missing. You’ll hear terms like "6×6" or "8×8" thrown around, but what do those numbers actually mean for your team’s comfort and productivity? Choosing the right size is about more than just measurements—it’s about designing a space that just works.

The office has come a long way from the paper-stacked mazes of the past. Today's workspaces are dynamic, tech-driven hubs built for both deep-focus work and quick collaboration. We dive into this shift in our guide on the evolution of the office cubicle, which really explains why certain dimensions became the industry standard.

From Footprints to Functionality

The key is to think beyond simple dimensions. Every footprint directly impacts an employee's ability to concentrate, collaborate, and stay organized. The goal isn't just to fill a room; it's to match the space to the demands of the job.

Just as a chef needs different counter space for different tasks, an employee's workspace must support their specific workflow. A one-size-fits-all approach rarely leads to peak efficiency or satisfaction.

This guide will break it all down, starting with a quick-reference table to help you visualize how different cubicle footprints translate into real-world applications for your team.

Quick Guide to Common Cubicle Sizes by Role

Think of this table as a cheat sheet for kickstarting your office plan. It lines up the most common cubicle dimensions with the roles they serve best, making it easier to picture how each size fits into a modern office.

Cubicle Size Typical Use Case Key Benefit
5' x 5' Call centers, data entry, touchdown stations High-density efficiency and space savings
6' x 6' General office staff, HR, administrative roles Versatile balance of space and privacy
6' x 8' Tech roles, designers, engineers needing more room Extra surface area for monitors or layouts
8' x 8' Managers, supervisors, roles requiring meetings Accommodates a guest chair and storage

As you can see, each size is tailored for a specific type of work. The versatile 6'x6' became the industry gold standard for good reason—it provides enough room for most general office staff without eating up too much valuable floor space. For a look at our full range, check out our cubicles.

Breaking Down Common Cubicle Dimensions

Choosing the right cubicle size is about more than just numbers on a floor plan. It’s about getting a feel for the real-world experience of working in that space day in and day out. Each footprint is built for a specific kind of workflow, directly shaping everything from an employee's focus to their ability to collaborate. This is where we stop talking about abstract measurements and start talking about practical, functional workspaces.

Let’s translate those common cubicle sizes into tangible workstations you can actually visualize for your team. Once you understand how each dimension feels and functions, you can make smart decisions that line up with your company’s needs and its culture.

This infographic really gets to the heart of office planning, showing how privacy, collaboration, and budget are all tangled together.

A concept map illustrating how office planning relates to privacy, collaboration, and budget to find the right standard cubicle size.

As you can see, a great office layout finds that sweet spot where all three factors meet. The goal is a space that's not only cost-effective but also genuinely supportive of how your team actually works.

The Compact 5'x5' Footprint

The 5'x5' cubicle is the definition of efficiency. It offers a tight 25-square-foot workspace designed for high-density environments where you need to maximize every inch. This size is a perfect match for roles that are almost entirely computer-based and don’t involve much physical paperwork, like call centers, data entry clerks, or telemarketing teams.

Think of it as a focused cockpit. There's just enough room for a computer, a phone, and the essentials—and not much else. This compact setup is brilliant for minimizing distractions and maximizing the number of workstations you can fit into an area, making it a budget-friendly choice for large teams handling repetitive tasks.

The Versatile 6'x6' Footprint

We mentioned it before, but the 6'x6' cubicle is the undisputed industry standard for good reason. At 36 square feet, it strikes an ideal balance between personal space and spatial efficiency, making it the go-to workhorse for most general office roles. This is the sweet spot for administrative staff, HR professionals, and project coordinators.

An employee in a 6'x6' station has plenty of room for an L-shaped desk, a couple of monitors, and some personal storage like a filing pedestal. It offers just enough "breathing room" to feel comfortable and focused without completely isolating team members from one another. For a deeper dive into how these can be laid out, check out our overview of popular cubicle configurations.

The 6'x6' cubicle is the jack-of-all-trades in office design. It’s large enough to support focused, multi-faceted work but compact enough to maintain a sense of team cohesion and fit within most floor plans.

The Expansive 6'x8' Footprint

When a role demands more real estate, the 6'x8' cubicle is the answer. Offering a generous 48 square feet of space, this dimension is ideal for employees who need to spread out. Think engineers, designers, or architects who are constantly working with large drawings, blueprints, or multiple oversized monitors.

That extra room is crucial for work that goes beyond a single screen. Those extra two feet can accommodate a much larger U-shaped work surface, more extensive storage, or simply provide more room to move around. It’s a significant upgrade that supports complex, detail-oriented tasks without needing to jump to a fully private office.

The Private 8'x8' Footprint

At a roomy 64 square feet, the 8'x8' cubicle starts to blur the line between a workstation and a small office. This generous footprint is typically reserved for managers, supervisors, and employees whose roles require a high degree of confidentiality or frequent small, private meetings.

This size easily fits a guest chair, making it simple to have one-on-one conversations without having to hunt down an open conference room. These spacious layouts are almost always paired with higher panels to create a true sense of privacy, making them an excellent choice for roles in finance, legal, or management.

How Panel Height Shapes Your Office Culture

A cubicle's size isn't just about its footprint on the floor. What really shapes the employee experience—and your company culture—is the height of the walls. This one factor directly controls privacy, manages noise, and dictates how easily people can collaborate.

Think of panel height as a privacy dial for your office. Turn it down low, and conversation flows freely. Turn it up high, and you create a secluded world for deep focus. Striking the right balance is all about matching your team's need for focus with your company's desire for an open, connected atmosphere.

Three office cubicles showing 42-inch low, 53-inch mid, and 65-inch tall heights with people working in each.

Choosing the right height is a strategic decision. It sends a clear message about how you expect work to get done.

Low Panels: Built for Collaboration

Low panels, usually around 42 inches tall, are all about encouraging open communication. At this height, employees have clear sightlines across the office, making it effortless to ask a quick question, bounce an idea off a coworker, or just feel the buzz of the team.

This setup is perfect for high-energy departments like sales, marketing, or creative teams that thrive on constant interaction. The low walls cultivate a real sense of community and transparency, which can be a powerful tool for building team spirit.

Mid-Height Panels: The Best of Both Worlds

By far the most common and versatile choice, mid-height panels stand around 53 inches. They offer what we call "seated privacy"—when an employee is sitting, they’re shielded from visual distractions, letting them get into the zone.

But the moment they stand up, they can see and speak with colleagues. This makes mid-height panels a fantastic middle ground, perfectly balancing the need for individual concentration with the ability to connect. It’s the go-to for a huge range of roles, from admin staff to project managers, because it just works.

Mid-height panels give employees a personal space for deep work while keeping them connected to the team. It prevents the isolation that can creep in with high-walled workstations.

This adaptability is exactly why the 53-inch height is so popular in modern office design. It allows for quiet focus without killing the collaborative vibe.

Tall Panels: For Maximum Focus and Confidentiality

When a job demands serious concentration or involves sensitive information, tall panels of 65 inches or more are the only way to go. These panels create semi-private offices that dramatically cut down on both visual and auditory distractions.

High-walled workstations are a no-brainer for finance, legal, or HR teams handling confidential data daily. They're also ideal for anyone who needs long, uninterrupted stretches of thought—think developers, writers, or researchers. If you want to learn more about creating these zones, you can explore our guide on effective office cubicle privacy.

Many businesses find a mix-and-match approach works best. You can design a high-energy "collaboration hub" with low panels for your sales team, then create a "quiet zone" with tall panels for your accounting department. With the flexibility of Cubicle By Design, you can build a truly dynamic layout that supports every single person on your team.

Mastering Your Office Layout and Space Planning

Once you have a feel for the right cubicle footprints and panel heights for your teams, the next big step is arranging them into a floor plan that actually works. This is so much more than just a game of office Tetris; it’s about creating a functional, intuitive environment where work can flow without a hitch. Thinking about the standard size of cubicle you've chosen gives you a predictable building block for mapping out the entire workspace.

A well-designed layout doesn't just squeeze everyone in—it boosts productivity, ensures safety, and frankly, just makes the office a better place to be. This means taking a thoughtful approach to walkways, shared spaces, and the overall circulation of people throughout the day.

An office floor plan blueprint showing 6x6' cubicle stations and 36-inch aisles, highlighting office layout planning.

Calculating Your Space Per Employee

Before you start placing a single cubicle on your blueprint, you absolutely have to understand your total space allocation. A common mistake we see is people only counting the workstation itself. The real calculation for square footage per employee must also include their slice of common areas like hallways, break rooms, conference rooms, and the reception area.

As a general rule of thumb, industry benchmarks suggest aiming for 150 to 200 square feet per person. This is a comfortable average for a traditional office layout that accounts for both personal and shared spaces, helping you avoid a cramped, inefficient environment. Of course, this can shift. For higher-density layouts like call centers, the number might shrink to around 80-150 sq. ft., while more spacious executive layouts could easily expand to 250 sq. ft. or more.

Think of it like city planning. A residential lot (the cubicle) is important, but you also need to account for roads, parks, and public buildings to create a functional community.

Ensuring ADA Compliance and Safe Walkways

The space between cubicles is just as critical as the workstations themselves. Getting the aisle width right is completely non-negotiable for safety, accessibility, and creating a comfortable flow of foot traffic. If you ignore these guidelines, you're setting yourself up for frustrating bottlenecks and, worse, serious compliance issues.

To make sure your office is accessible to everyone, stick to these key ADA (Americans with Disabilities Act) guidelines:

  • Main Aisles: These are the primary corridors in your office. They should be a minimum of 44 inches wide, though we often recommend 48-60 inches for high-traffic areas.
  • Secondary Walkways: These are the smaller paths that lead to individual workstations. You'll need a minimum width of 36 inches here for comfortable passage.
  • Clearance Behind Desks: Always leave at least 3 feet of space between the back of a seated employee's chair and the next obstacle. This gives them room to push back and stand up without any trouble.

Following these rules ensures your layout isn't just code-compliant but also comfortable and easy for every single member of your team to navigate.

Partnering with Experts for a Perfect Plan

While these rules of thumb provide a great starting point, creating a truly optimized layout can get complicated fast. To really get it right, it’s worth consulting a comprehensive resource for designing an effective office building layout that supports productivity and workflow.

Or, even better, you can remove all the guesswork by working with professionals. Expert layout assistance means every detail is considered, from power and data placement to figuring out which teams need to be near each other. At Cubicle By Design, our team specializes in turning your vision into a professional, code-compliant reality. You can learn more about our hands-on approach with our detailed office space planning and design services. We help you maximize every last square foot, ensuring your investment results in a workspace that is both beautiful and highly functional.

Weaving Power and Data Into Your Layout

Picking out the right size cubicle is a great start, but it's only half the battle. A modern office grinds to a halt without easy access to power and data, yet this crucial element is often an afterthought. That mistake leads to the all-too-familiar nest of tangled cables, overloaded circuits, and frustrated employees.

Thinking about your electrical needs from day one is the only way to sidestep these headaches. It’s about building power solutions right into the furniture itself, instead of daisy-chaining a bunch of extension cords and power strips after your team has already moved in.

Planning for Power and Data Needs

First things first: you need a clear picture of what each person actually needs to do their job. A developer powering multiple high-res monitors and a half-dozen gadgets has completely different demands than an admin who just needs to plug in a laptop.

A quick audit of your team’s tech needs can save you from major problems later on. For every single workstation, think about:

  • How many outlets? Count it up: laptops, monitors, phone chargers, desk lamps, and anything else that needs a plug. It adds up fast.
  • Data ports: Does this person need a rock-solid, hardwired ethernet connection, or is Wi-Fi good enough for their role?
  • USB ports: Could built-in USB charging ports for phones and accessories help clear up some desk clutter and free up a standard outlet?
  • What's next? Is it likely you'll be adding more equipment down the road? Planning for an extra outlet or two is always a smart bet.

Tidy Solutions for Cable Management

Thankfully, modern cubicle systems are designed with all this in mind, offering built-in ways to keep wires completely hidden. This isn't just about looks—it's a huge safety win, getting rid of those nasty tripping hazards.

The best systems use raceways, which are just hollow channels usually found at the base of the cubicle panels. All your power and data cables run through these channels, bringing connectivity right to the desktop without a single wire showing on the floor. Power is delivered to the entire setup through a base-in feed, which hooks the system directly into your building's electrical grid from a floor or wall connection.

Think of an integrated power system as the central nervous system of your office. When it's done right, you never see it, but it’s essential for everything to function smoothly.

Keeping Your Setup Safe and Scalable

This is one area where you absolutely don't want to DIY. Getting the electrical infrastructure for your cubicles done safely and up to code is non-negotiable. While your local codes are what matter most, resources like these Australian Electrical Wiring Standards show just how serious and detailed this work is.

Working with a full-service partner like Cubicle By Design takes all that complexity off your plate. Our team handles these technical details from the very beginning, making sure your power setup is safe, can grow with you, and fits seamlessly into your final layout. To see what a professional plan looks like, take a look at our guide to a proper cubicle electrical setup—it makes all the difference.

Build Your Ideal Workspace in Minutes

All the planning and knowledge you’ve gathered on the standard size of cubicle options and layouts comes together right here. It’s time to stop visualizing and start building. This is where your vision for a perfectly balanced workspace moves from a theoretical idea to a tangible, interactive design.

Instead of sketching layouts on paper or just trying to imagine how different pieces fit, you can step into a digital sandbox built just for this. It’s a space where you can experiment freely, test ideas, and see your future office take shape in real-time—all without any risk or commitment. This whole process takes the guesswork out and lets you make decisions you can feel confident about.

Your Personal Design Sandbox

Think of our online Custom Cubicle Designer as your personal workshop. It’s a powerful, intuitive tool that puts you in the driver's seat, letting you apply everything you’ve learned about footprints, panel heights, and workflow. With just a few clicks, you can translate your requirements into a custom configuration.

We designed it to be incredibly straightforward. You can easily drag and drop components, change dimensions, and cycle through different options to land on the perfect combination. The goal is to make designing your office accessible, efficient, and honestly, pretty enjoyable.

Here’s a quick look at what you can do:

  • Select Footprints: Start with popular standards like 6'x6' or 8'x8', or create a completely custom dimension to fit your unique floor plan.
  • Adjust Panel Heights: Instantly switch between low, collaborative panels and tall, private walls to create distinct zones for different teams.
  • Choose Finishes: Experiment with a huge array of fabrics, laminates, and trim colors to match your company’s branding and aesthetic.
  • Add Storage and Power: Seamlessly integrate pedestals, overhead bins, and electrical systems to build a fully functional workstation.

From Concept to Creation

This isn't just about picking parts from a catalog; it's about crafting a cohesive workspace that truly supports your team. Whether you’re designing high-privacy private office cubicles for your management team or open-concept workstation cubicles for a collaborative department, the designer lets you see exactly how your choices will impact the final look and feel.

This tool bridges the gap between your ideas and a functional, professional layout. It transforms complex planning into a simple, creative exercise, ensuring the final result aligns perfectly with your budget, workflow, and vision.

By the time you're done, you'll have more than just a concept—you'll have a detailed design ready for a quote. It’s the fastest way to explore the endless possibilities for your new office.

Ready to get started? Dive into the designer now and begin building the ideal workspace for your team in minutes.

Common Questions We Hear About Cubicle Sizes

Even when you think you've got the perfect floor plan nailed down, a few practical questions always seem to pop up. Think of this as a quick cheat sheet for the most common queries we get, reinforcing some of the key ideas we've covered so you can move forward with confidence.

What’s the Most Popular Standard Cubicle Size?

Hands down, the 6'x6' cubicle is the industry workhorse. Its 36-square-foot footprint just hits that sweet spot between providing enough personal workspace and being efficient with your floor space. It's the go-to for most general office roles, easily fitting an L-shaped desk and some storage without making anyone feel boxed in.

How Much Space Do I Need for Walkways Between Cubicles?

This is one of those things you can't afford to get wrong. For basic, comfortable movement, you need an absolute minimum aisle width of 36 inches.

But honestly, for main pathways where people are constantly moving, you'll want to aim for 44 to 48 inches. This isn't just about comfort; it's about meeting ADA compliance and preventing a daily traffic jam. Skimping on walkway space is a surefire way to create a frustrating and cramped office.

A little extra room in the walkways makes a massive difference in the daily flow of an office. It’s a small detail that ensures your space is welcoming and safe for every single person who walks through the door.

Can I Mix Different Cubicle Sizes in the Same Office?

Absolutely, and you probably should! Mixing and matching cubicle sizes and panel heights is one of the smartest ways to build a flexible workspace that actually supports how different teams work. It's a core principle of modern office design.

For example, you could set up a high-energy "pod" of low-panel 5'x5' workstation cubicles for a sales team that thrives on collaboration. Meanwhile, your finance or legal teams, who need quiet for deep focus, could get taller, more private 6'x8' private office cubicles.

This kind of tailored approach is exactly what we specialize in at Cubicle By Design—creating zones that help each department do their best work.


Ready to turn all this knowledge into a real-world plan? The team at Cubicle By Design is here to walk you through every step, from initial layout to final installation. Get started and bring your vision to life with our powerful Custom Cubicle Designer.

Read More

A Complete Guide to Typical Cubicle Size and Dimensions | Cubicle By Design

What if the secret to a more productive, efficient office has been hiding in plain sight for decades? When it comes to laying out an office, the go-to starting point is almost always the 6-foot by 6-foot cubicle. It's become the industry standard for a reason, striking that perfect balance between personal workspace and a smart floor plan.

But don't think of this 36-square-foot footprint as a rigid rule. It's more like a versatile foundation you can build on.

The Standard Cubicle Footprint

Think of the 6'x6' cubicle as the most fundamental piece in your office design toolkit—it's flexible, efficient, and surprisingly adaptable. This size didn't just appear out of thin air; it evolved from a real need to give people their own focus zones without putting up expensive, permanent walls.

Its popularity really boils down to providing just enough room for a desk, a chair, and some basic storage. This makes it a super practical choice for all sorts of different roles.

The real genius of this standard is its modularity. A 6'x6' footprint can handle different desk setups, from a simple straight surface to a more spacious L-shaped desk, all within that neat, contained area. That's why it's such a great solution for businesses trying to get the most out of every square foot. If you're looking for more general information on dimensions for various products, that resource can be a helpful starting point. At the end of the day, the goal is to create a functional workspace that supports your team without wasting valuable space.

Why Did 6×6 Become the Standard?

The 6'x6' cubicle has been the gold standard for a long time. You can trace its roots all the way back to the Action Office II system from 1968, which was all about boosting productivity with flexible designs. Then, as companies got more cost-conscious in the 1980s, this size really took over. It was the perfect compromise between those dense "cube farms" and roomy private offices.

Today, it’s still a popular choice because it fits so well into common layouts while giving employees enough personal space to actually focus—a huge factor in any good office design.

Here’s a quick breakdown of the most common sizes you'll encounter and what they're best used for.

Quick Guide to Common Cubicle Footprints

Cubicle Size (ft) Total Area (sq ft) Best For Configuration Type
5' x 5' 25 Call centers, data entry, high-density areas. Compact, Benching
6' x 6' 36 Standard individual workstations, all roles. L-Shape, U-Shape
6' x 8' 48 Mid-level staff needing more storage space. L-Shape, U-Shape
8' x 8' 64 Managers, staff needing meeting space. U-Shape
8' x 12' 96 Executive offices, collaborative pods. Private Office

As you can see, there's a footprint for just about every need, from the most compact setups to something more expansive.

A well-planned office layout is more than just arranging furniture; it’s about creating an environment that fosters productivity, collaboration, and employee well-being. The typical cubicle size serves as the cornerstone of this strategic process.

Ultimately, picking the right cubicle size is just the first step in a much bigger puzzle. The real work involves mapping out your entire floor plan, thinking about how people will move through the space, and making sure everything is up to code.

This whole process is what we call space planning. You can check out our guide on what is space planning to get a better handle on how all these pieces fit together to create an office that actually works. With this foundational knowledge, you can confidently move toward creating a space that your team will love.

Matching Cubicle Dimensions to Workplace Roles

Sure, the 6'x6' cubicle is a solid, reliable starting point, but it's far from your only option. Honestly, picking the right cubicle size isn't about chasing some universal standard. It’s about matching the workspace to what the job actually demands. You wouldn't use a smart car for a construction job, right? Same logic applies here—you don't cram an employee who needs to spread out blueprints or focus on complex projects into a tiny box.

When you start thinking this way, you move past the "one-size-fits-all" trap and start building an office that genuinely works. By aligning each workstation's footprint with the daily grind of the employee using it, you can seriously boost productivity, improve comfort, and get the most out of every square foot. It's the kind of strategic thinking that lies at the heart of smart office design.

This little balancing act between efficiency, comfort, and your overall goals is everything.

Concept map illustrating how standard cubicle size impacts balance, efficiency, and comfort, influencing space, productivity, and well-being.

As you can see, the dimensions you choose have a direct impact on your team's day-to-day productivity and well-being.

Compact Cubicles for High-Density Roles

For jobs that are heavy on phone calls or repetitive computer tasks, a smaller footprint is almost always the most practical way to go. Think call centers or data entry departments—environments where density and efficiency are the names of the game.

  • 4'x4' or 5'x5' Cubicles: These compact stations give you just enough room for a computer, a phone, and a few personal items. Their small size is perfect for maximizing the number of employees you can fit into one area, which is a must-have for large teams working in close quarters.

  • Benching Systems: Another go-to for these roles is a benching system. Imagine long, shared tables with low (or no) dividers. They're incredibly space-efficient and tend to foster a high-energy, collaborative vibe.

These smaller setups are all about function. They provide a no-frills workspace that gets the job done. If you're looking to optimize this kind of space, you can learn more about upgrading your workspace with call center cubicles.

Standard Workstations for Everyday Tasks

Now let's talk about the backbone of most offices: the administrative staff, marketing coordinators, and all the other roles that need a balanced environment. This is where the standard 6'x6' and the slightly roomier 6'x8' workstation cubicles really shine.

These sizes typically feature a versatile L-shaped work surface, giving employees plenty of room for a multi-monitor setup, paperwork, and personal touches without feeling hemmed in. That extra space in a 6'x8' layout is a great fit for people who need a bit more surface area or extra storage like pedestal files and overhead bins. It's the perfect middle ground between personal space and an efficient floor plan.

For these roles, the goal is to create a "home base" that feels both functional and personal. A well-proportioned standard cubicle gives employees a sense of ownership, which can lead to better focus and higher job satisfaction.

Spacious Layouts for Management and Focus Work

Finally, some roles just demand more. More space, more privacy, and more room for those little impromptu meetings. We're talking about managers, executives, designers, and engineers—people whose workflow requires a bigger footprint.

Spacious options like 8'x8' or 8'x12' configurations are ideal here. These dimensions can easily accommodate a U-shaped desk, guest chairs, and plenty of storage. The larger area creates a clear sense of separation and provides the privacy needed for confidential conversations or deep, uninterrupted concentration.

These bigger setups essentially act as private office cubicles without the cost and hassle of building permanent walls. Throw in some taller panels, and you've created a secluded environment that supports leadership and high-focus work. At Cubicle By Design, we help you find the perfect match for every single role on your team.

How Cubicle Layouts Shape Your Office Environment

A cubicle's dimensions are only half the story. The real magic happens when you start arranging them together to create a functional, flowing office. Think of it less like placing a single piece of furniture and more like city planning for your workspace. The way you cluster workstations—in tight-knit pods or long, orderly rows—has a huge impact on everything from foot traffic to team dynamics and even your company culture.

A smart layout does more than just cram people into a room. It can intentionally build bridges between collaborators or carve out quiet zones for deep, focused work. By understanding the most common configurations, you can turn a basic floor plan into a genuine productivity tool.

An aerial view of a modern open-plan office with various cubicle layouts and silhouetted workers.

The right arrangement can make all the difference in how your teams connect and perform every single day.

Fostering Teamwork with Collaborative Pods

When the goal is to get specific teams talking, arranging cubicles into pods or clusters is a fantastic strategy. This setup groups employees who need to work together into a shared zone, making those quick, spontaneous problem-solving chats completely effortless.

  • Pinwheel Layouts: Picture four L-shaped desks joined at the corners. From above, it looks just like a pinwheel. This gives each person their own defined area while keeping them just an arm's length away from their three closest teammates.
  • 4-Pod Clusters: This is a classic for a reason. It places four cubicles together in a simple square, which helps build a strong team identity and makes sharing resources feel natural and intuitive.

These clustered designs are ideal for departments like marketing, engineering, or project management, where constant communication is the name of the game. They transform a set of individual workstations into a team's unified command center.

Maximizing Efficiency with Linear Configurations

For roles that require more independent focus—or in offices where you just need to maximize your headcount—linear layouts offer a clean and highly efficient solution. These configurations line up cubicles in straight rows, creating obvious traffic paths and a structured, orderly environment.

The most popular linear style is the back-to-back row. This setup has employees facing away from each other, which cuts down on visual distractions while keeping shared aisles clear and accessible. It’s particularly effective for roles in accounting, administration, or any job where individual concentration is key.

Another option is a benching system, which is basically a long, shared desk with low or no dividers. You sacrifice some privacy, but the space-saving design is unbeatable for high-density offices. For a closer look at these and other layouts, check out our overview of common cubicle configurations.

Designing for Specific Workflows

Ultimately, the best layout is one that supports how your team actually works. A sales or telemarketing team, for instance, might thrive in a specialized "telemarketing pod." This design typically uses higher panels and a smaller footprint to create better acoustic separation, cutting down on background noise so they can hear clients on the phone.

For a more tailored approach, don't be afraid to mix and match. You could build collaborative pods for your creative teams, set up back-to-back rows for the finance department, and drop in a few standalone private office cubicles for managers who need them. This kind of hybrid model lets you fine-tune the environment for each department's unique needs.

Planning Your Aisles for Safety and ADA Compliance

Choosing the right cubicle size is a huge step, but the job isn't done until you've thought about the space between them. The pathways, aisles, and walkways are the arteries of your office, guiding traffic, ensuring safety in an emergency, and making sure every single employee can get around easily.

If you don't plan your aisles well, you're not just creating an inefficient office; you're creating a potentially dangerous one that could be a legal liability. A bad layout leads to frustrating bottlenecks, creates a fire hazard, and can fail to meet critical accessibility laws. A well-thought-out floor plan, on the other hand, makes for a safe, inclusive, and productive environment for everyone on your team.

A person in a wheelchair at an adjustable, accessible desk in a modern hospital hallway with large windows.

This commitment to smart design is fundamental to creating a workplace that truly works for all employees.

Aisle Widths for Fire Safety and Flow

The first rule of thumb for aisle planning is making sure there's a clear path out. Local fire codes are very specific about the minimum width for walkways to allow for a quick, orderly evacuation. While the exact rules can vary by location, a few general standards are a great place to start.

  • Main Aisles: Think of these as the highways of your office—they connect major areas like entrances, exits, and break rooms. They need to be at least 44 inches wide to handle heavy foot traffic and emergency crews.
  • Secondary Aisles: These are the smaller side streets that lead to individual cubicles. A minimum width of 36 inches is usually required, which is enough for one person to walk through comfortably.

It’s just like planning roads in a town. You need wide main streets for lots of cars and smaller side streets to get to individual houses. And, of course, keeping these paths clear of obstructions like boxes, chairs, or equipment is absolutely non-negotiable for safety.

Understanding ADA Requirements for an Inclusive Office

Beyond basic safety, your office layout must comply with the Americans with Disabilities Act (ADA). These federal guidelines are in place to ensure people with disabilities can access and navigate the workplace just like everyone else. For office layouts, that often boils down to providing enough clearance for wheelchair users.

"An accessible route must provide a clear width of at least 36 inches for a single wheelchair and 60 inches for two wheelchairs to pass. A T-shaped or 60-inch diameter circle is needed for a 180-degree turn."

This is one of the most critical ADA rules to remember. You absolutely have to provide a 60-inch (5-foot) diameter turning circle or a T-shaped intersection within your cubicle clusters so a wheelchair user can turn around. This space is mandatory and needs to be baked into your layout from day one.

The ADA guidelines also apply to the workstations themselves.

  • Desk Height: Surfaces need to provide at least 27 inches of knee clearance from the floor.
  • Reach Ranges: Controls, outlets, and storage have to be within easy reach from a seated position.

Building an ADA-compliant office isn't just about following the rules; it's about creating a space where every employee feels valued and can do their best work. As you map out your floor plan, carefully consider every detail, from door widths to desk heights. For a deeper look at these factors, our comprehensive office space planning guide offers valuable insights to help you get it right. At Cubicle By Design, we help you create a layout that’s efficient, safe, and welcoming for every member of your team.

Customizing the Perfect Workstation for Your Team

Knowing the standard cubicle sizes is a great starting point, but the real magic happens when you start tailoring workstations to how your team actually works. Moving beyond the pre-set dimensions is how you create an environment that actively helps your people succeed, rather than just giving them a place to sit. It’s like the difference between a suit off the rack and one that’s been custom-fitted; they both do the job, but one is a whole lot more comfortable and effective.

This is where you stop thinking about generic setups and start designing a truly high-functioning workspace. By focusing on the elements you can actually change—from panel heights that control privacy to built-in storage that keeps essentials close by—you can build a workstation from the ground up that becomes a real asset.

Key Elements of Customization

To build the perfect workstation, you need to think beyond its footprint. A few key components come together to define how a cubicle actually looks, feels, and functions for the person using it. Getting these details right is what turns a standard space into a powerhouse of productivity.

Here are the main dials you can turn:

  • Panel Height: This is your number one tool for managing privacy and noise. Low panels, around 42 inches, keep things open and make it easy for team members to collaborate. Mid-height panels, from 53 to 65 inches, give you seated privacy, which is perfect for focused work. For roles that demand deep concentration, full-height panels at 65+ inches create the quietest, most secluded spaces.
  • Storage Solutions: You can’t have an efficient workspace without good, integrated storage. Options run the gamut from mobile pedestal files that slide neatly under a desk to overhead bins that keep less-used items out of the way. Picking the right mix ensures an employee has everything they need without their desk becoming a mess.
  • Power and Data Integration: Let's face it, a modern workstation runs on power and data. Customizable cubicles let you build in electrical raceways to keep all those cords and cables organized and hidden. Not only does it look a whole lot better, but it also gets rid of dangerous tripping hazards.

Bring Your Vision to Life with Our Custom Designer

The idea of designing a whole office layout might sound intimidating, but today's tools make it surprisingly simple. You don't need to be an architect to map out a workspace that actually works for your team. You just need a tool that lets you see what you’re doing.

The best office designs come from a real understanding of daily workflows. When you customize, you can build workstations that solve the actual problems your team faces, whether it's not enough storage or too many distractions.

At Cubicle By Design, we want to empower you to create that ideal office. Our online Cubicle Designer tool is a powerful but straightforward platform that puts you in the driver's seat. You can play around with every aspect of your workstation, from the basic dimensions to the final touches.

With just a few clicks, you can:

  1. Pick a starting layout, whether you need a compact station or a spacious private office cubicle.
  2. Adjust panel heights to find that sweet spot between privacy and teamwork.
  3. Try out different fabrics and finishes to match your company’s vibe.
  4. Add the right storage and power options to build a complete workstation cubicle.

Once you have a design you love, you can send it right to our team for a detailed quote. This takes your plan from an idea to a real, tangible project you can move forward with. Stop settling for a one-size-fits-all solution and start building the exact workspace your team deserves with Cubicle By Design.

Start Your Office Transformation with Cubicle By Design

So, feeling ready to build a smarter, more productive workspace? You've journeyed through the essentials—from picking the right cubicle size to designing layouts that are efficient, safe, and up to code. Now, it’s time to turn all that great knowledge into action.

At Cubicle By Design, we're more than just a furniture company. Think of us as your partner in creating a better office, from that first spark of an idea all the way to a fully realized, functional workspace that just works.

Your Partner from Planning to Completion

Our expert team is here to jump in at any stage of your project. We can help with the initial space planning to make the most of every square foot, guide you in selecting the perfect workstation cubicles, and stick with you until the project is wrapped up successfully. We sweat the details so you can focus on running your business.

Ready to see what's possible? Take a look through our full range of cubicles to get some inspiration flowing.

The best workspaces are born from a clear vision and the right tools. We're here to provide the expertise and resources to bridge that gap between your concept and a finished, productive office.

If you're the hands-on type, you can start building your ideal setup right now. Learn how to transform your office with our interactive cubicle designer and begin tweaking every detail to fit your team's unique needs.

Whether you need a single private office cubicle or an entire floor of workstations, our goal is simple: to help you create a workplace that truly supports your team. Let's build a better office, together.

Got Questions About Cubicle Sizes? We've Got Answers.

Even after you’ve spent hours planning your office layout, a few specific questions always seem to pop up right when you think you're done. It's completely normal. We hear the same great questions from clients all the time, so we’ve put together some straightforward answers to help you lock in those final details with confidence.

What's the Smallest Cubicle Size That Actually Works?

You might see some ultra-compact stations out there, some as small as 4'x2', but for most day-to-day roles, the smallest you want to go is 5'x5'. This gives you a 25-square-foot space, which is just enough room for a desk, a proper office chair, and a bit of personal storage without making your team feel like they're working in a closet.

A 5'x5' footprint is a go-to choice for high-density setups where the main goal is fitting in as many people as possible. Think call centers, data entry departments, or even temporary "touchdown" spots for visiting employees—anywhere efficiency and a repeatable layout are key.

How Much Does Panel Height Really Matter for Privacy?

Panel height is a bigger deal than most people think. It’s one of the most critical levers you can pull to control the entire vibe of your office, dictating both visual privacy and how much noise bounces around the room.

  • Low Panels (around 42 inches): These are great for keeping things open and encouraging chatter. They create an airy, collaborative feel but don’t do much to block sound or sightlines.
  • Mid-Height Panels (53-65 inches): This is the sweet spot for a lot of companies. They offer "seated privacy," so when an employee is sitting down, they can focus without visual distractions. This height also does a decent job of soaking up ambient office noise.
  • High Panels (65+ inches): When you need to create quiet, heads-down workstations, this is the way to go. Tall panels provide maximum visual privacy and the best sound absorption, perfect for roles that require deep, uninterrupted concentration.

Ultimately, picking the right height comes down to balancing your company's culture with the need for individual focus.

What's the Best Way to Measure a Room for Cubicles?

Getting your measurements right is the foundation of a good layout. Don't rush this part—a small mistake here can turn into a huge headache (and a costly one) when the furniture arrives and doesn't fit.

First, get the big picture by measuring the total length and width of the room to calculate your overall square footage. Then, grab a notepad or tablet and sketch a basic floor plan. Walk the room and carefully mark the exact locations of every permanent fixture: columns, support beams, doors (and which way they swing!), windows, and, of course, where your power and data outlets are.

With this master plan in hand, you can start sketching out different cubicle runs and aisle placements. This forces you to think about traffic flow and ADA-compliant clearances long before you even think about placing an order.

Taking the time to be precise upfront is the surest way to guarantee your final layout is functional, compliant, and looks fantastic.


At Cubicle By Design, our team lives and breathes these details so you don't have to. We offer expert space planning to make sure your new workstations fit your office and your workflow perfectly. Take a look at our complete range of customizable cubicles or jump right in and start building your own layout with our online Cubicle Designer tool.

Read More