A Guide to Office Space Planning Services | Cubicle By Design

When you hear "office space planning services," what comes to mind? If it's just pushing desks around on a floor plan, it's time to think bigger. Much bigger. Think of it less like arranging furniture and more like creating a functional blueprint for how your company operates, collaborates, and grows.

What Are Office Space Planning Services

Imagine a city planner laying out a new neighborhood. They wouldn't just drop houses down at random. They’d strategically map out roads to manage traffic flow, designate quiet residential zones, and design public parks to bring the community together. Professional office space planning services do the exact same thing, but for your workplace.

This isn't just about filling square footage; it's about turning that space into a strategic asset. It's about designing a workplace ecosystem where every single element—from the path between departments to the placement of collaboration hubs and quiet zones—is put there for a reason: to eliminate bottlenecks and make every day run smoother.

More Than Just Arranging Furniture

At its heart, space planning is a deep dive into your company’s unique DNA. It goes way beyond aesthetics to answer the really important operational questions:

  • How do your teams actually work? We’re talking about analyzing real workflows to make sure the physical layout helps, not hurts, how they get things done.
  • What does your company culture value? A business built on open collaboration needs a totally different layout than one that prioritizes quiet, deep-focus work.
  • Where is your business headed? A great plan doesn't just solve for today. It anticipates future growth, saving you from expensive and disruptive redesigns down the road.

The goal is to create a space that not only looks great but also delivers a real return on your investment through better productivity and happier employees. We get into the nitty-gritty of this in our guide on what is space planning.

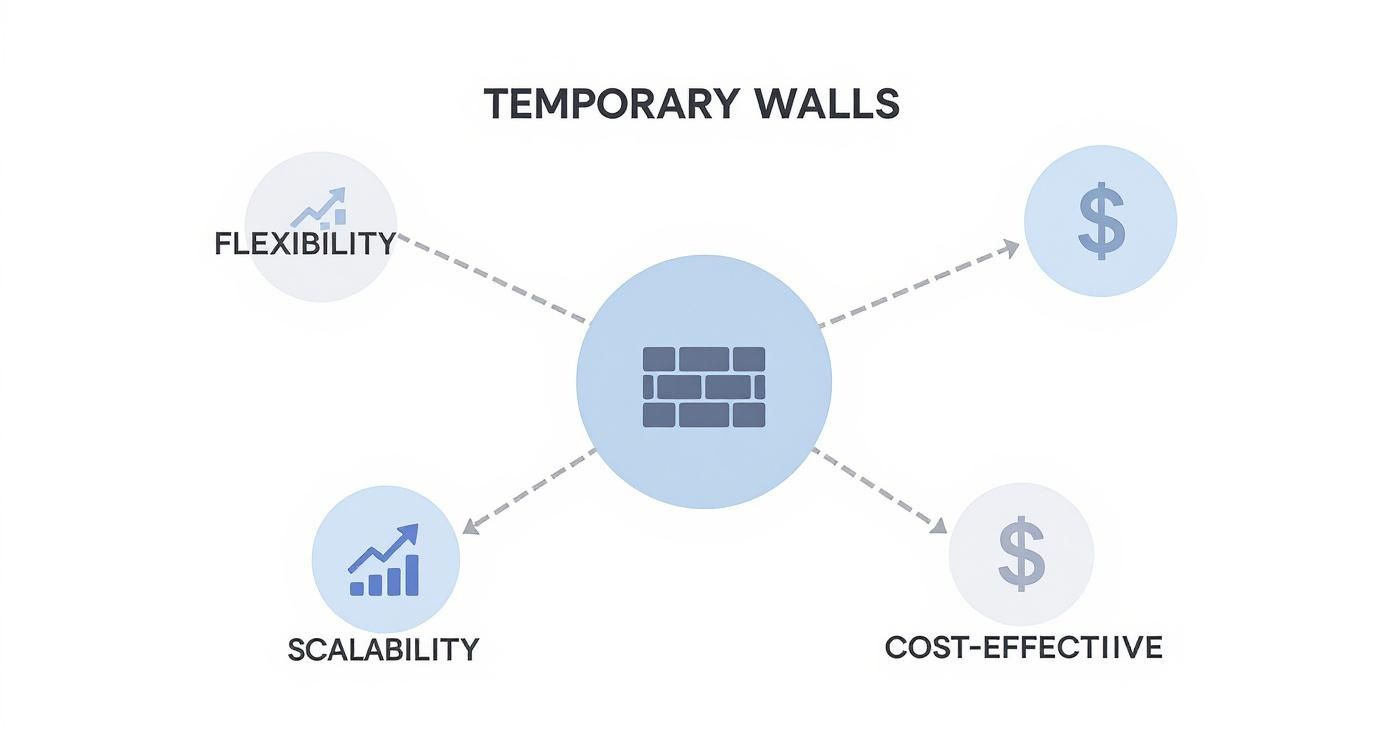
The Driving Force Behind Modern Workspaces

The need for smart, intentional planning has exploded as companies figure out what work looks like today. This shift is mirrored in the tools of the trade. The global market for space and workplace management software—a key part of modern office planning—was valued at $0.9 billion in 2021. It’s expected to shoot past $1.7 billion by 2026, growing at a healthy 13% clip as more businesses get serious about optimizing their offices. You can dig into the numbers in this market forecast from Verdantix.

A well-designed office isn't an expense; it's an investment in your company's most valuable asset—its people. By aligning the physical environment with strategic business goals, you create a powerful engine for productivity and innovation.

The Office Space Planning Journey, Step by Step

Turning an empty floor or an outdated office into a truly functional workspace doesn't happen by accident. It's a journey, and a professional office space planning services provider acts as your guide, making sure every choice we make together aligns with your company's real-world goals. This isn't just about picking out desks; it's a careful, collaborative process broken down into clear, manageable stages.

It all starts with a deep dive into how your organization actually works. Think of this as laying the foundation for a house—if we don't get the groundwork right by understanding your team, your workflows, and your culture, the final layout simply won't hold up. This is where we go beyond just square footage and start talking about the day-to-day realities of your business.

Phase 1: Discovery And Strategic Analysis

The first, and maybe most important, step is all about discovery. A good planning partner will sit down with your key people, from the C-suite to department heads, to get a handle on what you're trying to achieve. This means looking at how you're using your current space, finding the bottlenecks in your workflow, and talking honestly about where you see the company growing.

We get into the nitty-gritty with questions like:

  • How do your teams really collaborate? Is it all scheduled meetings, or do you need spaces that encourage those spontaneous, game-changing conversations?
  • What does each department need to succeed? Your engineering team might be desperate for quiet zones to do deep-focus work, while the sales team needs a buzzing, collaborative hub.
  • What about tech and storage? Planning for power outlets, data ports, and even physical storage from day one is so much cheaper than trying to retrofit everything later.

This phase is all about listening and gathering the raw intelligence that will shape every single design decision that follows. It's the critical first step that sets the whole project up for success.

Phase 2: Conceptual Design And Layout

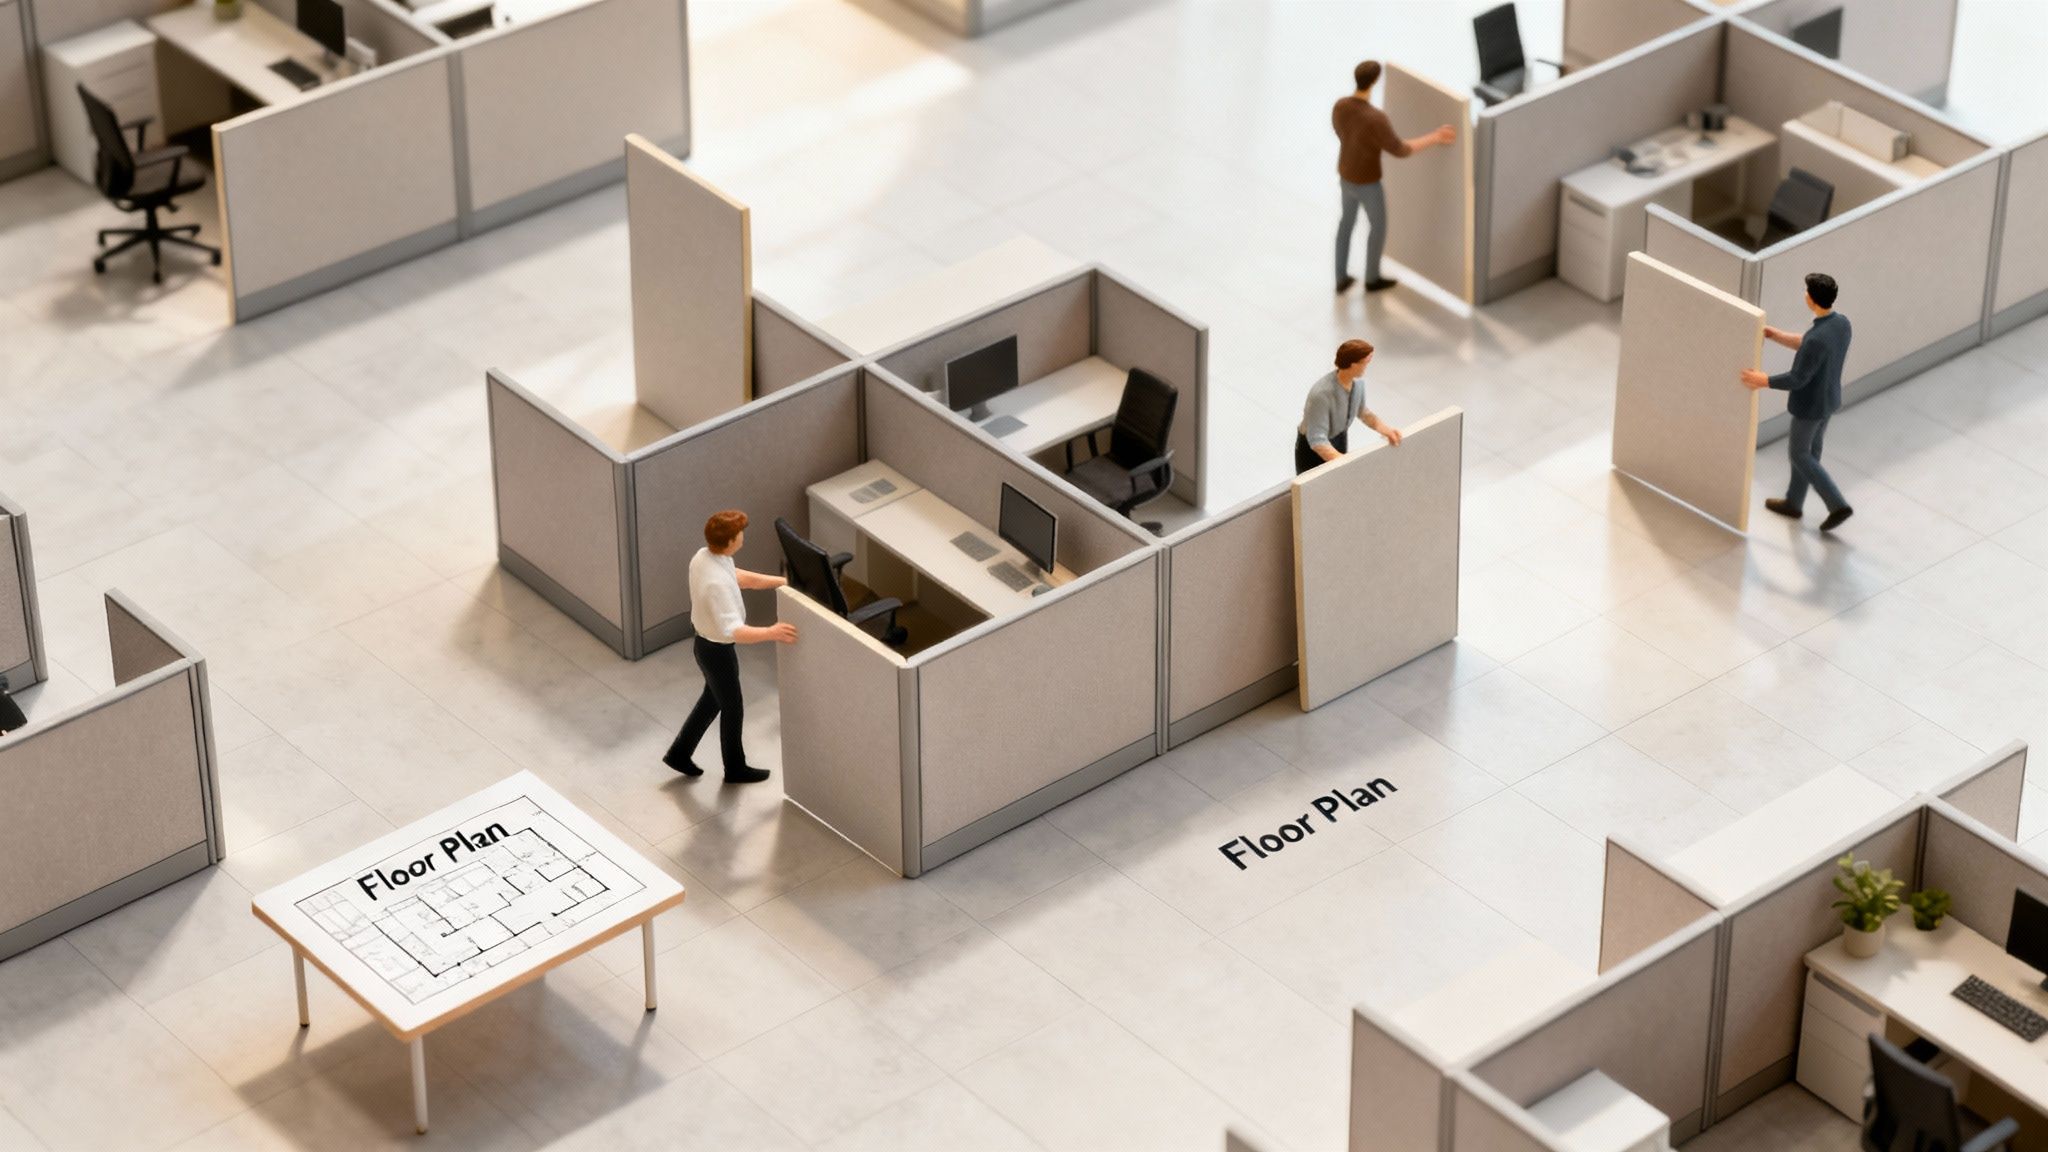
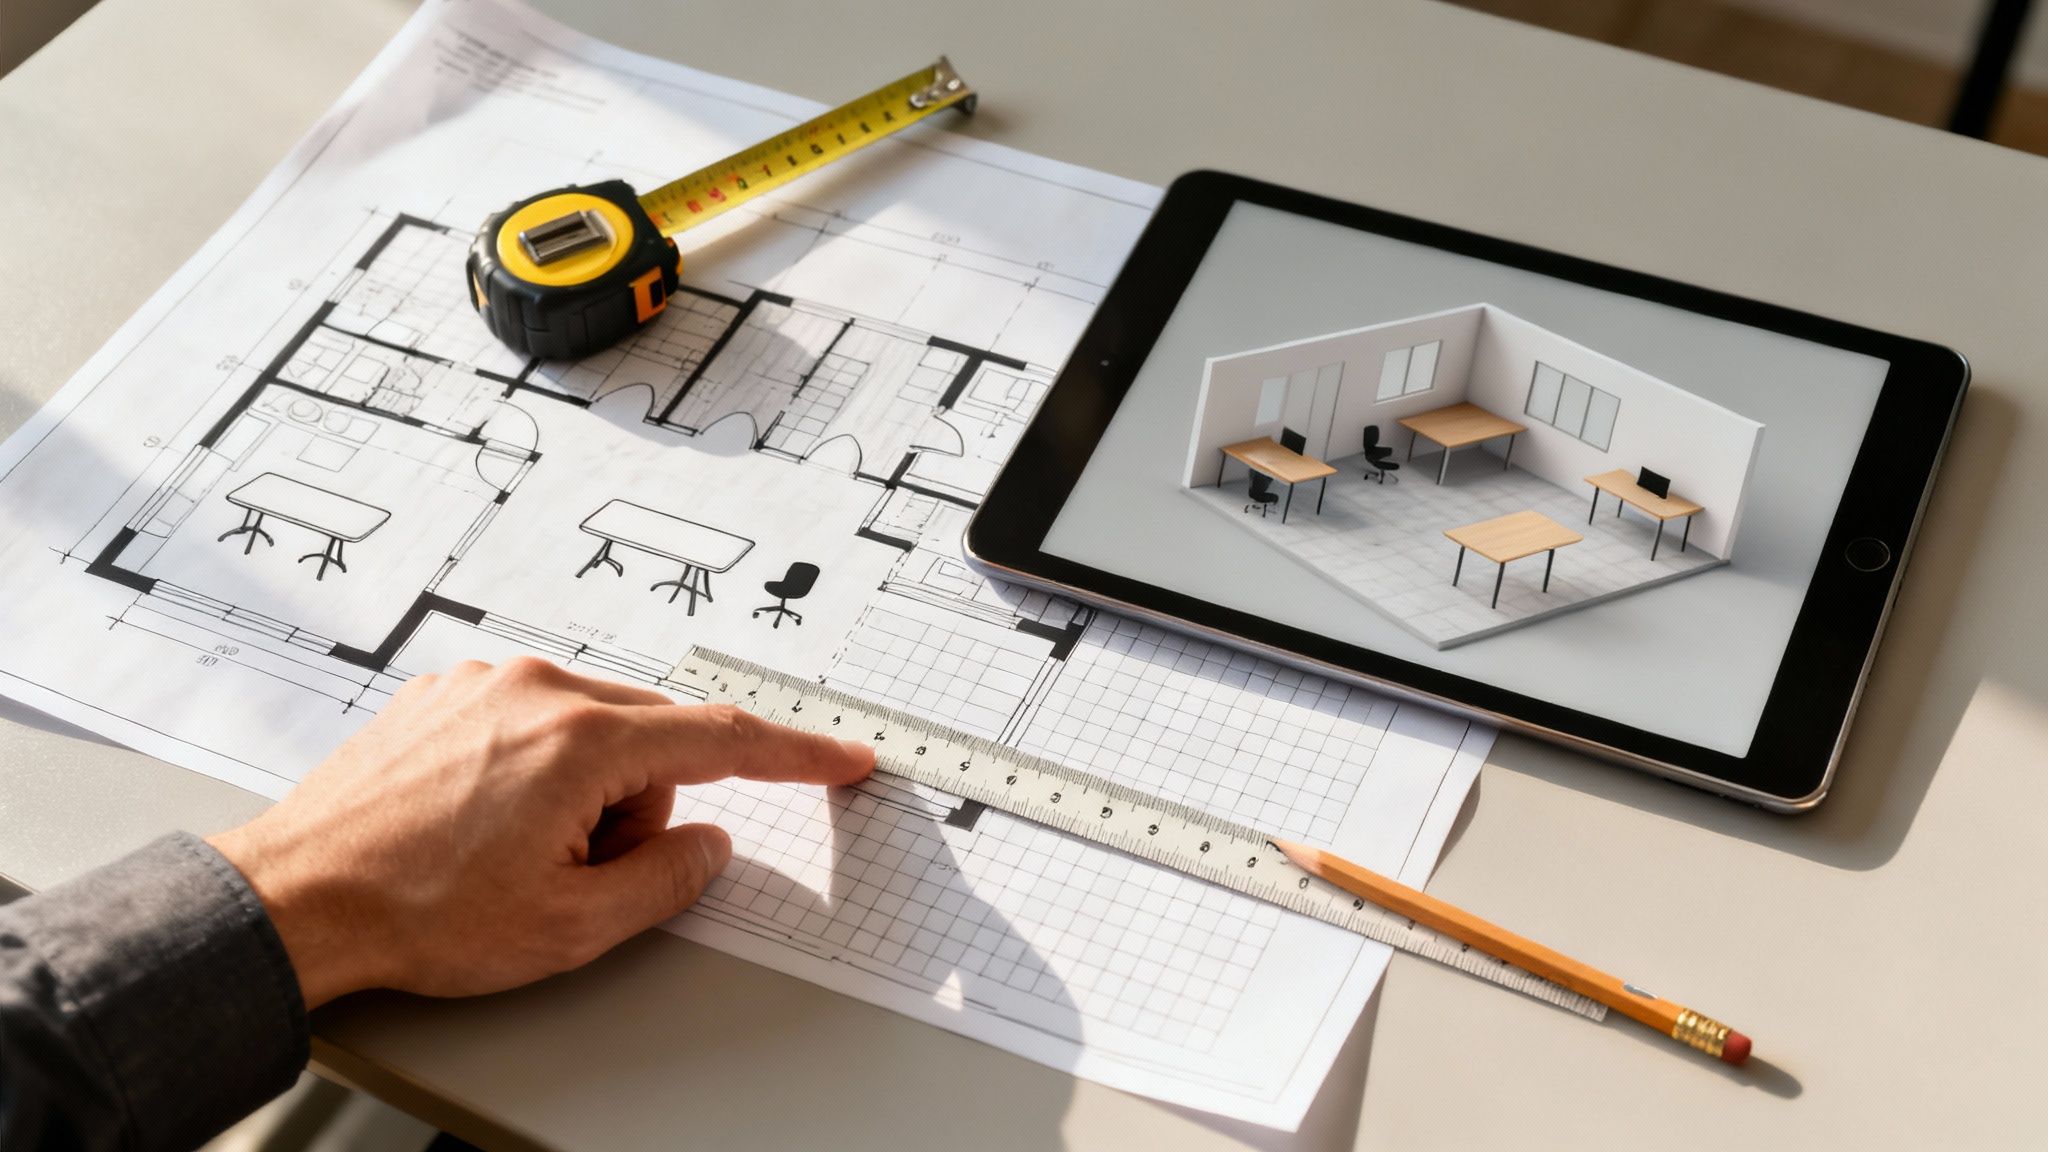
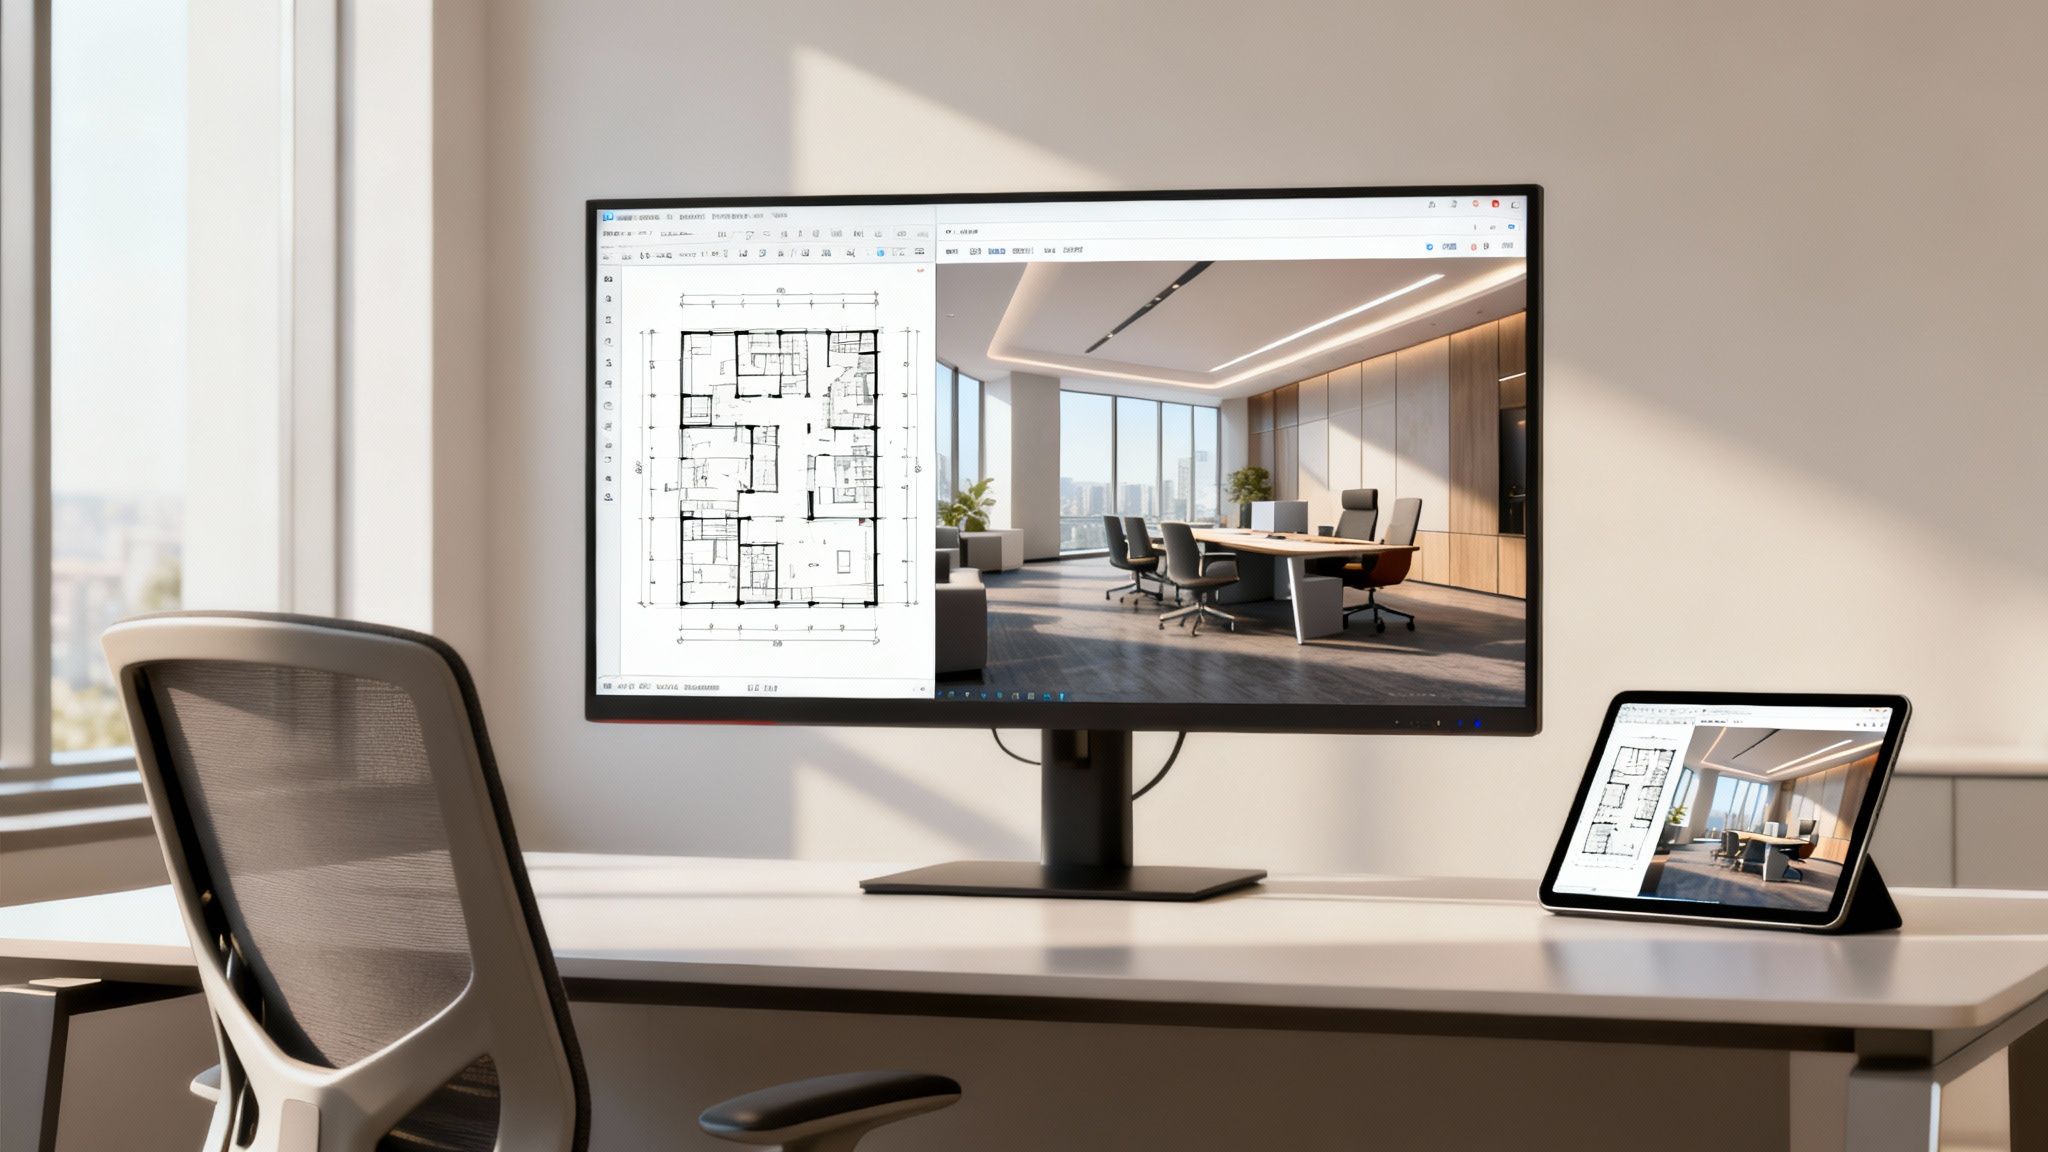
Once we have a solid grasp of your needs, we move into the conceptual design phase. This is where all those ideas and data points start to become something you can actually see. Using specialized software, our designers will sketch out initial 2D layouts—often called block plans—that show how different departments and zones could be arranged in your space.

Think of these early designs as the first draft of your new office. We'll explore different options for traffic flow, adjacencies (like putting marketing and sales next to each other), and the overall vibe of the workspace. The goal is to translate your operational needs into an efficient and logical floor plan of the office.

This stage is a true partnership. Your feedback is absolutely essential as we tweak and refine the concepts until we land on a layout that strikes the perfect balance between function, company culture, and your budget.

As part of this, we'll often create more detailed visualizations to help everyone really feel the space long before any furniture is ordered.

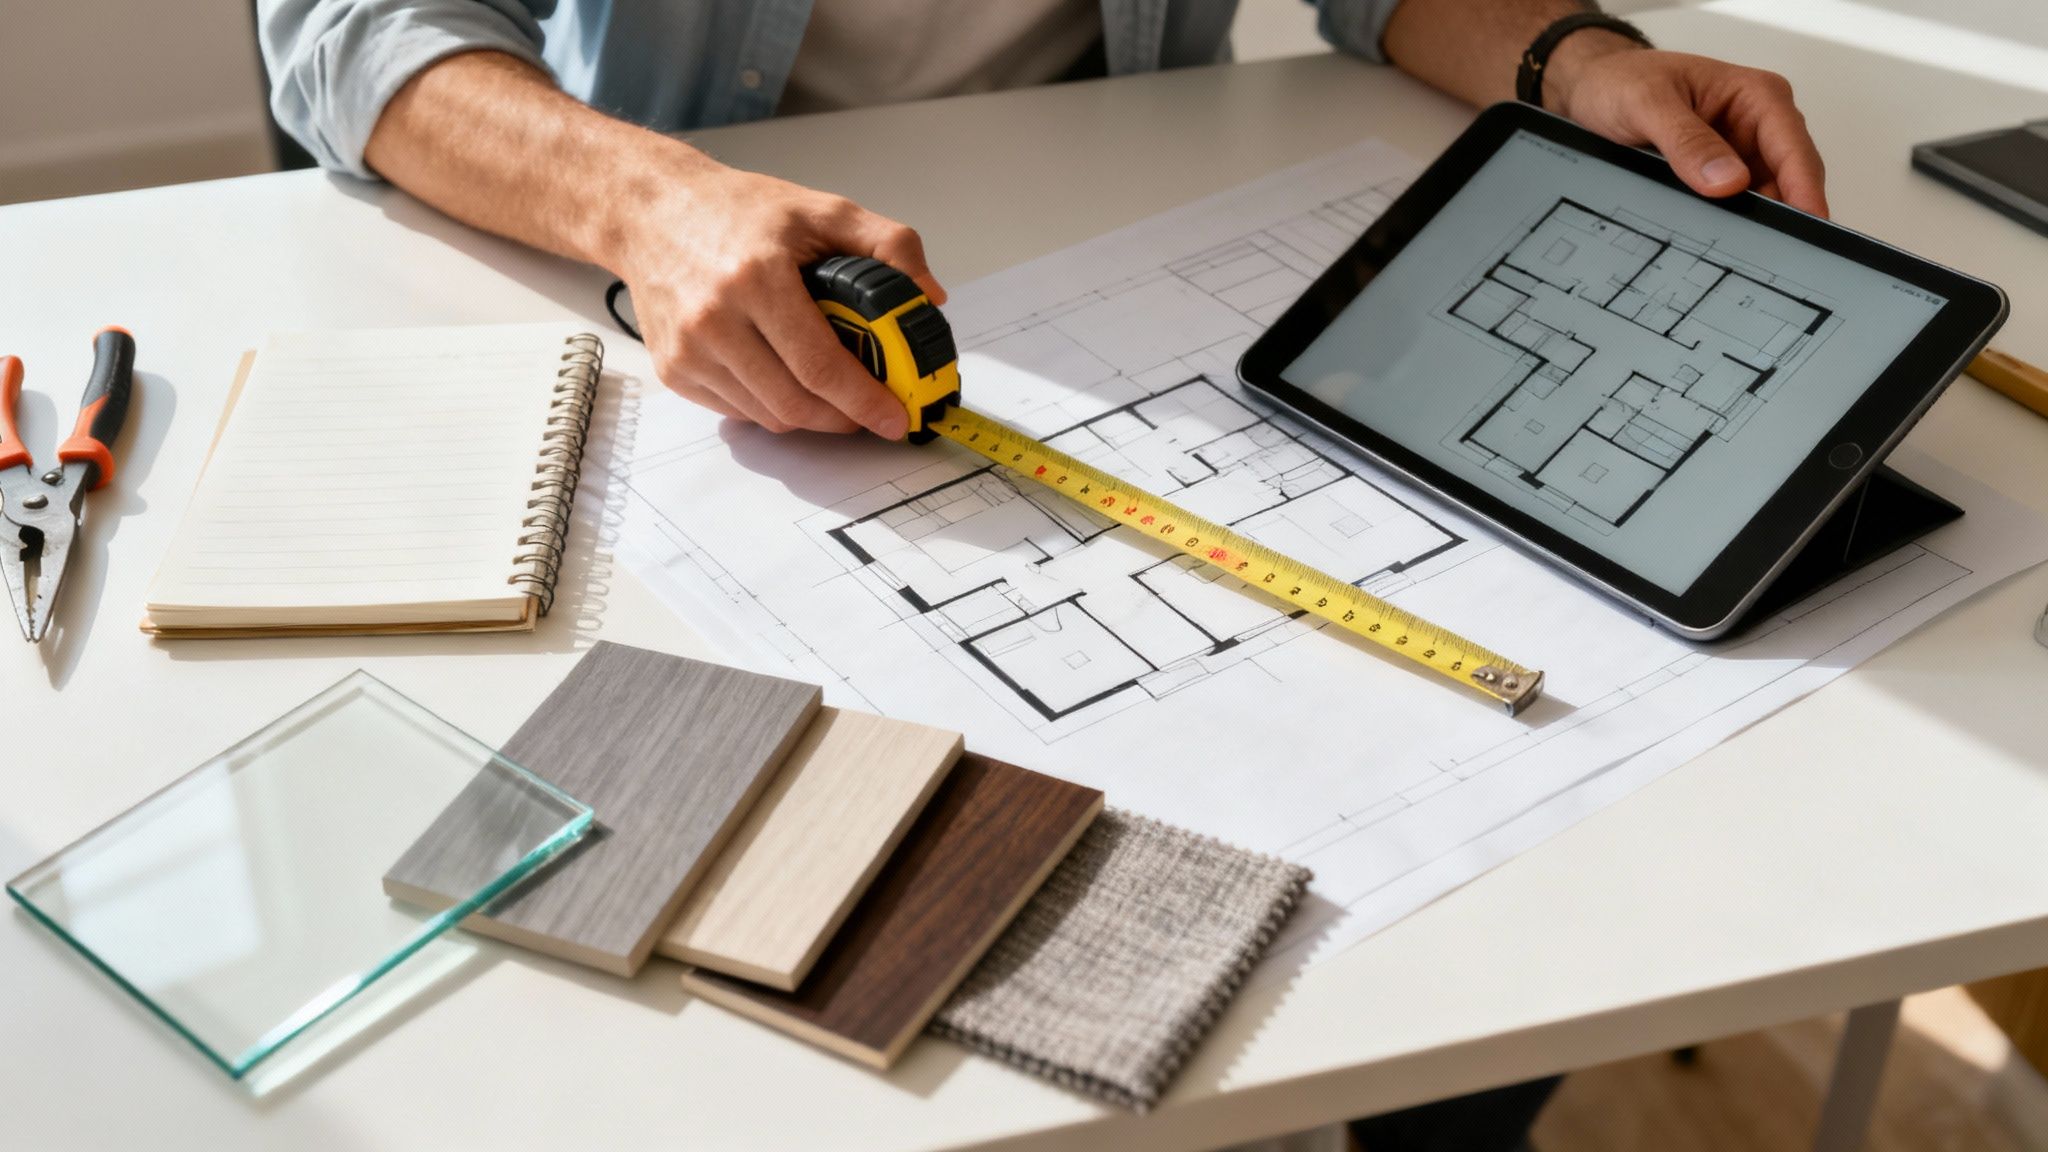
Phase 3: Detailed Specification And Finalization

With a conceptual layout approved, we zoom in on the details. This is the specification phase, where every last element of the new office is chosen, documented, and priced out. We're talking about the exact furniture systems, the finishes, the colors, and all the materials that will bring the design to life.

This is the point where you might use a tool like our online cubicle designer to customize individual workstations down to the last detail.

Key activities in this phase include:

  1. Furniture Selection: Pinpointing the specific desks, chairs, storage units, and collaborative furniture that fit the design and the budget.
  2. Finish Specification: Deciding on paint colors, flooring types, fabrics, and other aesthetic touches that create the right atmosphere.
  3. 3D Renderings: Creating photorealistic images or even virtual walkthroughs of the final design. This gives you a crystal-clear vision of the finished product.
  4. Budget Confirmation: Locking in the final project cost based on all the selections.

This meticulous work ensures there are no costly surprises down the road.

Phase 4: Project Management And Installation

The final stage is all about execution. With a rock-solid plan in hand, your partner takes over managing the procurement, delivery, and installation of every component. A dedicated project manager coordinates with all the vendors, contractors, and your own team to ensure everything rolls out smoothly, on time, and with as little disruption to your business as possible.

From that first conversation to the final walkthrough, the entire journey is a partnership focused on one thing: turning your vision into a productive, inspiring workplace that truly works for you.

What to Expect from Your Planning Partner

When you bring in an office space planning service, you’re doing more than just hiring someone to draw up a floor plan. You're bringing on a partner who delivers a concrete set of tools to bring your vision to life and, just as importantly, protect your investment. A real pro provides tangible results that take the guesswork out of the process and prevent those costly mistakes down the line.

These key deliverables are what truly separate a professional service from a simple furniture vendor. They give you clarity, confidence, and control over your entire project.

A monitor and a tablet display architectural floor plans and a modern office interior design concept for an office space planning service.

The journey from a big idea to a functioning office starts with clear, precise documentation. This is where professional deliverables make all the difference, creating a roadmap that everyone—from your leadership team right down to the installation crew—can follow. Let’s break down what you should get.

The Foundation: 2D Layouts

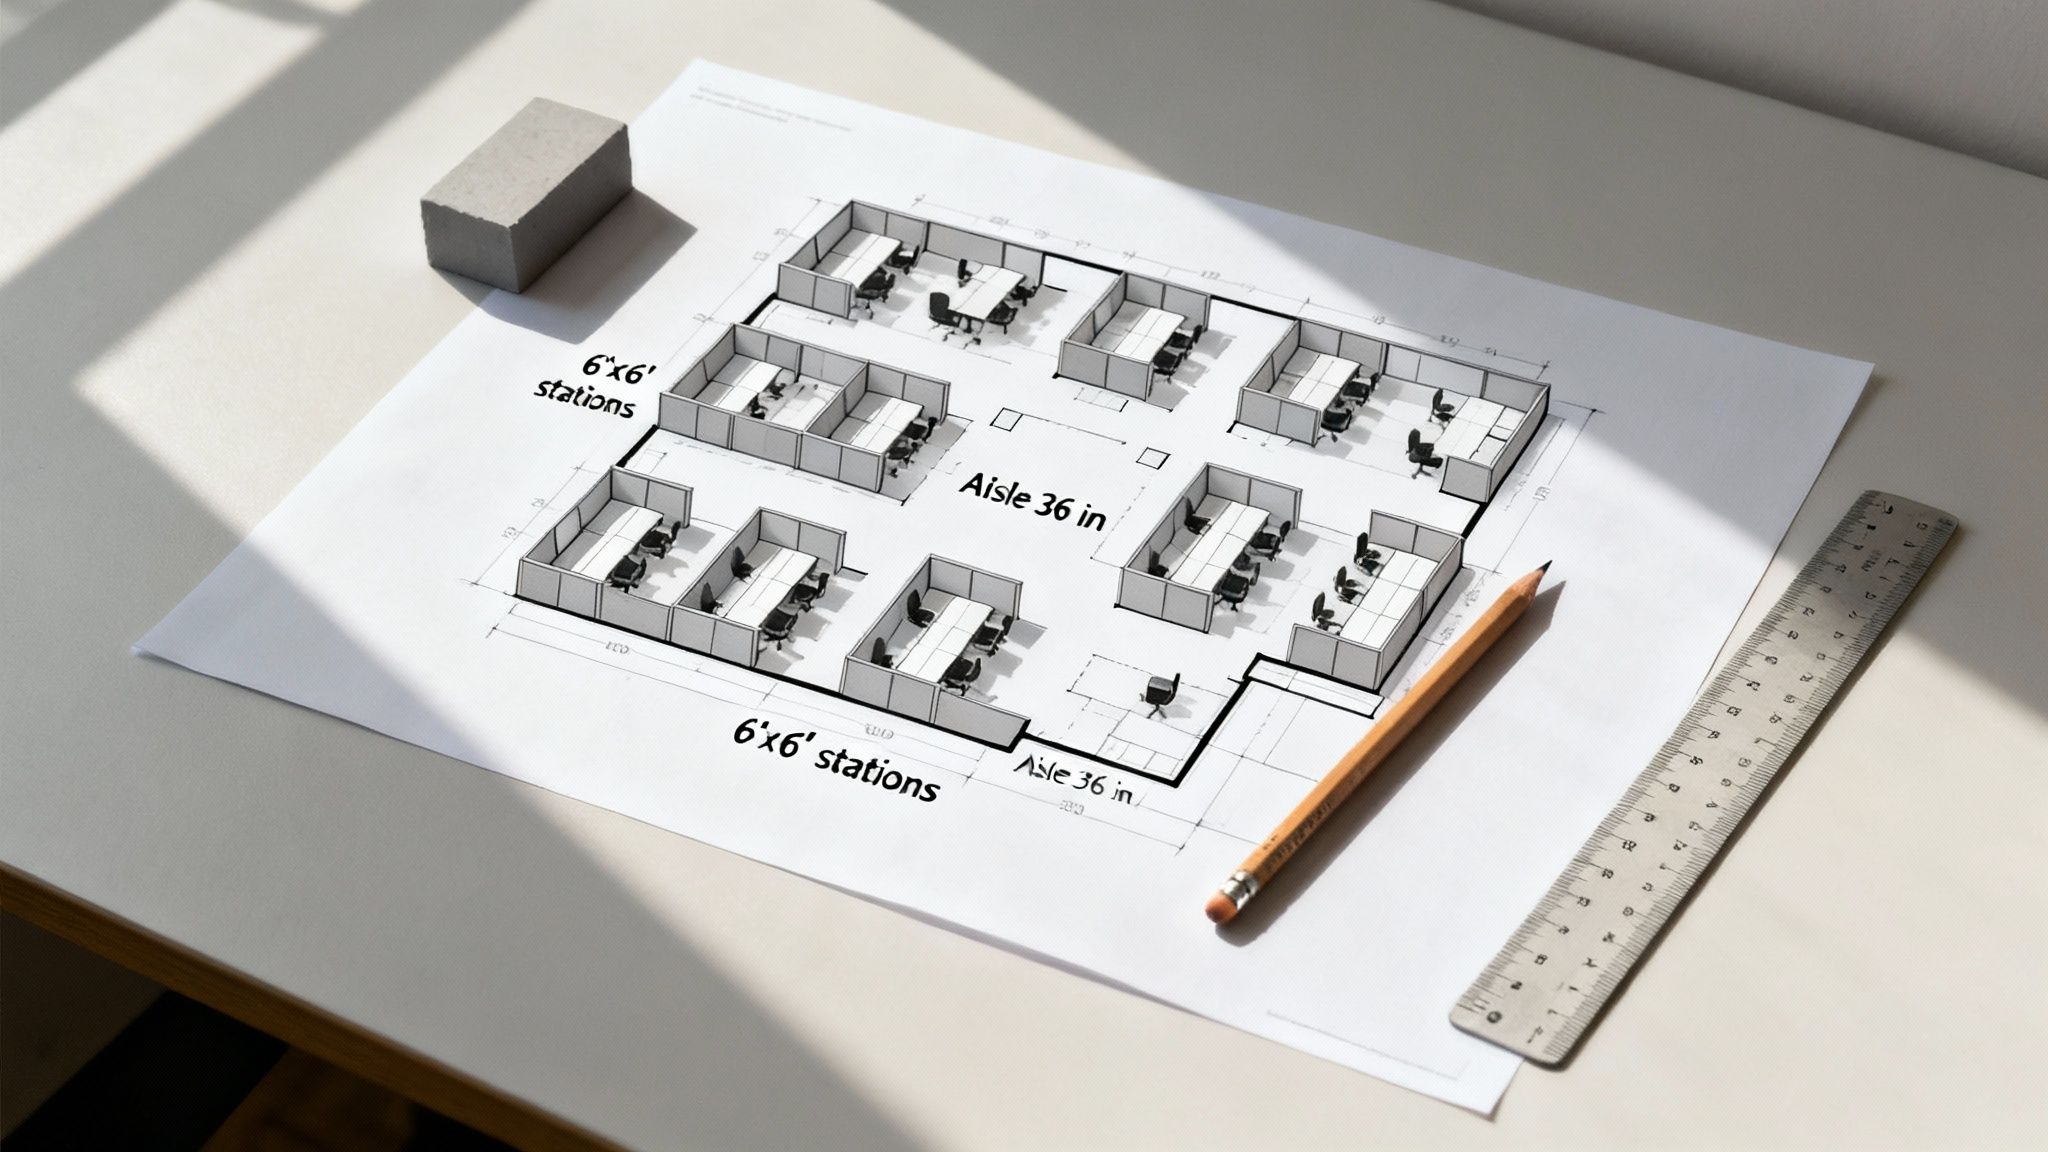
The very first, most fundamental deliverable is the 2D layout. Think of it as the architectural blueprint for your new workspace. It’s a top-down view that precisely maps out every wall, doorway, electrical outlet, and piece of furniture, showing exact dimensions and clearances.

This document is absolutely non-negotiable. First off, it ensures everything physically fits while leaving room for people to actually move around, preventing cramped walkways or awkward dead ends. More importantly, it’s essential for making sure your layout meets building codes and ADA (Americans with Disabilities Act) requirements, which protects your business from some serious legal and safety headaches.

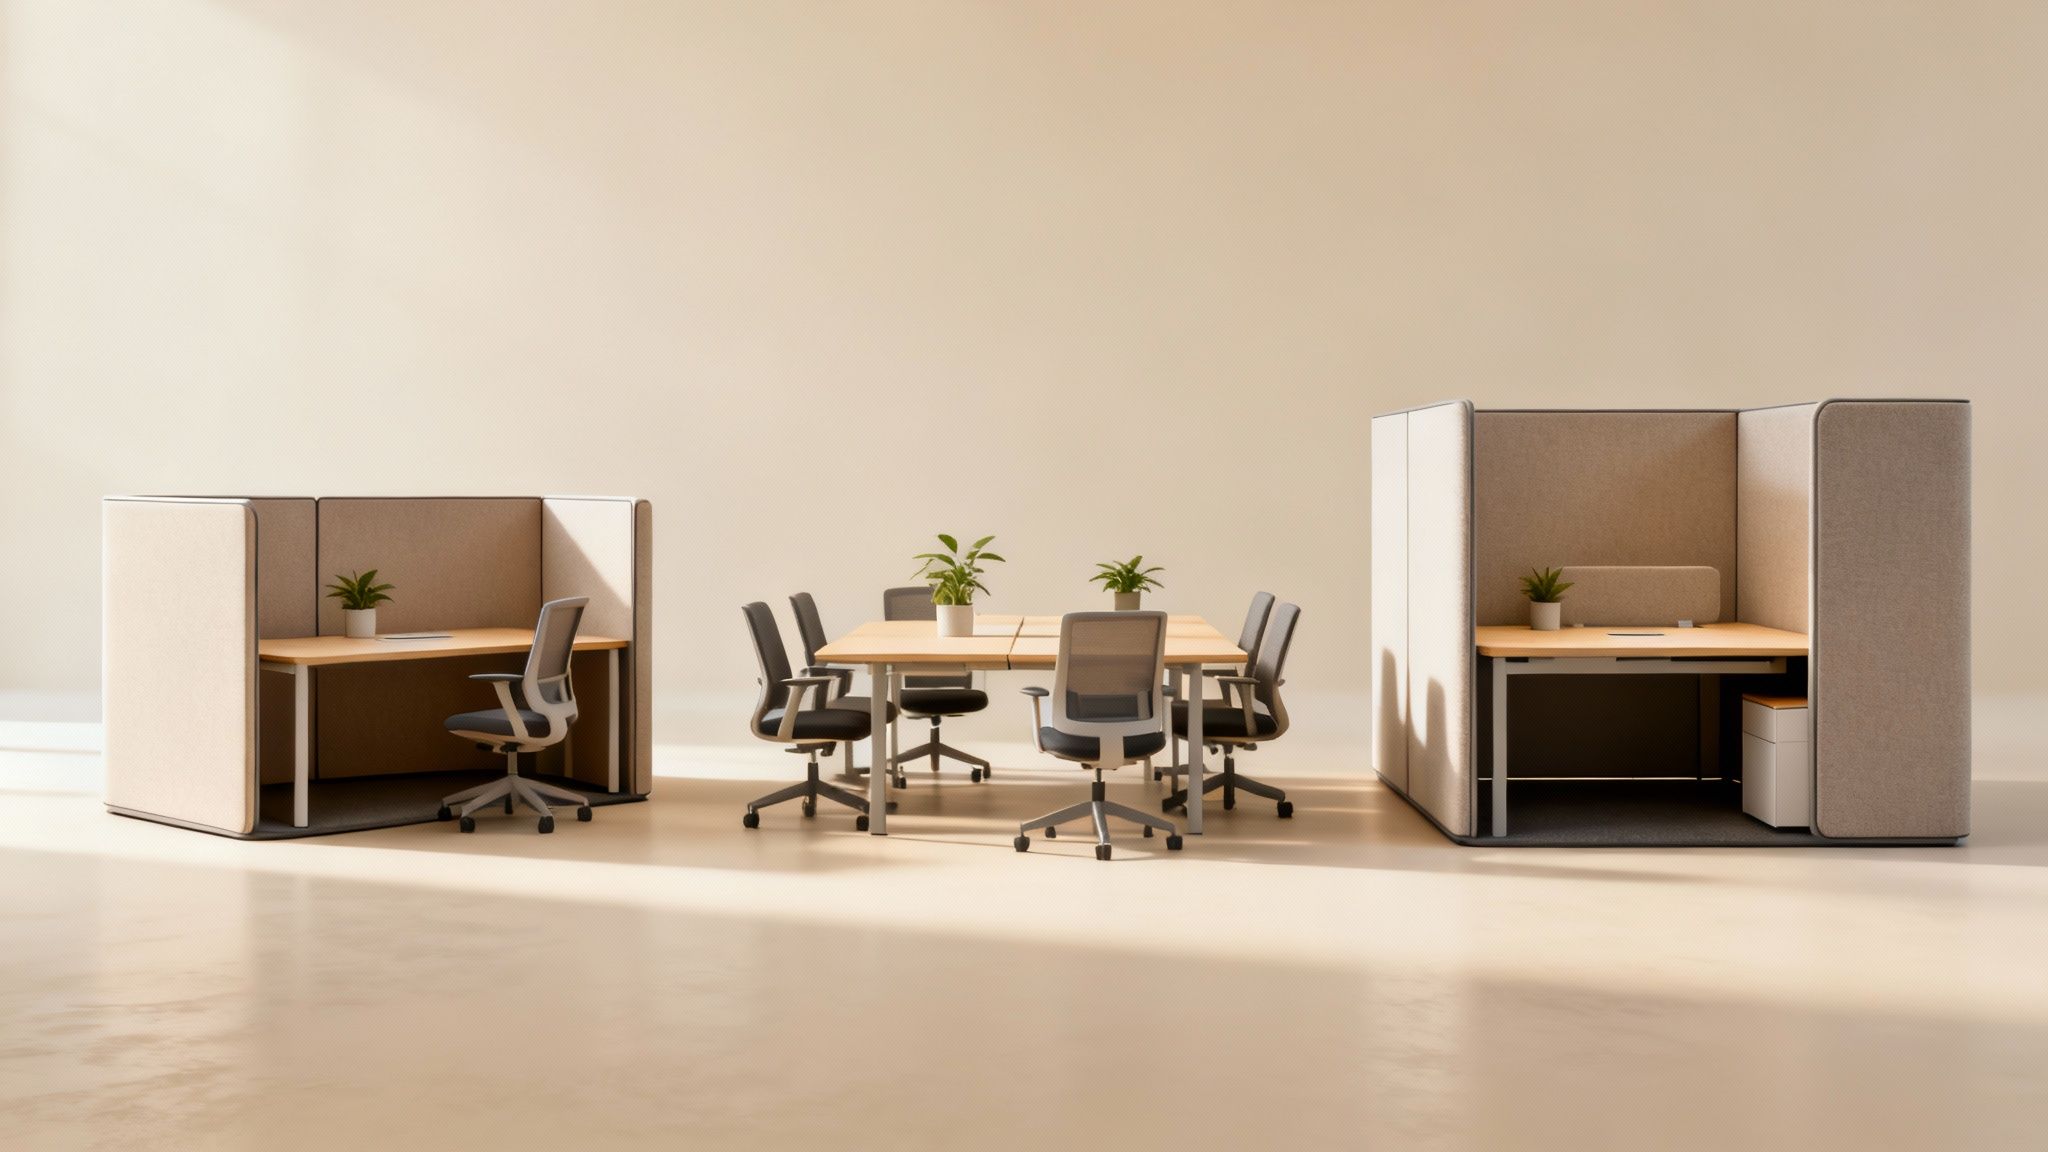
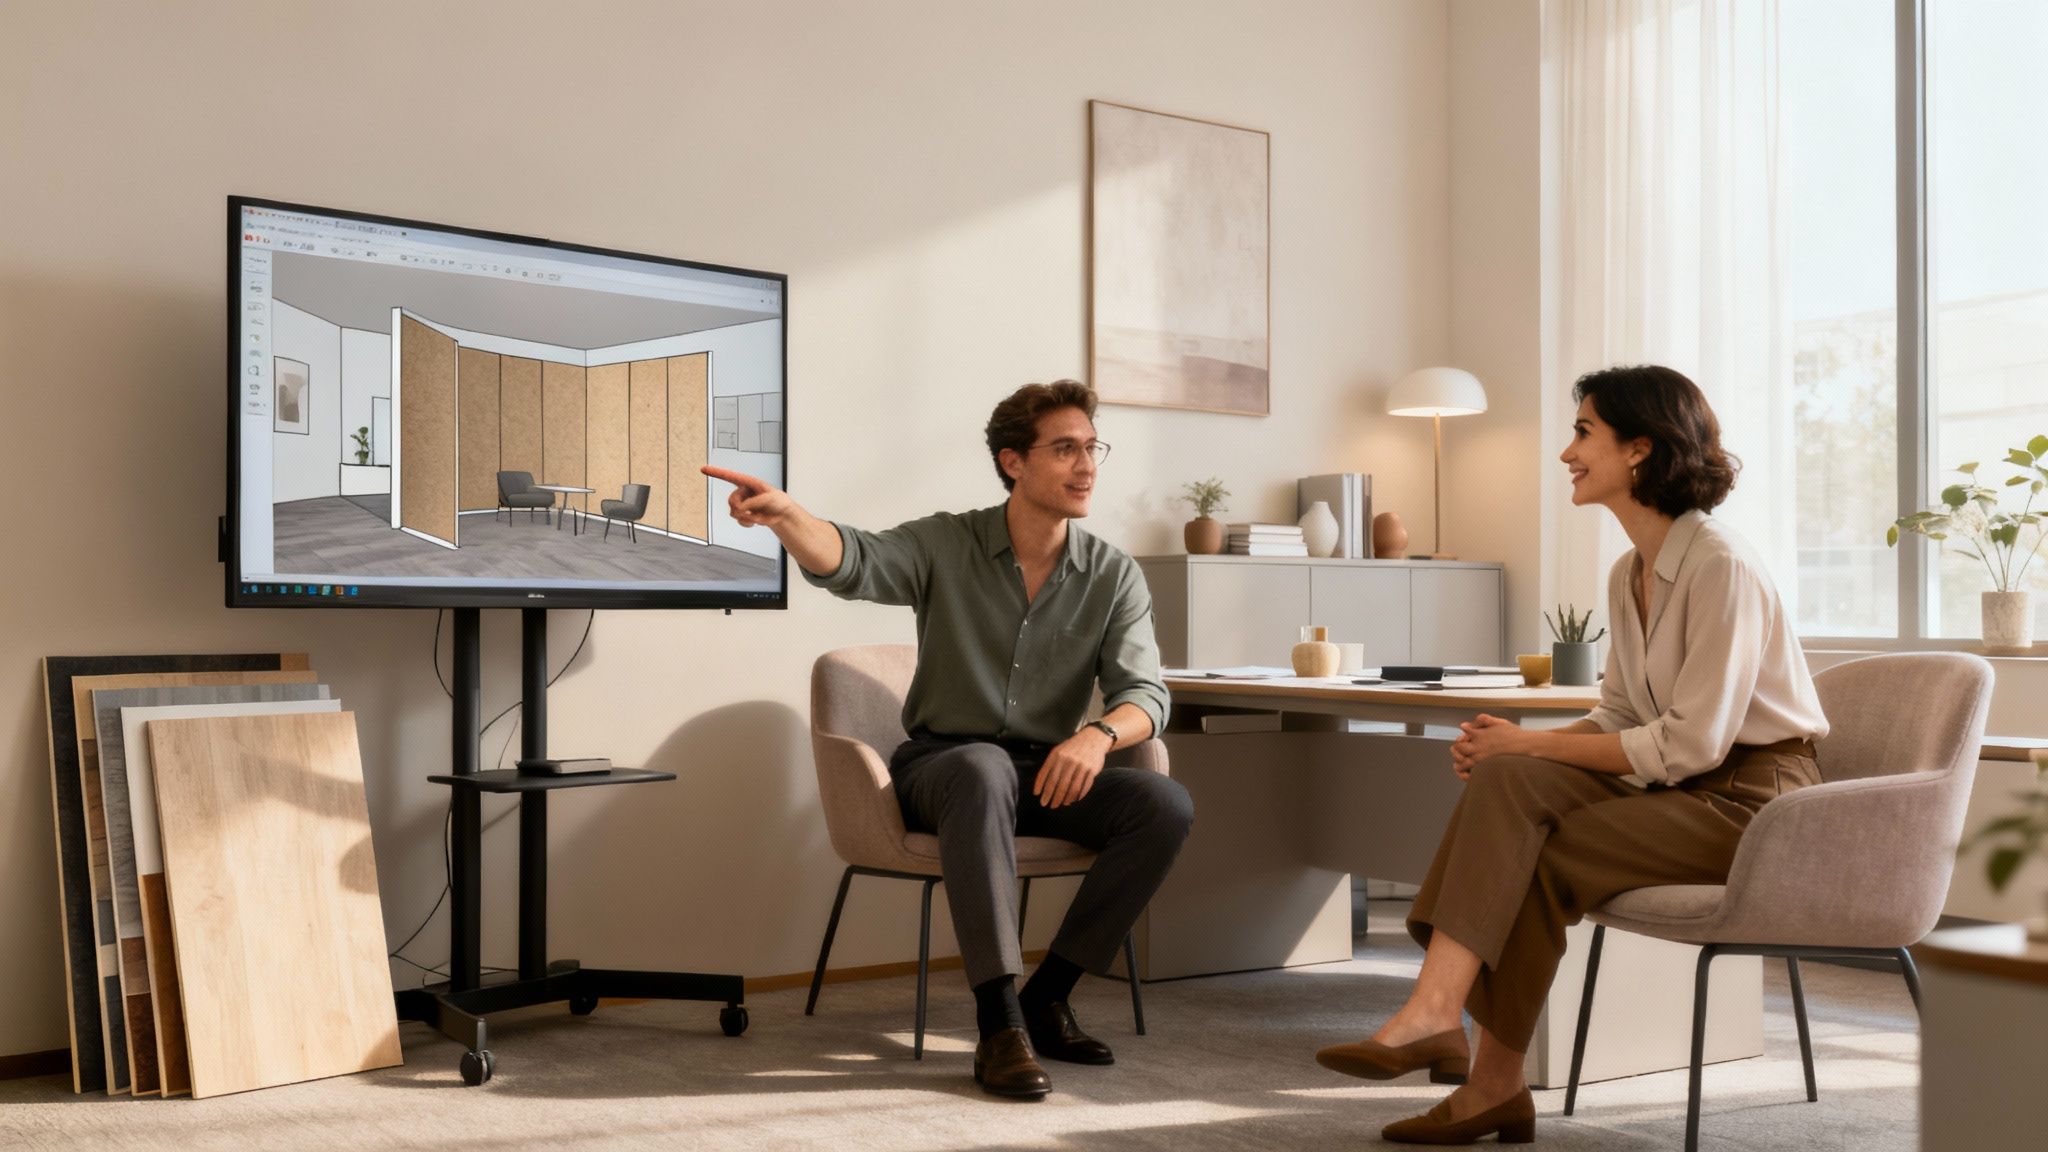
Bringing the Vision to Life: 3D Renderings

If 2D layouts are all about precision, 3D renderings are all about vision. These photorealistic images take that flat blueprint and turn it into a vibrant, three-dimensional model of what your office will actually look like. You’ll see exactly how the colors, textures, lighting, and furniture come together to create the right atmosphere.

This isn't just a "nice-to-have." Immersive 3D renderings and virtual walkthroughs are powerful tools for securing buy-in from stakeholders. When leadership can virtually stand in the new space, they can feel the design’s impact, making approvals faster and a lot more enthusiastic.

These visualizations make sure everyone is on the same page about the final look and feel, so there are no surprises on installation day. They bridge that crucial gap between what’s on paper and what you can picture in your head, confirming that the design concept will create a space your team will genuinely love.

The Details: Furniture Schedules and Budgets

A great design is only successful if you can actually build it—on time and on budget. That’s where a detailed Furniture, Fixtures, and Equipment (FF&E) schedule comes in. This is basically a master spreadsheet listing every single item planned for the space, including:

  • Item Identification: Manufacturer, model number, and a unique ID for each piece.
  • Specifications: Dimensions, finishes, fabric colors, and any custom options.
  • Quantities and Location: How many of each item you need and exactly where they go, referencing the 2D layout.

This schedule works hand-in-hand with a transparent budget breakdown, giving you a clear, line-item cost for every single component. This level of detail is the cornerstone of effective project management. It ensures there are no hidden costs and prevents incorrect orders of items like private office cubicles, keeping the entire project on track financially.

Understanding the Cost of Office Planning

When you're putting together a budget for a new workspace, it's easy to see office space planning services as just another line item to get through. That’s a common mistake. It's much better to think of it as a strategic investment—one that protects your much larger investment in furniture and real estate by making sure every square foot is used effectively from day one.

The reality is, professional planning doesn’t just cost money; it actively saves you money down the road. It helps you dodge common but expensive mistakes, like ordering furniture that doesn't fit, creating a confusing layout that kills productivity, or boxing yourself in with no room for future growth. A solid plan delivers a real return by preventing much bigger headaches and costs later on.

What Drives the Cost of Planning

The price of professional space planning isn't a simple, one-size-fits-all number. Several key factors will shape the final cost, and getting a handle on them will help you budget more accurately. It's a bit like commissioning a custom piece of furniture versus grabbing something off the shelf—the more unique your needs, the more involved the process.

Here are the primary cost drivers:

  • Total Square Footage: It’s simple—larger spaces take more time and resources to plan out properly.
  • Project Scope: A quick reconfiguration of one department is going to cost a lot less than a full-scale design for a brand-new headquarters.
  • Design Complexity: An open-plan office with standard workstations is less complex (and less expensive to plan) than a dynamic space with specialized zones, custom millwork, and built-in tech.
  • Level of Project Management: The more hands-on help you need from your partner—from coordinating with contractors to managing the final installation—the more comprehensive the service fee will be.

Common Pricing Models for Planning Services

When you start talking to providers, you'll generally come across two main ways they structure their fees. Each has its own benefits depending on your project.

  1. Flat Fee or Hourly Rate: Some firms, especially independent design or architectural agencies, will charge a standalone fee for their planning services. This can be based on the project scope or a simple hourly rate, giving you a clear, upfront cost for the design work itself.
  2. Integrated into Furniture Purchase: Many full-service dealers, like Cubicle By Design, often roll the cost of space planning right into the overall furniture purchase. This is a huge plus for many businesses because you get expert design and layout services as part of your investment in new workstations.

This integrated approach really aligns the goals of the design team with your own. The focus is squarely on creating the most effective and efficient layout possible using the furniture you're already buying. It makes for a seamless process from the first sketch to the final installation.

The Long-Term Financial Impact of Smart Planning

Strategic planning is changing the game in commercial real estate. The global office space market was valued at a massive $2,739.37 billion in 2021 and is projected to hit $3,312 billion by 2025, with a lot of that growth coming from retrofits for hybrid work. As companies adapt, getting space utilization right is the key to maximizing that investment.

Beyond the big picture, a detailed plan helps you see all the related expenses that go beyond just the furniture. For a deep dive into what you can expect, check out our cubicle price guide.

And don't forget ongoing costs. When budgeting for your new layout, it’s smart to also consider the specifics of commercial office cleaning contracts for long-term maintenance. A well-designed space can even help reduce those cleaning costs over time.

How to Choose the Right Space Planning Partner

Picking the right partner for your office redesign is probably the single most important decision you'll make. This isn’t just about finding a company to sell you some furniture. It’s about finding a team that becomes a true extension of your own—one that gets your vision and has the chops to actually bring it to life. A great partner listens to what you need, rather than just pushing a one-size-fits-all solution they have on hand.

Think of your ideal partner as a guide. They're there to help you navigate the tricky parts, like design, budgeting, and installation. They make sure the whole experience, from the first sketch to the final walkthrough, is cohesive and stress-free. It turns what could be a massive headache into a pretty exciting journey.

Evaluate Their Portfolio and Expertise

First things first, you need to dig into their past work. Look for projects similar to yours, whether in size, industry, or even just the general vibe you're going for. A solid portfolio is more than just a gallery of pretty pictures; it proves they’ve been in the trenches and know how to deliver. Pay close attention to how they solved real-world problems for other businesses.

Beyond the aesthetics, look for proof of functional design. Do the layouts they’ve created for other companies look like places where people can actually get work done? A partner’s past work is the best crystal ball you have for predicting your own success.

This is more critical now than ever. With the rise of flexible workspaces, smart office planning is essential. The global coworking market, valued at a staggering $22.01 billion in 2024, is expected to hit $93.68 billion by 2035. This isn't just a fleeting trend. In fact, 59% of companies planning to expand are opting for flexible spaces, which shows just how much businesses need partners who get modern workplace dynamics. If you want to dive deeper, you can explore detailed coworking statistics and insights.

Ask the Right Questions

Once you’ve got a shortlist, it's time to start asking questions. Your goal here is to get a feel for their process, how they communicate, and what happens when things don't go exactly as planned.

Here are a few questions I’d recommend having in your back pocket:

  • Process and Collaboration: How will you involve our team in the design process? Who’s going to be our day-to-day contact?
  • Budget Management: How do you make sure we stay on budget? What’s the plan if unexpected costs pop up?
  • Technology and Tools: What software do you use for layouts and 3D models? Can we see a virtual walkthrough before we commit?
  • Timeline and Installation: What’s a realistic timeline for a project like ours? Who handles the chaos of delivery and installation?
  • Past Experience: Can you put us in touch with a few past clients who had projects similar to ours?

Their answers will tell you a lot. You'll quickly get a sense of their professionalism and whether they're the right cultural fit. A partner who is transparent and communicative will have no problem walking you through their entire playbook.

Look for an End-to-End Solution

Don't underestimate the value of a partner who can handle everything from start to finish. A firm that manages the initial space plan, the design, furniture sourcing, and the final installation can save you a world of hurt. It prevents costly miscommunications and finger-pointing between different vendors.

This is where full-service office furniture dealers near me really shine, because they combine design expertise with deep product knowledge. They know which solutions will actually fit your workflow and your budget, ensuring the entire project is as seamless and efficient as possible.

Common Office Layout Mistakes to Avoid

A beautiful office is completely useless if it doesn’t work for the people inside it. When you’re jumping into an office space planning project, knowing what not to do is just as important as having a great vision. Avoiding the most common pitfalls is really the key to creating a space that actually boosts productivity instead of accidentally crushing it.

These mistakes can be subtle, but they have a huge impact on daily operations, team morale, and your bottom line. Frankly, learning from the missteps of others is the smartest way to ensure your project is a home run from the moment your team walks through the door.

Miniature office models showing how an office space planning service contrasts traditional vs. modern layouts.

Forgetting About Workflow and Adjacencies

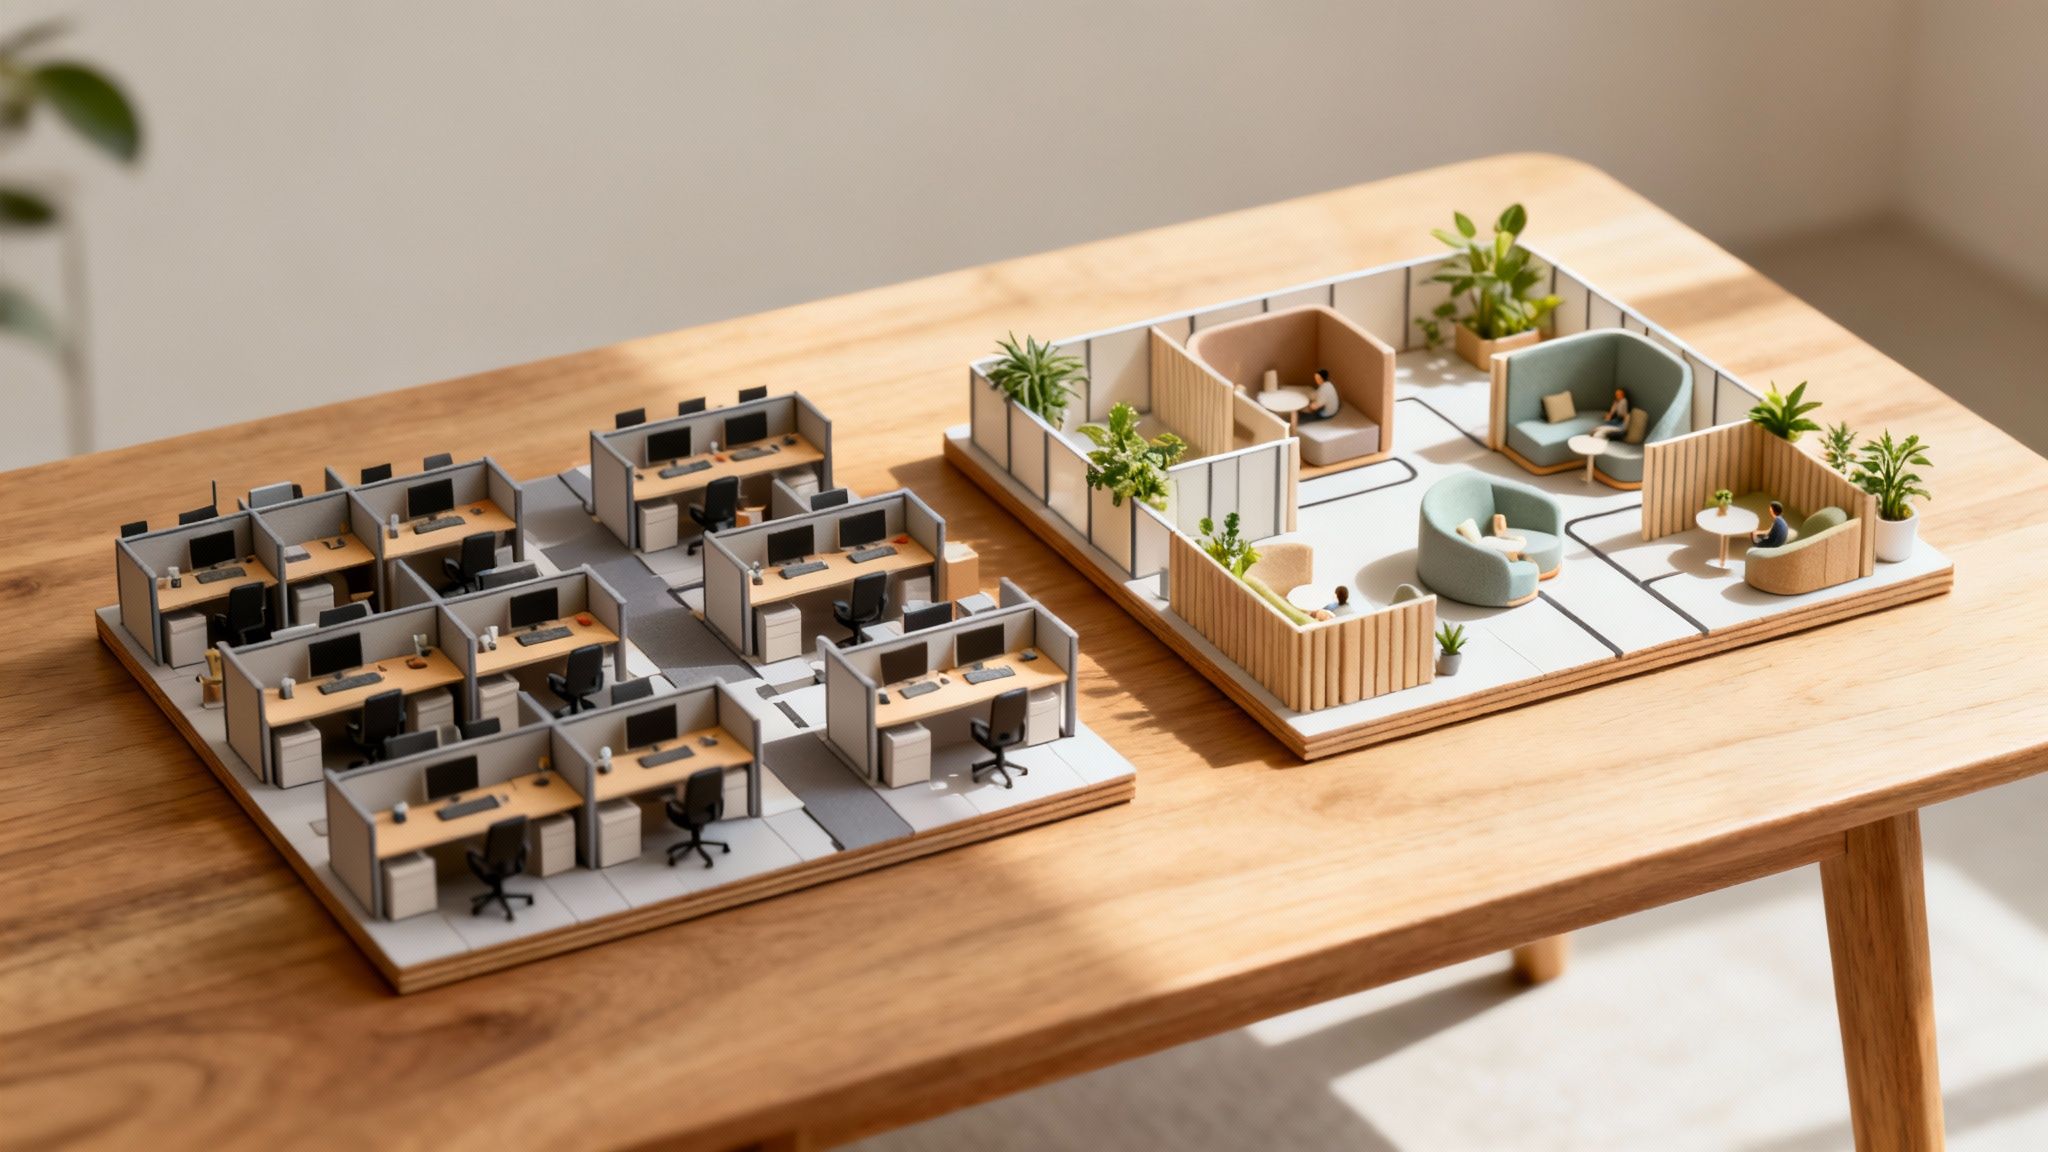
One of the biggest blunders we see is designing a layout based purely on aesthetics or a rigid hierarchy, completely ignoring how teams actually interact. Placing departments that collaborate constantly on opposite ends of the building just creates friction and wastes valuable time. Imagine the marketing team having to trek across the entire office multiple times a day to sync with sales—it’s a recipe for inefficiency.

A professional planner starts by mapping these "workflow paths." They make sure collaborative teams are neighbors and that high-traffic areas like kitchens or copy rooms don't cut right through quiet zones meant for focused work. At Cubicle By Design, we always prioritize function to make sure the final layout actively supports how your business runs.

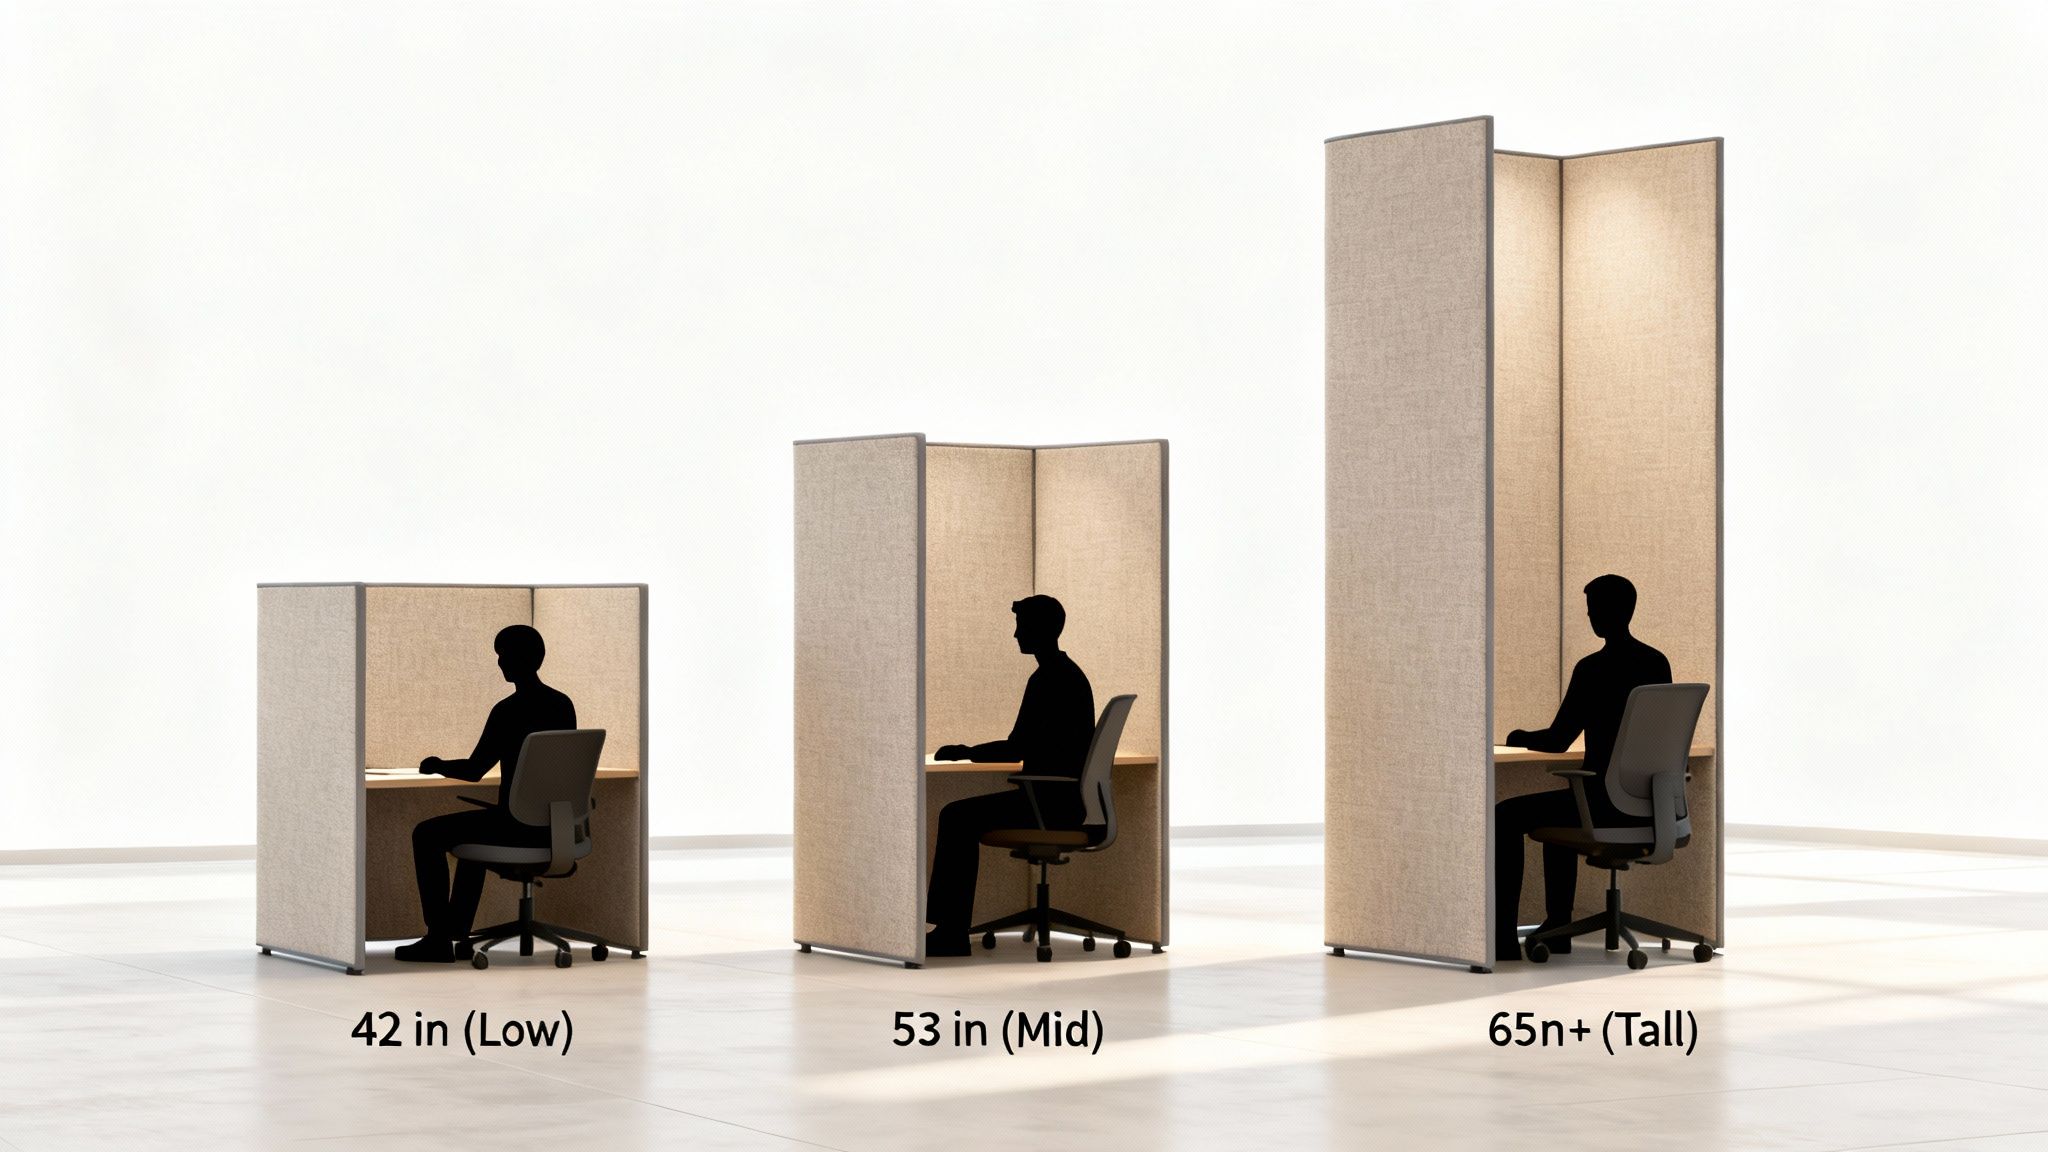
Neglecting Acoustics and Privacy

The open-office trend promised a new era of collaboration, but for many, it delivered a chaotic mess of distractions. Without proper acoustic planning, the background noise from conversations, phone calls, and even footsteps can completely destroy concentration. In fact, studies show that poor environmental conditions can slash productivity by as much as 10%.

A great design has to balance that collaborative energy with the very real need for individual focus. This means thinking about sound-absorbing materials, creating designated quiet zones, and using flexible solutions like modular walls or private office cubicles to give employees back some control over their environment.

Overlooking Future Growth

Designing a space that’s a perfect fit for your current headcount but has zero room to grow is a classic, short-sighted mistake. If you're planning to expand, a rigid layout will force you into an expensive and disruptive reconfiguration in just a couple of years. It’s a headache you don’t need.

The solution is to build in flexibility right from the start. Using modular workstation cubicles that can be easily rearranged or planning for "soft" areas that can be converted into new desk spaces allows your office to scale right alongside your business. An experienced partner is always thinking about your success five years down the road, not just for opening day.

Ignoring Health and Compliance

Finally, it’s a huge error to neglect the factors that lead to employee discomfort or even illness. Poor ventilation, bad lighting, and layouts that don't meet building codes or ADA standards aren't just mistakes—they're liabilities. It's critical to understand how to avoid sick building syndrome symptoms by prioritizing a healthy indoor environment from the get-go. A professional partner ensures your design isn't just functional but is also safe, compliant, and supportive of your team’s well-being, which is the foundation of any productive workplace.

Still Have Questions? We've Got Answers

Embarking on an office redesign can feel a little overwhelming, and it's natural to have a few questions pop up. We get it. To help clear things up, here are some straight answers to the most common queries we hear about office space planning services.

How Long Does the Office Space Planning Process Typically Take?

Honestly, it all comes down to the size and complexity of your project. A quick refresh of a small office might only take a few weeks from our first chat to the final installation. But if we're talking about a full-scale build-out for a new corporate headquarters, you're likely looking at a timeline of three to six months, sometimes even longer.

It helps to think of the process in a few key stages:

  • Discovery & Analysis: Usually 1-2 weeks.
  • Conceptual Design: Give this 1-3 weeks.
  • Detailed Design & Furniture Selection: This can take anywhere from 2-6 weeks.
  • Procurement & Installation: This is often the longest leg of the journey, at 4-12 weeks.

The good news? Working with a team like ours at Cubicle By Design can really streamline things. We keep the design, purchasing, and project management all under one roof, which helps keep the entire process moving smoothly.

Can I Use These Services for a Small Office on a Tight Budget?

Absolutely. In fact, that's where smart planning can make the biggest impact. Effective space planning isn't just for big corporations; it’s about making the most of what you have, no matter the size. A good partner will dig into your budget and find ways to maximize every square foot and every dollar.

They might suggest clever, cost-effective solutions like high-quality remanufactured cubicles or versatile, modular workstation cubicles that can grow and change right along with your team.

Don’t make the mistake of thinking professional planning is out of your reach. We even created tools like our online Custom Cubicle Designer specifically to help you find that perfect sweet spot between what your business needs and what your budget allows.

What Is the Difference Between an Interior Designer and an Office Space Planner?

It's a great question, and while their skills definitely overlap, their core focus is different. Think of it this way: an interior designer is often centered on the aesthetics—the color palettes, the textures, the finishes, and the overall "vibe" of the space. They make it look and feel great.

An office space planner, especially one from a full-service dealer, is laser-focused on function. We're the ones who dive deep into how your team actually works. We analyze workflow, figure out the most efficient use of space, and determine how furniture systems like private office cubicles will support your business goals. Our job is to create a productive machine, ensuring layouts support day-to-day tasks while meeting all the necessary building codes and ADA rules.

Ultimately, a planner’s main goal is to make sure the space works as beautifully as it looks.


Ready to turn your simple floor plan into your company's greatest strategic asset? At Cubicle By Design, our expert team is here to guide you with end-to-end office space planning services, creating a workplace that's efficient, inspiring, and right on budget. Start your journey to a better workplace today.

Read More

Transform Your Workspace with Modular Office Cubicles | Cubicle By Design

If you’ve ever stared at a fixed office layout, you know how limiting and frankly, outdated, it can feel. For any business trying to navigate growth, hybrid work, or just the day-to-day shuffle, the answer isn’t to knock down walls—it’s modular office cubicles.

Think of it this way: traditional office construction is like building a house with glue instead of screws. It’s permanent. Modular systems, on the other hand, are like a high-end LEGO set for your workspace, giving you the power to reconfigure, expand, or shrink your layout with incredible ease.

The Blueprint for a Flexible Modern Office

In a world where business needs can change seemingly overnight, your physical office has to keep up. Traditional construction, with its drywall and permanent floor plans, often locks companies into one way of working. That rigid setup quickly becomes a major headache when a team needs to grow, a new department pops up, or you decide to create more collaborative zones. The old way of thinking forced businesses to adapt to the office; the new way makes the office adapt to the business.

This is where modular office cubicles completely change the game. They aren't permanent fixtures. Instead, they're a system of pre-engineered components—panels, work surfaces, storage units, and even glass walls—that click together to create anything from open-plan workstations to fully private offices. If you want to dive deeper into the basics, we have a whole guide explaining what modular furniture is. It’s this system-based approach that gives you an incredible amount of freedom.

Miniature people are assembling modular office cubicles, showing a flexible workspace design with a floor plan.

Why a Modular Blueprint Matters

Adopting a modular mindset isn’t just about buying furniture; it's an investment in an adaptable, long-term infrastructure for your company. This kind of blueprint lets you react quickly to organizational shifts without the massive disruption and high costs of a full-blown renovation.

A modular blueprint gives you control over your workspace's destiny. You can reconfigure a department over a weekend, add private offices without calling a construction crew, and scale your footprint up or down as your headcount fluctuates.

At Cubicle By Design, we live and breathe this stuff—we help businesses create these dynamic environments every day. Whether you're just starting to explore our versatile cubicles or you need something specific like private office cubicles or collaborative workstation cubicles, the principle is the same: you get the power to design a smarter, more responsive workplace.

Our interactive Cubicle Designer tool is the perfect first step to turn this blueprint into a reality, letting you play with different layouts to build the perfect setup for your team.

The Real-World Benefits of a Modular System

Okay, so we know modular systems are flexible. But what does that actually mean for your business, your bottom line, and your team's day-to-day sanity? It’s about more than just movable walls; it’s a strategic decision that pays off in real, tangible ways. Let's dig into the three biggest advantages you'll see.

A modern office interior featuring two private cubicles, a central meeting table, and chairs.

Scalability On Demand

Imagine this: your startup just landed a huge contract and you need to bring on ten new developers—yesterday. With a traditional, fixed-wall office, you’re staring down the barrel of noisy construction, dust, and weeks of downtime just to make room. A modular system, on the other hand, can turn that massive headache into a simple weekend project.

Because all the components are designed to work together like building blocks, you can add, subtract, or completely rearrange workstations to fit your team’s changing size. This means you can:

  • Expand Rapidly: Need to add a new department? You can pop in new workstation cubicles without throwing the entire office into chaos.
  • Downsize Efficiently: Shifting to a hybrid work model? You can shrink your layout to save on rent, all without scrapping your initial furniture investment.
  • Reconfigure Instantly: That row of individual pods can become a collaborative hub for a new project in a matter of hours, not weeks.

When your office can grow and shrink with you, your physical space stops being a roadblock and starts being an asset.

Long-Term Cost Efficiency

While the upfront cost of a good modular system might seem similar to other office furniture, the real savings come over the long haul. You're avoiding the gut-wrenching costs of traditional construction. There’s a reason the global modular office furniture market is booming—it was valued at USD 12.5 billion in 2026 and is on track to hit USD 20.3 billion by 2031. Businesses are catching on to the smarter investment.

By investing in a system that can be reconfigured and reused, you sidestep the recurring expenses of demolition, construction, and disposal associated with permanent walls. Every time you adapt your layout, you're tapping into the value you've already paid for.

And what happens when you move? Your investment comes with you. Modular cubicles can be taken apart, moved, and put back together in your new location. If you’re planning a move, using a comprehensive office relocation checklist can make the whole process smoother.

An Enhanced Employee Experience

Let’s be honest: a one-size-fits-all office rarely fits anyone well. Modular systems give you the power to create a workspace that actually works for the people in it. When your team has the right environment, focus and morale go way up.

For example, you can give your finance team the quiet they need with private office cubicles built with high, sound-dampening walls. At the same time, your marketing team can get low-walled, open pods perfect for hashing out ideas on the fly. This isn’t just about furniture; it’s about showing your employees you’re thinking about their needs.

You can finally create an office that offers the best of both worlds:

  • Privacy and Focus: Carve out quiet zones where people can actually concentrate.
  • Collaboration: Design open, interactive hubs that encourage teamwork.
  • Personalization: Give people a say in how their own space is set up.

At Cubicle By Design, we help businesses strike this exact balance with our huge range of cubicles. You can even start playing with ideas right now using our online Cubicle Designer.

Deconstructing the Modular Cubicle

When you're looking at modular office cubicles, you're not just buying a desk with some walls tacked on. You're really investing in a complete system of interconnected parts, where every single piece has a purpose and a surprising range of customization. Think of it like building a custom PC—you start with the case, but then you choose the processor, motherboard, and all the other components that make it work exactly how you need it to.

Getting to know these individual components is what separates a good office layout from a great one. It’s how you go from a vague idea of "needing more workstations" to a specific, smart plan for your space. Let's break down the essential building blocks.

The Core Building Blocks: Panels and Surfaces

The two most fundamental pieces of any cubicle are its panels and work surfaces. These are the parts that create the structure, define each person's space, and give your team a place to actually get work done.

Panels are the vertical walls of the cubicle, but they do a lot more than just divide space. They're your primary tool for managing acoustics and setting privacy levels. The options here are vast:

  • Height: You can go with low panels (around 42 inches) to encourage conversation and collaboration, or choose taller panels (65 inches or more) to create quiet, heads-down workstations.
  • Material: Need to dampen sound? Go with sound-absorbing acoustic fabrics. Want something easy to clean and modern? Laminates are a great choice. You can even use elegant glass panels to keep things private without blocking natural light.
  • Functionality: Some panels are "tackable," which is perfect for pinning up notes and reminders. Others have built-in accessory rails, so you can easily mount monitors and shelves without drilling a single hole.

Work Surfaces are simply the desktops, but they're far from simple anymore. Modern systems offer all sorts of shapes and finishes to fit different work styles. You've got L-shaped surfaces for corner setups, curved "cockpit" style desks that put everything within easy reach, and traditional straight surfaces for clean, linear rows.

The real magic of modular office cubicles is seeing how these pieces combine. A tall, fabric-wrapped panel paired with a big L-shaped desk creates a perfect private hub for an accountant. Meanwhile, a cluster of low-paneled workstations with straight desks is an ideal setup for a collaborative sales team.

It's All in the Details: Integrated Storage and Organization

Clutter is the absolute enemy of productivity. Modular cubicles tackle this problem head-on with storage solutions that are built right into the system, keeping everything organized without eating up precious floor space. These aren’t just afterthoughts; they're designed to be a seamless part of the workstation.

This table gives a quick overview of the essential components and how you can tailor them to your needs:

Component Function & Purpose Common Customization Choices
Panels Form the walls of the cubicle; provide privacy, acoustic control, and structural support. Height (low, medium, high), material (fabric, glass, laminate), tackable surfaces, power integration.
Work Surfaces The main desk area where work is performed. Shape (L-shape, U-shape, straight, curved), size (depth and width), finish (woodgrain, solid colors).
Pedestals Under-desk filing and storage for personal items and documents. Mobile or fixed, file/file or box/box/file drawer configurations, locking options.
Overhead Storage Bins or shelves mounted to panels for storing binders, books, and supplies off the desk. Open shelves, flipper door bins, various widths and finishes to match the system.
Power & Data Raceways Channels in the panels that house electrical wiring and data cables for a clean, safe setup. Base-level or belt-line access, number of outlets and data ports per workstation.

By mixing and matching these elements, you can ensure every employee gets the exact setup they need to stay organized and focused. For a deeper dive into how these components create different layouts, check out our guide on cubicle configurations and their components.

Powering and Connecting Your Team

In any modern office, easy access to power and data is a must. One of the biggest wins for modular office cubicles is how they handle all the cables and tech. Instead of a chaotic mess of extension cords snaking across the floor, the entire infrastructure is built directly into the panels.

This is done using "raceways"—hidden channels that run along the base or middle of the panels. These raceways neatly contain all the electrical wiring and data cables, delivering outlets and network ports right where you need them. It’s a clean, safe, and incredibly functional system.

This kind of built-in efficiency is a huge reason the market is growing so fast. The global office cubicles market, valued at USD 61 billion in 2023, is on track to hit USD 104.8 billion by 2031. It’s clear that businesses are demanding these kinds of organized and forward-thinking solutions.

Once you understand how these different pieces—panels, surfaces, storage, and power—all fit together, you can start to really visualize your ideal workspace. Each component is a decision point, a chance to fine-tune the environment to perfectly match how your team works.

Designing Your Ideal Workspace Layout

Taking the idea of modular design and turning it into a real, working office layout—that's where the magic happens. It’s one thing to understand the parts, but it’s another to arrange them strategically to solve your company’s unique challenges. A great layout isn't just about cramming desks into a room; it’s about building an environment that actively helps your teams work, talk, and get things done.

The first step? Think in terms of zones and workflows. Who needs to collaborate all the time? Who needs dead silence to concentrate? Where do people tend to gather, and how can you manage the foot traffic so it isn’t disruptive? Answering these questions helps you map out a floor plan that just feels right from day one.

Creating Purpose-Built Work Zones

With modular office cubicles, you can finally ditch the one-size-fits-all approach and design specific areas for different kinds of work. This zoning strategy is the key to keeping everyone happy and productive in a single space.

Here are a few common ways to do it:

  • Focused 'Pods' for Deep Work: Got programmers, writers, or accountants who need to get in the zone? Create small clusters of high-walled private office cubicles. Using panels that are 65 inches or taller with acoustic fabric is a game-changer for cutting down ambient noise, creating a quiet sanctuary for heads-down work.
  • Efficient Rows for High-Volume Teams: Call centers or data entry teams often thrive in organized, linear layouts. Here, you can use medium-height panels to set up uniform workstation cubicles. This gives everyone their own space while still making it easy for managers to supervise and for the team to feel connected.
  • Collaborative Hubs for Project Teams: For your creative or project-based teams, low panels and shared surfaces are perfect for sparking those spontaneous conversations and brainstorming sessions. Arranging these workstations in a pinwheel or small group creates a natural hub for teamwork.

This graphic really breaks down how all the essential pieces come together to make these custom setups a reality.

Hierarchy diagram illustrating a workstation made of modular panels, surface, and storage components.

As you can see, every workstation is just a system of interchangeable parts—panels, surfaces, and storage—that you can mix and match in countless ways to build the exact layout you need.

Principles of Smart Space Planning

Beyond creating zones, smart space planning is about thinking through the entire flow and feel of the office. A well-designed layout considers density, pathways, and technology to create a workspace that’s as comfortable as it is functional. As you get ready for the switch, it’s also a good time to think about logistics. Before the new setup arrives, you’ll need a clean slate. Using professional office cleanout and IT equipment disposal services can be a huge help in efficiently clearing out old furniture and tech to prep your space.

An effective workspace layout is a strategic asset. It guides employee interaction, supports different work styles, and can directly influence productivity and job satisfaction by removing daily friction points like noise, clutter, and inefficient pathways.

A few key principles to keep in mind:

  1. Managing Traffic Flow: Make sure you have clear, wide pathways between cubicle clusters to prevent bottlenecks. The main "walkways" should be kept free of clutter so people can move around without disturbing those who are focused on their work.
  2. Balancing Density: It’s tempting, but avoid cramming too many workstations into one area. Giving people proper breathing room not only makes the office more comfortable but also helps with noise control and makes the whole space feel more open and less chaotic.
  3. Integrating Technology Seamlessly: Plan for your power and data needs right from the start. Modular systems with built-in raceways are brilliant for this—they keep all the cables hidden but accessible, which means no more trip hazards or messy-looking wires.

Pulling all of this together can feel a bit overwhelming, but you don't have to go it alone. Getting some expert help can make all the difference. To see how the pros handle this, you can learn more about our dedicated office space planning and design services, where we help you get the most out of every square foot. By combining thoughtful design with the versatility of modular office cubicles, you can create an environment that’s built for today and ready for whatever comes next.

Planning Your Budget for Modular Cubicles

Let's get down to brass tacks. While dreaming up a flexible, modern workspace is the exciting part, the conversation always circles back to one critical question: what's this going to cost? Budgeting for modular office cubicles isn't about finding a single price tag. It's about understanding all the little things that add up and recognizing the long-term value you're getting.

Unlike buying a simple desk or chair, the price of a modular workstation is really the sum of its parts. Every single choice you make—from the height of the walls to the finish on the desktop—shapes the final number. This is actually a good thing, because it puts you in the driver's seat. You get to decide where to invest in premium features, like better acoustics for privacy, and where you can be a bit more economical.

Key Factors That Influence Price

When you know what drives the cost of these systems, you can make smart trade-offs. It allows you to put your money where it matters most for your team's day-to-day work, all while sticking to your financial plan.

Here are the main things that will move the price needle:

  • Panel Height and Material: It's simple—taller panels cost more than shorter ones. Likewise, if you opt for panels with special sound-dampening materials or sleek glass inserts, you'll see a bigger investment than with standard fabric ones.
  • Integrated Power and Data: How wired you need to be matters. Basic power outlets at the base of a panel are pretty cost-effective. But if you need easy-access power and multiple data ports right at desk level for every workstation, that will add to the cost.
  • Work Surface Size and Finish: A larger, premium laminate work surface is naturally going to be priced higher than a smaller desktop with a standard finish.
  • Storage Components: The more storage you add, the more it will cost. Things like overhead bins for binders, rolling filing cabinets, and open shelving all contribute to the final price of each station.

For a really detailed look at how these pieces come together on a price sheet, our comprehensive cubicle price guide is a fantastic resource. It'll help you get a much clearer picture of your project costs.

Total Cost of Ownership: A Smarter Financial Outlook

The real story behind the cost of modular office cubicles isn't just the check you write today. It's about the total cost of ownership over the entire life of your office. This is where modular systems leave traditional construction in the dust.

An investment in modular is a capital expense that holds its value. Drywall becomes a sunk cost the second it's put up, but your cubicle system can be reconfigured, moved, and used again, saving you a fortune on future construction and headaches.

Think about that for a second. When your team expands or you realize the current layout just isn't working, you don't have to call in a demolition crew. You simply reconfigure the assets you already own. That kind of adaptability delivers a return on investment that fixed walls can never hope to match.

Modular Cubicles vs. Traditional Office Construction: A Cost-Benefit Analysis

When you’re weighing your options, looking at modular systems versus building out traditional drywall offices is a common crossroads. The initial invoice is only one part of the story; the real differences emerge in flexibility, long-term value, and operational impact.

This table breaks down the clear financial and practical advantages:

Factor Modular Office Cubicles Traditional Construction
Initial Cost Upfront investment in reusable furniture assets. Includes labor, materials, permits, and finishing costs.
Flexibility Layouts can be reconfigured with minimal cost and downtime. Any change requires costly demolition and new construction.
Relocation Assets can be disassembled and moved to a new location. The entire investment is lost; you must start from scratch.
Depreciation Treated as a depreciable asset (furniture), often with tax benefits. Becomes a permanent part of the building with less favorable depreciation.
Disruption Reconfigurations can happen quickly, often over a weekend. Involves weeks of noise, dust, and significant operational disruption.

Ultimately, choosing a modular system is a strategic financial move. It shifts your spending away from a cycle of expensive, one-and-done construction projects and toward a single, flexible investment that grows and changes right alongside your business.

Partnering with Cubicle By Design

Picking out the right modular office cubicles is a huge step, but honestly, it’s only half the battle. The other half—and you could argue it's the more critical part—is choosing a partner who can actually guide you from a rough idea to a fully functioning workspace. A great partner doesn't just sell you furniture; they bring the expertise and support to make sure your project gets done right, on time, and within your budget.

That’s where we come in. At Cubicle By Design, we are that full-service partner. Our whole goal is to take the complex, often stressful process of outfitting an office and make it feel straightforward and manageable. We get it. You're not just buying cubicles; you’re building an environment where your team can do their best work.

This hands-on approach is more important than ever. The demand for adaptable office solutions is soaring—the modular furniture market was valued at USD 88.4 billion in 2025 and is expected to hit USD 134.7 billion by 2035. With that kind of growth, having an experienced guide in your corner is a game-changer.

A Comprehensive Support System

Our support begins long before the first panel arrives at your door. We’ve built a complete set of services to cover every single stage of your office transformation. We don't do "one-size-fits-all" here. Instead, everything we do is tailored to what you actually need.

This includes:

  • Expert Space Planning: Our team digs into your floor plan to optimize it for workflow, collaboration, and smart use of space, making sure every square foot pulls its weight.
  • Dedicated Project Management: You'll have a single point of contact to guide you through it all, handling the logistics and keeping everything on track so you don't have to.
  • Professional Installation: Our seasoned installers take care of the entire assembly, ensuring your workstation cubicles and private office cubicles are set up correctly and safely from the start.

The Power of the Custom Cubicle Designer

One of the coolest tools we offer is our online Custom Cubicle Designer. This interactive tool puts you in the driver's seat, letting you build, experiment, and visualize the perfect setup before you commit to anything. You can play around with different layouts, materials, and add-ons to create a workspace that truly matches your vision.

Partnering with an expert team means you get more than just products; you get a strategic ally committed to designing a better workplace. We handle the complexities so you can focus on your business.

This customer-first mindset is at the heart of everything we do. We’ve built our name on being a reliable, knowledgeable resource for businesses of all sizes. To get a better feel for our philosophy, you might want to read about why so many businesses rely on Cubicle By Design for their office needs. From exploring our wide range of cubicles to seeing the final installation through, we’re with you every step of the way.

Got Questions About Modular Office Cubicles? We’ve Got Answers.

As you get closer to reimagining your workspace, it’s only natural for practical questions to pop up. Planning a new office layout has a lot of moving parts, and getting clear answers upfront is the key to a smooth, predictable process. Here are some of the most common questions we hear from clients diving into modular office cubicles.

How Long Does Installation Actually Take?

This is where you see one of the biggest wins for modular systems: speed. Unlike traditional construction that can drag on for weeks with endless noise and dust, modular components are engineered for incredibly fast assembly.

Believe it or not, a standard project with a dozen or so workstations can often be knocked out over a single weekend. That means your team can leave the office on Friday and walk into a completely refreshed layout on Monday with absolutely zero operational downtime. Bigger or more complex jobs might take a bit longer, but the timeline is still just a fraction of what you’d be looking at with drywall.

Can We Mix New Cubicles with Our Existing Furniture?

This is a huge concern for businesses looking to upgrade in stages, and the short answer is yes—with a little planning. While different brands might not snap together like Legos, modern modular systems are designed to be freestanding and completely self-supporting.

This means you can easily place new workstation cubicles right alongside your existing desks or build out new private offices without worrying about a perfect match with the old system. We do this all the time, helping clients blend new, modern pieces with their current furniture in a way that feels intentional and cohesive, not pieced together.

The whole point of a modular approach is flexibility. That flexibility should absolutely extend to your current assets, letting you modernize your space at a pace that works for your budget and your team.

What’s the Real Difference Between Panel Options?

The panels you pick are a huge deal. They do more than just divide space; they have a major impact on the look, feel, and function of your office, giving you direct control over privacy, acoustics, and light.

  • Fabric Panels: Think of these as the workhorses for sound control. Sound-dampening fabric panels are fantastic for creating quiet, focused workstations and cutting down on that distracting ambient office buzz.
  • Laminate Panels: If you’re going for a sleek, modern vibe, laminate is a great choice. These panels are durable, a breeze to clean, and offer excellent visual privacy. Just know they don’t absorb sound quite like fabric does.
  • Glass Walls: Glass panels, sometimes called "storefronts," are perfect when you want private office cubicles that still feel open and connected to the rest of the team. They let natural light pour through the space while providing surprisingly good acoustic separation.

A great way to get a feel for the possibilities is to browse the different cubicles available and see how these materials can be mixed and matched.

How Do These Systems Handle All Our Wires and Cables?

A jungle of tangled cables isn't just ugly—it's a safety hazard. Modular systems were designed to solve this problem from the ground up with integrated "raceways." These are simply hidden channels built right into the base or middle of the panels.

These raceways neatly house all your electrical wiring and data cables, delivering power outlets and network ports directly to each person's desk. Everything stays organized, safe, and completely out of sight. It’s a clean, brilliant solution built for how we actually work with technology today.


Ready to build a workspace that truly works for you? At Cubicle By Design, we help you navigate every decision, from the first sketch to the final installation. Start bringing your vision to life with our powerful and easy-to-use Custom Cubicle Designer today.

Read More

A Practical Guide to the Standard Size of Cubicle | Cubicle By Design

When you're trying to figure out the most common cubicle size, the industry overwhelmingly points to the 6'x6' (six-foot by six-foot) footprint. This versatile 36-square-foot space hits the sweet spot for most office tasks, giving it a well-earned reputation as the go-to starting point for any layout plan from Cubicle By Design.

Decoding the Language of Cubicle Dimensions

Staring at a blank floor plan can feel like trying to solve a puzzle with half the pieces missing. You’ll hear terms like "6×6" or "8×8" thrown around, but what do those numbers actually mean for your team’s comfort and productivity? Choosing the right size is about more than just measurements—it’s about designing a space that just works.

The office has come a long way from the paper-stacked mazes of the past. Today's workspaces are dynamic, tech-driven hubs built for both deep-focus work and quick collaboration. We dive into this shift in our guide on the evolution of the office cubicle, which really explains why certain dimensions became the industry standard.

From Footprints to Functionality

The key is to think beyond simple dimensions. Every footprint directly impacts an employee's ability to concentrate, collaborate, and stay organized. The goal isn't just to fill a room; it's to match the space to the demands of the job.

Just as a chef needs different counter space for different tasks, an employee's workspace must support their specific workflow. A one-size-fits-all approach rarely leads to peak efficiency or satisfaction.

This guide will break it all down, starting with a quick-reference table to help you visualize how different cubicle footprints translate into real-world applications for your team.

Quick Guide to Common Cubicle Sizes by Role

Think of this table as a cheat sheet for kickstarting your office plan. It lines up the most common cubicle dimensions with the roles they serve best, making it easier to picture how each size fits into a modern office.

Cubicle Size Typical Use Case Key Benefit
5' x 5' Call centers, data entry, touchdown stations High-density efficiency and space savings
6' x 6' General office staff, HR, administrative roles Versatile balance of space and privacy
6' x 8' Tech roles, designers, engineers needing more room Extra surface area for monitors or layouts
8' x 8' Managers, supervisors, roles requiring meetings Accommodates a guest chair and storage

As you can see, each size is tailored for a specific type of work. The versatile 6'x6' became the industry gold standard for good reason—it provides enough room for most general office staff without eating up too much valuable floor space. For a look at our full range, check out our cubicles.

Breaking Down Common Cubicle Dimensions

Choosing the right cubicle size is about more than just numbers on a floor plan. It’s about getting a feel for the real-world experience of working in that space day in and day out. Each footprint is built for a specific kind of workflow, directly shaping everything from an employee's focus to their ability to collaborate. This is where we stop talking about abstract measurements and start talking about practical, functional workspaces.

Let’s translate those common cubicle sizes into tangible workstations you can actually visualize for your team. Once you understand how each dimension feels and functions, you can make smart decisions that line up with your company’s needs and its culture.

This infographic really gets to the heart of office planning, showing how privacy, collaboration, and budget are all tangled together.

A concept map illustrating how office planning relates to privacy, collaboration, and budget to find the right standard cubicle size.

As you can see, a great office layout finds that sweet spot where all three factors meet. The goal is a space that's not only cost-effective but also genuinely supportive of how your team actually works.

The Compact 5'x5' Footprint

The 5'x5' cubicle is the definition of efficiency. It offers a tight 25-square-foot workspace designed for high-density environments where you need to maximize every inch. This size is a perfect match for roles that are almost entirely computer-based and don’t involve much physical paperwork, like call centers, data entry clerks, or telemarketing teams.

Think of it as a focused cockpit. There's just enough room for a computer, a phone, and the essentials—and not much else. This compact setup is brilliant for minimizing distractions and maximizing the number of workstations you can fit into an area, making it a budget-friendly choice for large teams handling repetitive tasks.

The Versatile 6'x6' Footprint

We mentioned it before, but the 6'x6' cubicle is the undisputed industry standard for good reason. At 36 square feet, it strikes an ideal balance between personal space and spatial efficiency, making it the go-to workhorse for most general office roles. This is the sweet spot for administrative staff, HR professionals, and project coordinators.

An employee in a 6'x6' station has plenty of room for an L-shaped desk, a couple of monitors, and some personal storage like a filing pedestal. It offers just enough "breathing room" to feel comfortable and focused without completely isolating team members from one another. For a deeper dive into how these can be laid out, check out our overview of popular cubicle configurations.

The 6'x6' cubicle is the jack-of-all-trades in office design. It’s large enough to support focused, multi-faceted work but compact enough to maintain a sense of team cohesion and fit within most floor plans.

The Expansive 6'x8' Footprint

When a role demands more real estate, the 6'x8' cubicle is the answer. Offering a generous 48 square feet of space, this dimension is ideal for employees who need to spread out. Think engineers, designers, or architects who are constantly working with large drawings, blueprints, or multiple oversized monitors.

That extra room is crucial for work that goes beyond a single screen. Those extra two feet can accommodate a much larger U-shaped work surface, more extensive storage, or simply provide more room to move around. It’s a significant upgrade that supports complex, detail-oriented tasks without needing to jump to a fully private office.

The Private 8'x8' Footprint

At a roomy 64 square feet, the 8'x8' cubicle starts to blur the line between a workstation and a small office. This generous footprint is typically reserved for managers, supervisors, and employees whose roles require a high degree of confidentiality or frequent small, private meetings.

This size easily fits a guest chair, making it simple to have one-on-one conversations without having to hunt down an open conference room. These spacious layouts are almost always paired with higher panels to create a true sense of privacy, making them an excellent choice for roles in finance, legal, or management.

How Panel Height Shapes Your Office Culture

A cubicle's size isn't just about its footprint on the floor. What really shapes the employee experience—and your company culture—is the height of the walls. This one factor directly controls privacy, manages noise, and dictates how easily people can collaborate.

Think of panel height as a privacy dial for your office. Turn it down low, and conversation flows freely. Turn it up high, and you create a secluded world for deep focus. Striking the right balance is all about matching your team's need for focus with your company's desire for an open, connected atmosphere.

Three office cubicles showing 42-inch low, 53-inch mid, and 65-inch tall heights with people working in each.

Choosing the right height is a strategic decision. It sends a clear message about how you expect work to get done.

Low Panels: Built for Collaboration

Low panels, usually around 42 inches tall, are all about encouraging open communication. At this height, employees have clear sightlines across the office, making it effortless to ask a quick question, bounce an idea off a coworker, or just feel the buzz of the team.

This setup is perfect for high-energy departments like sales, marketing, or creative teams that thrive on constant interaction. The low walls cultivate a real sense of community and transparency, which can be a powerful tool for building team spirit.

Mid-Height Panels: The Best of Both Worlds

By far the most common and versatile choice, mid-height panels stand around 53 inches. They offer what we call "seated privacy"—when an employee is sitting, they’re shielded from visual distractions, letting them get into the zone.

But the moment they stand up, they can see and speak with colleagues. This makes mid-height panels a fantastic middle ground, perfectly balancing the need for individual concentration with the ability to connect. It’s the go-to for a huge range of roles, from admin staff to project managers, because it just works.

Mid-height panels give employees a personal space for deep work while keeping them connected to the team. It prevents the isolation that can creep in with high-walled workstations.

This adaptability is exactly why the 53-inch height is so popular in modern office design. It allows for quiet focus without killing the collaborative vibe.

Tall Panels: For Maximum Focus and Confidentiality

When a job demands serious concentration or involves sensitive information, tall panels of 65 inches or more are the only way to go. These panels create semi-private offices that dramatically cut down on both visual and auditory distractions.

High-walled workstations are a no-brainer for finance, legal, or HR teams handling confidential data daily. They're also ideal for anyone who needs long, uninterrupted stretches of thought—think developers, writers, or researchers. If you want to learn more about creating these zones, you can explore our guide on effective office cubicle privacy.

Many businesses find a mix-and-match approach works best. You can design a high-energy "collaboration hub" with low panels for your sales team, then create a "quiet zone" with tall panels for your accounting department. With the flexibility of Cubicle By Design, you can build a truly dynamic layout that supports every single person on your team.

Mastering Your Office Layout and Space Planning

Once you have a feel for the right cubicle footprints and panel heights for your teams, the next big step is arranging them into a floor plan that actually works. This is so much more than just a game of office Tetris; it’s about creating a functional, intuitive environment where work can flow without a hitch. Thinking about the standard size of cubicle you've chosen gives you a predictable building block for mapping out the entire workspace.

A well-designed layout doesn't just squeeze everyone in—it boosts productivity, ensures safety, and frankly, just makes the office a better place to be. This means taking a thoughtful approach to walkways, shared spaces, and the overall circulation of people throughout the day.

An office floor plan blueprint showing 6x6' cubicle stations and 36-inch aisles, highlighting office layout planning.

Calculating Your Space Per Employee

Before you start placing a single cubicle on your blueprint, you absolutely have to understand your total space allocation. A common mistake we see is people only counting the workstation itself. The real calculation for square footage per employee must also include their slice of common areas like hallways, break rooms, conference rooms, and the reception area.

As a general rule of thumb, industry benchmarks suggest aiming for 150 to 200 square feet per person. This is a comfortable average for a traditional office layout that accounts for both personal and shared spaces, helping you avoid a cramped, inefficient environment. Of course, this can shift. For higher-density layouts like call centers, the number might shrink to around 80-150 sq. ft., while more spacious executive layouts could easily expand to 250 sq. ft. or more.

Think of it like city planning. A residential lot (the cubicle) is important, but you also need to account for roads, parks, and public buildings to create a functional community.

Ensuring ADA Compliance and Safe Walkways

The space between cubicles is just as critical as the workstations themselves. Getting the aisle width right is completely non-negotiable for safety, accessibility, and creating a comfortable flow of foot traffic. If you ignore these guidelines, you're setting yourself up for frustrating bottlenecks and, worse, serious compliance issues.

To make sure your office is accessible to everyone, stick to these key ADA (Americans with Disabilities Act) guidelines:

  • Main Aisles: These are the primary corridors in your office. They should be a minimum of 44 inches wide, though we often recommend 48-60 inches for high-traffic areas.
  • Secondary Walkways: These are the smaller paths that lead to individual workstations. You'll need a minimum width of 36 inches here for comfortable passage.
  • Clearance Behind Desks: Always leave at least 3 feet of space between the back of a seated employee's chair and the next obstacle. This gives them room to push back and stand up without any trouble.

Following these rules ensures your layout isn't just code-compliant but also comfortable and easy for every single member of your team to navigate.

Partnering with Experts for a Perfect Plan

While these rules of thumb provide a great starting point, creating a truly optimized layout can get complicated fast. To really get it right, it’s worth consulting a comprehensive resource for designing an effective office building layout that supports productivity and workflow.

Or, even better, you can remove all the guesswork by working with professionals. Expert layout assistance means every detail is considered, from power and data placement to figuring out which teams need to be near each other. At Cubicle By Design, our team specializes in turning your vision into a professional, code-compliant reality. You can learn more about our hands-on approach with our detailed office space planning and design services. We help you maximize every last square foot, ensuring your investment results in a workspace that is both beautiful and highly functional.

Weaving Power and Data Into Your Layout

Picking out the right size cubicle is a great start, but it's only half the battle. A modern office grinds to a halt without easy access to power and data, yet this crucial element is often an afterthought. That mistake leads to the all-too-familiar nest of tangled cables, overloaded circuits, and frustrated employees.

Thinking about your electrical needs from day one is the only way to sidestep these headaches. It’s about building power solutions right into the furniture itself, instead of daisy-chaining a bunch of extension cords and power strips after your team has already moved in.

Planning for Power and Data Needs

First things first: you need a clear picture of what each person actually needs to do their job. A developer powering multiple high-res monitors and a half-dozen gadgets has completely different demands than an admin who just needs to plug in a laptop.

A quick audit of your team’s tech needs can save you from major problems later on. For every single workstation, think about:

  • How many outlets? Count it up: laptops, monitors, phone chargers, desk lamps, and anything else that needs a plug. It adds up fast.
  • Data ports: Does this person need a rock-solid, hardwired ethernet connection, or is Wi-Fi good enough for their role?
  • USB ports: Could built-in USB charging ports for phones and accessories help clear up some desk clutter and free up a standard outlet?
  • What's next? Is it likely you'll be adding more equipment down the road? Planning for an extra outlet or two is always a smart bet.

Tidy Solutions for Cable Management

Thankfully, modern cubicle systems are designed with all this in mind, offering built-in ways to keep wires completely hidden. This isn't just about looks—it's a huge safety win, getting rid of those nasty tripping hazards.

The best systems use raceways, which are just hollow channels usually found at the base of the cubicle panels. All your power and data cables run through these channels, bringing connectivity right to the desktop without a single wire showing on the floor. Power is delivered to the entire setup through a base-in feed, which hooks the system directly into your building's electrical grid from a floor or wall connection.

Think of an integrated power system as the central nervous system of your office. When it's done right, you never see it, but it’s essential for everything to function smoothly.

Keeping Your Setup Safe and Scalable

This is one area where you absolutely don't want to DIY. Getting the electrical infrastructure for your cubicles done safely and up to code is non-negotiable. While your local codes are what matter most, resources like these Australian Electrical Wiring Standards show just how serious and detailed this work is.

Working with a full-service partner like Cubicle By Design takes all that complexity off your plate. Our team handles these technical details from the very beginning, making sure your power setup is safe, can grow with you, and fits seamlessly into your final layout. To see what a professional plan looks like, take a look at our guide to a proper cubicle electrical setup—it makes all the difference.

Build Your Ideal Workspace in Minutes

All the planning and knowledge you’ve gathered on the standard size of cubicle options and layouts comes together right here. It’s time to stop visualizing and start building. This is where your vision for a perfectly balanced workspace moves from a theoretical idea to a tangible, interactive design.

Instead of sketching layouts on paper or just trying to imagine how different pieces fit, you can step into a digital sandbox built just for this. It’s a space where you can experiment freely, test ideas, and see your future office take shape in real-time—all without any risk or commitment. This whole process takes the guesswork out and lets you make decisions you can feel confident about.

Your Personal Design Sandbox

Think of our online Custom Cubicle Designer as your personal workshop. It’s a powerful, intuitive tool that puts you in the driver's seat, letting you apply everything you’ve learned about footprints, panel heights, and workflow. With just a few clicks, you can translate your requirements into a custom configuration.

We designed it to be incredibly straightforward. You can easily drag and drop components, change dimensions, and cycle through different options to land on the perfect combination. The goal is to make designing your office accessible, efficient, and honestly, pretty enjoyable.

Here’s a quick look at what you can do:

  • Select Footprints: Start with popular standards like 6'x6' or 8'x8', or create a completely custom dimension to fit your unique floor plan.
  • Adjust Panel Heights: Instantly switch between low, collaborative panels and tall, private walls to create distinct zones for different teams.
  • Choose Finishes: Experiment with a huge array of fabrics, laminates, and trim colors to match your company’s branding and aesthetic.
  • Add Storage and Power: Seamlessly integrate pedestals, overhead bins, and electrical systems to build a fully functional workstation.

From Concept to Creation

This isn't just about picking parts from a catalog; it's about crafting a cohesive workspace that truly supports your team. Whether you’re designing high-privacy private office cubicles for your management team or open-concept workstation cubicles for a collaborative department, the designer lets you see exactly how your choices will impact the final look and feel.

This tool bridges the gap between your ideas and a functional, professional layout. It transforms complex planning into a simple, creative exercise, ensuring the final result aligns perfectly with your budget, workflow, and vision.

By the time you're done, you'll have more than just a concept—you'll have a detailed design ready for a quote. It’s the fastest way to explore the endless possibilities for your new office.

Ready to get started? Dive into the designer now and begin building the ideal workspace for your team in minutes.

Common Questions We Hear About Cubicle Sizes

Even when you think you've got the perfect floor plan nailed down, a few practical questions always seem to pop up. Think of this as a quick cheat sheet for the most common queries we get, reinforcing some of the key ideas we've covered so you can move forward with confidence.

What’s the Most Popular Standard Cubicle Size?

Hands down, the 6'x6' cubicle is the industry workhorse. Its 36-square-foot footprint just hits that sweet spot between providing enough personal workspace and being efficient with your floor space. It's the go-to for most general office roles, easily fitting an L-shaped desk and some storage without making anyone feel boxed in.

How Much Space Do I Need for Walkways Between Cubicles?

This is one of those things you can't afford to get wrong. For basic, comfortable movement, you need an absolute minimum aisle width of 36 inches.

But honestly, for main pathways where people are constantly moving, you'll want to aim for 44 to 48 inches. This isn't just about comfort; it's about meeting ADA compliance and preventing a daily traffic jam. Skimping on walkway space is a surefire way to create a frustrating and cramped office.

A little extra room in the walkways makes a massive difference in the daily flow of an office. It’s a small detail that ensures your space is welcoming and safe for every single person who walks through the door.

Can I Mix Different Cubicle Sizes in the Same Office?

Absolutely, and you probably should! Mixing and matching cubicle sizes and panel heights is one of the smartest ways to build a flexible workspace that actually supports how different teams work. It's a core principle of modern office design.

For example, you could set up a high-energy "pod" of low-panel 5'x5' workstation cubicles for a sales team that thrives on collaboration. Meanwhile, your finance or legal teams, who need quiet for deep focus, could get taller, more private 6'x8' private office cubicles.

This kind of tailored approach is exactly what we specialize in at Cubicle By Design—creating zones that help each department do their best work.


Ready to turn all this knowledge into a real-world plan? The team at Cubicle By Design is here to walk you through every step, from initial layout to final installation. Get started and bring your vision to life with our powerful Custom Cubicle Designer.

Read More

10 Facilities Management Best Practices for a High-Performance Workplace | Cubicle By Design

In today's competitive business environment, a well-managed facility is no longer just a backdrop for work. It is a strategic asset that directly drives productivity, enhances employee well-being, and fortifies the bottom line. The discipline has shifted dramatically from a reactive, fix-it-when-it-breaks model to a proactive, data-driven strategy essential for operational excellence. Adopting proven facilities management best practices is the key to creating a safe, efficient, and inspiring workspace that can adapt to the evolving demands of your workforce.

This definitive guide moves beyond theory to provide a practical roadmap. We will explore 10 essential strategies that top-performing organizations are implementing right now to transform their physical environments. You will gain actionable insights into critical areas, from implementing a robust preventive maintenance schedule to optimizing your floor plan for maximum efficiency. We'll cover how to integrate smart building technology, champion sustainability initiatives, and foster a culture of safety and compliance.

Throughout this comprehensive list, we will demonstrate how strategic space planning and the use of flexible solutions, such as modular workstation cubicles and private office setups, can be instrumental in achieving these goals. By the end of this article, you will have a clear, step-by-step framework for elevating your facility from a necessary cost center into a powerful competitive advantage. Partnering with experts at Cubicle By Design can help bring these best practices to life, ensuring your office is not just functional but a true catalyst for success.

1. Preventive Maintenance Planning & Scheduling

Shifting from a reactive "break-fix" model to a proactive, preventive maintenance strategy is a foundational pillar of effective facilities management best practices. This approach involves scheduling regular inspections, planned servicing, and component assessments to identify and address potential issues before they escalate into costly failures. By anticipating needs, you can minimize unexpected downtime, extend the lifespan of critical assets, and ensure a consistently safe, comfortable, and productive work environment. For instance, a scheduled check-up on the power and data components within your workstation cubicles can prevent a productivity-killing outage that affects an entire department. This strategic foresight is the cornerstone of operational excellence and long-term cost control.

A maintenance worker performing a preventive check on industrial equipment, demonstrating facilities management best practices.

Why It Matters

A reactive approach means you are always behind, dealing with emergencies that disrupt operations and strain budgets. Preventive maintenance puts you in control, allowing for planned, methodical upkeep that aligns with business goals and operational schedules. A large enterprise campus, for example, can maintain its extensive cubicle systems with quarterly electrical inspections, while a call center might schedule bi-annual ergonomic assessments of task seating to prevent employee discomfort and boost morale.

Key Insight: The goal of preventive maintenance is not just to prevent failures but to transform facilities management from a cost center into a strategic business partner that enhances operational reliability and employee well-being.

Actionable Implementation Steps

  • Create a Maintenance Calendar: Develop a detailed schedule aligned with fiscal quarters for easier budget planning. Prioritize systems based on their impact on business continuity (e.g., HVAC, electrical in cubicles, server room cooling).
  • Document Everything: Log all inspections, repairs, and component replacements in a centralized system. This data helps identify recurring issues, track asset performance, and justify budget requests for upgrades or replacements.
  • Partner with Vendors: Collaborate with key suppliers for proactive assessments. For example, a furniture partner like Cubicle By Design can offer expert inspections of modular walls and cubicle components, identifying surface wear or potential structural issues before they become major problems.
  • Establish Performance Baselines: Define key performance indicators (KPIs) for critical systems. Monitor metrics like energy consumption, equipment uptime, and the number of maintenance work orders to measure the effectiveness of your program.

2. Space Planning & Utilization Optimization

Effective facilities management best practices extend beyond physical maintenance to the strategic arrangement of the workspace itself. Space planning and utilization optimization is a data-driven approach to designing office layouts that maximize efficiency, support diverse work styles, and enhance employee productivity. It involves analyzing how space is currently used and reconfiguring it to better align with organizational goals, whether that's fostering collaboration, enabling focused work, or accommodating hybrid schedules. For instance, a growing tech company can use a Custom Cubicle Designer to model flexible desk arrangements, ensuring the layout can adapt as the team expands without requiring a costly relocation. This strategic space management turns the physical office from a static expense into a dynamic asset that supports business agility.

Why It Matters

A poorly utilized office leads to wasted real estate costs, decreased employee morale, and inefficient workflows. Strategic space planning addresses these challenges by creating an environment tailored to the actual needs of the workforce. A financial services firm transitioning to a hybrid model, for example, can use modular walls to create a mix of private, focus-oriented spaces and open collaborative zones, reducing its overall square footage by 20% while boosting productivity. Similarly, an enterprise call center can use strategically placed cubicles to improve acoustics and minimize distractions, directly impacting employee performance and satisfaction.

Key Insight: Optimizing your space isn't just about fitting more people in; it's about creating an intentional environment that actively enhances workflow, collaboration, and employee well-being, ultimately driving better business outcomes.

Actionable Implementation Steps

  • Analyze Current Usage: Conduct employee surveys and observational studies to understand how different teams use the space. Use this data to identify underutilized areas and high-demand zones, moving beyond assumptions to make informed decisions.
  • Embrace Modularity: Choose furniture systems that offer flexibility for future changes. Modular solutions like the workstation cubicles offered by Cubicle By Design allow for easy reconfiguration as business needs evolve, protecting your initial investment.
  • Model Before You Build: Leverage space planning tools to create and visualize different layout configurations. This virtual modeling helps you test ideas, gather feedback, and avoid costly mistakes before committing to a physical build-out. To see how this works in practice, learn more about our comprehensive office space planning guide.
  • Measure and Refine: Establish and track key metrics like cost per workstation, employee density (employees per 1,000 sq ft), and utilization rates for different areas. Use these KPIs to measure the success of your design and identify opportunities for further refinement.

3. Integrated Facilities Management (IFM) Systems

Adopting an Integrated Facilities Management (IFM) system represents a strategic leap from managing siloed functions to orchestrating them through a single, unified platform. This approach consolidates maintenance, asset tracking, vendor management, real estate, and compliance into a centralized software hub. By doing so, you gain complete operational visibility, allowing you to coordinate services, track work orders, manage budgets, and make data-driven decisions. For example, a large enterprise can use an IFM system to manage inventories and relocations of workstation cubicles across multiple national sites, all while tracking maintenance schedules for the HVAC systems in those same locations. This holistic view is a key component of modern facilities management best practices.

Why It Matters

Operating with separate systems for maintenance, space planning, and asset management creates data silos, leading to inefficiencies, redundant work, and missed opportunities. An IFM platform breaks down these barriers, providing a single source of truth that aligns facilities operations with broader business objectives. A healthcare system, for instance, can simultaneously track medical equipment maintenance records and workspace utilization, ensuring both compliance and efficient use of its real estate portfolio. This integration transforms facilities data from a simple record into a strategic asset.

Key Insight: The true power of an IFM system is its ability to connect disparate data points, revealing relationships between asset performance, maintenance costs, and space utilization to unlock significant operational efficiencies and cost savings.

Actionable Implementation Steps

  • Start with Core Functions: Begin by implementing modules for your most critical needs, such as maintenance work orders and asset tracking for your cubicle systems, before expanding into more complex areas like sustainability or real estate management.
  • Ensure System Integration: Select a platform that can seamlessly integrate with your existing HR and procurement software to automate processes like employee onboarding and vendor payments.
  • Establish Data Governance: Before implementation, create clear data standards and naming conventions for assets, locations, and work types. Consistent data is essential for accurate reporting and analytics.
  • Prioritize Mobile Access: Choose an IFM vendor with a robust and user-friendly mobile app. This empowers on-site technicians and staff to update work orders, access asset information, and log issues in real-time.

4. Workplace Wellness & Ergonomic Design Integration

Integrating workplace wellness and ergonomic design is a critical component of modern facilities management best practices. This approach goes beyond basic safety to create environments that actively support employee health, comfort, and productivity. It involves the strategic selection of adjustable furniture, thoughtful layout planning for lighting and acoustics, and the provision of spaces that cater to both physical and mental well-being. For instance, a tech firm can equip its workstation cubicles with sit-stand desks and monitor arms, directly addressing ergonomic risks and boosting employee focus. This holistic strategy transforms the workplace from a purely functional area into a supportive ecosystem that enhances human performance.

A bright, modern home office featuring an ergonomic standing desk, monitor, and office chair, reflecting workplace wellness principles.

Why It Matters

A poorly designed workspace can lead to physical strain, mental fatigue, and increased absenteeism. Prioritizing ergonomics and wellness demonstrates a commitment to employee health, which improves morale, reduces injury-related costs, and enhances talent retention. A financial services company, for example, can mitigate the high-stress nature of its call center by installing acoustic panels in its cubicle systems and providing truly supportive seating. Making the right choices in furniture and layout is a direct investment in your most valuable asset: your people.

Key Insight: Effective ergonomic design is not a one-time setup but an ongoing process of assessment, adjustment, and education that adapts to the evolving needs of your workforce, making the facility a strategic tool for organizational health.

Actionable Implementation Steps

  • Conduct Ergonomic Audits: Regularly assess workstations to identify high-risk areas. Use checklists based on OSHA guidelines to evaluate posture, monitor height, keyboard placement, and seating support.
  • Invest in Adjustable Furniture: Prioritize modular furniture that allows for personalization. Equip workstations with adjustable-height desks, articulating monitor arms, and high-quality task chairs. Investing in the best ergonomic office chairs often yields the highest return on investment in wellness.
  • Provide Employee Training: Educate staff on how to properly adjust their chairs, desks, and monitors. Host brief workshops or provide digital guides to empower employees to create their own comfortable and safe setups.
  • Manage Environmental Factors: Address lighting, air quality, and acoustics. Use layered lighting to reduce eye strain, ensure proper ventilation, and implement sound-masking or acoustic solutions in open-plan areas to minimize distracting noise.

5. Sustainability & Green Facilities Management

Integrating environmental stewardship into operations is a critical component of modern facilities management best practices. This forward-thinking approach focuses on energy efficiency, waste reduction, and sustainable procurement to minimize ecological impact while simultaneously reducing long-term operating costs. Green facilities management transforms the workplace into a healthier, more responsible environment. For instance, a tech headquarters can pursue LEED certification by specifying systems like workstation cubicles made from recycled content, directly contributing to sustainability goals while creating a productive workspace. This commitment to green principles is not just an ethical choice; it's a strategic business decision that enhances brand reputation and operational resilience.

Why It Matters

Ignoring sustainability risks higher utility bills, increased regulatory scrutiny, and a negative perception among environmentally conscious clients and employees. A green facilities strategy addresses these risks by creating a resource-efficient operation that aligns with corporate social responsibility values. For example, a corporation can implement a furniture reuse program, donating decommissioned cubicle systems to non-profits instead of sending them to a landfill, which saves on disposal fees and generates community goodwill. This approach turns potential liabilities into tangible assets.

Key Insight: Sustainability in facilities management is about creating a circular system where resources are conserved, waste is minimized, and the workplace environment actively supports both ecological health and employee well-being, driving value beyond simple cost savings.

Actionable Implementation Steps

  • Conduct a Green Audit: Start by assessing your current energy consumption, waste streams, and procurement policies to identify the highest-impact areas for improvement. This provides a baseline for setting realistic goals.
  • Prioritize Sustainable Procurement: Choose vendors with transparent environmental practices. When sourcing office furniture, opt for modular solutions from partners like Cubicle By Design that can be reconfigured and reused, extending asset life and reducing waste.
  • Track and Report Metrics: Establish key performance indicators (KPIs) such as waste diversion rates, energy use per square foot, and carbon footprint. Regularly report on progress to stakeholders to demonstrate the value of your initiatives.
  • Educate and Engage Employees: Foster a culture of sustainability through clear communication, workplace signage, and training on recycling programs and energy conservation. Empower your team to become active participants in your green strategy. Learn more about how you can transform your small business and go green.

6. Technology Infrastructure & Smart Facilities Integration

Integrating smart technology into your facility's infrastructure transforms it from a static environment into a responsive, data-driven ecosystem. This approach involves leveraging IoT sensors, building management systems (BMS), and advanced analytics to monitor and optimize everything from energy consumption and space utilization to air quality and security. By embedding this intelligence into the workplace, you enable proactive adjustments that enhance efficiency and the employee experience. For instance, a hybrid workplace can use desk booking systems integrated with its workstation cubicles to provide real-time availability, streamlining the on-site experience for a flexible workforce.

Hands hold a tablet displaying data in a modern office with a ceiling-mounted smart air quality device.

Why It Matters

A traditional facility operates on assumptions and historical data, leading to wasted energy, underutilized space, and a one-size-fits-all environment. Smart facilities provide granular, real-time data that empowers managers to make informed decisions that directly impact the bottom line and employee well-being. A call center, for example, can monitor noise levels and air quality, automatically triggering HVAC adjustments to maintain an optimal environment. This data-backed approach is a cornerstone of modern facilities management best practices, ensuring resources are allocated precisely where they are needed most.

Key Insight: Smart facility integration is not about collecting data for its own sake; it's about translating that data into actionable intelligence that creates a more efficient, sustainable, and human-centric workplace.

Actionable Implementation Steps

  • Start with a Pilot Program: Before a full enterprise rollout, test your technology on a single floor or department. Use this pilot to identify challenges, gather feedback, and prove the ROI for wider implementation.
  • Prioritize Cybersecurity: Choose IoT platforms and systems with robust, end-to-end encryption and strong security protocols. Optimizing your facilities' technological infrastructure requires diligent asset management; explore key IT Asset Management best practices to safeguard your network and data.
  • Integrate with Existing Systems: Select technologies that can seamlessly connect with your current workplace management software, employee apps, and building systems to create a unified and user-friendly experience.
  • Train Your Team: Ensure facilities staff are thoroughly trained on system operation, data interpretation, and basic troubleshooting. Empowering your team is critical to maximizing the value of your technology investment.
  • Set and Track KPIs: Establish clear performance metrics for energy savings, occupancy rates, maintenance response times, and employee satisfaction. Regularly review this data to refine your strategy and demonstrate the program's success.

7. Change Management, Employee Engagement & Phased Implementation

Successfully reconfiguring a workspace or transitioning to a new operational model involves more than just moving furniture; it requires a people-centric strategy. This approach combines change management principles with a phased implementation to guide employees through transitions smoothly. By engaging stakeholders early, communicating transparently, and rolling out changes incrementally, facilities managers can significantly improve adoption rates, boost morale, and achieve better project outcomes. For instance, instead of a disruptive, company-wide overhaul, a large enterprise might introduce new workstation cubicles on a floor-by-floor basis, using pilot groups to gather feedback and refine the process. This methodical, human-focused strategy is a critical component of modern facilities management best practices, ensuring that physical changes align with organizational culture and employee needs.

Why It Matters

Abrupt, poorly communicated changes to an employee's physical workspace can lead to resistance, decreased productivity, and a drop in morale. A structured change management plan addresses the human side of facilities projects, transforming potential detractors into advocates. A startup growing from 20 to 100 employees can use a phased approach to install modular cubicles as new teams are formed, making the expansion feel organic rather than disruptive. This strategy ensures that the new environment is not just functional but also actively supports employee well-being and collaboration. To dive deeper, you can explore how to promote camaraderie with modern cubicles.

Key Insight: The success of a facilities project is measured not only by its budget and timeline but also by the successful adoption and positive reception from the employees who use the space every day.

Actionable Implementation Steps

  • Form a Steering Committee: Create a cross-functional team with representatives from HR, IT, and affected departments to guide the project. This ensures diverse perspectives are considered from the outset.
  • Communicate Early and Often: Develop a communication plan that uses multiple channels like town halls, newsletters, and an intranet hub to keep everyone informed about the project timeline, goals, and progress.
  • Run Pilot Programs: Identify a small, representative group of employees to test new layouts or furniture, such as private office cubicles, before a full-scale rollout. Use their feedback to make critical adjustments.
  • Gather Continuous Feedback: Implement surveys, focus groups, and suggestion boxes at each phase. Visibly act on the feedback received to build trust and show that employee input is valued.

8. Cost Management & Total Cost of Ownership (TCO) Analysis

Effective facilities management best practices extend beyond operational efficiency to encompass sophisticated financial strategy. Adopting a Total Cost of Ownership (TCO) approach means evaluating investments not just by their initial purchase price but across their entire lifecycle. This includes acquisition, installation, energy consumption, maintenance, and eventual disposal or reconfiguration costs. By analyzing the long-term financial impact, you can make smarter procurement decisions that deliver greater value and support sustainable budget planning. For instance, a TCO analysis might reveal that investing in high-quality, reconfigurable private office cubicles is more cost-effective over five years than purchasing cheaper, fixed-wall solutions that require expensive demolition for future layout changes.

Why It Matters

Focusing solely on upfront costs can lead to significant, unforeseen expenses down the road. A TCO framework provides a comprehensive financial picture, empowering facilities managers to justify investments that might have a higher initial price but a lower overall cost. A growing startup, for example, can use TCO to justify investing in modular systems that adapt to team growth, avoiding the repeated expense of discarding and replacing furniture. Similarly, comparing the TCO of new versus refurbished assets can reveal significant savings, a strategy detailed further in this guide to buying used office furniture. This strategic financial lens ensures every dollar spent contributes to long-term operational resilience and value.

Key Insight: TCO analysis transforms facilities procurement from a simple transaction into a strategic financial decision, aligning asset management directly with the organization's long-term fiscal health and growth objectives.

Actionable Implementation Steps

  • Establish Standard Cost Categories: Define and track key TCO metrics: acquisition, installation, utilities, maintenance, labor, and replacement/disposal costs. This creates a consistent framework for every evaluation.
  • Model Multiple Scenarios: Develop conservative, moderate, and optimistic cost projections to understand the potential range of financial outcomes. Factor in variables like inflation and potential changes in operational needs.
  • Include "Soft" Costs: Account for indirect expenses such as project management time, employee training on new equipment, and potential productivity loss during installation or downtime.
  • Leverage TCO in Vendor Negotiations: Use your analysis as a tool for discussions with suppliers. A partner like Cubicle By Design can provide data on the lifecycle costs of their systems, helping you build a more accurate and compelling TCO model.

9. Vendor Relationship Management & Strategic Partnerships

Shifting the perspective from viewing vendors as transactional suppliers to treating them as strategic partners is a critical evolution in modern facilities management best practices. This approach involves cultivating deep, collaborative relationships with key providers, such as furniture suppliers, maintenance contractors, and technology integrators. By fostering open communication, shared goals, and mutual trust, you can unlock greater value, innovation, and reliability that goes far beyond simple cost savings. For example, a long-term partnership with a furniture provider for your private office cubicles can lead to priority support, proactive space planning advice, and access to new product lines before they hit the market. This collaborative model transforms procurement from a purely administrative function into a strategic advantage.

Why It Matters

A purely transactional vendor relationship is limiting; it prioritizes short-term cost over long-term value, service quality, and resilience. Strategic partnerships align vendor capabilities with your business objectives, ensuring they are invested in your success. A growing enterprise, for instance, can work with a primary vendor to standardize its cubicle systems across multiple locations, ensuring brand consistency, simplifying maintenance, and securing volume discounts that improve the total cost of ownership. This deeper engagement drives continuous improvement and supports operational agility.

Key Insight: Strategic vendor partnerships create a resilient ecosystem where suppliers act as extensions of your team, proactively identifying opportunities and mitigating risks to enhance facility performance and support core business functions.

Actionable Implementation Steps

  • Establish Vendor Scorecards: Develop clear key performance indicators (KPIs) to measure vendor performance. Track metrics like on-time delivery, quality of work, cost-effectiveness, and responsiveness to create an objective basis for evaluation.
  • Conduct Regular Business Reviews: Schedule quarterly or semi-annual meetings to discuss scorecard results, address challenges, and collaboratively plan for future needs. This creates a forum for strategic alignment and continuous improvement.
  • Share Forecasts and Plans: Provide key partners with insights into your future needs, such as office expansions or reconfigurations. This allows them to better plan their capacity and resources, often resulting in better pricing and service for you.
  • Integrate Partners in Planning: Involve trusted vendors like Cubicle By Design in the early stages of a project. Their expertise can offer innovative solutions and help you avoid costly design mistakes, especially when using tools like a cubicle designer to map out a new layout.

10. Compliance, Safety & Risk Management Framework

Establishing a systematic framework for compliance, safety, and risk management is a critical component of modern facilities management best practices. This approach moves beyond simply meeting minimum requirements; it involves proactively identifying, assessing, and mitigating risks related to building codes, safety regulations, and accessibility standards. It's a structured process of audits, training, and documentation designed to prevent incidents, reduce liability, and create a secure environment for all occupants. For example, a financial services firm must ensure its private office cubicles not only offer acoustic privacy but also comply with data security and fire safety codes. This holistic strategy protects the organization's people, assets, and reputation.

Why It Matters

Ignoring compliance and safety isn't just negligent; it's a significant financial and operational risk. Violations can lead to heavy fines, legal action, operational shutdowns, and irreparable damage to brand reputation. A well-defined framework ensures the facility adheres to all relevant regulations, from local building codes to federal mandates like the ADA. A critical element of any robust facilities management strategy is strict adherence to regulations like the Australian workplace safety standards, which protect health and safety. Similarly, a growing tech company must ensure its open-plan cubicle systems are designed with proper egress paths and accessibility in mind to comply with fire safety and ADA requirements from day one.

Key Insight: A strong compliance and risk management framework transforms safety from a reactive checklist into a proactive, integral part of the organizational culture, safeguarding employees and positioning the company as a responsible leader.

Actionable Implementation Steps

  • Conduct a Baseline Audit: Perform a comprehensive audit against all applicable codes and standards (OSHA, ADA, NFPA) to identify existing gaps. Use this baseline to create a prioritized action plan.
  • Create a Compliance Calendar: Develop a schedule for mandatory inspections, permit renewals, and required training sessions. Align this with your operational calendar to minimize disruption and ensure deadlines are met.
  • Document Rigorously: Maintain a centralized digital log of all compliance activities, including inspection reports, training records, incident reports, and communications with regulatory bodies. This documentation is crucial during audits.
  • Provide Regular Training: Equip your facilities team and all employees with ongoing training on emergency procedures, ergonomic safety, and hazard recognition. This fosters a culture of awareness and responsibility.

Top 10 Facilities Management Best Practices Comparison

Initiative 🔄 Implementation Complexity ⚡ Resource Requirements 📊 Expected Outcomes 💡 Ideal Use Cases ⭐ Key Advantages
Preventive Maintenance Planning & Scheduling Medium — scheduled processes, training Medium — maintenance staff/CMMS, vendor support Fewer breakdowns; downtime ↓; asset life +20–40% Large campuses, call centers, corporate facilities Improves reliability, lowers emergency costs
Space Planning & Utilization Optimization Medium–High — analysis + stakeholder buy‑in Medium — space audits, planners, tools Real estate footprint ↓15–30%; productivity ↑ Growing orgs, hybrid workplaces, cost reduction drives Maximizes space efficiency and workflow
Integrated Facilities Management (IFM) Systems High — software integration, change mgmt High — licensing, IT, training, data governance Silos eliminated; response times ↓30–40%; KPI visibility Multi‑site enterprises, healthcare, education Centralized control, automation, compliance
Workplace Wellness & Ergonomic Design Integration Medium — design + behavior change Medium–High — ergonomic furniture, training Injuries ↓15–25%; productivity ↑10–20% High‑density offices, call centers, talent-focused firms Boosts health, retention, and focus
Sustainability & Green Facilities Management Medium–High — certifications & supply changes Medium–High — efficient systems, sustainable materials Energy costs ↓20–35%; improved ESG/air quality HQs seeking LEED/WELL, organizations with ESG goals Lowers operating costs and improves brand/ESG
Technology Infrastructure & Smart Facilities Integration High — IoT, BMS, cybersecurity High — sensors, platforms, IT support Energy ↓15–25%; utilization insights +25–40%; predictive maintenance Smart campuses, hybrid workplaces, data-driven ops Real‑time data, automation, personalized environments
Change Management, Employee Engagement & Phased Implementation Medium — ongoing coordination & pilots Medium — communications, training, project leads Adoption ↑30–50%; disruptions minimized Large transformations, phased rollouts, cultural change Higher adoption, smoother transitions, better feedback
Cost Management & Total Cost of Ownership (TCO) Analysis Medium–High — detailed modeling & assumptions Medium — financial analysts, benchmarking data Total spend ↓20–30%; better long‑term investment choices Procurement decisions, vendor selection, budgeting Financial clarity, justified lifecycle investments
Vendor Relationship Management & Strategic Partnerships Medium — governance and reviews Medium — vendor management, contract resources Service quality ↑25–40%; cost savings via volume Recurring procurement, large-volume purchasing Better service, discounts, joint innovation
Compliance, Safety & Risk Management Framework Medium–High — regulatory expertise & audits Medium — audits, training, documentation Incidents ↓30–50%; lower liability and fines Regulated sectors (healthcare, finance), large offices Risk reduction, legal compliance, insurance benefits

Integrating Best Practices to Design a Better Workplace

Navigating the landscape of modern facilities management requires more than just reacting to daily issues; it demands a proactive, strategic, and integrated approach. The ten facilities management best practices detailed in this article are not isolated tactics but interconnected pillars that form the foundation of a high-performance work environment. From the foundational logic of a Preventive Maintenance Plan to the forward-thinking implementation of Smart Facilities Technology, each practice contributes to a larger ecosystem where efficiency, employee well-being, and organizational goals are in perfect alignment.

Mastering these concepts transforms the role of a facilities manager from a building operator into a strategic business partner. By systematically integrating these principles, you are not merely maintaining a physical space; you are actively cultivating an environment that drives productivity, enhances collaboration, and strengthens your company's culture and brand identity.

From Strategy to Execution: Your Actionable Roadmap

The journey from understanding these best practices to implementing them can seem daunting. The key is to approach it methodically, focusing on incremental improvements that deliver tangible results. Your next steps should be clear and deliberate.

  • Start with an Audit: Begin by evaluating your current operations against the ten best practices. Where are your strengths? Where are the most significant gaps? Use the KPIs and checklists provided in each section to create a baseline. This data-driven assessment will highlight your most pressing priorities.
  • Prioritize for Impact: You cannot tackle everything at once. Identify the initiatives that will deliver the greatest return on investment or solve the most critical pain points. Is your space utilization inefficient? Start with Space Planning & Utilization Optimization. Are you struggling with vendor costs and performance? Focus on building a Strategic Vendor Partnership framework.
  • Leverage Technology and Partnerships: You don't have to go it alone. Implementing an Integrated Facilities Management (IFM) system can centralize data and automate workflows, creating massive efficiency gains. Similarly, partnering with specialists in areas like ergonomic design or modular office furniture can provide the expertise needed to execute your vision flawlessly. This is where strategic partnerships become invaluable, turning complex projects into manageable successes.

The Human-Centric Core of Modern Facilities Management

Ultimately, the most profound takeaway is the shift towards a human-centric model. Best practices like Workplace Wellness & Ergonomic Design and Change Management & Employee Engagement underscore a critical truth: a facility’s greatest asset is the people within it. A thoughtfully designed workspace directly impacts employee satisfaction, health, and productivity.

This is where strategic space planning becomes a physical manifestation of your company culture. Flexible, modular solutions are the tools that allow you to bring these principles to life. Whether you are creating focused work areas with private office cubicles or fostering collaboration with open-plan workstation cubicles, the physical environment must be adaptable to the evolving needs of your team. This adaptability is the hallmark of truly effective facilities management best practices. By designing spaces that are as dynamic as the work being done within them, you create a workplace that is not just built for today but engineered for the challenges and opportunities of tomorrow.


Ready to translate these best practices into a tangible, high-performance workspace? The experts at Cubicle By Design specialize in creating flexible, scalable office environments that align with your strategic goals. Explore our extensive range of cubicles or use our interactive cubicle designer tool to start building a space that truly works for you.

Read More

Finding the Best Office Furniture Dealers Near Me: A Cubicle By Design Guide

Typing "office furniture dealers near me" into a search bar is the easy part. The real work starts when you have to figure out who on that list can actually bring your vision to life.

Finding a true partner means looking past the simple retailers to identify specialists like Cubicle By Design—folks who offer the whole package, from initial design concepts to the final installation. This guide will help you turn that overwhelming list of names into a curated shortlist of qualified experts ready to build your ideal workspace.

Starting Your Search for Local Furniture Partners

Kicking off the hunt for the right office furniture dealer is a huge first step. You’re not just buying desks and chairs; you're making a serious investment in your company's culture and your team's daily well-being. A great local partner doesn't just sell you stuff—they act as a consultant, helping you sidestep expensive mistakes and ensuring your new layout works for you today and for your future growth.

The market definitely reflects this shift. The global office furniture market has been valued anywhere from USD 57.51 billion to USD 107.26 billion in recent years. And with projections showing it could climb as high as USD 180.20 billion by 2032, it's clear that companies are putting more stock in their physical environments than ever before.

Moving Beyond a Basic Google Search

A simple search will spit out a list of businesses, but it won’t tell you the most important thing: who can actually deliver on your specific vision? To build a solid list of potential partners, you’ve got to dig a little deeper.

Start by getting more specific with your search terms. Instead of something generic, try queries like:

  • "Modular cubicle installers in [Your City]"
  • "Commercial office space planners near me"
  • "Ergonomic office chair showrooms in [Your Area]"

These targeted searches help cut through the noise, pushing general retailers down the list and highlighting dealers with the specialized skills you really need. Once you have a handful of names, the real vetting begins.

Evaluating a Dealer's Digital Footprint

Think of a dealer's website as their digital showroom. It’s your first real peek into what they're capable of. A professional, easy-to-use site is a good start, but you need to look closer.

Dive into their project galleries or case studies. Do their completed projects have the same look and feel you're going for?

A robust project gallery is so much more than a collection of pretty pictures. It's proof of concept. It shows you the dealer's real-world ability to handle projects of different sizes and complexities, not just their sales pitch.

Look for dealers who showcase a wide range of work, from small office refreshes to massive corporate installations. For instance, seeing a map of recent jobs gives you tangible proof of their experience right in your area. That kind of transparency says they're proud of their work and confident you’ll be happy with the results.

Here's a quick checklist to help you size up potential dealers right from the start.

Initial Dealer Vetting Checklist

Evaluation Criteria What to Look For Red Flags to Avoid
Project Gallery Diverse projects, clear before/after photos, relevant industry examples. Stock photos only, very few projects shown, or work that looks dated.
Services Offered In-house space planning, design, installation, and project management. Just "sales" or "delivery." A lack of comprehensive services is a big warning.
About Us/Team Page Details on their history, expertise, and the actual people you'll work with. Vague, generic mission statements with no personal touch or team info.
Website Quality Modern, mobile-friendly design that's easy to navigate and professional. Broken links, outdated information, or a site that's hard to use.

Checking these basics online helps you quickly weed out the duds.

Another critical spot to check is their "About Us" or "Services" page. You're looking for a partner, not just a supplier. A true partner will offer services that go way beyond the sale, including:

  • Space Planning and Design: Do they have designers on staff? A dealer who helps you map out the space from the get-go is invested in making it a success.
  • Installation and Project Management: You want to see mentions of in-house or dedicated installation crews. This signals accountability and a smoother process.
  • Customization Options: The ability to tailor solutions, maybe with something like a Custom Cubicle Designer, shows they can adapt to your unique needs instead of pushing a one-size-fits-all product.

This initial digital vetting is crucial. It saves you a ton of time by eliminating unqualified candidates early on, letting you focus your energy on the local dealers who can genuinely deliver.

Evaluating Showrooms and Product Quality Firsthand

Alright, you’ve done your online homework and have a shortlist of local dealers. Now for the fun part: getting hands-on with the furniture. Online galleries and slick marketing photos are a great starting point, but you can’t truly judge quality through a screen. You need to see it, touch it, and sit in it.

A showroom visit is where the rubber meets the road. It’s your chance to see past the sales pitch and feel the difference between furniture that just looks good and furniture that’s built to last. This is a critical step in making sure your investment pays off for years to come.

Person adjusting a modern grey office chair next to a desk in a furniture showroom.

What to Look for in Build Quality

Let’s be clear: commercial-grade office furniture is a different beast entirely from what you’d buy for your home office. It’s engineered to withstand 8-10 hours of daily use, day in and day out. When you're in the showroom, put on your detective hat and look for the details that signal real quality.

Start with the desks and tables. Give them a gentle shake. Do they wobble or feel flimsy? Look closely at the joints and where the legs connect—everything should be tight and seamless. Run your hand over the laminate or wood veneer. A quality surface feels solid and should be finished to resist the inevitable scratches and coffee cup rings.

Next, find the chairs and start testing. Sit down, lean back, and play with every lever and knob you can find. The adjustments for height, tilt, and armrests should feel smooth and secure, not clunky or loose. Check the base—a five-point base is the standard for stability—and give the casters a roll. They should glide effortlessly.

Pay close attention to the fabric and upholstery. High-quality commercial fabrics are designed for durability and cleanability. Ask about the "double rub" count—a rating that measures a fabric's abrasion resistance. For a typical office, a rating of 30,000 double rubs is a good benchmark for longevity.

Finally, give the workstation cubicles and private office cubicles a once-over. Are the panels stable? Do the connectors that hold them together look and feel robust? Open and close every drawer and cabinet door. They should move smoothly on their tracks and feel solid, not tinny. These are the little things your team will notice every single day.

Engaging With the Sales Team

Your interaction with the showroom staff is as telling as the furniture itself. You’re not looking for a pushy salesperson; you’re looking for a knowledgeable consultant. A great one will ask you questions first—about your company culture, how your teams work, and what problems you’re trying to solve.

Use this time to pick their brain. A true expert can explain why one laminate is better than another for a high-traffic area, or how the ergonomics of a specific chair can reduce back strain. They should be guiding you to the right solutions for your needs and budget, not just the most expensive items on the floor.

Key Questions to Ask During Your Visit

To make sure you get all the info you need for an apples-to-apples comparison later, go in with a list of questions. It keeps the conversation focused and ensures you don't forget anything important.

Here are a few essentials to have on your list:

  • Warranty Details: What exactly does the warranty cover on chairs versus desks? How long is it for, and what’s the process if we need to make a claim?
  • Lead Times: What are the real-world lead times for the items we’re interested in? Do you have any "quick ship" programs if we’re in a time crunch?
  • Customization Options: How much can we customize? Can we specify fabrics, finishes, or even dimensions?
  • Delivery and Installation: Is your installation team in-house or subcontracted? What does the whole delivery and setup process look like from start to finish?

Walking out of the showroom with solid answers to these questions means you're ready to confidently compare your options and make a final decision.

How to Nail Your Office Space Planning

Finding beautiful, high-quality furniture is one thing. Making sure it actually fits your space and supports how your team works? That’s an entirely different challenge. This is where the search for "office furniture dealers near me" moves beyond picking out chairs and becomes about finding a strategic partner like Cubicle By Design.

Let's be honest, even the most amazing desks will be a disaster if they block a fire exit or don't fit the flow of your office. Getting the space plan right from the start is what prevents those costly, headache-inducing mistakes and ensures your investment pays off.

A hand points at architectural blueprints on a desk with a tablet showing a 3D office design.

Measuring Your Space with Precision

Before you can plan a single thing, you need good data. And I don’t just mean the basic length and width of the room. A truly functional layout is built on the details—the little quirks and features of your physical space.

So, grab a measuring tape, a notepad, and your phone's camera. Your mission is to create a detailed map that accounts for every potential obstacle and opportunity.

Be sure to document the exact location and dimensions of:

  • Structural Elements: Note every single support pillar, column, or permanent fixture that isn't going anywhere.
  • Access and Egress: Measure all doorways, windows, and hallways. You'll also want to note which way the doors swing and how far windows open.
  • Utility Access: Mark the location of all power outlets, data ports, and light switches. This is a big one—it dictates where your tech-heavy workstations can realistically go.
  • Vertical Space: Don't forget about ceiling height! This becomes critical if you're looking at taller partitions or certain storage solutions.

This isn’t busywork. This detailed map is the foundation for everything that comes next. It prevents the nightmare scenario of furniture arriving on-site only to discover it blocks a key doorway or can't reach a power source.

Translating Measurements into a Functional Layout

With your measurements in hand, the real design work can begin. This is where a skilled dealer proves their worth, helping translate those raw numbers into a layout that considers how people actually move and work throughout the day.

A true space planning expert will dig into a few key areas:

  • Workflow and Adjacency: They'll ask which teams collaborate the most and then arrange their spaces to make that seamless, cutting down on disruptions.
  • Traffic Flow: A good layout has clear, logical pathways. It prevents those awkward bottlenecks and ensures everyone can move around easily and safely.
  • Compliance and Accessibility: Every plan must adhere to ADA (Americans with Disabilities Act) requirements, ensuring proper clearance in walkways and around desks.

A professional layout isn't just about cramming in as many desks as possible. It's a strategic plan that balances individual focus areas with collaborative zones and the natural flow of a busy workday. It's about creating an environment that just works.

For a deeper dive, our comprehensive office space planning guide offers more detailed insights to help you prepare for those initial conversations with a dealer.

The Power of Visualization with 2D and 3D Renderings

All this planning comes together in one of the most valuable tools a dealer can offer: professional renderings. It's one thing to look at a floor plan, but it’s nearly impossible to truly imagine the finished space from a simple drawing. This is where visualizations change the game.

A 2D rendering gives you that top-down, blueprint-style view. It’s perfect for confirming clearances, seeing traffic patterns, and getting the overall spatial arrangement just right.

A 3D rendering is where the magic happens. It provides a realistic, photo-like preview of your future office. You can see how different fabrics and finishes will actually look together, understand the sightlines from various desks, and get a genuine feel for the room's atmosphere.

These visualizations are your best defense against buyer's remorse. They allow you to make confident decisions and request changes before a single piece of furniture is ordered, saving you time, money, and a whole lot of stress.

You’ve done the legwork, talked to a few dealers, and now the proposals are rolling in. This is where the real work begins. Getting quotes from different office furniture dealers is one thing, but figuring out what they actually mean is another. The goal isn't just to find the lowest number—it's to find the best partner.

A great proposal is clear, comprehensive, and leaves no room for doubt. It's on you to make sure you're comparing apples to apples.

Let's be honest: the cheapest quote is almost never the best deal. That super-low price can look tempting, but it’s often a red flag. It probably means critical services like delivery, installation, or project management have been left out. Those are costs you'll end up paying for later, and they always come as a nasty surprise. A real pro gives you the full picture upfront.

Breaking Down the Bid

To get a true comparison, you have to dissect each proposal, line by line. Don't even consider a dealer who just gives you a single lump-sum number. A professional bid will itemize everything.

When you're comparing quotes, you need to be a detective. Look for these key details:

  • Product Specifications: Are the quotes for the exact same products? Check the model numbers, the dimensions, and especially the finishes and fabric grades. A dealer might substitute a "similar" chair, but a lower-grade fabric won't last as long. Those small details make a big difference in both price and durability.
  • Service Inclusions: Is delivery included? What about professional installation and trash removal? These are essential services, not optional add-ons. If they aren't listed, assume they'll cost you extra.
  • Project Management: A dedicated project manager is your lifeline. They coordinate every moving part and make sure the entire process runs smoothly. Make sure this service is included in the package, not billed as an afterthought.

If a quote is vague or missing this information, push back. Ask for a revised, fully itemized version before you move forward. Any dealer worth their salt will be happy to provide it.

Office Furniture Bid Comparison Checklist

To make this easier, we've put together a checklist. Use this to line up the bids side-by-side and see how they really stack up. It’s the only way to get a true, unbiased view of what you're being offered.

Checklist Item Dealer A Details Dealer B Details Dealer C Details
Product Match (Model, Size, Finish)
Delivery & Freight Costs
Professional Installation Fees
Debris & Trash Removal
Dedicated Project Manager
State & Local Taxes
Payment Terms & Schedule
Proposed Project Timeline
Installation Crew (In-House vs. Sub)
Product Warranty Details
Post-Installation Support Plan

Once you’ve filled this out, the right choice often becomes much clearer. The proposal with the most "included" or "in-house" checkmarks is usually the one that offers the most long-term value.

Identifying Hidden Costs and Understanding Terms

Beyond the big items, you have to sweat the small stuff. The fine print is where hidden fees love to hide, and they can completely blow up your budget.

The most transparent quotes clearly outline every potential charge, from delivery fees to taxes. A dealer who hides costs in the fine print is not a partner you can trust for a long-term relationship.

Always check the payment terms. What’s the deposit requirement? When are the other payments due? A clear schedule for delivery and installation shows the dealer has a real plan. It's not just a guess. And while you're thinking about the financials, it's worth exploring all your options. For some companies, understanding the financial implications of leasing versus buying can be a smart move for managing cash flow.

Weighing the Non-Monetary Factors

Finally, value is about more than just money. The intangibles often tell you the most about the kind of experience you’re going to have. And if you want to get a better feel for what specific furniture systems should cost, our cubicle price guide is a great place to start.

Look at the dealer’s proposed timeline. Is it realistic? Does it work with your own deadlines? Dig into their installation process, too. Do they use their own experienced, in-house team, or do they just subcontract it out to the lowest bidder? An in-house crew almost always means more accountability and better quality work.

Don't forget to review the warranty and support details. A strong warranty shows that a dealer stands behind their products. And what happens after the project is done? The best partners are there for you down the road, ready to help with reconfigurations, repairs, or additions. That’s where the true value is.

What to Expect During Installation and Beyond

You’ve vetted the dealers, toured the showrooms, and finally signed on the dotted line. It feels like a huge accomplishment, but the real work is just beginning. The installation is where all that planning becomes a physical reality, and a smooth, professional install is every bit as important as the quality of the furniture itself.

Knowing what’s coming can turn a potentially chaotic day into an exciting one. A top-notch dealer doesn’t just dump boxes on your curb; they orchestrate the entire process to bring your new office to life with as little disruption as possible. This is the final, make-or-break step.

The Pre-Installation Checklist

A successful install day starts long before the trucks ever pull up. Any professional dealer worth their salt will work with you to nail down the pre-arrival logistics so everything is ready to go.

Your dealer’s project manager should be in touch to coordinate a few key things:

  • Site Access and Logistics: This means confirming building hours, figuring out loading dock access, and navigating any specific rules for using the elevator.
  • Insurance and Permits: They should handle providing your building management with a Certificate of Insurance (COI) and securing any necessary work permits on their end.
  • Site Protection: This is a big one. They should have a plan to protect your space, like laying down floor coverings and using corner guards to prevent scuffs and dings.

This kind of proactive communication is the sign of a team that’s done this a thousand times. It heads off last-minute headaches and lets the crew work efficiently from the moment they walk in the door.

Timeline graphic illustrating the quote process: receive, compare costs, and sign a deal with dates.

This process just gets you to the starting line—the installation phase is where the real race begins.

During the Installation Process

When the big day arrives, you should see a uniformed, professional crew led by an on-site supervisor. This person is your go-to, the single point of contact for updates and any questions that pop up. Beyond just getting the furniture in the door, it’s worth using experienced crews for professional furniture assembly services to ensure everything is built correctly and safely.

The team will usually start by staging all the components according to the approved floor plan. Then, the assembly begins. You can get a detailed look at what a streamlined process looks like by exploring Cubicle By Design's office furniture installation process.

Once everything is built, the crew should wipe down every surface, haul away all the cardboard and packaging, and leave your new space truly move-in ready.

The final step before the crew packs up is the walkthrough. This is your chance to walk the entire space with the project manager, point out any issues, and create a "punch list" of anything that needs a tweak or correction.

This punch list ensures every detail is perfect, whether it's a misaligned drawer or a tiny scratch on a desk. A reputable dealer will jump on these items and fix them right away, no questions asked.

After the Work Is Done

A great furniture dealer doesn't disappear the second the last screw is tightened. Real long-term support is what separates a true partner from a one-time vendor.

This ongoing relationship should include:

  • Warranty Management: If a product fails or has a defect down the line, your dealer should handle the warranty claim for you, coordinating repairs or replacements directly with the manufacturer.
  • Day-Two Services: Once your team moves in, you might notice small things that need adjusting. A good partner will be available to help with ergonomic tweaks or minor reconfigurations.
  • Future Growth Planning: The best dealers, like Cubicle By Design, stick with you. When it's time to grow, they can help you reconfigure your existing furniture or add new pieces that perfectly match what you already have.

This kind of long-term partnership ensures your office can evolve right alongside your business, making your initial investment that much smarter for years to come.

Common Questions About Choosing a Furniture Dealer

Navigating the world of commercial furniture can bring up a lot of questions, especially if it’s your first major office project. When you start searching for "office furniture dealers near me," knowing what to ask can save you a world of time, money, and stress down the line.

These are the real-world concerns we hear from business owners and office managers every day. Getting clear answers to these questions is the first step in finding a true partner, not just another vendor.

How Far in Advance Should I Start Looking for an Office Furniture Dealer?

The sweet spot is 3-6 months before you absolutely need everything in place. I know, that probably sounds like a ton of time, but building in that buffer is one of the smartest moves you can make.

This timeframe gives you the breathing room to do things right. You'll have enough time for proper research, a few showroom visits, detailed space planning, and making thoughtful product selections. Most importantly, it accounts for manufacturing lead times, which can sometimes stretch for several weeks on custom orders.

Rushing the process is the fastest way to make compromises you'll regret later. Starting early gives you the leverage to negotiate better, evaluate all your options, and make sure every last detail aligns with what your company actually needs.

What Is the Difference Between a Dealer and a Retail Store?

This is a critical distinction that trips a lot of people up. A retail store is where you go to buy a pre-made desk or chair off the floor. The products are usually residential-grade, the services are limited, and the relationship pretty much ends when you walk out the door.

An office furniture dealer, on the other hand, is a full-service business partner. Dealers like Cubicle By Design offer durable, commercial-grade products built to handle the wear and tear of a busy office for years. But the furniture is just one piece of the puzzle. The real value is in the complete solution they provide.

A good dealer brings a whole team to the table:

  • Expert Space Planning: They'll take your floor plans and create a layout that’s efficient, compliant with codes, and actually works for your team.
  • Professional Design Services: They help you pick finishes, fabrics, and styles that build a cohesive, professional environment that reflects your brand.
  • Project Management: A dedicated person coordinates everything, from placing the order to scheduling the final installation.
  • Professional Installation: Experienced crews—not just delivery guys—assemble and install everything correctly and safely.
  • Ongoing Support: Need to file a warranty claim, reconfigure a department, or add more workstations next year? Your dealer is who you call.

Simply put, a dealer understands workplace dynamics, ergonomics, and building codes in a way a typical retailer just doesn't.

Can I Mix and Match Furniture From Different Brands?

Absolutely! In fact, it's a fantastic way to get a custom look and make your budget go further. A skilled dealer is your best guide for pulling this off successfully.

When it comes to systems furniture like cubicles, it’s almost always best to stick with one manufacturer. This ensures all the panels, connectors, and surfaces are compatible. But for things like task chairs, lounge seating, or conference tables, you can easily pull from other brands to add personality and visual interest.

An experienced designer will be your secret weapon here. They know how to match styles, scale, and finishes across different product lines so the final space looks intentionally curated, not like it was pieced together from a catalog.

What Are the Most Common Mistakes to Avoid?

Knowing where others have gone wrong is the best way to get it right. From our years of experience, we've seen a few common missteps that can derail a project:

  • Choosing a dealer on price alone. The lowest bid often comes with hidden costs for essential services like project management, installation, or even trash removal.
  • Skipping the showroom visit. You just can't judge the true quality, comfort, and feel of furniture from a picture on a website. You have to sit in the chair.
  • Forgetting to check references. Talking to past clients is the single best way to learn about a dealer's real-world performance and follow-through.
  • Underestimating the power of space planning. A bad layout can make even the most beautiful furniture a daily frustration, tanking productivity and morale.

Steering clear of these traps is half the battle. When you partner with a knowledgeable dealer who has your back, you can create a workspace that truly supports your team and your business for years to come.


Ready to turn your office vision into a reality with a partner you can trust? The team at Cubicle By Design is here to guide you through every step, from initial space planning with our Custom Cubicle Designer to professional installation and beyond.

Read More

Standard Cubicle Size: A Practical Guide | Cubicle By Design

If you ask what the standard cubicle size is, most people in the industry will tell you it’s 6’x6’. And they’re not wrong. That dimension has become the go-to baseline for office planning, offering a solid sweet spot between personal space and efficient use of the floor plan.

Defining the Modern Workspace Footprint

But thinking of 6'x6' as a rigid rule is a mistake. It’s really just a starting point—a flexible foundation you build on based on what your team actually does all day. The right size for your office is a direct reflection of your company’s culture, your employees’ roles, and the kind of work they need to get done.

This whole idea of a "standard" is always shifting, too. Decades ago, the average office worker might have had close to 100 square feet. Over time, thanks to smaller tech and a focus on cost-efficiency, that number has shrunk. The 36-square-foot 6'x6' footprint is what we’ve landed on today, but it’s part of a much longer story in office design.

Common Cubicle Dimensions

To get a better feel for your options, let’s look at the most common sizes you’ll encounter. It’s pretty clear that what a general staff member needs is completely different from a manager who needs extra room for small meetings or has more files to wrangle.

  • 6'x6' (36 sq ft): This is the workhorse of the modern office. It’s ideal for most task-focused employees, giving them plenty of room for a computer, some paperwork, and a few personal items without hogging real estate.
  • 6'x8' (48 sq ft): A nice step up, this size is perfect for team leads or anyone who just needs a bit more elbow room. That extra two feet of space is often used for an L-shaped desk or a small filing cabinet, making it a favorite for supervisors.
  • 8'x8' (64 sq ft): Now we're getting into semi-private office territory. This larger footprint is great for managers, engineers, or designers who might spread out blueprints or frequently have a colleague pull up a chair to collaborate.

This concept map really helps visualize how these standard sizes line up with different roles in a company.

As you can see, the definition of "standard" just expands as responsibility and space requirements grow, moving from focused individual work up to managerial duties.

To help you get a quick handle on these options, here's a simple breakdown of the most common dimensions and where they fit best.

Common Cubicle Sizes and Their Applications

Cubicle Size (ft) Square Footage Primary Use Case Common Panel Height Range
5'x5' 25 sq ft Call centers, data entry, telemarketing 42" – 53"
6'x6' 36 sq ft Standard employee, administrative, customer service 53" – 65"
6'x8' 48 sq ft Supervisors, team leads, technical staff 53" – 65"
8'x8' 64 sq ft Mid-level managers, accountants, engineers 65" and up
8'x12' 96 sq ft Executive management, shared workstations 65" and up

This table gives you a great starting point for matching a specific job function with the right amount of real estate.

Visualizing Your Options

Trying to picture these sizes in your own space can be tough. Sometimes, the best way to figure out what works is to see it in action. Browsing through a gallery of office cubicles images can spark ideas and help you see how different layouts look and feel in a real environment.

The goal is to match the cubicle footprint to the job function. An undersized workstation can hinder productivity, while an oversized one wastes valuable real estate and budget.

Here at Cubicle By Design, we have solutions for all these standard sizes and everything in between. Whether you need compact workstation cubicles or spacious private office cubicles, we have you covered. Understanding the basics is the first step, and you might find our guide on cubicle configurations and their applications helpful. Even better, you can play around with different sizes and layouts yourself with our hands-on cubicle designer tool to find the perfect setup for your office.

Why Your Cubicle Dimensions Need a Purpose

Picking a standard cubicle size isn't just about grabbing numbers off a chart; it’s about assigning a specific mission to each workspace.

Think of it like setting up a professional kitchen. A pastry chef needs wide, sprawling counters for rolling dough, while a line cook thrives in a compact, efficient station where every single tool is within arm's reach. Each space is purpose-built for the task at hand.

That same logic is exactly how you should approach your office. A cubicle isn't just a box—it's a tool designed to help an employee do their best work. When you match the dimensions to the job, you stop furnishing an office and start engineering a high-performance environment. It's an investment in productivity, not just furniture.

Matching Size to Job Function

The day-to-day reality of your employees' tasks should be the number one driver behind your size decisions. A one-size-fits-all strategy almost never works because different roles have wildly different needs for space, equipment, and focus.

A high-density call center, for instance, might opt for compact 5'x5' workstation cubicles. This size minimizes the footprint for each person, letting you fit more staff into one area while still providing just enough room for a headset, monitor, and keyboard. The name of the game is efficiency.

On the flip side, an engineering or design team needs room to spread out and think. A much more spacious 8'x8' layout makes sense here. It can easily handle multiple large monitors and physical blueprints, and it gives a colleague enough space to pull up a chair and collaborate without everyone feeling jammed together.

Privacy and Seniority Considerations

Beyond job tasks, the need for privacy plays a huge role. Anyone handling sensitive information, like your HR or finance teams, often needs a larger footprint combined with higher panels to guarantee confidentiality.

Seniority is another factor to weigh. Giving managers and team leads a slightly larger cubicle, like a 6'x8', accomplishes two things:

  • Practicality: It gives them the extra desk space they need for planning, holding small team huddles, or storing more files.
  • Hierarchy: It offers a subtle, unspoken signal of their leadership role in the company, which can be a valuable part of office culture.

The most effective office layouts are the ones where every square foot has a job. When you align cubicle dimensions with roles and collaboration styles, you build a workspace that actively helps your team hit their goals instead of getting in their way.

This thoughtful approach to space planning is what makes or breaks an office design. If you're curious about the nitty-gritty details that create a truly functional workspace, you might want to read our insights on what makes a well-designed cubicle.

Fostering Collaboration and Focus

Finally, your choice of cubicle dimensions directly impacts the balance between teamwork and individual focus. Open, collaborative cultures might use smaller footprints clustered together to make interaction feel natural and easy. Teams that need deep, uninterrupted concentration, however, will do better in larger, more isolated workstations.

Think about how your teams actually work.

  • Do they need to constantly talk and bounce ideas off each other? Smaller, grouped stations could be perfect.
  • Do they need quiet time to crack complex problems? Larger, more enclosed private office cubicles would be a much better fit.

Ultimately, thinking strategically about the purpose behind each cubicle size is what separates a great office from a mediocre one. It turns a logistical headache into a genuine opportunity to boost both morale and productivity.

How Panel Height Shapes Your Office Environment

When people talk about the standard cubicle size, they usually focus on the footprint—the length and width. But it's the panel height, the vertical dimension, that truly defines how an office feels and functions. This single factor quietly dictates everything from privacy and noise control to your company’s entire culture.

Think of it like designing a house. Do you want an open-concept living room where everyone interacts, or a home with traditional, separate rooms for quiet and focus? Neither is better than the other; the right choice just depends on the lifestyle you want to support. In the office, it's about the work style.

Office design has swung back and forth on this for decades. The towering, maze-like cubicles of the past have mostly given way to more open setups, all reflecting shifts in how we work together.

Low Panels for Open Collaboration

The shortest panels you'll find, typically around 39 to 42 inches high, are built for buzz. They sit just below eye level for someone who is seated, creating an environment that feels open, airy, and ready for teamwork.

These are perfect for departments that run on spontaneous conversation. Imagine a sales floor or a creative agency where bouncing ideas around is a constant. The low walls remove any real barrier, making it effortless to ask a quick question, share a screen, or just stay connected to the team's energy.

  • Best For: Sales teams, creative departments, and any role requiring constant interaction.
  • Key Benefit: Promotes a strong sense of community and makes the office feel larger and brighter.
  • Consideration: Offers minimal acoustic or visual privacy, which can lead to distractions.

Mid-Height Panels for Balanced Focus

This is the sweet spot. Mid-height panels, usually around 53 inches, are the most popular choice for a reason. They're tall enough to rise just above the eye level of a seated employee, giving them a clear sense of personal space and visual privacy.

This "seated privacy" is fantastic for focused, individual work, shielding people from the distraction of colleagues walking by. At the same time, all you have to do is stand up to see across the office, ask a neighbor a question, or feel like part of the group. It’s the best of both worlds—balancing the need for concentration with the desire for connection.

For many businesses, the 53-inch panel strikes the ideal compromise. It supports heads-down productivity while preventing employees from feeling completely isolated from their colleagues, making it a versatile choice for a wide range of administrative and technical roles.

Tall Panels for Maximum Privacy

When a job demands deep concentration, confidentiality, or serious noise control, tall panels are the only way to go. Ranging from 65 inches and up, these walls create a genuine semi-private office.

They are essential for roles in HR, finance, or legal departments where sensitive information is a daily reality. The high walls provide excellent visual privacy and, when built with acoustic materials, can dramatically cut down on office chatter. This setup is all about minimizing distractions so employees can tackle complex tasks without interruption. If you're looking to create quiet zones, our guide to improving office cubicle privacy has some great tips.

Ultimately, the right panel height for your standard cubicle size comes down to the work happening inside it. At Cubicle By Design, we offer a full range of panel heights across all our cubicle systems so you can find the perfect match. Whether you need collaborative workstation cubicles or focused private office cubicles, our cubicle designer tool lets you customize every detail to build a workplace that truly works.

Planning Your Office Layout for People and Workflow

Once you’ve locked in the right standard cubicle size for your teams, the next big step is arranging them. You're not just fitting desks into a room; you're building an ecosystem. A thoughtful layout can be the difference between a place that feels disjointed and one that buzzes with productive energy.

Think of it like planning a city grid. You need wide avenues for the main traffic and smaller side streets that connect different neighborhoods. In your office, this translates to clear walkways and logical groupings that actually support how your teams work together.

Common Cubicle Configurations

There are a few proven ways to arrange workstations, and the best one really comes down to your company’s workflow and culture.

  • Linear Rows: This is the most straightforward setup, with cubicles lined up back-to-back. It's incredibly efficient for departments like accounting or data entry, where individual focus is the name of the game and work moves sequentially down the line.
  • Clusters or Pods: Grouping four to six cubicles into a pod creates a natural neighborhood for a project team. This is perfect for encouraging collaboration, as team members can easily chat without broadcasting their conversations to the entire office.
  • Spine-Based Layouts: Here, a central "spine" houses all the power and data cabling, with workstations branching off it. This approach makes tech management a breeze and keeps the whole space looking clean and organized.

These are great starting points. For more design inspiration, you can also check out some transformative office study room ideas to see how others are creating productive workspaces.

The Non-Negotiables of Office Flow

Beyond just arranging the furniture, a few critical factors ensure your office is safe, comfortable, and compliant. Getting these wrong can lead to frustrated employees and even expensive code violations.

First up: walkway width. Your main traffic arteries—the paths leading to exits, break rooms, and conference rooms—need to be at least 44 inches wide. This gives two people enough room to pass comfortably and meets most accessibility standards. For the smaller aisles between cubicle rows, 36 inches is the minimum.

A well-planned office layout prioritizes easy movement. If people feel like they’re navigating an obstacle course just to get to their desk, it creates a low-grade, constant friction that chips away at morale and productivity.

You also have to think about building codes, especially when it comes to fire safety. Your layout can't block sprinkler systems or emergency exits. It’s always a smart move to check local regulations before you start moving anything.

To stay on track, a simple checklist can make all the difference.

Office Layout Planning Checklist

Here's a quick rundown to ensure your layout is functional, compliant, and optimized for how your team actually works.

Planning Step Key Consideration Best Practice Tip
1. Map Your Workflow How do teams and individuals interact throughout the day? Group collaborative teams in pods and place departments with sequential workflows in linear rows.
2. Measure Your Space What are the exact dimensions, including columns and doorways? Create a scaled floor plan before ordering furniture. Account for every pillar and outlet.
3. Define Walkways How will people move through the office? Designate main traffic paths (44" min) and secondary aisles (36" min) for clear, safe passage.
4. Check Local Codes Does the layout meet fire safety and ADA requirements? Consult local building codes to ensure all exits, sprinklers, and accessible routes are unobstructed.
5. Plan for Power & Data Where are the existing outlets and data ports located? Use a spine-based layout or power poles to avoid trip hazards from extension cords. Ensure every desk has access.
6. Get Feedback What do the people who will use the space actually need? Involve department heads or team leads in the planning process to avoid overlooking practical needs.

Following these steps will help you create a space that not only looks good on paper but works great in reality.

Power and Data Planning

In a world run by tech, planning for power and data is just as crucial as planning for people. Before you finalize anything, map out where your outlets and data ports are. A spine-based layout is a massive help here, but you still have to make sure every employee can plug in without a jungle of extension cords creating trip hazards.

This is where getting some expert guidance can save you a world of headaches. A professional space planner can help you create a layout that not only looks fantastic but functions flawlessly, taking care of every detail from walkway widths to power distribution. You can get a head start by exploring a detailed office space planning guide to get a handle on all the key factors.

Essential ADA and Building Code Considerations

Beyond just picking a layout that looks good, your office plan absolutely must be safe, accessible, and up to code. This isn't just about sidestepping some hefty fines or having to tear everything out and start over. It's about creating a workplace where every single employee can move around and work safely and comfortably.

You can't treat regulations like the Americans with Disabilities Act (ADA) and local fire codes as an afterthought. They are the non-negotiable foundation of any smart office plan. Navigating these rules might seem daunting, but it all comes down to a few core ideas of safety and access. Thinking about this stuff from the very beginning will save you a world of headaches later on.

Decoding ADA Requirements

The Americans with Disabilities Act (ADA) is there to make sure workspaces are accessible to everyone, including team members who use wheelchairs or have other mobility challenges. When you're planning your cubicle layout, this directly impacts your standard cubicle size and the pathways weaving through the office.

The biggest rule here is the accessible route. You need clear, unobstructed paths at least 36 inches wide that connect workstations to all the common areas—think entrances, restrooms, and the break room.

Your layout also needs to have enough room for people to actually maneuver. This often means designing certain workstations with a larger footprint to allow for a 60-inch diameter turning space for a wheelchair. Desk surfaces have to be at an accessible height, too, usually between 28 to 34 inches from the floor, with plenty of knee clearance underneath.

Compliance is proactive, not reactive. Building an accessible office from the ground up creates a genuinely welcoming culture and avoids the significant expense and disruption of a forced redesign down the road.

Meeting Fire and Safety Codes

Fire safety is the other critical piece of the puzzle that shapes your cubicle arrangement. Local building codes are written to ensure one simple thing: that everyone can get out of the building quickly and safely in an emergency.

A key focus is maintaining clear egress paths. Your cubicles cannot block any designated fire exits, and your main hallways must meet minimum width requirements—often 44 inches or more—to handle a crowd moving in a hurry.

Here's a detail people often miss: the relationship between your cubicle panels and the ceiling-mounted sprinkler system. Panel heights and their placement can't get in the way of the sprinklers' spray patterns. In most cases, you must have at least an 18-inch clearance between the top of the panels and the sprinkler heads. Getting this wrong is a serious safety violation.

  • Egress Paths: Keep all designated exit routes completely clear and wide enough for rapid evacuation.
  • Sprinkler Clearance: Ensure at least 18 inches of vertical space between cubicle panels and sprinkler heads.
  • Emergency Lighting: Don’t let tall cubicles block emergency lights or exit signs.

Proper planning makes sure your office isn't just a productive space, but a fundamentally safe one for every person in it. For layouts that demand this level of detail, like creating compliant private office cubicles, getting professional guidance is a smart move. The team at Cubicle By Design has the expertise to help you create a space that meets all necessary codes, ensuring your design is both functional and secure.

Choosing the Right Cubicle Solution for Your Business

Once you have a handle on cubicle sizes, heights, and potential layouts, you can start putting it all together for your own space. Picking the right standard cubicle size is really about matching the furniture to the job function. A smart investment here actively helps your team do their best work, and different types of businesses need completely different setups.

Think about a bustling call center. It’s all about efficiency and focus. In that scenario, compact workstation cubicles with good acoustic panels are the way to go. They knock down the noise and distractions while letting you fit more people into the floor plan, creating an environment that’s built from the ground up for high-volume, individual work.

Tailoring Solutions for Different Business Needs

A growing startup, on the other hand, is playing a totally different game. Their biggest challenge is often just keeping up with growth. For them, a scalable, modular system is a perfect match. These setups can be easily rearranged or added to as new people come on board, giving them the flexibility they need without having to rip everything out and start over every year.

An established corporate headquarters usually needs a bit of everything. The goal is to create spaces for teamwork while also providing the privacy that executives and focused workers need. This might look like open-plan clusters for project teams, paired with taller, more spacious private office cubicles for senior leadership. By the early 21st century, it was common for around 60-70% of office work to happen in modular workstations, showing just how popular this blended approach became. You can learn more about the history of the modern office on thenewatlantis.com.

The best office design is a direct reflection of the business it serves. By visualizing how different teams work, you can select cubicle solutions that address specific needs for collaboration, focus, density, and scalability.

Finding Your Perfect Fit with Cubicle By Design

These examples show that there’s no single “right” answer for every office. The perfect setup is completely tied to your company’s culture and how your teams operate. Whether you need a sea of high-density stations or a few quiet executive suites, the key is having options. You might even be surprised to find that custom-fit cubicles are more affordable than you think.

At Cubicle By Design, our product lines were built to meet these different needs. From our all-purpose general cubicles to more specialized workstations, we have the building blocks for any business. Our online cubicle designer tool makes it easy to play around with different sizes and layouts until you find the perfect fit for your vision and budget, making sure your office is truly built for success.

Your Cubicle Sizing Questions, Answered

Jumping into office furniture planning always brings up a few specific questions. To help you nail down the details, we've pulled together answers to the most common things people ask about cubicle sizes and layout planning.

What’s the Go-To Cubicle Size for a Typical Office Role?

The classic, most common cubicle size you'll see is 6'x6'. It gives you a solid 36 square feet of workspace and really hits the sweet spot between having enough personal room and being efficient with your floor plan. It’s pretty much perfect for most administrative and general office roles. That said, the 6'x8' is also a popular choice for folks who need a bit more desk surface or storage space.

How Much Room Do We Need for Walkways?

Think about how people move through the office. For those main arteries where there's two-way traffic, you'll want to aim for a minimum width of 44 inches. This keeps things from feeling cramped and helps with ADA compliance. For the smaller aisles that run between individual rows of cubes, 36 inches is usually enough. It’s always smart to double-check this against your local building and fire codes, just in case they have their own specific rules.

A great office layout isn't just about the desks—it's about the space in between. Getting the aisle width right is crucial for safety, accessibility, and a smooth flow of traffic, all of which are key for a happy, productive team.

Is It Okay to Mix Different Cubicle Sizes in the Same Office?

Absolutely. In fact, mixing sizes is often a really smart way to build a more dynamic and functional space. You could use standard 6'x6' workstation cubicles for most of your team, give managers a little more breathing room with 6'x8' or 8'x8' setups, and even use smaller pods for touchdown spots or high-density teams like a call center.

The trick is to stick with a cohesive system from one manufacturer. This ensures that even with different footprints, the whole office has a unified, professional look.

How Do I Pick the Right Panel Height for My Team?

Panel height really comes down to how your team works. Here's a simple way to think about it:

  • Low Panels (around 42 inches): These are fantastic for super-collaborative teams. They keep the lines of communication wide open and create a buzzing, energetic atmosphere.
  • Mid-Height Panels (53-55 inches): This is the most popular option for a reason. It gives people privacy to focus when they're sitting down but still makes it easy to chat with a neighbor by just standing up.
  • Tall Panels (65 inches and up): If your team handles sensitive information or needs to block out noise, this is the way to go. Think HR, finance, or legal departments where confidentiality is key.

Getting the right blend of size and height is what turns a good workspace into a great one.


Ready to design an office that truly works for your team? At Cubicle By Design, we specialize in creating flexible, modern workspaces that fit your vision and your budget. Get started with our interactive cubicle designer tool and build your ideal office today.

Read More

A Guide to Typical Cubicle Dimensions by Cubicle By Design

If you’re setting up a new office, you’ll hear one size mentioned over and over again: the 6×6 foot cubicle. It’s the industry’s go-to standard for a reason. Hitting that sweet spot of 36 square feet, it gives an employee a respectable amount of personal space without eating up your entire floor plan.

But treating the 6×6 as a one-size-fits-all solution is a rookie mistake. The world of office design is full of options, each tailored to different job functions, team dynamics, and company cultures.

Why Cubicle Dimensions Matter More Than You Think

Picking out cubicle sizes isn’t just about playing Tetris with your floor plan; it’s a critical decision that directly influences how people work, how happy they are, and ultimately, your company’s bottom line. Think of it like outfitting a kitchen. A tiny galley kitchen is fine for a single person grabbing a quick meal, but a big family needs an open-plan space with a proper island to function.

It’s the same in an office. A high-volume call center has completely different needs than a team of architects who need to spread out massive blueprints. The right dimensions give each employee the physical room and psychological comfort they need to do their best work. This guide will walk you through the whole spectrum, from compact “touchdown” spots to spacious private office cubicles, so you can make a choice that actually works for your team.

Key Factors in Your Decision

Before you start measuring out squares on a blueprint, take a step back and think about what you’re trying to achieve. Are you aiming to:

  • Boost collaboration? If so, lower walls and shared spaces are your friend.
  • Protect focused work? Taller panels and bigger individual footprints are the way to go.
  • Accommodate specific gear? People with multiple monitors, drawing tablets, or stacks of paperwork need more surface area. It’s that simple.
  • Ensure accessibility for everyone? This isn’t optional. ADA compliance and clear walkways are a must.

Answering these questions first will help you zero in on the perfect setup. Whether you’re looking at standard workstation cubicles or a more complex, hybrid layout, getting these fundamentals right is the first step toward an office that people actually like working in.

A well-planned office layout is a strategic asset. When you match cubicle dimensions to job roles, you’ll see real improvements in workflow, morale, and output. That’s how a simple furniture choice becomes a smart business investment.

To help you get a quick handle on the most common options, here’s a look at the standard cubicle footprints and where they fit best.

Quick Guide to Common Cubicle Footprints

This table breaks down the typical dimensions you’ll encounter, from compact setups to more executive-sized spaces. Use it as a starting point to figure out what makes sense for different roles within your company.

Cubicle Dimensions (Feet) Total Square Footage Best For
5′ x 5′ 25 sq. ft. High-density roles like call centers or temporary “touchdown” spots.
6′ x 6′ 36 sq. ft. The all-purpose standard for administrative staff, accountants, and developers.
6′ x 8′ 48 sq. ft. Mid-level managers or employees needing extra space for documents or meetings.
8′ x 8′ or Larger 64+ sq. ft. Senior management or roles requiring significant privacy and storage.

As you can see, a small adjustment in dimensions makes a huge difference in total square footage—and in how the space feels to the person working in it. A 25-square-foot space is purely functional, while a 64-square-foot station starts to feel like a personal office.

Decoding Cubicle Footprints: Common Sizes and Their Uses

Figuring out the right cubicle footprint is about more than just numbers. These dimensions aren’t arbitrary; they’re designed to support specific jobs and work styles. Getting the size right is a crucial decision that affects everything from an individual employee’s focus to the way people move through your office.

Think of each footprint as telling a story. A smaller station suggests a role that’s either temporary or focused on a single, straightforward task. On the other hand, a larger footprint points to someone who needs more resources, deep concentration, or even a space for small, private collaborations.

The 6×6 Foot Cubicle: The Office Workhorse

When you picture a typical office cubicle, you’re probably thinking of the 6×6 foot model. Offering a solid 36 square feet of personal space, this size has become the industry standard for a very good reason. It strikes the perfect balance between giving an employee a dedicated area and making efficient use of your floor plan.

This size is incredibly versatile, which is why it’s the default for so many roles. Accountants, developers, administrative staff, and customer service reps all find that a 6×6 gives them enough room for their computer, paperwork, and personal items without feeling hemmed in. It’s the Goldilocks of cubicles—not too big, not too small.

Interestingly, this standard evolved over time. The 6×6 has been king since the early 2000s, shrinking from the bulky 10×10 foot setups common in the 80s when massive CRT monitors hogged desk space. As tech got smaller, so did the furniture. If you want to see how these different sizes can be arranged, you should check out our guide on cubicle configurations and their layouts.

This quick visual shows how the most common footprints stack up for different roles.

As you can see, even a small shift in dimensions makes a big difference in how the space can be used.

The 6×8 Foot Cubicle: A Step Up in Space

For employees who need a bit more elbow room, the 6×8 foot cubicle is a fantastic upgrade. That extra two feet of depth boosts the total area to 48 square feet—a noticeable 33% increase over the standard 6×6. This isn’t just wasted space; it serves some really important functions.

This larger footprint is perfect for mid-level managers, HR professionals, or anyone who often has colleagues stop by their desk. The extra room can easily fit a guest chair, creating a mini-meeting space without having to track down an open conference room. It’s also great for roles that handle blueprints, large reports, or multiple projects at once, since many 6x8s feature an L-shaped desk for maximum surface area.

By providing a 6×8 workstation, you’re sending a clear message that you value an employee’s need for both focused work and collaborative discussions. It’s a strategic investment in roles that bridge the gap between individual contribution and team leadership.

The 5×5 Foot Cubicle: Maximizing Density

On the other end of the spectrum is the compact 5×5 foot cubicle. At just 25 square feet, this footprint is all about efficiency. It’s the go-to solution for high-density environments where the main goal is fitting the maximum number of people into a space.

You’ll typically find 5×5 stations in call centers, data entry departments, or telemarketing operations. The work in these settings is almost entirely computer-based, so there’s no need for a sprawling desk. The compact layout also helps supervisors easily monitor their teams and allows for quick communication between agents.

These smaller cubicles are also finding a new life as “touchdown” stations in hybrid offices. For employees who are only in the office a couple of days a week, these unassigned “hot desks” provide a functional spot to land and work without taking up the real estate of a full-sized, dedicated station.

The Critical Role of Cubicle Panel Height

When you’re laying out an office, it’s easy to focus on the footprint—the length and width of each workstation. But there’s another dimension that’s just as critical in shaping your office environment: the height of the cubicle panels. This vertical measurement is the key dial for controlling everything from privacy and noise to collaboration.

Choosing the right panel height isn’t just a design preference; it’s a strategic decision that reflects your company culture. Are you trying to build an open, buzzing space where ideas flow freely? Or do you need to create quiet zones for deep, focused work? The answer is all about how high you build the walls.

Low-Height Panels For Collaboration

Think of a low fence between two backyards. You have your own defined space, but it’s still easy to lean over and have a conversation. That’s exactly what you get with low-height panels, which typically stand around 42 inches tall. This height is perfect for teams that need constant communication to get things done.

While sitting, employees have a clear line of sight to their colleagues, making it simple to ask a quick question or share an idea without even getting up. This setup naturally encourages a sense of teamwork and keeps the energy in the room high.

  • Best For: Sales teams, creative departments, and any group working on collaborative projects.
  • Key Benefit: Promotes open communication and a strong team vibe.
  • Consideration: Offers very little acoustic or visual privacy, which can be a major distraction for some roles.

Mid-Height Panels For Balanced Privacy

The most popular choice in modern offices is the mid-height panel, usually around 53 inches. This has become the industry go-to because it offers what’s known as “seated privacy.” It’s like having your own booth at a diner—private enough for your own conversation, but you’re still part of the room’s atmosphere.

When seated, an employee is shielded from most visual distractions, helping them focus. But all it takes is a quick stand-up to see across the office and chat with coworkers. This makes 53-inch panels an incredibly versatile solution that strikes a great balance between individual focus and team connectivity.

This height is the perfect compromise for many businesses. It respects the need for personal space without creating the total isolation that can come with high walls, making it a cornerstone of effective office design.

Getting familiar with the different parts of a cubicle, like panels and work surfaces, can be a huge help. For a deeper dive, exploring common cubicle terminology will clarify what each component does and how they all fit together.

High-Height Panels For Deep Focus

For any role that demands confidentiality and serious concentration, high-height panels are the only way to go. At 65 inches or taller, these walls create a space that feels more like a private office than a standard cubicle. It’s the office equivalent of a personal library carrel, designed specifically to shut out the world.

These panels are ideal for people in legal, HR, or finance, where conversations and documents need to stay private. They’re also a lifesaver for writers, programmers, or researchers who need long, uninterrupted stretches of quiet to be productive. The tall panels drastically cut down on both visual and auditory distractions, creating a true sanctuary for focused work.

Ultimately, picking the right panel height comes down to understanding how your team actually works day-to-day. By matching the vertical dimension to the job function, you can create a workplace that is more efficient, comfortable, and productive for everyone.

Designing for Different Work Styles: From Call Centers to Private Offices

Knowing the basic cubicle footprints and panel heights is the first step. But the real magic happens when you combine them into a functional workspace that actually helps people do their jobs better. This is where design stops being about furniture and starts being about productivity, perfectly matching the space to the role.

There’s no such thing as a “best” cubicle. There’s only the best configuration for a specific task.

An effective office layout isn’t just a uniform grid of identical boxes. It’s more like an ecosystem where different work styles need to coexist peacefully. By thoughtfully assigning specific cubicle dimensions to different teams, you can create zones that support everything from high-volume call centers to deep, confidential work.

High-Density Call Centers and Open Teams

In environments like call centers, where density and efficiency are the name of the game, the compact cubicle is king. These jobs demand the maximum number of people in the smallest possible space, all while giving supervisors an easy line of sight. Function definitely trumps privacy here.

  • Footprint: A 5×5 foot footprint (25 sq ft) is the go-to standard. It’s just enough room for a computer, a headset, and the essentials—nothing more, nothing less.
  • Panel Height: Low panels (42 inches) are key. They keep sightlines open, which helps build a team atmosphere and lets managers easily see who needs help.

This minimalist setup has come a long way. For high-density roles, it’s now common to see even smaller 2×5 foot stations with 39-43 inch glass-topped panels. As tech like VoIP headsets replaced bulky old equipment, these modern workstations have shrunk by as much as 75% from their 1980s counterparts.

Collaborative Workstations for Team Synergy

When your team’s daily routine involves spontaneous brainstorming and constant teamwork, the layout has to encourage that interaction. This is where mid-height panels and shared spaces can create a connected, energetic vibe.

For these teams, the standard 6×6 foot cubicle is a great starting point, but the key is adjusting the panel height to spark communication. We often recommend 53-inch panels to provide “seated privacy” for focus time, while still making it effortless to pop up and talk to a neighbor.

A successful collaborative space isn’t just open; it’s intentionally designed to lower the barriers to communication. Using moderately sized cubicles with mid-height walls creates neighborhood-like clusters that encourage team cohesion without sacrificing individual workspace.

If your team thrives on non-stop interaction, benching systems—those long, shared desks with minimal dividers—are another fantastic choice. They’re the ultimate in open-plan design, perfect for creative agencies or tech startups. You can find out more about setting up these efficient spaces in our article about upgrading with call center one-surface cubicles.

Managerial and Focus-Intensive Roles

As job responsibilities expand, so does the need for space and privacy. Mid-level managers, HR professionals, or anyone working on sensitive projects needs a workstation that can handle focused work, confidential chats, and small, informal meetings.

This is where larger workstation cubicles really shine.

  • Footprint: An 8×8 or 6×8 foot footprint is ideal, giving you 48 to 64 square feet. That’s plenty of room for an L-shaped desk, a guest chair, and extra storage like filing cabinets.
  • Panel Height: High panels (65+ inches) are non-negotiable. These taller walls are crucial for creating the acoustic and visual privacy needed to kill distractions and signal a zone for concentration.

For senior leaders or roles demanding total confidentiality, you can even opt for specialized private office cubicles. These are a smart, modular alternative to building traditional drywall offices. They often feature extra-tall panels and lockable doors, giving you all the perks of a separate office with the flexibility of a systems furniture layout.

Essential Space Planning Considerations and Measurements

Picking out the right size cubicles is a great start, but it’s really only half the job. To build an office that actually works for your team, you have to think about the space around the workstations. This is all about planning for traffic flow, easy access, and how people will move through the office every single day.

If you don’t nail these measurements, you can end up with a cramped and frustrating maze. Bottlenecks form, people feel squished, and not everyone can get around easily. Good space planning is what makes an office feel open, safe, and efficient.

Navigating ADA Compliance and Walkway Clearances

One of the first things to lock down in any office layout is compliance with the Americans with Disabilities Act (ADA). These aren’t just friendly suggestions—they’re legal requirements that make sure your workspace is accessible to everyone, including team members who use wheelchairs.

For instance, any main path or corridor needs a minimum clear width of 36 inches. This gives enough room for a wheelchair to pass through without getting stuck. And for someone to make a full 180-degree turn, you need a clear space of at least 60 inches by 60 inches.

Following these rules means every single employee can move around freely and safely, from the front door to their desk and to the breakroom.

Major vs. Minor Walkways: What’s the Difference?

Beyond the legal minimums, a well-designed office anticipates the natural flow of foot traffic. It helps to think of your office pathways like a city’s road system: you’ve got major highways and smaller neighborhood streets.

  • Major Walkways: These are the main arteries of your office. They connect large departments or lead to busy spots like exits, kitchens, and conference rooms. To keep things moving and prevent “traffic jams,” these paths should be generous—ideally between 48 and 60 inches wide.
  • Minor Walkways: These are the smaller paths between individual cubicles or within a team’s zone. A minimum width of 36 inches works just fine here, allowing one person to pass through comfortably.

A common mistake is looking at a floor plan on a screen and thinking it’s spacious enough. In reality, a layout that seems perfect on paper can feel claustrophobic if the walkways are too tight. When in doubt, always give people a little more room to breathe.

If you want to dive deeper into optimizing your entire floor plan, our detailed guide on office space planning and design is packed with expert advice to help you create a layout that truly works.

Calculating Your Usable Office Space

When you’re figuring out how many cubicles you can fit, you need to work with your usable square footage, not the total number on your lease. The total footage is a bit misleading because it includes things you can’t use, like structural pillars, utility closets, and wall thickness.

Your usable square footage is what’s left after you subtract all those obstructions. This is the real number you should base your layout on. As a general rule of thumb, you can expect walkways and common areas to eat up about 25-30% of your usable space. That leaves you with roughly 70-75% of your floor for the actual workstations from Cubicle By Design.

To make it easier, here’s a quick-reference table summarizing the essential clearance measurements you’ll need to keep in mind.

Minimum Space Planning Clearances

Area Type Recommended Minimum Width Note
Major Walkway/Corridor 48 inches Main path for high foot traffic; must be ADA compliant.
Minor Walkway (Between Cubicles) 36 inches Path within a cubicle cluster; allows for single-file movement.
ADA Wheelchair Passage 36 inches The absolute minimum clear width required by law for accessibility.
ADA 180-Degree Turn 60-inch Diameter Required clear space for a wheelchair to turn around completely.

Having these key numbers handy will help you avoid common layout mistakes and ensure your office is both compliant and comfortable for everyone.

Putting It All Together: Your Custom Cubicle Solution

So, you’ve journeyed through the world of typical cubicle dimensions. You know the difference between a workhorse 6×6 and the pros and cons of various panel heights. Now comes the fun part: using that knowledge to design a workspace that genuinely helps your team thrive. It all boils down to a few key decisions that balance what each person needs with what’s best for the office as a whole.

Think of it this way: you wouldn’t give a racecar driver a minivan. The same logic applies here. Match the cubicle footprint to the job. An accountant buried in spreadsheets needs a different setup than a call center agent, and a team lead requires another space entirely. Then, pick a panel height that reflects your company culture. Are you trying to spark collaboration with low walls, or do you need to protect deep, focused work with taller ones?

Finally, map everything out with plenty of room to move. Good circulation and total accessibility for every single employee aren’t afterthoughts—they’re essential.

Take Control of Your Office Design

Armed with these principles, you’re no longer just buying furniture; you’re creating a productive, comfortable environment. Don’t leave your layout to chance. As you start piecing together your ideal setup, using tools like 3D rendering for interior design can be a game-changer. It helps you see exactly how the space will feel before you commit.

A well-designed office isn’t just about furniture; it’s a strategic tool that enhances workflow and boosts morale. You now have the foundational knowledge to make smart, impactful choices for your space.

A popular go-to for team leads and mid-level managers is the 6×8 foot cubicle. This layout provides a generous 48 square feet of L-shaped workspace, giving you a 33% increase over a standard 6×6. That extra room is perfect for handling more documents, adding a guest chair, or setting up multiple monitors. The 6×8 is a flexible powerhouse that fits nicely within the typical 80-100 square foot per-person allocation many companies aim for.

Ready to bring your vision to life? Get inspired by browsing our full range of office cubicles or jump right in and experiment with our interactive Cubicle Designer tool.

At Cubicle By Design, we’re here to help you build the perfect workplace. You might also find some great ideas in our guide on creating personalized workspaces with custom cubicles.

Common Questions About Cubicle Dimensions, Answered

Once you get a handle on the basics of footprints and panel heights, the practical questions start popping up. It’s one thing to know the theory, but another to apply it to your own space. Let’s dig into some of the most common questions we hear from people planning their office layout.

What Is the Most Common Office Cubicle Size?

Hands down, the industry go-to is the 6×6 foot cubicle. Why? Because its 36-square-foot footprint hits the sweet spot between giving an employee comfortable personal space and using your floor plan efficiently. It’s the perfect all-rounder for a huge range of roles, from accountants and project managers to developers and support staff.

This size easily fits a classic L-shaped desk, leaving plenty of legroom and space for a file cabinet or two. It’s the workhorse of office design for a reason—it’s a reliable, flexible solution that just works for most general office tasks.

How Much Space Should I Leave Between Cubicles?

This is a critical one for safety, flow, and just making the office feel comfortable. You can’t have people bumping into each other all day.

For the smaller walkways between a few cubicles or inside a team pod, you need a minimum of 36 inches. This gives people enough room to walk through single-file without feeling like they’re squeezing by.

For main arteries—the major corridors that lead to exits or common areas—you’ll want to be more generous. Aim for 48 to 60 inches to handle more foot traffic. And no matter what, your layout must follow ADA (Americans with Disabilities Act) guidelines. That means keeping at least a 36-inch clear path for wheelchair access and ensuring there’s a 60-inch diameter circle somewhere for turning space.

How Do I Choose the Right Cubicle Panel Height?

Picking the right panel height is all about the kind of work getting done and the culture you want to build. This choice directly shapes privacy, manages noise, and dictates how easily people can collaborate.

  • Low Panels (around 42 inches): Perfect for high-energy, collaborative teams where people are constantly talking and sharing ideas. These keep sightlines open and make the whole space feel connected.
  • Mid-Height Panels (around 53 inches): This is the most popular height for a reason. It provides “seated privacy,” which means you can focus without distraction when you’re sitting down but can easily pop your head up to talk to a neighbor. It’s the best of both worlds.
  • High Panels (65 inches or more): When you need to create a quiet zone for deep concentration or confidential work, this is your answer. Think HR, legal, or finance departments. These walls create an almost private office-like feel, cutting down significantly on both visual and sound distractions.

Can I Mix and Match Different Cubicle Sizes?

You absolutely can, and you should! A one-size-fits-all approach rarely works in a modern office. Mixing cubicle sizes is a smart strategy to create a dynamic layout that’s tailored to the actual work people are doing.

For example, you could give managers larger 8×8 private office cubicles so they have room for small, private meetings. Your general staff might be perfectly comfortable in standard 6×6 workstation cubicles, while a call center team could be set up in efficient 5×5 stations to save space. This tiered setup makes the most of your square footage and gives every employee the right environment to be productive.


Ready to design a workspace that perfectly fits your team’s needs? At Cubicle By Design, we specialize in creating functional and modern office solutions. Explore our full range of cubicles or bring your vision to life with our interactive Cubicle Designer tool.

Read More
Perfect Size of a Conference Room

A Guide to the Perfect Size of a Conference Room

Trying to figure out the right size for a conference room can feel like you’re doing complicated math, but it’s usually more straightforward than it seems. As a good starting point, we always recommend planning for about 20-25 square feet per person. This simple rule of thumb gives everyone enough elbow room and space for equipment without feeling cramped.

Why the Right Conference Room Size Matters

Getting the dimensions of your conference room right is so much more than a detail on a floor plan. Think of it as a strategic investment in your team’s productivity and your company’s culture. A well-sized room means no awkward shuffling to get to a seat and meetings that just flow without unnecessary distractions. It’s the difference between a frustrating, stuffy experience and a comfortable, collaborative space where great ideas can actually happen.

This guide is your roadmap to creating a room that just works. We’ll dig into why the right dimensions are so critical for everything from productive brainstorming sessions to basic employee comfort, framing it as a smart move for your company’s future.

The Impact of Poor Sizing

An incorrectly sized room, whether too big or too small, creates persistent headaches that get in the way of daily work. Knowing these common pitfalls makes it obvious why getting it right from the start is so important.

  • Underutilized Space: A massive boardroom that’s too large for your typical meetings just becomes wasted real estate. We’ve seen it time and again. In fact, research shows that a whopping 75% of meetings involve three people or fewer, which means those giant, empty rooms are often just inefficiently used by small groups.
  • Reduced Productivity: On the flip side, a room that’s too small creates a cramped, uncomfortable vibe. It can easily stifle creativity, kill attention spans, and make even short meetings feel like they drag on forever.
  • Accessibility Challenges: Not having enough clearance makes it tough for team members to move around, especially for anyone with mobility needs. Proper planning ensures that everyone can participate easily and feel included.

At Cubicle By Design, we believe a great office starts with smart planning. A conference room should be a hub of innovation, not a source of frustration. Getting the size right is the first step toward building a better workplace.

Effective office space planning and design looks at more than just the room itself; it considers how that room fits into the overall flow of your office. By carefully thinking through capacity, technology, and circulation, you can create a space that truly supports your team’s best work. From small, agile huddle rooms to impressive boardrooms, every space should have a clear purpose.

Diving Into the Core Sizing Principles

Moving beyond quick estimates, it’s time to understand the ‘why’ behind the numbers. Figuring out the right size for a conference room is a lot like planning a perfect dinner party—you need enough space for your guests, clear paths for people to move around, and designated spots for all the essentials.

You’ve probably heard the industry guideline to allocate 20-25 square feet per person. But where does that number actually come from?

This benchmark isn’t just pulled out of thin air. It’s a calculated balance of comfort, function, and collaboration that has held firm for years. Workplace demands are always evolving, but this standard ensures there’s enough room for both people and the technology they use. In markets like North America and Europe, a typical small-to-medium room for 6 to 12 people runs from 150 to 400 square feet. Larger boardrooms for 20 or more can easily top 1,200 square feet. That 20 to 25 square feet per seat is the constant that makes it all work.

To really get it right, you have to break the space down into three distinct zones. The total square footage is just the sum of its parts.

The Three Foundational Zones of a Conference Room

Think of your conference room as having three invisible layers of space, each with its own job. If you neglect any one of them, the room will feel awkward and impractical, no matter how big it is.

  1. The Table Zone: This is the heart of your meeting space—the actual footprint of the conference table itself. Its size and shape set the stage for everything else.
  2. The Personal Space Zone: This is the “elbow room” for each person. It includes the chair and the immediate area needed to comfortably take notes, use a laptop, or just sit without feeling jammed in.
  3. The Circulation Zone: These are the critical pathways around the table and chairs. It’s the space people use to get in and out of the room or walk to a whiteboard without tripping over their colleagues.

A well-planned conference room respects all three zones equally. It ensures the table fits, people are comfortable, and movement is effortless. This balanced approach is the secret to creating a space that feels both spacious and efficient.

Understanding how these zones interact is the first real step toward a smart layout. A wider table, for instance, doesn’t just take up more floor space; it demands a larger room to keep those circulation paths clear and usable. Our cubicle designer tool can help you visualize these layouts effectively.

Calculating Your Space Needs

Let’s put this into practice. The 20-25 square foot rule is a great starting point because it automatically accounts for these three zones. For a 10-person meeting, you’d be looking for a room somewhere between 200 and 250 square feet.

But other factors can completely change a room’s feel. The shape of the table and where the door is located can make or break the layout.

A long rectangular table, for example, creates very different traffic patterns than a round one. Likewise, a door that opens directly behind a chair can make that seat practically unusable, which instantly shrinks your room’s real capacity. For a deeper dive, check out our guide on conference tables dimensions to see how different shapes impact your layout.

This foundational logic will empower you to look at any potential space and make smart decisions that go way beyond simple measurements. By keeping these core principles in mind, you’ll design a conference room that truly works for your team and becomes a real hub for collaboration.

Designing for People and Easy Movement

A conference room that looks perfect on paper can be a total failure if people are constantly bumping chairs or squeezing past each other. The real measure of a room’s design is how it feels when people are actually using it. This is where we move past simple square footage and get into the nitty-gritty measurements that guarantee comfort and an intuitive flow.

The whole point is to create a space that feels open and is a breeze to navigate, not some kind of obstacle course. When you plan for circulation from the get-go, you’re making sure the room helps collaboration, rather than getting in the way. A meeting space should make movement easy, not restrict it.

The Golden Rule of Clearance

The single most important measurement in your conference room isn’t the length or width—it’s the clearance around the furniture. This is that invisible buffer zone that lets people pull out their chairs, walk behind seated colleagues, and move around without causing a fuss. Without enough of it, even a huge room will feel cramped and awkward.

Here’s the non-negotiable standard: you absolutely need 36 to 48 inches of clearance behind every occupied chair. This isn’t just a friendly suggestion; it’s the bare minimum for comfortable, disruption-free movement. This “circulation path” is what allows someone to slip in late or step out for a call without making the whole table shuffle around.

Think of it this way: 36 inches (3 feet) lets one person carefully walk behind someone who’s seated. Bumping that up to 48 inches (4 feet) gives enough room for two people to pass one another without doing the awkward side-step. For rooms that see a lot of traffic, that extra foot makes a world of difference.

Ensuring Accessibility for Everyone

A truly great conference room works for every single member of your team. That means designing your space to meet—or, even better, exceed—the standards set by the Americans with Disabilities Act (ADA). Getting accessibility right isn’t a box to check at the end; it’s a fundamental part of inclusive, smart design.

Planning for ADA compliance means factoring in a few key numbers that directly impact your room’s size:

  • Doorways: Your entrance needs a clear width of at least 32 inches when the door is swung open 90 degrees.
  • Pathways: All the main walkways inside the room have to be at least 36 inches wide.
  • Turning Space: The room must have a clear floor space of 60 inches in diameter (a 5-foot circle) or a T-shaped area so a wheelchair can turn around easily.
  • Table Access: Make sure you have enough knee and toe clearance under the conference table for wheelchair users to pull up comfortably.

By making these accessibility standards a priority, you’re not just complying with regulations—you’re creating a more welcoming and functional space for all your employees. It’s a core part of designing a better workplace, which is something we’re passionate about at Cubicle By Design.

Sightlines and the Surrounding Office

Beyond just letting people walk around, a well-designed room considers visual flow. Every single person in that meeting should have a clear, unobstructed view of the main screen, the whiteboard, or whoever is speaking. This is absolutely critical for keeping people engaged and making sure no one feels like they’re stuck with the bad seat.

Before you lock in your layout, do a simple test: sit in every chair. Can you see the presentation screen without craning your neck? Is a support column blocking half the whiteboard? These little details feel minor on a floor plan but can kill the effectiveness of a meeting.

And don’t forget to think about how the conference room fits into the rest of the office. The flow of foot traffic from nearby workstation cubicles can dictate the best place for the door and how the interior should be arranged. A room that’s easy to get in and out of without disturbing neighboring work areas makes for a more productive and harmonious office for everyone.

How Technology Shapes Your Room Dimensions

Let’s be honest: in today’s world, a conference room without technology is just a box with a table. The right audiovisual (AV) tools have gone from a “nice-to-have” to a core part of how we collaborate. That means their physical footprint has a direct impact on the size of a conference room you’ll need.

It’s a classic mistake to design the room first and try to cram the tech in later. That’s a recipe for a cluttered, hazardous mess of tangled wires and equipment that doesn’t quite work right. When you plan your room dimensions around your tech stack from the start, you create a space that’s clean, functional, and ready for action.

The market is screaming this from the rooftops. The global conference room solutions market was pegged at USD 1.9 billion in 2025 and is on track to hit USD 7.6 billion by 2035. This explosion shows just how critical it is to design rooms that can handle advanced AV equipment, which all begins with thoughtful sizing.

Planning for Screens and Sightlines

The first domino to fall in your layout is almost always the main display. Whether it’s a massive monitor, a projector screen, or an interactive whiteboard, its size and placement dictate the entire room’s orientation and, most importantly, its depth.

Here’s a simple rule of thumb: the person sitting farthest away should be no more than four to six times the height of the screen. For a standard 55-inch display (which is about 27 inches high), that means your back row can’t be more than 13.5 feet from the screen. This one calculation is a crucial starting point for figuring out the minimum length of your room.

Think of your screen as the anchor point of the entire room. The right viewing distance ensures that everyone, from the head of the table to the person in the back corner, can clearly see the content without straining their eyes.

Allocating Space for AV Hardware

It’s not just about the screen. Your video conferencing gear needs its own real estate. That high-quality PTZ (pan-tilt-zoom) camera needs a clear line of sight, usually mounted right above or below the display. Microphones, whether they sit on the table or are installed in the ceiling, also have specific placement requirements to capture clear audio from everyone.

You’ll need to account for the space these common components take up:

  • Cameras: Wall-mounted cameras need solid support and the right angle to capture the whole room.
  • Microphones: Tabletop mics eat up valuable surface area, while ceiling mics need to be clear of noisy HVAC vents.
  • Control Panels: A touchscreen controller needs to be within easy reach on the conference table.
  • Credenzas: Many rooms use a credenza to hide away equipment racks, mini-PCs, and other hardware, which adds to the room’s overall footprint.

The Critical Role of Power and Cabling

This is the big one that everyone forgets: the power outlets and data ports that make everything run. Nothing ruins the look of a sleek, modern conference room faster than a tangle of extension cords snaking across the floor. They’re not just ugly—they’re a major tripping hazard.

You have to plan your power and data needs from day one. That means outlets near the display, power integrated directly into the conference table for laptops, and data ports for a rock-solid wired connection. Planning this infrastructure in advance is the only way to get a clean, professional, and safe environment. If you’re laying out your whole office, understanding the basics of a proper cubicle electrical setup gives you a huge head start on managing power everywhere. This proactive thinking ensures your room works today and can adapt to whatever tech comes next.

Looking Beyond Square Footage

Getting the dimensions right for your conference room is a huge step, but it’s really just the beginning of the story. A room with the perfect square footage can still be a total dud if the environment itself is distracting. To create meeting spaces that people actually want to use, we need to look at three critical, and often forgotten, elements: acoustics, lighting, and ventilation.

Think of these as the finishing touches that transform a functional box into a genuinely productive workspace. Without them, even the most meticulously planned layout can leave your team feeling drained and unfocused.

Taming Sound and Echoes

Ever been in a meeting where every little cough echoes off the walls? Or you struggle to hear the person across the table over the low hum of the air conditioning? That’s the classic sign of a room with bad acoustics. Hard surfaces like glass, concrete, and even drywall are notorious for bouncing sound waves around, creating an echo chamber that makes it tough to hear.

This gets even worse on video calls, where all that background noise can make your team sound like they’re in a cave. The room’s shape plays a part, too. Long, narrow rooms can create a weird “flutter echo” that is especially grating.

The good news? You don’t have to tear down walls to fix it. Here are a few simple but effective solutions:

  • Acoustic Panels: These are your best friend for soaking up excess noise. You can mount them on walls or ceilings, and they come in tons of designs to match your office vibe.
  • Soft Furnishings: It’s amazing what a difference a rug, some fabric chairs, or even curtains can make. They give sound waves something soft to land on, instantly cutting down on reverb.
  • Strategic Layout: Think about what’s next door. A well-placed bank of private office cubicles can act as a natural sound buffer, helping to quiet the entire floor.

Lighting That Engages, Not Drains

Lighting does so much more than just let you see. It sets the entire mood of a room and has a real impact on people’s energy levels. If the lighting is too dim, too harsh, or creates a nasty glare on screens, you’re just inviting eye strain and fatigue—a guaranteed productivity killer for long meetings.

The best strategy is a layered lighting approach. This just means combining different types of light to create a balanced, flexible environment. You want bright, even light for taking notes, but you also need to kill those harsh shadows and screen glares that make video calls a nightmare. On that note, think about the materials you use; for instance, see how glass partition walls for offices can help bring in natural light while still keeping things quiet.

Keeping the Air Fresh and Comfortable

Finally, let’s talk about something most people completely forget: fresh air. A stuffy, warm room is a recipe for drowsy, distracted people. As a meeting fills up, carbon dioxide levels climb, and you can literally feel the focus leave the room.

Your HVAC system needs to be sized for the room’s maximum capacity, keeping the temperature comfortable and consistent. Just as important, it needs to run quietly so it doesn’t become another source of distracting noise. A comfortable climate keeps everyone alert and ready to contribute, turning a potentially draining meeting into one where great ideas happen.

Sample Layouts and Your Planning Checklist

Trying to juggle all the rules for sizing, traffic flow, and technology can feel a bit overwhelming. Sometimes, the best way to make sense of it all is to see it in action. Let’s look at a few common examples to visualize how these principles play out in the real world.

Seeing a layout on paper is often the easiest way to understand how specific dimensions create a meeting space that’s both functional and comfortable for everyone inside. These examples should give you a solid starting point.

Three Common Conference Room Layouts

To bring these concepts to life, we’ve sketched out three sample layouts, each built for a different purpose and capacity. You’ll see how the right size of a conference room directly supports what it’s meant to do, from quick huddles to formal board meetings.

  • The Compact Huddle Room (4 People): Perfect for those quick check-ins or one-on-one video calls. These spaces are usually around 10′ x 10′ (100 sq ft). You’ll typically find a small round table (about 48″ in diameter) and a wall-mounted monitor, which leaves just enough room to move around comfortably without any wasted space.
  • The Versatile Meeting Room (10 People): This is the workhorse of most offices. A room measuring about 12′ x 20′ (240 sq ft) easily fits a 12-foot rectangular table. This setup gives you plenty of clearance (at least 42 inches) and leaves space at one end for a large display and a credenza to house AV gear.
  • The Tech-Ready Boardroom (20 People): When you need to host large, formal meetings, you’ll want a room around 16′ x 30′ (480 sq ft). This size can handle a substantial table, allows for generous 48-inch circulation paths, and supports integrated tech like ceiling microphones and multiple displays.

To make these layouts even clearer, here’s a quick-reference table summarizing the key specs for each room type.

Sample Conference Room Layout Specifications

Room Type Capacity Minimum Room Dimensions Typical Table Size Key Features
Huddle Room 2-4 People 10’ x 10’ 48” Round Small footprint, ideal for quick, informal meetings and video calls.
Mid-Size Meeting Room 8-10 People 12’ x 20’ 12’ Rectangular Versatile for team meetings, presentations, and client discussions.
Large Boardroom 16-20 People 16’ x 30’ 18’+ Rectangular Designed for formal meetings with integrated A/V and ample circulation.

These numbers provide a great baseline, but always remember to adjust for your specific furniture and technology choices, including a wide range of cubicles.

Your Essential Planning Checklist

Before you sign off on any floor plans, take a minute to run through this checklist. Answering these questions now will help you catch any oversights and save you from expensive mistakes down the road. A little foresight prevents major headaches, especially when it’s time for the build-out. For a seamless setup, getting professional help with office furniture installation can ensure your vision is executed perfectly.

  1. Define Primary Use: What is this room’s main job? (e.g., video calls, brainstorming, formal presentations?)
  2. Determine Max Capacity: How many people really need to fit in here at one time?
  3. Confirm Table Shape & Size: Is a round, square, or rectangular table the best fit for the room’s purpose?
  4. Map Out Circulation Paths: Have you left at least 36-48 inches of clearance behind every chair?
  5. Plan for Technology: Where will the screen, camera, and microphones actually go?
  6. Locate Power & Data: Are outlets and ports planned for both the table and the walls?
  7. Assess Environmental Factors: Have you thought about acoustics, lighting, and ventilation?

This visual summary highlights the key environmental factors that turn a sized room into a functional one.
As you can see, a great conference room isn’t just about square footage—it’s about balancing these three elements to create a space where people can actually be productive and comfortable.

Still Have Questions? Here Are Some Common Ones

Even with all the guidelines, planning the perfect conference room can feel a bit like a puzzle. Getting clear, straightforward answers to those nagging questions is the best way to move forward with confidence and sidestep the common pitfalls that can derail a project.

Let’s dig into some of the most frequent questions we hear about getting the size of a conference room just right. Answering these helps nail down the small details that make a huge difference in the final layout.

How Much Space Should I Plan For Per Person?

A solid rule of thumb is to plan for 20-25 square feet per person. This isn’t just an arbitrary number. It’s a balanced calculation that gives each person enough personal space at the table, room to pull their chair out, and a clear path to walk behind others without causing a disruption.

Could you technically squeeze it down to 15 square feet per person? Sure, but it will feel cramped, especially during longer meetings. Sticking to that 20-25 square foot range is the key to creating a comfortable and productive environment.

What’s a Good Size for a 10-Person Conference Room?

For a 10-person meeting, you’ll want a room that is at least 200 to 250 square feet. A common and highly effective dimension for this capacity is around 12 feet by 20 feet.

This size comfortably fits a large conference table (think 4 ft x 12 ft) and still provides about four feet of clearance on all sides for easy movement. It also leaves dedicated space at one end for a presentation screen, whiteboard, or credenza without making the room feel cluttered.

How Do You Calculate a Room’s Capacity?

First, start by measuring the room’s length and width to get the total square footage. Don’t forget to subtract any unusable space taken up by permanent fixtures like support columns or bulky built-in cabinets.

Next, just divide that usable square footage by your target space per person (let’s use 25 sq ft for a comfortable setup). So, a room with 250 usable square feet would have a capacity of 10 people (250 / 25 = 10). Always remember that the conference table itself is often the real limiting factor.

What Common Mistakes Should I Avoid?

The most frequent error we see is underestimating how much circulation space people actually need. People often calculate size based only on the table and chairs, forgetting to leave at least 36-48 inches behind chairs so others can walk past without disrupting the meeting.

Another big one is not planning for the footprint of technology. AV equipment, credenzas, and whiteboards all consume significant floor and wall space. We also see companies overbuilding, creating massive boardrooms when most of their day-to-day meetings are small. For instance, tech firms often find their rooms are sized larger than needed, with actual occupancy being 15-20% lower than what booking rates suggest. This highlights a growing need for more small-to-medium rooms. You can read more on meeting room utilization benchmarks to see how data is shaping modern office design.


At Cubicle By Design, we help you move beyond questions and start building solutions. From efficient workstation cubicles to collaborative meeting spaces, our team is here to help you design a better workplace.

Read More
Your Guide to Temporary Office Walls

Your Guide to Temporary Office Walls

Your Guide to Temporary Office Walls

Temporary office walls are just what they sound like: modular, non-permanent partitions you can use to divide up your space. They’re a flexible and much more affordable alternative to putting up traditional drywall. With these systems, you can create private offices, huddle rooms, or collaborative zones without the chaos and downtime of a major renovation, making them perfect for today’s ever-changing workplace.

Why Your Modern Office Needs Flexible Walls

Let’s face it, the old-school office layout—that static grid of cubicles and corner offices—is becoming a thing of the past. Businesses today have to be nimble. They need to scale teams up or down at a moment’s notice and rearrange layouts to support hybrid work models. This is where the headache of permanent construction really becomes a problem.

Imagine your fast-growing startup just hired ten new developers. That open-plan office, which was once great for collaboration, is now a noisy mess of distractions. Building new offices with drywall would take weeks, kick up a ton of dust, and lock you into a layout that might not even make sense six months from now.

The Problem with Permanent Solutions

Traditional construction is slow, expensive, and completely inflexible. Once a drywall partition is up, it’s there for good—unless you’re ready to shell out for costly, disruptive demolition and rebuilding. That kind of rigidity just doesn’t work for the modern business.

This is exactly why temporary office walls have become so popular. They offer a practical, scalable solution that actually keeps pace with the agile nature of today’s work environment.

Think of them as high-end, architectural building blocks for your office. You can build, take down, and reconfigure your space whenever you need to, creating a workspace that evolves right alongside your company.

To give you a clearer picture, let’s break down the key differences.

Temporary Walls vs Permanent Drywall Construction

Feature Temporary Office Walls Permanent Drywall Construction
Flexibility Highly reconfigurable and reusable. Fixed and permanent once built.
Installation Quick, clean, and with minimal disruption. Slow, messy (dust, paint fumes), and very disruptive.
Cost Lower upfront cost and can be a depreciable asset. High upfront cost for labor and materials.
Timeline Can be installed in a matter of days. Takes weeks or even months from start to finish.
Customization Wide range of finishes, glass, and integrated tech. Limited to paint and basic trim options.
Sustainability Reusable and reduces construction waste. Creates significant demolition waste.

As you can see, temporary wall systems are designed from the ground up for adaptability, a stark contrast to the set-in-stone nature of drywall.

A Market Driven by Adaptability

The shift toward flexible workspaces isn’t just a fleeting trend; it’s a massive market movement. The global modular partition wall systems market, valued at USD 3.34 billion, is expected to skyrocket to USD 5.21 billion by 2031. This explosive growth is being driven by the huge adoption of hybrid work, with over 70% of companies now using flexible policies.

This data tells a simple story: businesses are actively looking for smarter ways to manage their physical office space. They need environments that can be tweaked on the fly to support new project teams, changing headcounts, and unpredictable in-office schedules.

By looking into solutions like modular office walls, companies can effectively future-proof their offices. Instead of being trapped by rigid architecture, they get the freedom to design a workplace that truly works for them—both today and for whatever comes next.

Exploring the Main Types of Office Partitions

When you start looking into temporary office walls, you’ll find a whole range of solutions, each built to solve a specific problem in the workplace. It’s less about a single product and more like a toolkit for shaping your environment. Getting to know the main players—modular partitions, demountable walls, and acoustic dividers—is the first step toward building a more flexible and productive office.

Each system brings its own mix of flexibility, style, and function to the table. Once you understand what makes them different, you can find the perfect match for your team, whether you’re setting up a busy call center or carving out a quiet corner for focused work.

This infographic really gets to the heart of what makes temporary walls such a smart move for modern businesses.

Infographic showing a central wall icon with radiating nodes for Flexibility, Scalability, and Cost-Effectiveness, each with a relevant icon.

As you can see, these benefits all work together, letting a company adapt its physical space on the fly without breaking the budget.

Modular Partitions: The Building Blocks of Your Office

Imagine having a set of professional-grade LEGOs for your office. That’s pretty much what modular partitions are. These systems are made of prefabricated panels that click together to create cubicles, workstations, and dedicated team areas. They are the true workhorses of office flexibility, built for quick setup and easy reconfiguration.

What makes modular partitions so popular is their sheer versatility. Panels come in all sorts of materials—fabric-covered surfaces to soak up sound, tough laminates for durability, and even glass elements to let natural light flow through. Because it’s all panel-based, you can create just about any layout you can dream up.

Take a growing tech startup, for instance. They could start with small “pods” for two-person teams. As they hire more people, they can simply add more panels to expand the existing pods or build new ones entirely, all without major construction. This adaptability makes them a favorite for dynamic companies where team sizes and project needs are always changing. If you’re curious about the possibilities, you can explore a complete overview of different cubicle configurations and an overview of their benefits to see just how customized these systems can get.

Demountable Walls: The Best of Both Worlds

If modular partitions are the building blocks, then demountable walls are like high-end, movable fixtures. These systems give you the solid, finished look of permanent construction, but with one huge advantage: they can be taken down and reinstalled somewhere else. We call them “demountable” because they’re designed to be uninstalled without the dust, debris, and waste of drywall demolition.

Demountable systems often use floor-to-ceiling glass panels, which create a modern, open feel while still delivering real acoustic privacy. This makes them a perfect choice for private offices, conference rooms, or any client-facing area where a polished, professional look is non-negotiable.

A key advantage is their long-term value. While the initial investment might be higher than for basic dividers, their reusability means you aren’t throwing money away on construction every time your company reorganizes its floor plan. A law firm, for instance, could use demountable glass walls to build partner offices, and if they move to a new building, they can take the entire wall system with them.

Acoustic Panels and Room Dividers: The Sound Tamers

In today’s open-plan offices, noise is one of the biggest productivity killers. Acoustic panels and room dividers are designed specifically to fight back. While they don’t always form a complete “wall,” these solutions are essential for creating quiet zones and visual separation in larger spaces.

Acoustic panels are made from sound-absorbing materials and can be freestanding, hung from the ceiling, or mounted on existing walls. They work by literally trapping sound waves, cutting down on echo and background chatter. Freestanding room dividers, on the other hand, are simple visual barriers that can be moved in a flash to section off a space for an impromptu meeting or create a temporary quiet zone.

  • Noise Reduction: They absorb ambient sound, making it easier for employees to concentrate on deep-focus tasks.
  • Visual Privacy: Simple dividers can block sightlines, reducing distractions in high-traffic areas.
  • Ultimate Flexibility: Often lightweight and on wheels, they can be deployed in seconds to adapt a space on the fly.

These are perfect for creating temporary “huddle rooms” for brainstorming or carving out a quiet nook for someone to take a private call. They offer a simple yet incredibly effective way to manage the chaos of an open office.

Why Flexible Walls Are More Than Just Dividers

When you start thinking beyond simple drywall, you realize temporary office walls aren’t just about splitting up a room. They offer real, strategic advantages that can directly impact your company’s budget, agility, and even how happy your employees are. Choosing a flexible wall system isn’t just a construction decision; it’s a forward-thinking business move that pays you back long after the installation is done.

These aren’t just isolated perks. The financial savings, the ability to adapt on the fly, and the boost in employee comfort all work together. It’s about creating a workspace that is strategically designed for modern business challenges, not just physically divided.

The Financial Advantage of Flexibility

Let’s be honest, one of the first things everyone looks at is the cost. Traditional construction is messy and expensive. You’re paying for labor, materials, and the inevitable cleanup and disruption. Temporary office walls flip that script. Since they’re prefabricated and built for quick assembly, you slash those upfront costs. Less mess, fewer labor hours, and your team can keep working without a construction crew in their way.

But the savings don’t stop there. Because these walls are considered tangible personal property—like furniture—they can often be depreciated much faster than permanent construction, which can be a nice little bonus come tax time. Plus, their biggest superpower is reusability. That initial investment keeps delivering value year after year as your company grows and changes.

Agility and Scalability on Demand

In business today, you have to be able to pivot. Fast. Temporary walls give you that power. You can completely reconfigure a layout in a few hours or a couple of days—not the weeks or months you’d be stuck waiting for with drywall. This means you can react instantly to a new project team, a sudden growth spurt, or a shift to a new work model.

Think about it: your company lands a big client and needs a dedicated project room, like, yesterday. With a modular system, you can build out a fully functional, private space over a weekend. When the project wraps up, those same walls can be taken down just as easily and either stored or used somewhere else. You simply can’t get that kind of on-demand adaptability from a permanent wall.

It’s no surprise the demand for these solutions is growing. The global market for removable wall partitions was valued at USD 4.75 billion and is expected to hit USD 8.18 billion by 2033. That’s a clear sign that businesses everywhere are putting a premium on adaptable spaces. You can read the full research about this market growth to see how flexibility is truly shaping the future of office design.

Boosting Privacy and Acoustic Comfort

The open-plan office was supposed to be great for collaboration, but it often killed focus and privacy. Modern temporary walls are engineered to fix that exact problem by delivering enhanced acoustics and privacy. They’re built with sound-dampening cores and sealed connections that do a surprisingly good job of cutting down on noise bleeding from one space to another.

This is how you strike the perfect balance. You can create quiet zones for deep work, private offices for confidential calls, and meeting rooms where a lively discussion won’t derail the entire office. You get the collaborative vibe without sacrificing the essential need for people to just focus.

A Commitment to Sustainability

Opting for temporary walls is also a much greener choice. Think of all the waste from a traditional demolition—drywall, studs, and insulation all heading straight for a landfill. Because temporary walls are designed from the ground up to be reused, they support a far more sustainable approach to building out your workspace.

Instead of tearing down and throwing away, you just reconfigure. This “circular” way of thinking not only keeps tons of debris out of landfills but also reduces the demand for new raw materials. For any company serious about its environmental footprint, flexible walls are a practical, visible way to put that commitment into action.

How to Plan Your Temporary Wall Project

Jumping into a workspace redesign without a solid game plan is like trying to drive somewhere new without a map. You’ll get somewhere, sure, but probably not where you intended. Taking the time to plan is the single most important step to make sure your temporary office walls actually solve the problems you have and give you the return you expect.

A well-thought-out plan doesn’t just make the process smoother; it lets you have a much more productive conversation with a design partner. It helps you spell out your vision, sidestep common pitfalls, and make sure the final layout truly helps your team get their work done. This early effort is what prevents expensive changes and frustrating delays later on.

A person sketching a floor plan for a temporary office wall installation on a blueprint.

Defining Your Project’s Purpose

Before you even think about fabrics or finishes, you have to answer one huge question: What problem are you trying to solve? The “why” behind your project is the North Star that will guide every other decision. Are you trying to carve out quiet zones for deep focus, build a private conference room from scratch, or just create some visual separation in a loud, open-plan office?

Your goal directly points to the right kind of wall system.

  • For Noise Reduction: Your top priority will be walls with high acoustic ratings (STC) and materials designed to dampen sound.
  • For Visual Privacy: The focus shifts to frosted glass or solid fabric panels instead of see-through glass.
  • For Collaboration Hubs: Maybe all you need are some semi-private, lower-height walls to outline team areas without completely closing them off.

Getting this core purpose nailed down is the foundation of a great project. A smart way to start is by getting some professional help with office space planning and design, which helps you align the physical space with what your business is trying to achieve.

The Essential Specification Checklist

Once you know your “why,” it’s time to dig into the nuts and bolts. Having clear answers to the questions in this checklist will make your consultation and the whole design process incredibly smooth.

Here’s a handy checklist to walk you through the key decisions you’ll need to make for your temporary office wall installation.

Consideration Key Questions to Ask Example Options
Dimensions & Layout What are the exact height, width, and length measurements of the space? Where will doors or openings be located? 8-foot ceiling height, 12-foot wall length, single door entry.
Material & Finish What aesthetic are you aiming for? Do you need durability, transparency, or a specific color? Tempered glass, fabric-wrapped acoustic panels, wood grain laminate.
Privacy Level How much visual separation is needed? Do you want to maintain an open feel or create full seclusion? Clear glass, frosted or etched glass, fully opaque solid panels.
Acoustic Needs What is the target Sound Transmission Class (STC) rating? Is sound-blocking or sound-absorbing more important? STC 35 for general privacy, STC 45+ for confidential meetings.
Power & Data Do the walls need to support electrical outlets, data ports, or AV equipment? Integrated power raceways, pre-wired panels, cutouts for media ports.

Thinking through these specifics ahead of time saves a world of trouble. A simple mistake in measurements or forgetting about power outlets can cause major headaches and unexpected costs during installation.

Navigating Compliance and Safety Codes

Finally, no office project—temporary or permanent—gets to ignore building codes and accessibility standards. While temporary walls often have a much simpler approval process than traditional drywall, they still have to meet critical safety rules. Skipping this step can lead to failed inspections and expensive rework.

You’ll need to pay close attention to a few key areas:

  1. Fire Safety: Your new layout can’t block fire exits, sprinkler heads, or fire extinguishers. The wall materials themselves also need to meet local fire code ratings.
  2. Egress Paths: You have to maintain clear, wide-enough paths for everyone to exit the building in an emergency. There are minimum width requirements for hallways and corridors that must be respected.
  3. ADA Accessibility: Any new spaces, doorways, or hallways you create must comply with the Americans with Disabilities Act (ADA). This ensures the office is accessible to everyone.

When you work with an experienced team like Cubicle By Design, you get the peace of mind that these critical compliance factors are baked into your plan from day one. It’s the proactive way to create a space that’s not just functional and stylish, but also safe and up to code.

Understanding Costs, Timelines, and Long-Term ROI

Choosing temporary office walls isn’t just a design decision—it’s a financial one that touches your budget, your team’s efficiency, and your company’s ability to adapt down the road. To make a smart choice, you need to look past the initial price tag and understand the full picture: how long it takes, what it costs, and what the real return on investment (ROI) looks like.

Unlike traditional construction, which can drag on with messy, unpredictable schedules, temporary wall systems are all about speed and clarity. The magic happens off-site. Your panels are built to precise specifications in a factory, so when they show up at your office, the job is mostly about assembly, not demolition and dust. This approach drastically cuts down on installation time and keeps disruption to your daily operations at an absolute minimum.

Breaking Down the Installation Timeline

The speed of installation is easily one of the biggest draws of temporary office walls. While every project is different, the process is always significantly faster than putting up drywall.

A typical project usually unfolds like this:

  1. Consultation and Design (1-2 weeks): This is where we nail down the details. We’ll finalize the layout, choose materials and finishes, and plan for any power or data needs.
  2. Production and Fabrication (3-6 weeks): Once you sign off on the design, your custom wall panels and parts are manufactured.
  3. On-Site Installation (2-5 days): A professional crew puts everything together. A single private office might be done in a day, while an entire floor of workstations can be up and running in less than a week.

This streamlined process means you can get your team into a new, more effective space in a fraction of the time of a standard renovation.

Demystifying the Cost of Temporary Walls

So, what do they cost? It’s a bit like buying a car—the base model is one price, but the final cost depends on the features you add.

Several key factors influence the price:

  • Materials: Glass panels, especially those with high acoustic ratings, will cost more than standard fabric or laminate options.
  • Customization: Special sizes, unique finishes, or built-in tech like media cutouts will impact the final investment.
  • Complexity: A simple, straight wall is naturally going to be more budget-friendly than a complex layout with multiple offices, doors, and corners.

While the upfront cost can sometimes be similar to basic drywall, the real financial story is about the long-term savings. For a more detailed look at what to expect, check out our comprehensive cubicle price guide—it offers some great insights for budgeting.

Calculating the Long-Term ROI

The real financial power of temporary walls comes from their reusability. This is where you see a massive return on your initial investment, and it’s a concept that’s hard to overstate.

Think about it this way: A company spends $15,000 on a drywall renovation. Two years later, they restructure and need to change the layout. That $15,000 is gone—it’s a sunk cost. They have to pay for demolition and start building all over again. With temporary walls, that initial investment is an asset you can simply reconfigure for a fraction of the cost.

This incredible adaptability is a huge reason why the global market for flexible solutions like folding temporary walls is exploding. Valued at USD 1.5 billion recently, it’s projected to hit USD 2.8 billion by 2033. Businesses are catching on to the value of infrastructure that can change with them. You can discover more insights about these market trends to see just how big this shift is.

When you factor in avoiding repeated construction costs, minimizing the need for larger leases, and potential tax advantages, the ROI on temporary walls becomes undeniable within just a few years.

Designing Your Space with Cubicle By Design

Turning a rough idea into a real, functional workspace that people actually enjoy working in takes a clear head and the right partner. At Cubicle By Design, we don’t just sell temporary office walls; we work with you, step-by-step, to build a space that genuinely solves your team’s problems. It’s a collaborative process where we make sure every detail, from the layout down to the finishes, lines up with what you actually need.

It all starts with a simple conversation about your goals. Are you trying to cut down on office noise? Carve out some much-needed private offices? Or maybe build dedicated hubs for your teams to brainstorm? Our design experts listen first, then help you find the right temporary wall system for the job. We’ll balance your budget, style, and day-to-day needs to land on a solution that fits your company culture.

A modern office designed with Cubicle By Design's temporary glass office walls.

From 3D Visualization to Professional Installation

Once we’ve got a solid plan, we bring it to life with detailed 3D space planning. This is a game-changer. It lets you see exactly how the new layout will look and feel before a single panel is ordered. You can play around with different setups and tweak things with total confidence, which gets rid of all the guesswork and prevents expensive do-overs.

Our whole process is designed to be straightforward. We’ll walk you through our product lines, showing you all the ways you can customize—from glass clarity and fabric finishes to built-in power outlets—so your new space is as practical as it is polished.

Want to get a head start? You can start playing with ideas right now using our easy-to-use online cubicle designer tool. It’s a great way to build out and customize your ideal workstation setup and get a feel for the possibilities before we even talk.

The last step is the professional installation. Our experienced crew handles the entire setup with skill and efficiency, keeping the disruption to your daily routine to an absolute minimum. We manage the project from the first screw to the final walkthrough, making sure your new temporary walls are installed correctly, on schedule, and ready for your team to move in.

Start Your Workspace Transformation Today

Ready to see how temporary office walls can create the flexible, productive space you’ve been picturing? The best way to get started is with a conversation. We invite you to schedule a free design consultation with one of our experts. Let’s work together to build an environment that can adapt as your business grows and helps your team do their best work.

Answering Your Questions About Temporary Walls

Stepping into a workspace redesign naturally brings up a lot of practical questions. As you think about shifting to a more flexible layout, you’re probably wondering how these temporary office walls actually perform in the real world. We’ve gathered some of the most common questions we hear to give you clear, straightforward answers and help you move forward with confidence.

Our goal here is to clear up any lingering uncertainties you might have. From day-to-day practicalities to long-term performance, getting these key details sorted out will help you make a fully informed decision about transforming your space.

Are Temporary Walls Strong and Durable?

This is a common concern, but modern temporary walls are far from flimsy. Many systems are built with seriously robust materials like steel or aluminum framing and solid cores designed for durability. In fact, they’re engineered to meet or even exceed the same building codes as traditional construction, making them a totally reliable choice for long-term use in busy offices.

Unlike drywall, which can get dinged up, crack, or bow over time, high-quality modular systems keep their structural integrity. They’re built to handle daily wear and tear, and many can even support heavy items like cabinets or monitors when they’re properly reinforced.

How Do They Handle Office Noise?

This is where modern temporary walls really shine. Effective sound control is a major advantage, and many are specifically engineered with acoustic performance in mind. They use sound-dampening cores and tightly sealed connections to stop noise in its tracks.

You can even choose walls with a specific Sound Transmission Class (STC) rating to match your needs. A higher STC rating means better soundproofing, ensuring private conversations in an office or conference room actually stay private. It’s an incredibly effective way to solve the noise and distraction problems that plague so many open-plan layouts.

Can Temporary Walls Be Moved and Reused Easily?

Absolutely—that’s their whole point! Temporary walls are designed from the ground up for disassembly and reassembly. If you need to change your layout down the road, move to a new building, or scale your team up or down, the entire system can be taken down and reinstalled.

This reusability delivers an incredible long-term return on investment. Instead of paying for demolition and new construction every single time your needs change, you have a flexible asset that adapts right alongside your business. The whole process is clean, fast, and creates virtually zero construction waste.

Do They Meet Building and Fire Codes?

Yes, any reputable temporary wall system is designed to comply with all the essential safety regulations. This includes meeting fire code ratings for materials and ensuring that any new layout maintains clear paths for emergency egress. They are also planned to accommodate ADA accessibility requirements. Working with an experienced provider ensures your final design is not only functional but also safe and fully compliant.


Ready to create a workspace that can keep up with your business? The team at Cubicle By Design is here to help you plan, design, and install the perfect flexible office solution.

Start designing your ideal workspace with Cubicle By Design today.

Read More