Office Glass Wall Partitions Guide by Cubicle By Design

Office Glass Wall Partitions Guide by Cubicle By Design

Introduction To Office Glass Wall Partitions

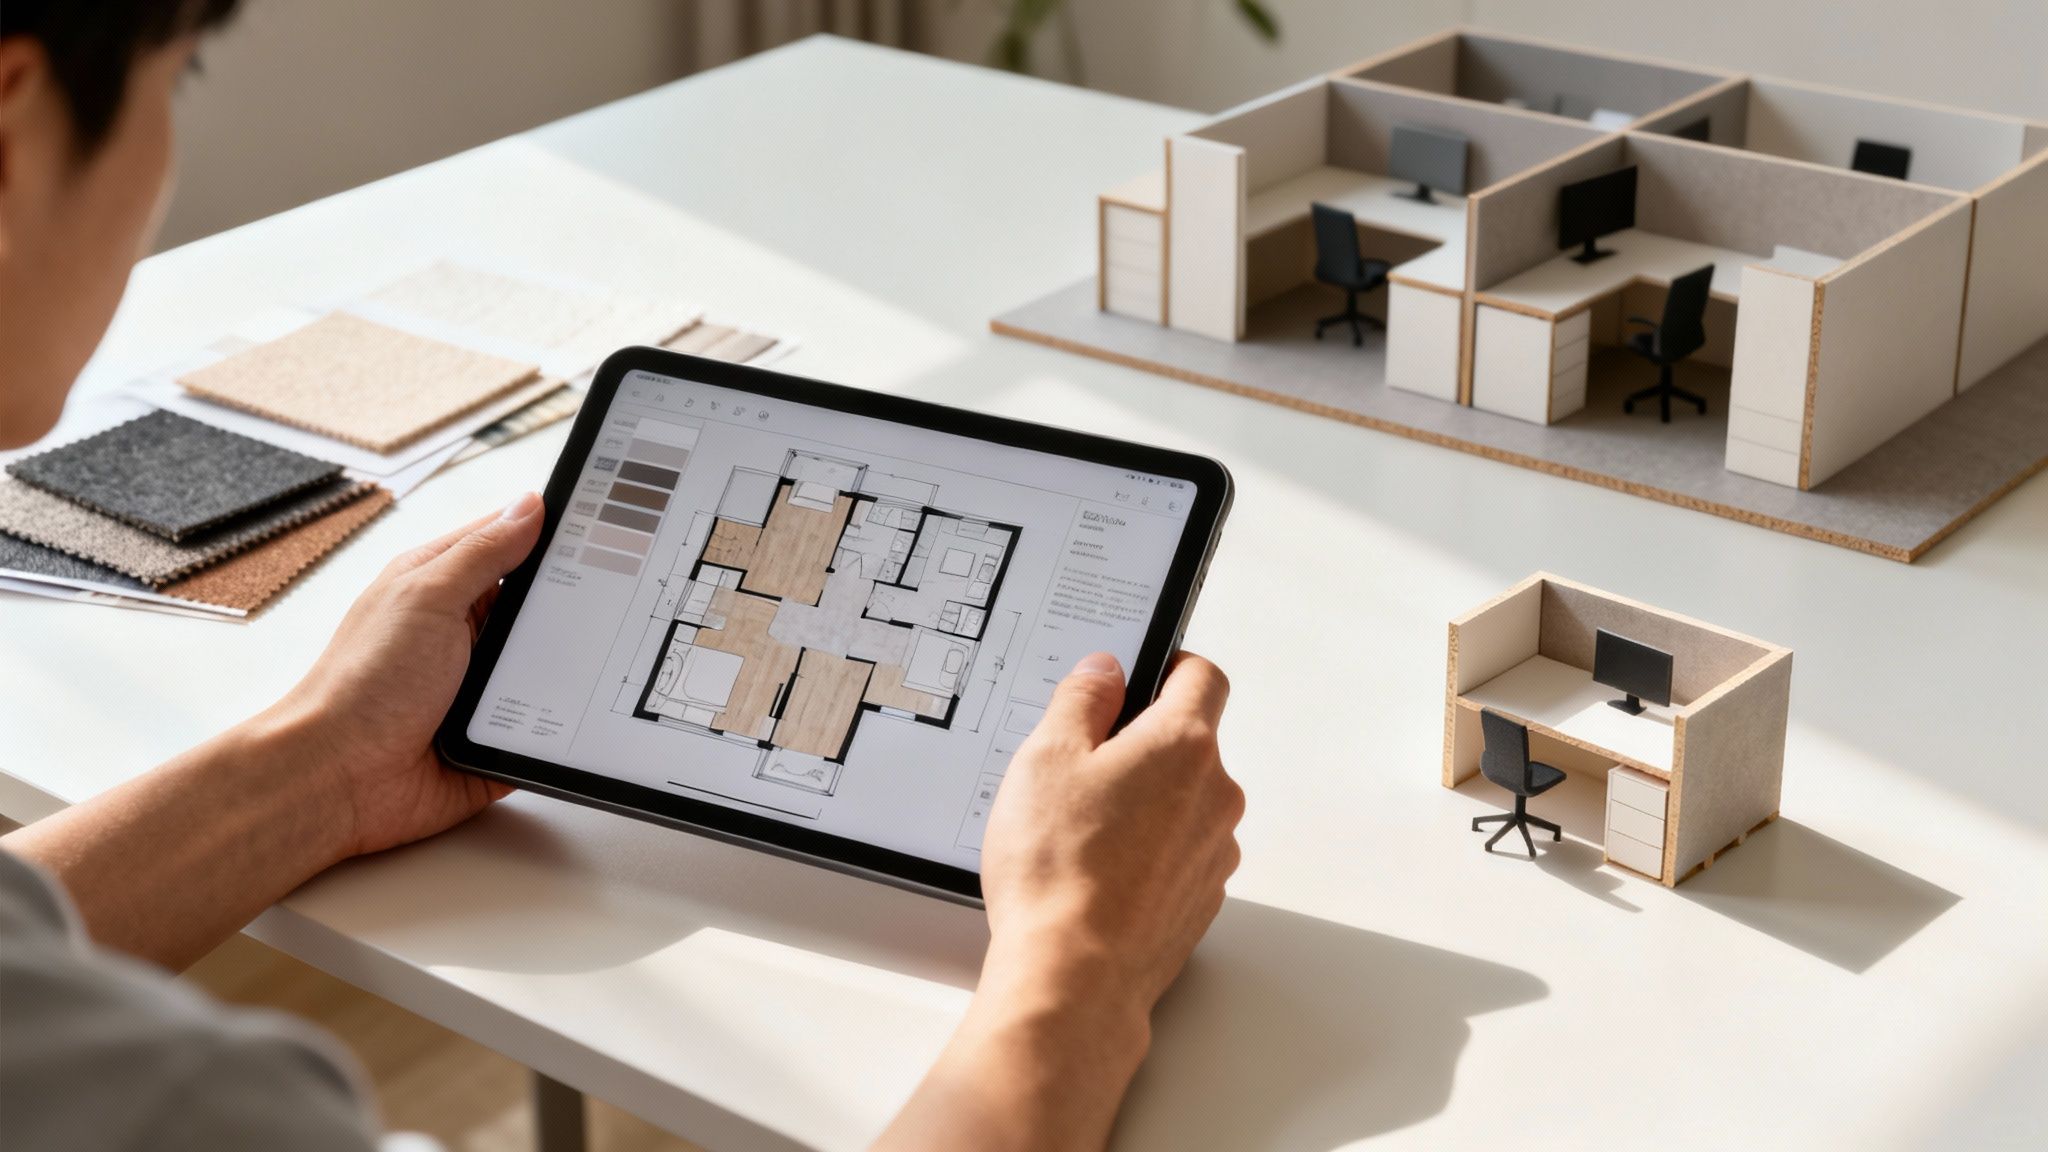
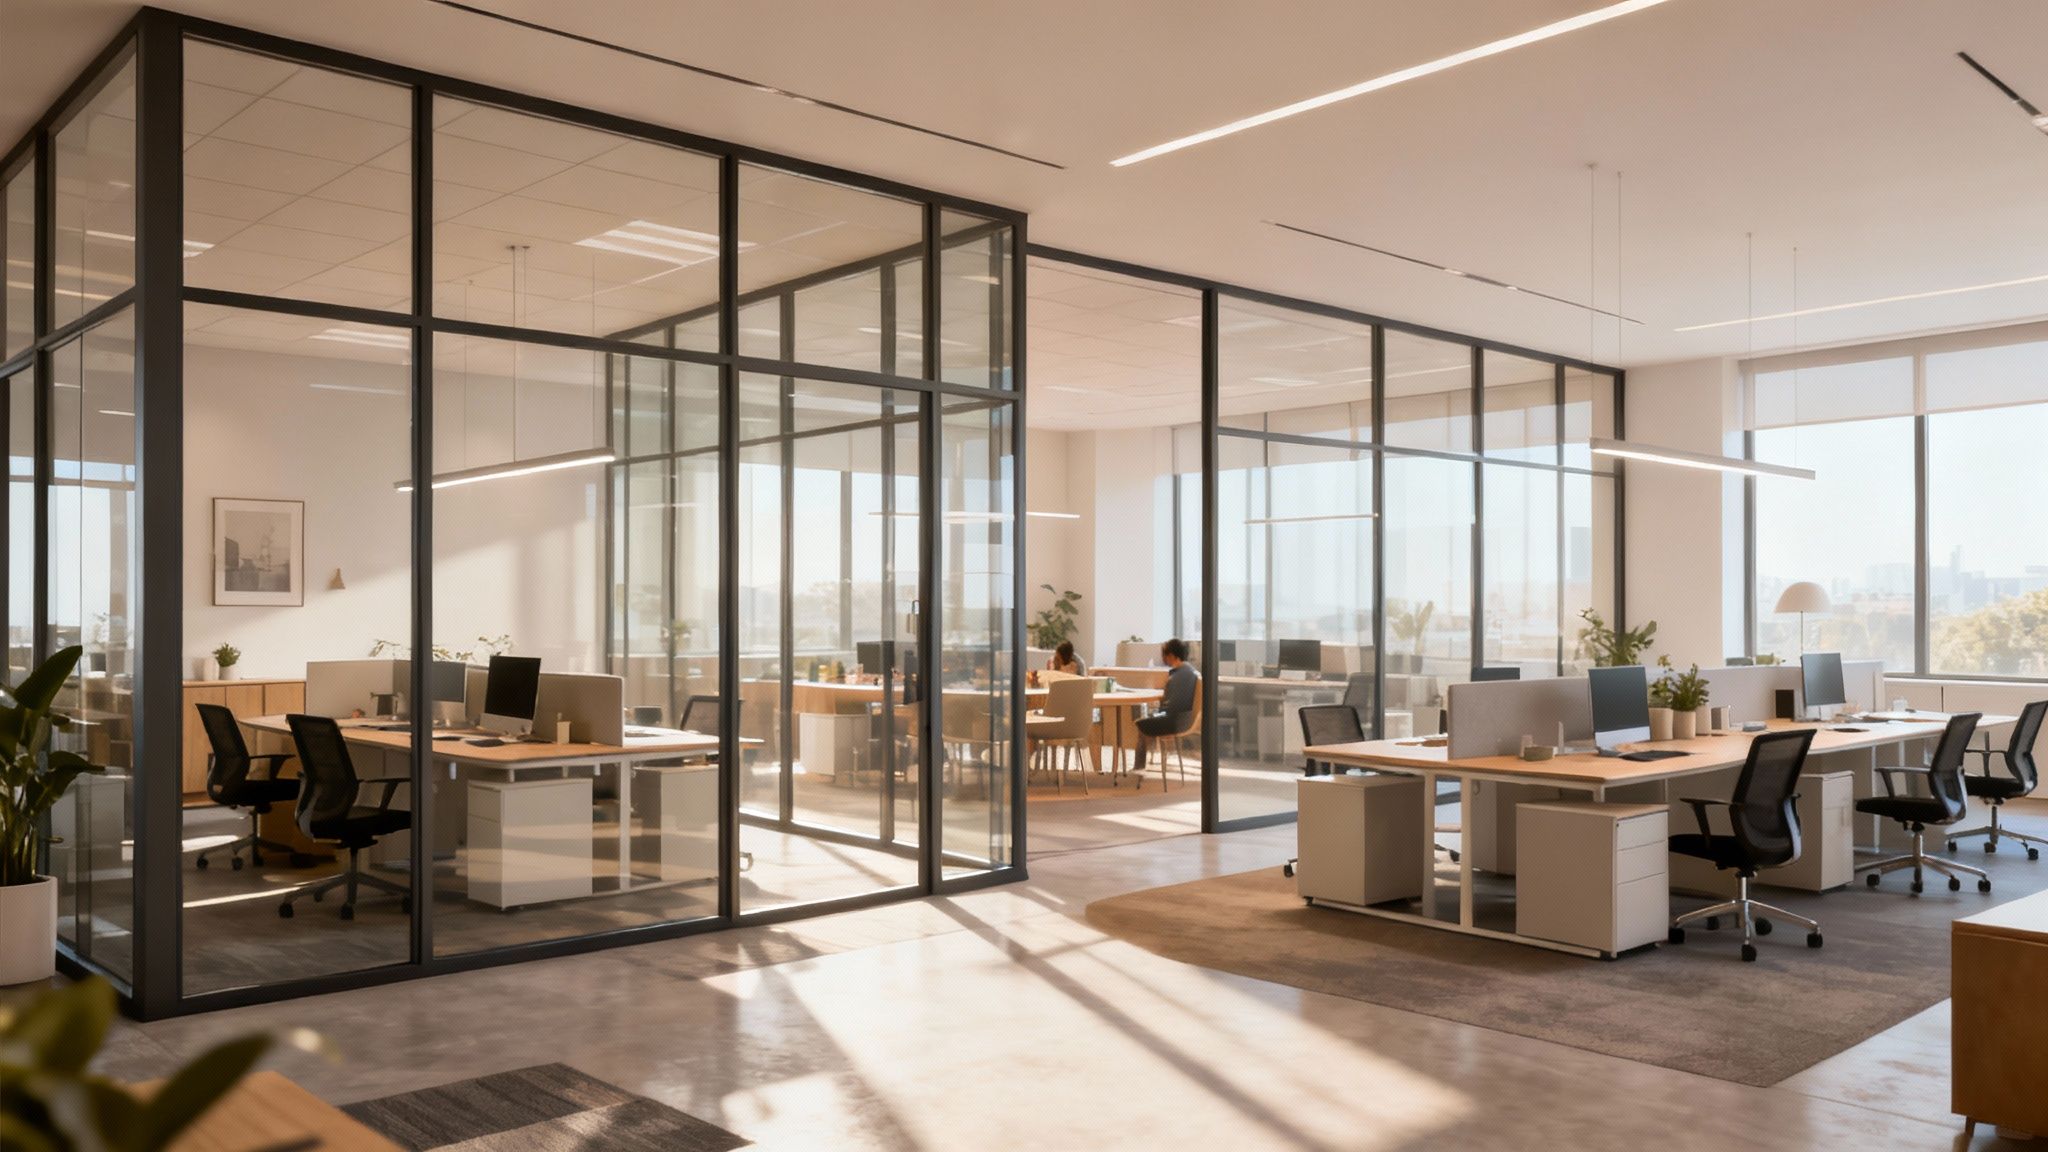
Office glass wall partitions strike a unique balance between openness and seclusion. They let sunlight spill into every corner while still marking out dedicated work zones. In short, glass partitions blend modern design with practical noise control.

Why Office Glass Wall Partitions Elevate Workspaces

Open offices can feel airy—but that can come at the expense of focus. Glass wall systems act like a clear boundary: you see what’s happening around you, yet you enjoy a degree of quiet when you need it. It’s the best of both worlds.

Consider these core benefits:

  • Natural Light Distribution: Transmits up to 80% of daylight, cutting down on artificial lighting and energy bills.
  • Visual Connectivity: Keeps teams in view, fostering unity without physical crowding.
  • Acoustic Control: Laminated or double-glazed panels can reach an STC 50 rating, taming distracting noise.
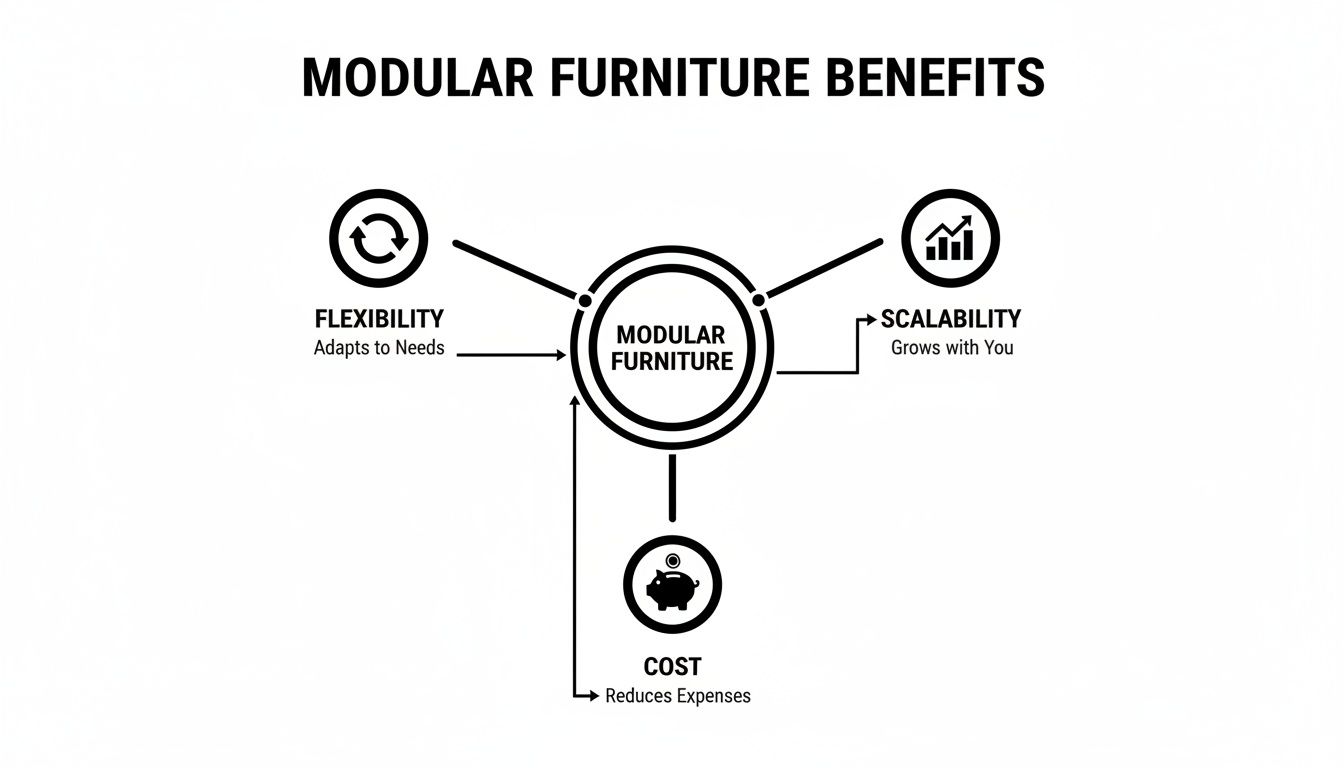
  • Modular Flexibility: Demountable frames let you reshape layouts on the fly—no major construction required.

These perks are ideal for hybrid work models, where staff move between shared areas and private offices. Glass walls feel more premium than cubicles, yet offer the same reconfigurable ease.

Office glass wall partitions in modern workspace by Cubicle By Design

Key Features That Set Glass Walls Apart

Far from cold panes and steel frames, today’s glass partitions integrate seamlessly with your workspace:

  • Frame Choices: Opt for the framed 700 or 800 series or the sleek, frameless 500 series.
  • Blinds & Films: Add privacy or custom branding on demand—no need to replace the glass.
  • Power & Data Channels: Hide cables inside mullions so desks stay uncluttered.

“A glass wall is like a picture frame that displays your team at work without locking them behind closed doors.”
– Workspace Designer

This guide walks you through every essential decision point:

  • Framed vs. frameless options
  • Acoustic and privacy performance
  • Sizing and glazing choices
  • Cost and ROI considerations
  • Installation and compliance tips
  • Space-planning examples and case studies

You’ll move seamlessly from initial concept to final installation.

Learn more about glass partition applications in our guide on glass partition walls for offices.

Graphical layouts in our look book spark fresh ideas. Explore Cubicle By Design solutions to see how glass walls blend with furniture and optimize your workspace today.

Understanding Key Concepts

Glass wall partitions bring natural light and a sense of openness without letting one area spill into another. Think of them as aquarium windows: you can see straight through, yet each zone stays defined.

At the core, these systems rely on modular and demountable components. You get the freedom to reconfigure an entire floor plan with hand tools—almost as effortless as swiveling a chair, but on a building scale.

  • Modular Assemblies lock panels into place using minimal tools.
  • Demountable Frames let you remove entire panels intact when layouts shift.
  • Framed Vs Frameless choices let you weigh visual heft, budget, and style.

Putting together a modular glass system feels like completing a puzzle—each piece snaps in and adapts as your office picture changes.

Daylighting And Transparency Benefits

Glass walls draw daylight deep into the workspace. With up to 80% of visible light passing through, you’ll cut back on overhead fixtures and trim your energy bills.

That extra brightness also reduces eye strain and supports natural circadian rhythms by eliminating shadowy corners.

For instance, positioning glass partitions next to window banks can push ambient light an extra 20 feet into the floorplate.

80% of natural light transmission translates to up to 20–30% energy savings in mixed layouts.

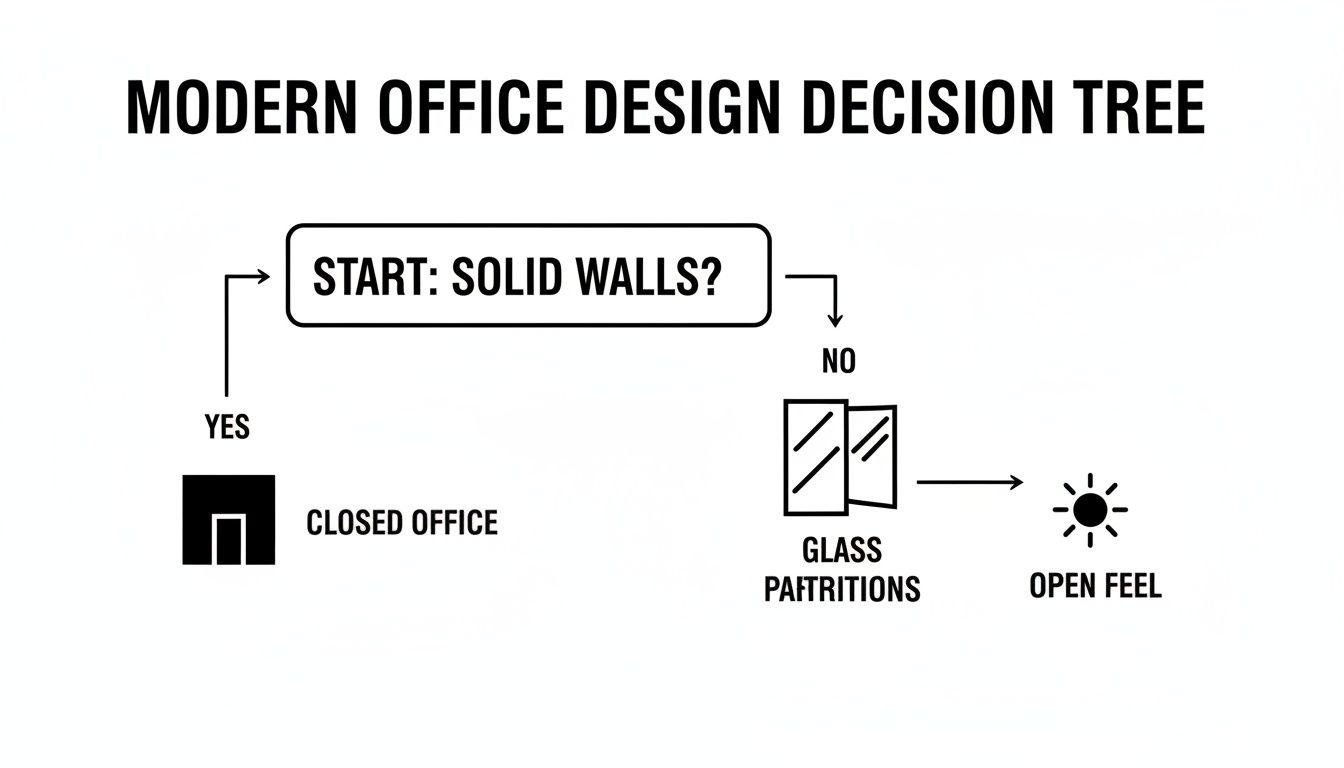
The diagram below shows common partition types from Wikipedia.

This sketch highlights how glass options stack up against solid walls in real-world interiors.

Integration With Workstation Layouts

Glass walls aren’t just decorative—they integrate smoothly with cubicle banks and desk clusters. See-through barriers carve out private offices or team huddle areas, all while keeping everyone visually connected.

  • Align panels to desk grids using low-profile mullions.
  • Match Series 7 cubicles for a unified metal finish.
  • Tuck private-office cubicles beside glass walls for extra sound control.

These tactics reduce corridor clutter and make the transition between open and closed spaces feel deliberate.

Glass partitions surged in popularity alongside open-plan offices in the late 20th century. Market analysts estimate a global glass partition market of USD 4.8 billion in 2025, growing to USD 6.46 billion by 2035 at a CAGR near 3%. (Learn more about glass partition market growth on BusinessResearchInsights.com).

To see how Series 500 or framed Series 700 and 800 solutions fit your workspace, try the Cubicle By Design Custom Cubicle Designer or browse our product category.

You can also explore pairings with private office cubicles or workstation cubicles to build zones that balance focus and collaboration.

These insights will guide you toward an office glass partition system that aligns with both your design vision and practical requirements.

Comparing Framed And Frameless Glass Walls

Comparison of framed and frameless office glass wall partitions

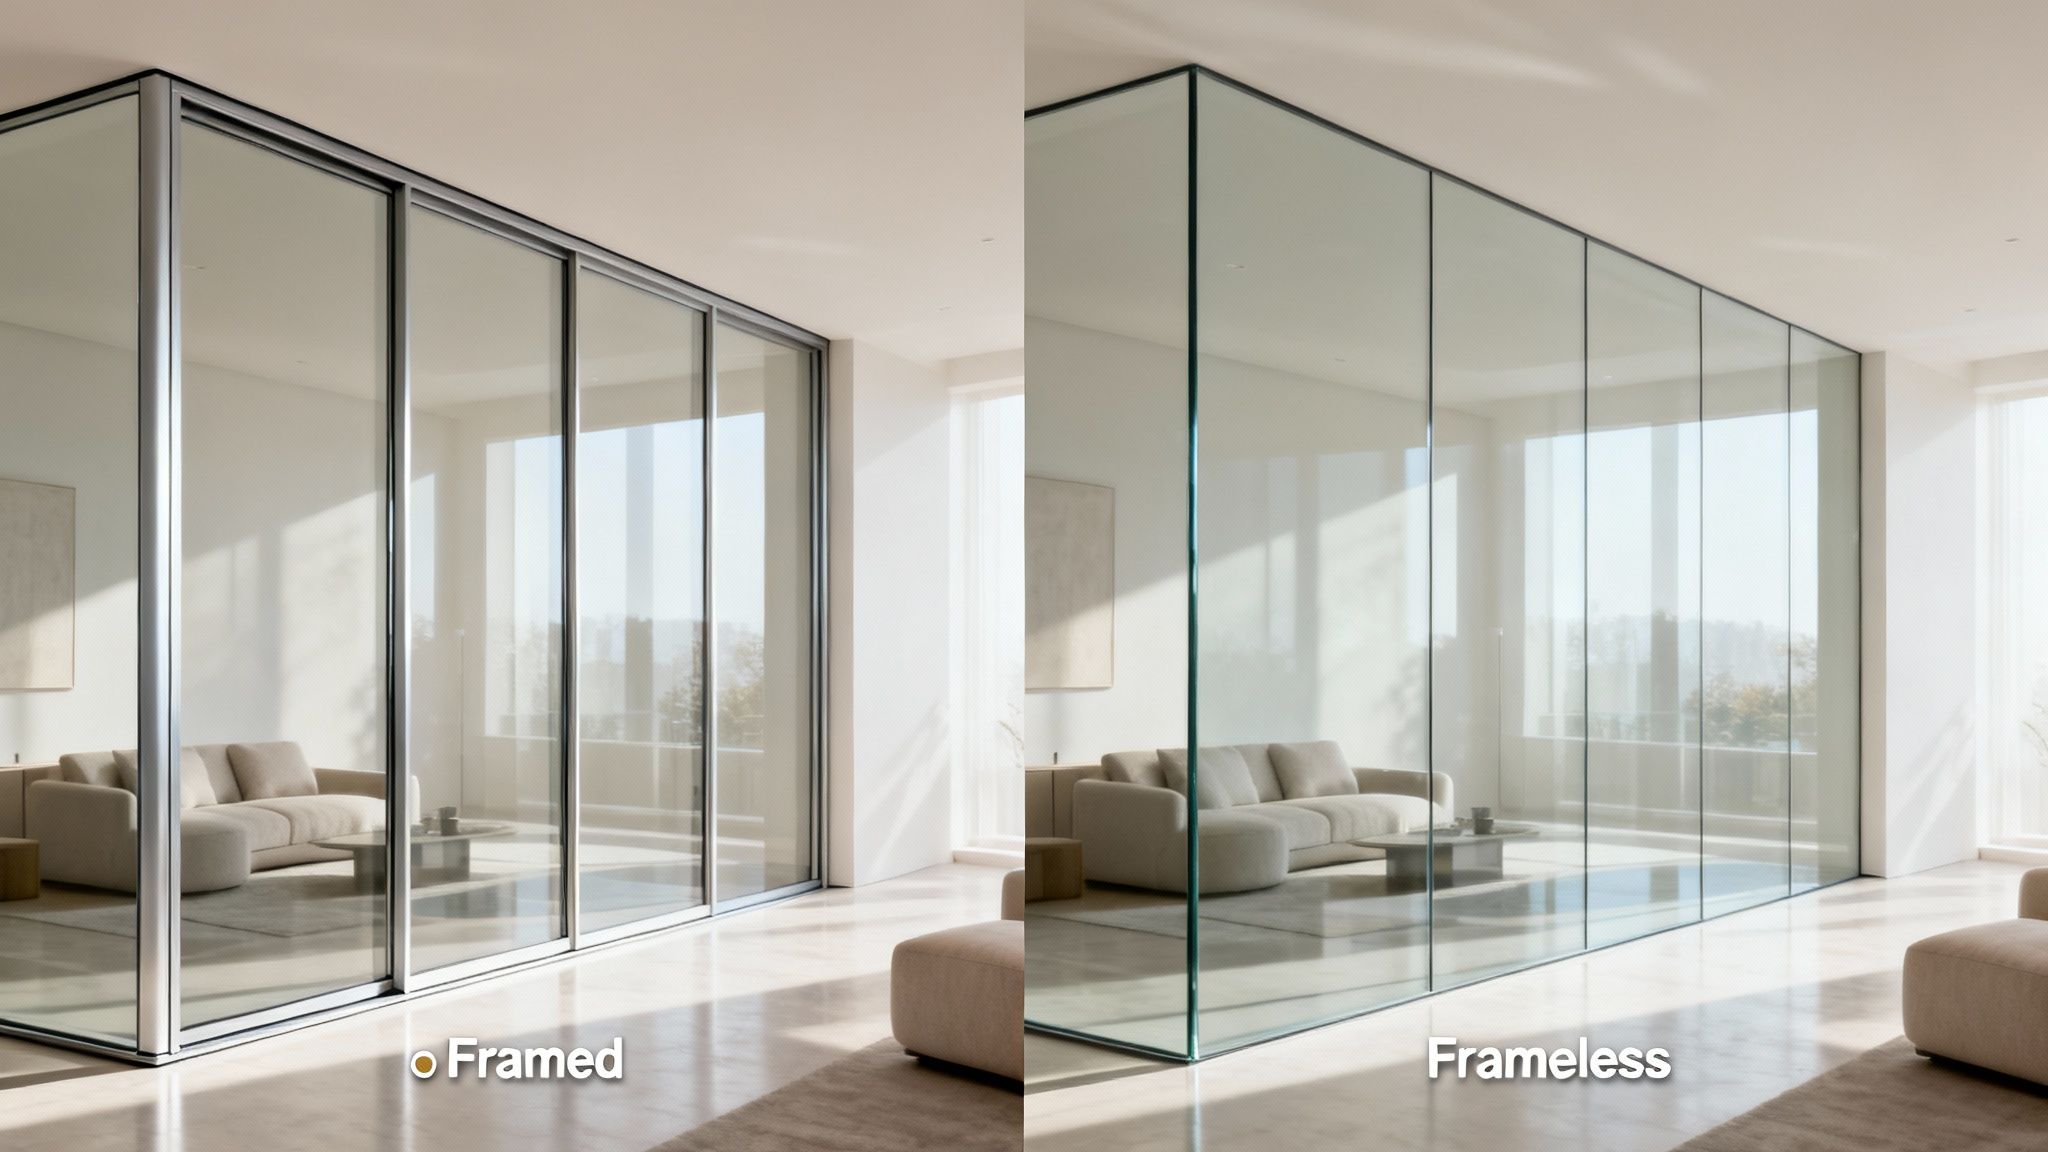
Choosing the right office glass wall partitions often comes down to balancing style, cost, and downtime. Framed systems feature visible profiles and a lower entry price. Frameless walls, by contrast, give you uninterrupted sightlines and an elevated ambience.

Installation times vary, too. A framed run typically takes 2–3 days per office segment, while frameless glazing often wraps up in 1–2 days, keeping projects on schedule and staff productive.

  • Framed partitions: dependable cost control and design variety
  • Frameless units: clear transparency and a premium finish

Evaluate Framed Glass Walls

Framed glass walls use metal or wood mullions to surround each panel. That framework makes weather-tight sealing straightforward and often costs 20–30% less than frameless.

  • Profile Variety: Choose from multiple colors and finishes
  • Reliable Sealing: Gaskets and caulking deliver solid acoustic performance
  • Upfront Savings: Lower initial investment without sacrificing durability

For a hands-on test drive, experiment with our Custom Cubicle Designer and see framed layouts come to life.

Evaluate Frameless Glass Walls

Frameless systems rely on point-supported fittings or slim edge channels. With no visible frames, daylight flows through uninterrupted, but that minimalist look carries premium pricing.

  • Maximum Transparency: Panels appear to float, boosting daylight penetration
  • Upscale Feel: Ideal for executive suites and high-end conference rooms
  • Speedy Glazing: Silicone joints can cut installation down to a day

Innovations such as acoustic laminates, laminated safety glass, and switchable (smart) panes are nudging average prices higher, even as installation volumes hold steady. Dive deeper at TechSci Research.

Framed vs frameless office glass wall partitions comparison by Cubicle By Design

Comparison of Framed and Frameless Glass Wall Features

Here’s a quick side-by-side look at how each system measures up:

Feature Framed Glass Walls Frameless Glass Walls
Cost Lower initial investment Higher upfront investment
Aesthetics Defined profiles Seamless, edge-to-edge clarity
Installation Time Moderate (2–3 days per office segment) Fast (1–2 days per office segment)
Acoustic Performance Solid with gasket seals (STC 45) Superior with laminated glass (STC 50+)
Customization Wide range of finishes and colors Limited finishes, focus on glass clarity

Even though price points differ, both framed and frameless walls deliver reliable performance. It’s all about matching their strengths to your project goals.

Choosing The Right System

Begin by listing your top priorities—budget, design vision, acoustic needs, and timeline. Then weigh them against the attributes above. Don’t forget to factor in maintenance and potential reconfigurations down the road.

  1. Lock in a realistic budget and expected ROI.
  2. Identify acoustic and privacy requirements across departments.
  3. Go framed if customization and cost control are key.
  4. Opt for frameless when sightlines and a luxury finish matter most.
  5. Plan your installation in phases to minimize office disruption.

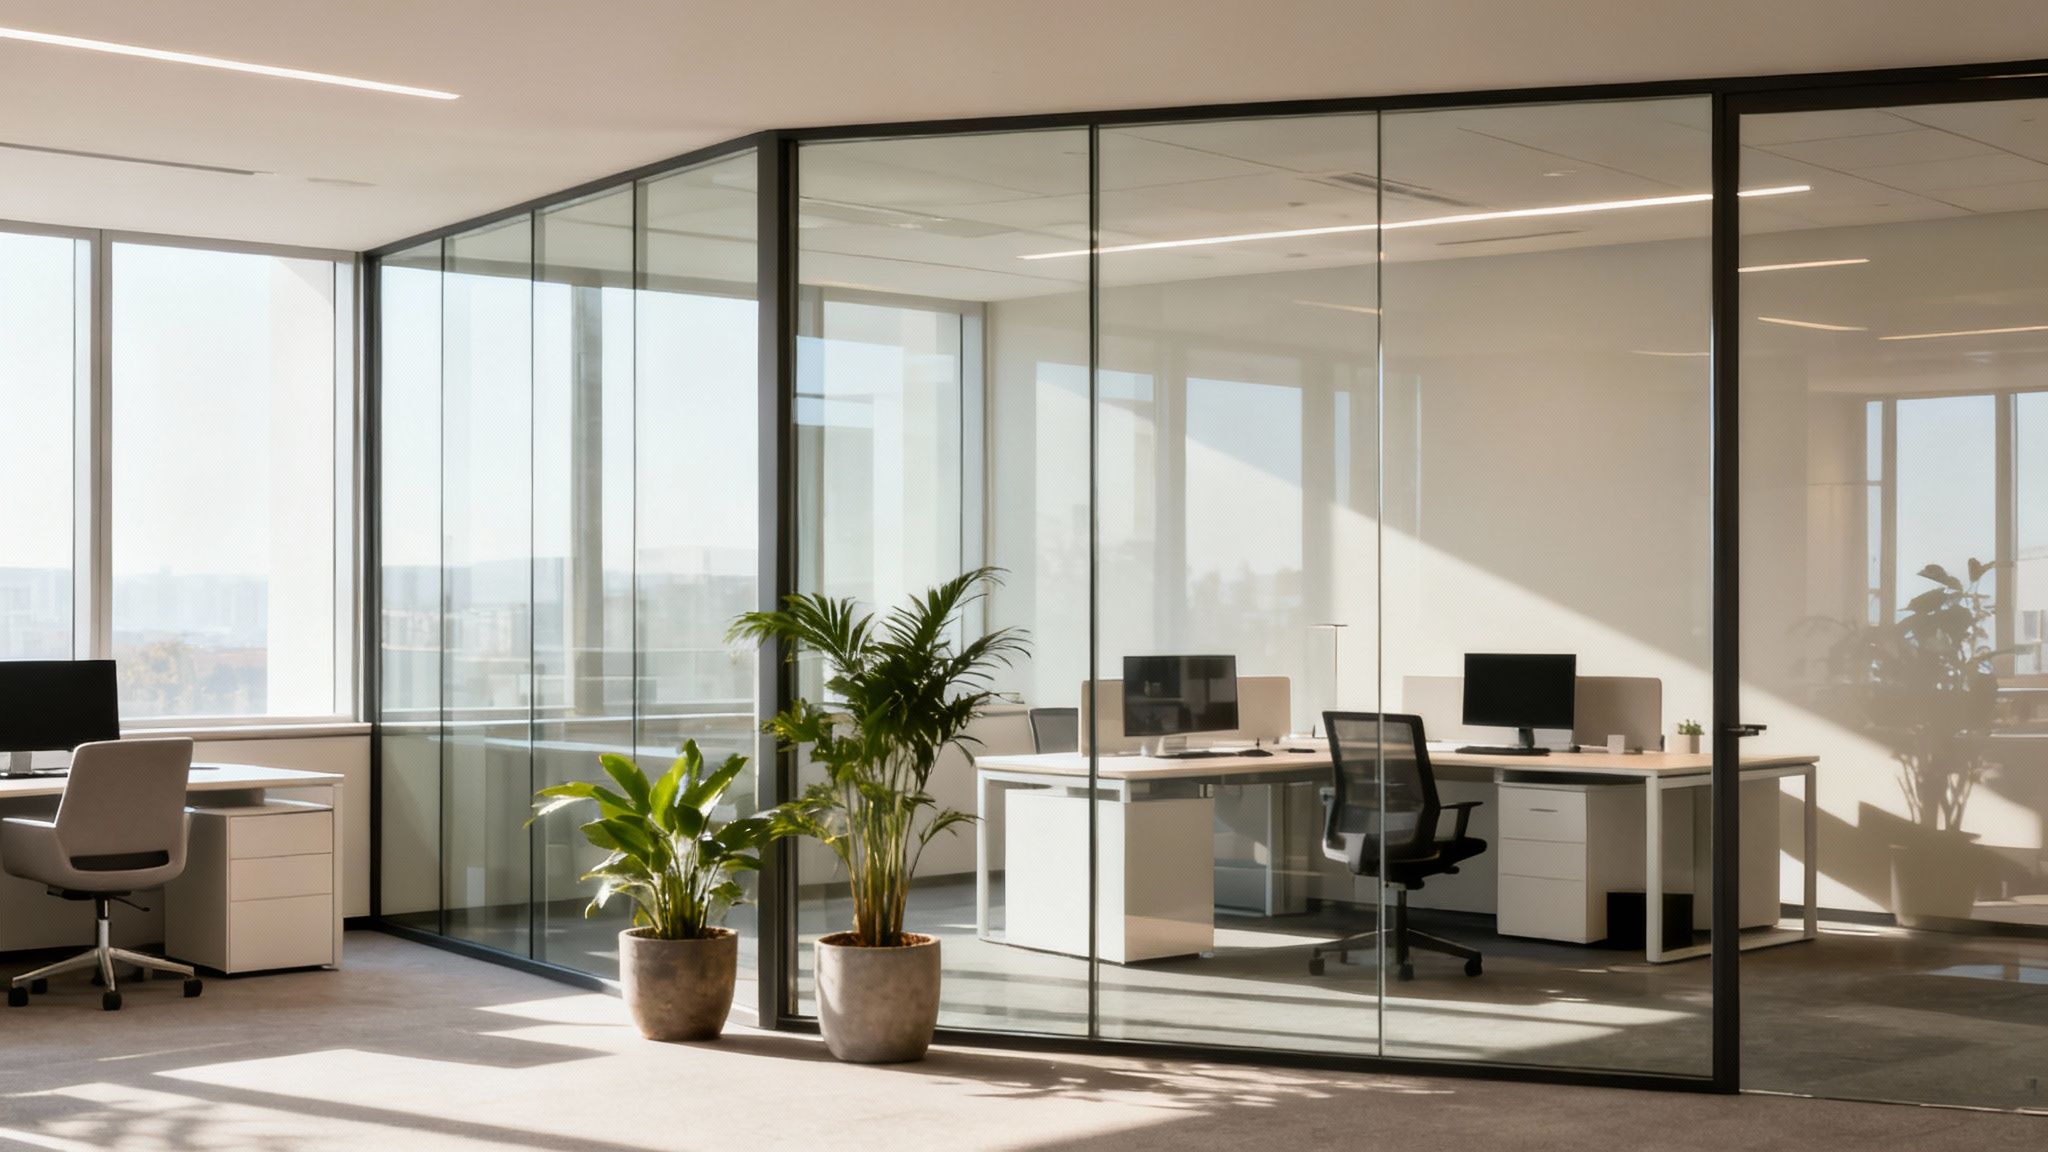
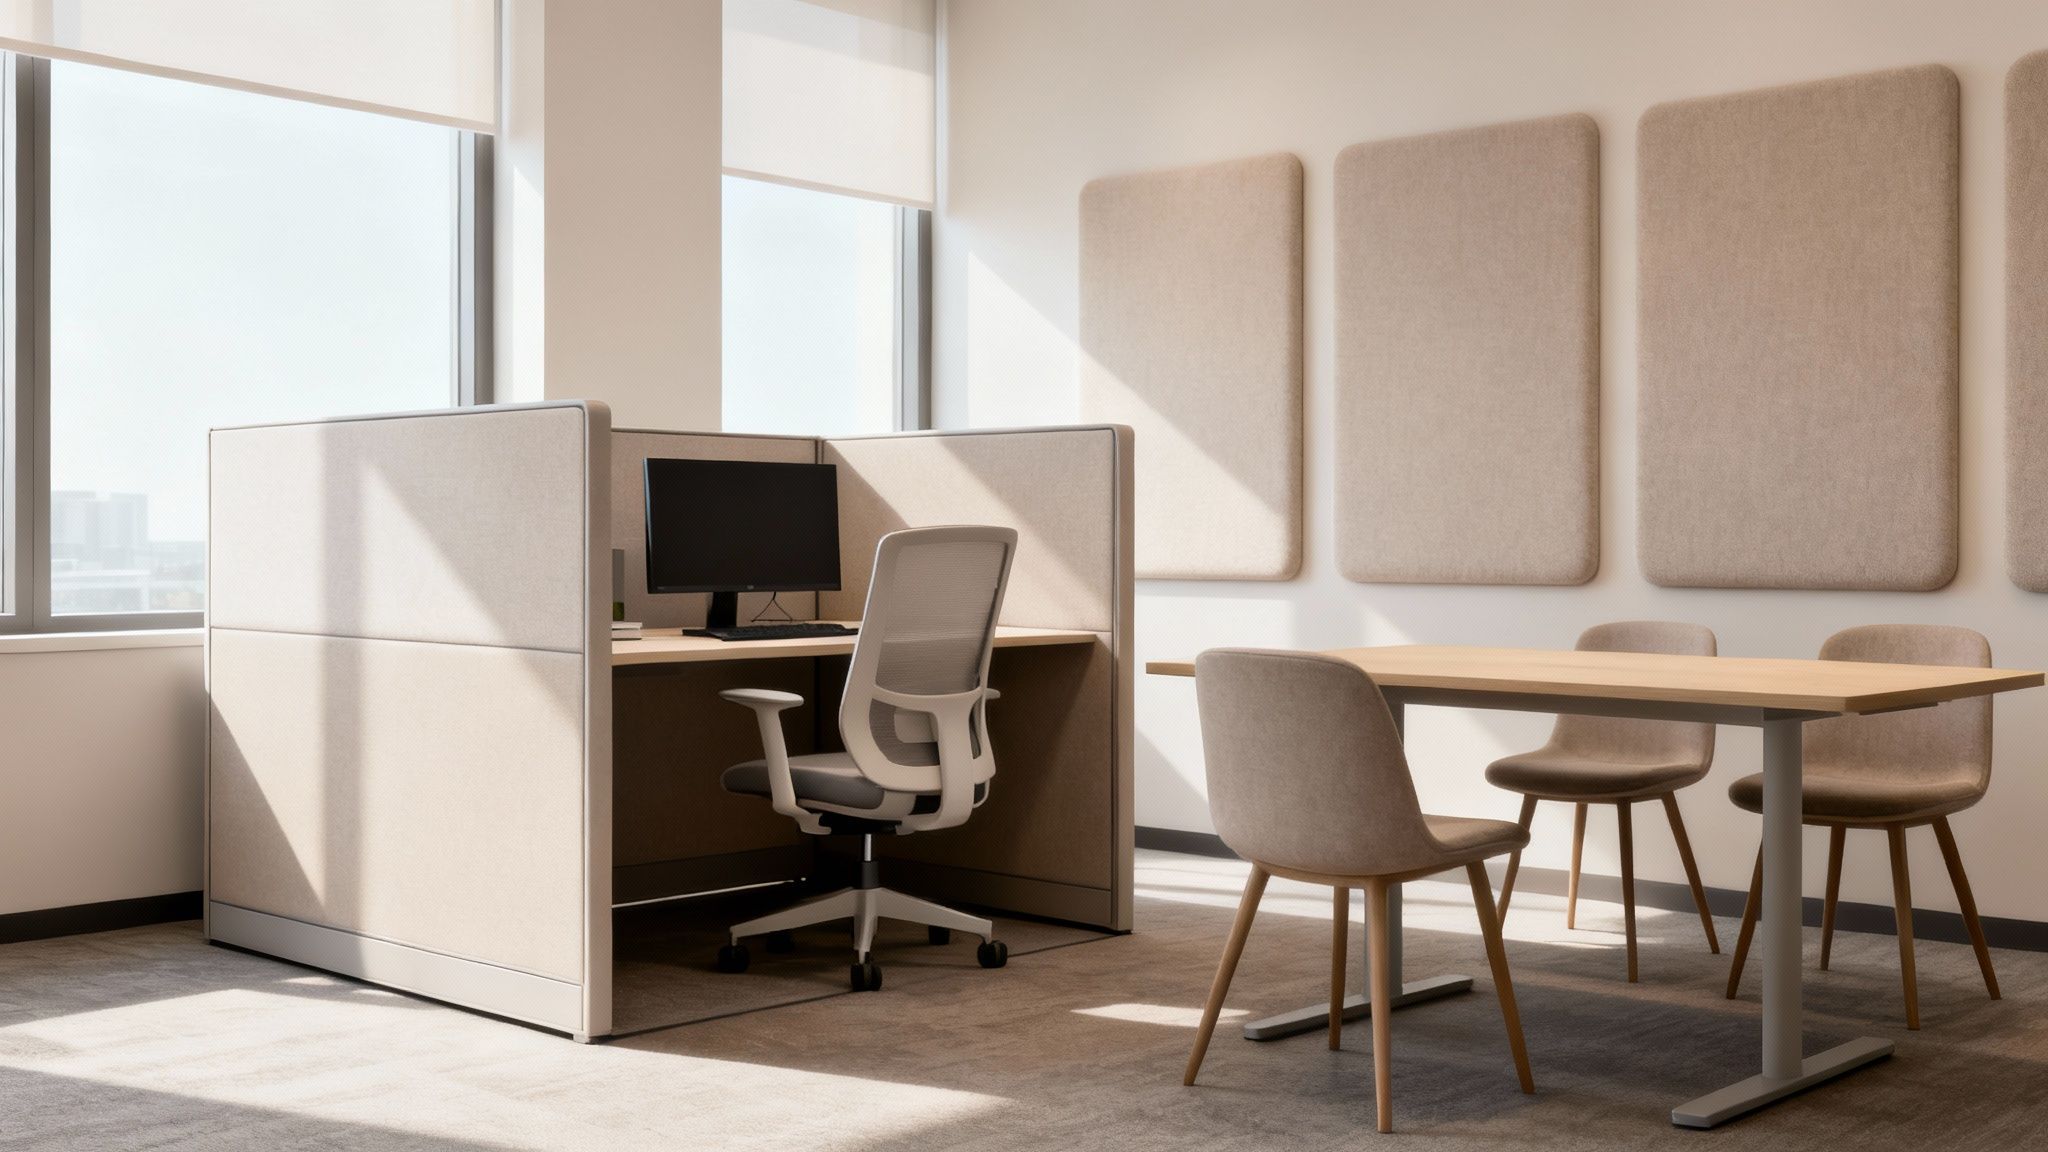
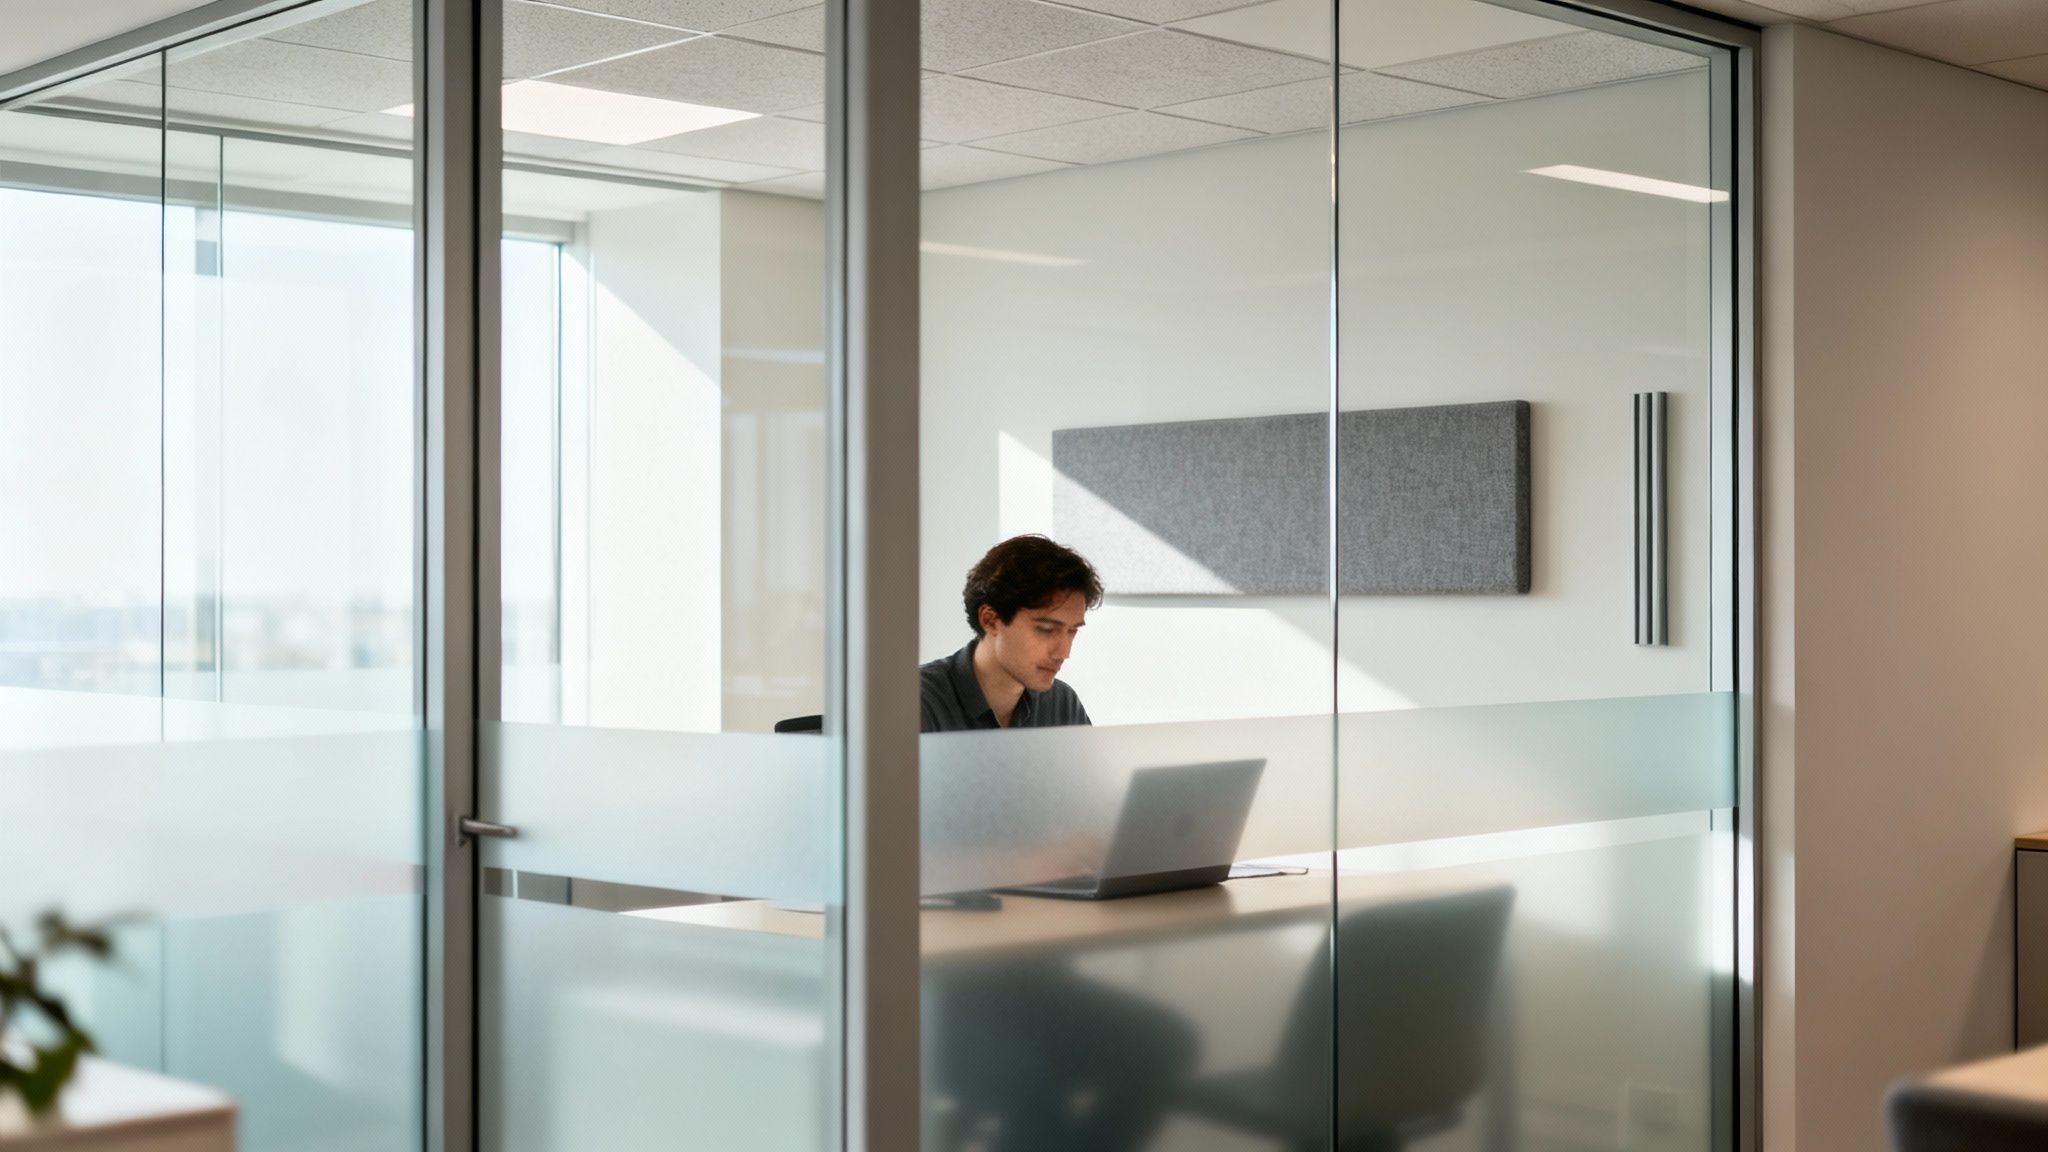
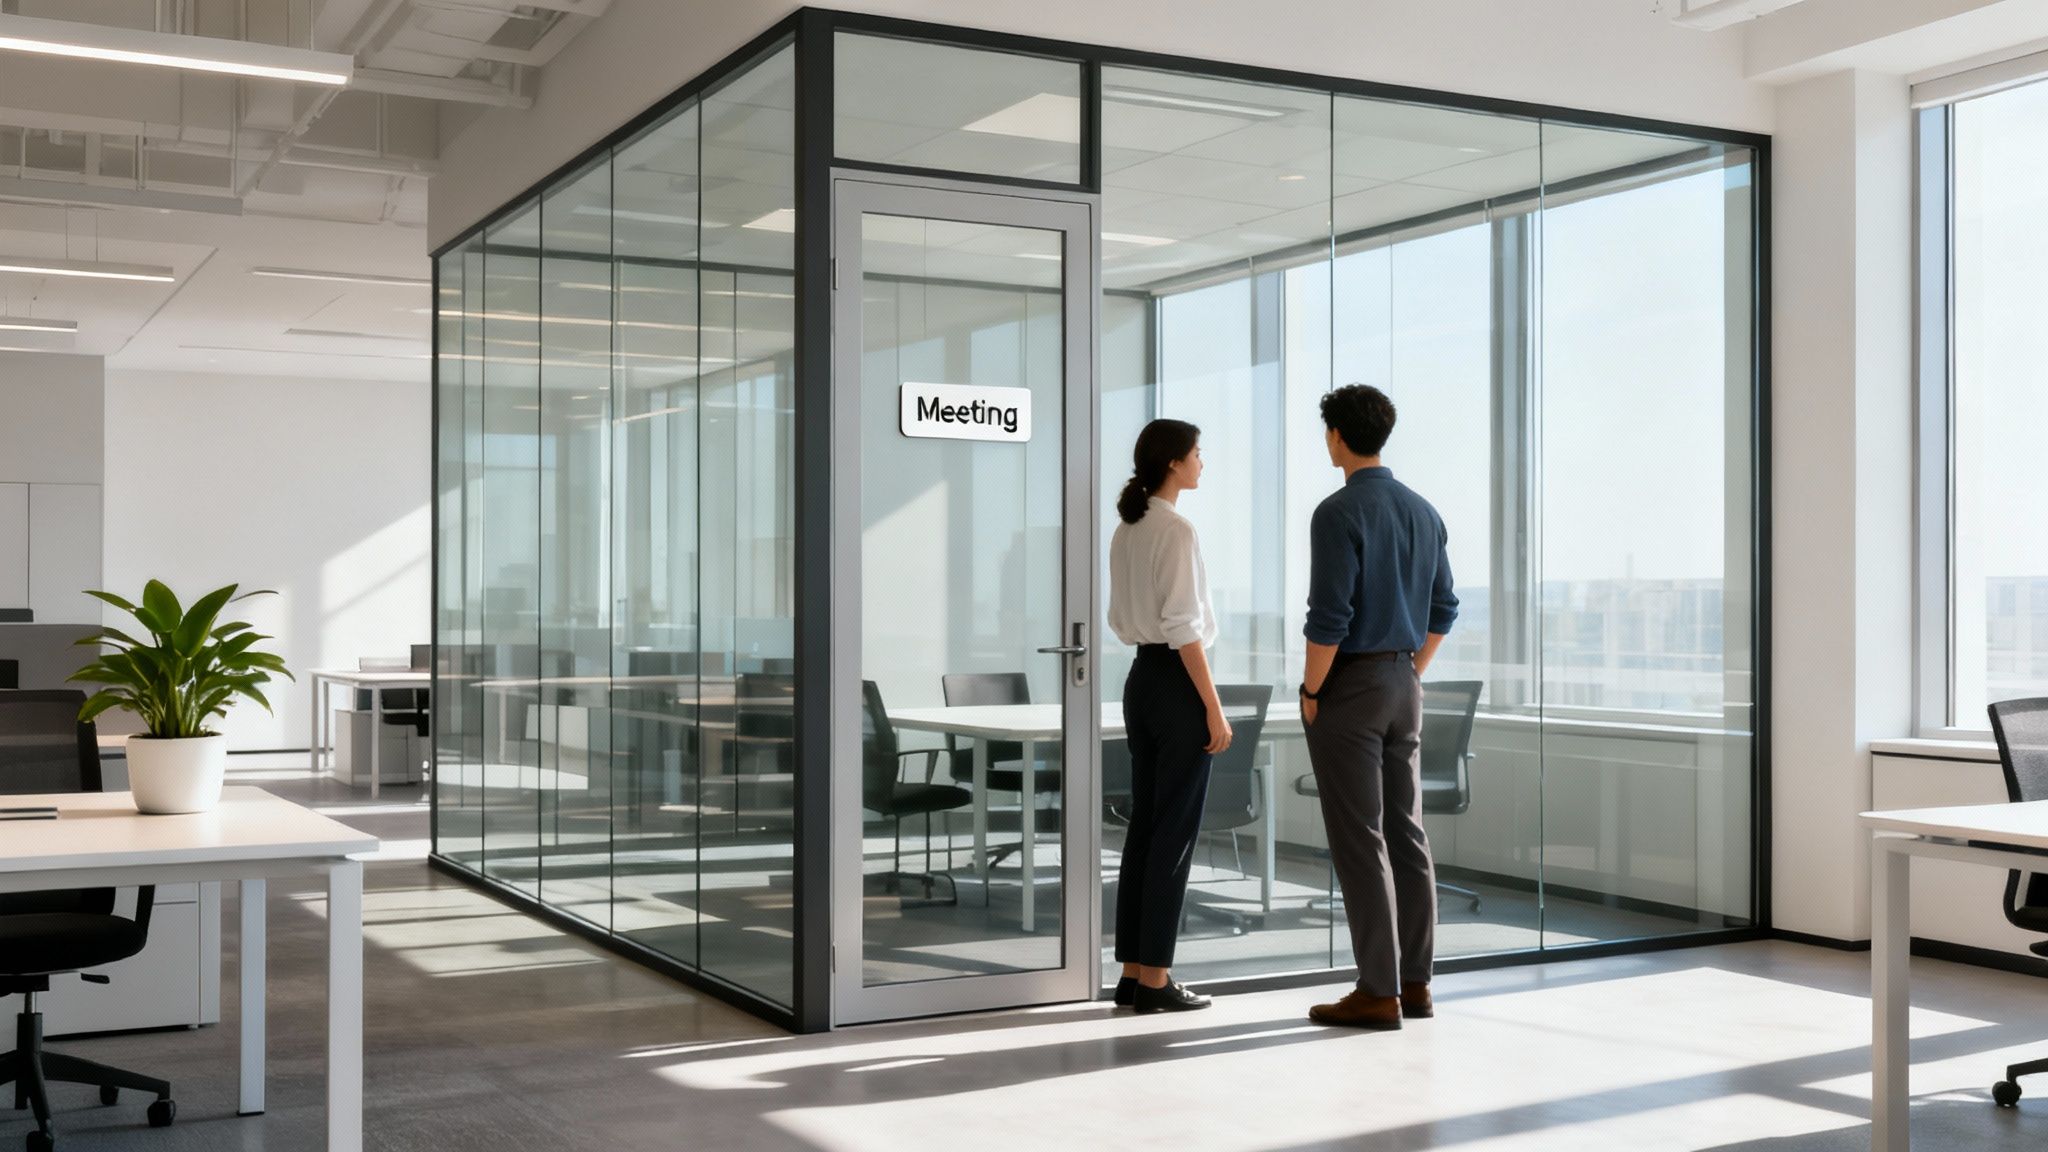
Below is a screenshot showing private office cubicles integrated with glass walls to create dedicated work areas.

Comparison of framed and frameless office glass wall partitions

This example highlights how framed panels pair with cubicles to maintain both structure and visual continuity.

“Framed systems offer versatile customization while frameless designs elevate premium appeal.”
– Workspace Designer Insight

For a full breakdown of options, see our guide on Glass Wall Systems for Offices.

Explore related solutions:

Now you have the insights to configure glass partitions that balance open collaboration with focused, private work zones. Visit our site to configure your system.

Acoustic And Privacy Considerations

Glass partitions flood your workspace with daylight, yet they often feel like sieves when it comes to controlling noise. Striking the right balance between an open feel and genuine privacy hinges on understanding acoustic performance. We measure this using Sound Transmission Class (STC) ratings.

Laminated panels typically hit around STC 35, while tempered double-glazed units climb to STC 45 or higher.

  • A vinyl interlayer in laminated glass soaks up mid-range noise
  • Double-glazed tempered glass adds an air gap for extra isolation
  • Acoustic gaskets seal edges and keep flanking noise at bay

These figures guide you on where to place partitions—whether in an open bullpen or alongside private offices.

Sound Rating Table

Here’s a quick comparison of common glass types and their STC ratings:

Glass Type STC Rating Notes
Single Laminated 35 Basic absorption
Double Tempered 45 Strong isolation
Smart Switchable 40–45 Variable transparency

Add seals and integrated blinds to push performance even higher. High-grade weatherstripping under frames and doors helps muffle hallway noise.

Seals And Blinds

Blinds sandwiched between glass panels block sightlines and act as a second sound barrier.

  • Built-in blinds drop into place on demand
  • Neoprene gaskets close invisible gaps around the perimeter

Right sealing can boost your STC by 5 points or more.

Smart Glass Use Cases

Switchable glass toggles from clear to frosted with an electric control. It offers on-demand privacy without extra hardware—and keeps acoustic performance steady in both states.

“Smart glass blends convenience with control, offering privacy without compromising sound quality.”

Beyond sight and sound, there’s an energy advantage: over 70% of modern commercial buildings use glass partitions for aesthetics and collaboration, cutting lighting costs by 20–30% through daylighting. Read more in the report from Global Growth Insights.

Privacy Resources

For deeper tips on balancing visibility and sound control, explore our office cubicle privacy guide.

You can also combine glass walls with dedicated panels from our private office cubicles to craft quiet executive suites.

Benefits And Metrics

When you reduce noise and let daylight reach deeper, the ROI speaks for itself. Offices that upgraded saw a 25% drop in noise complaints and up to 30% savings on lighting.

Use this simple checklist to secure top sound performance:

  1. Select glass rated STC 45+
  2. Install neoprene seals around all edges
  3. Add integrated blinds or acoustic films
  4. Test acoustics with a decibel meter

Decorative laminated films can boost privacy and raise STC by 3 points while preserving transparency. Whether you choose floor-to-ceiling panels or framed systems, partner with Cubicle By Design for expert design, code compliance, and seamless installation.

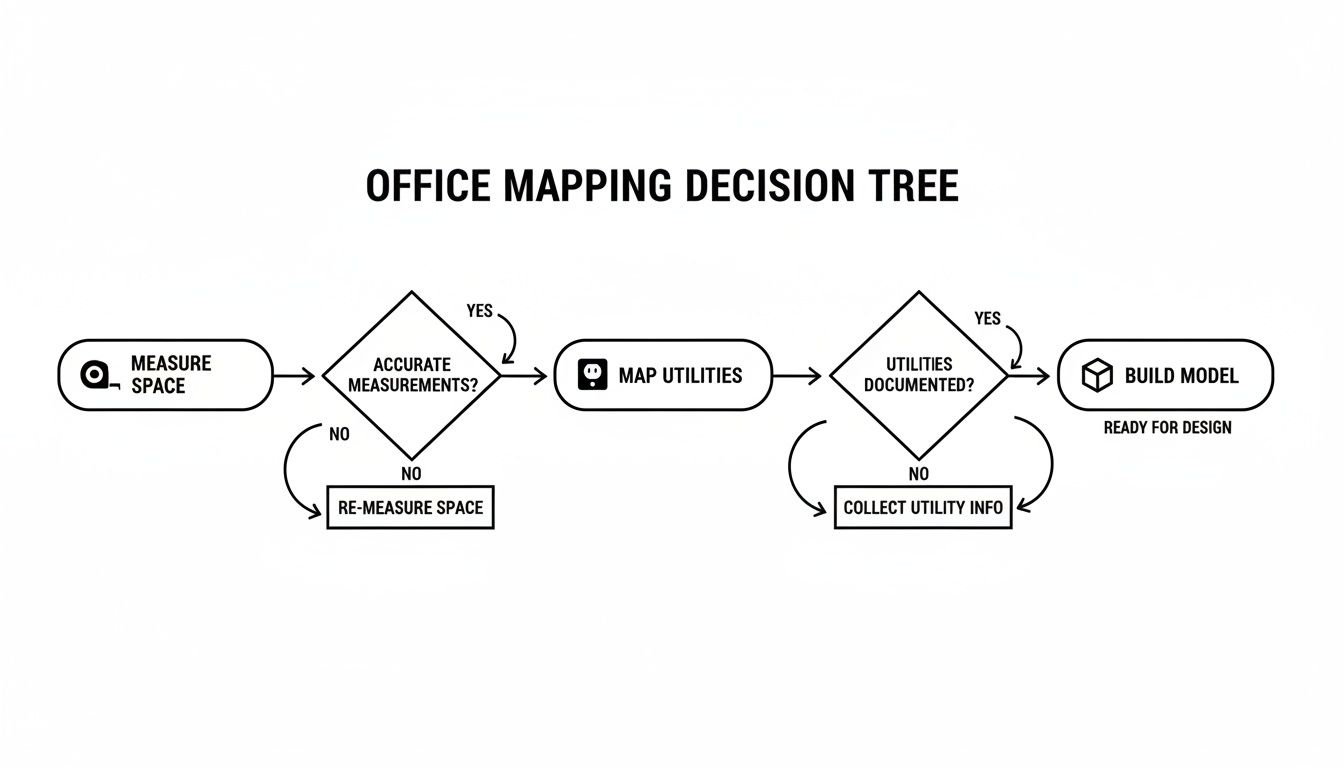
Cost Estimation And ROI Decisions

Accurate project budgets for office glass wall partitions always start with square footage. Nothing else makes sense until you know the space you’re working with.

Next up, you’ll dial in glazing preferences—single, laminated or double—and ballpark cost per linear foot. This early step shapes almost every number that follows.

For a truly custom take, plug your specs into our Custom Cubicle Designer. It’s the quickest way to see price tags matched to your vision.

Key cost influencers include:

  • Material Type: Premium double tempered glass or budget-friendly single laminated panels.
  • Frame Profile: Slim aluminum mullions versus near-invisible edge channels.
  • Installation Complexity: Uneven floors, built-in wiring chases and air-sealing add hours on site.
  • Add-Ons: Integrated blinds, privacy films, acoustic seals or smart glass toggles.

Simple ROI Model

Putting numbers on paper usually boils down to three buckets: energy savings, productivity gains and lease premiums. Here’s a rough sketch:

  1. Lighting Energy Savings: Natural daylight can trim lighting bills by around 25%.
  2. Productivity Gains: Quiet, private spaces often deliver up to 5% more focused work time.
  3. Potential Lease Uplift: Sleek glass interiors may command 10–15% higher rent.

Run that out over a typical 10-year span and most glass partition investments break even in 2–3 years.

Learn more about cost breakdowns in our Cubicle Price Guide.

Cost Ranges And ROI For Glass Wall Configurations

Use this table as a quick reference for what various glass wall types cost and when you might see returns.

Configuration Type Cost Per Sq Ft Typical ROI Period Notes
Single Laminated Glass $65–$75 36–48 months Basic sound absorption, budget option
Double Tempered Glass $90–$120 24–36 months Higher STC, better daylighting
Frameless Premium Glass $130–$160 18–30 months Seamless look, fastest payback
Framed Aluminum System $70–$100 30–42 months Balanced cost and customization

This table should help you gauge upfront costs alongside likely payback timelines.

Interpreting The Data

The chart below compares acoustic performance and daylight gains for popular glass partitions.

Infographic about office glass wall partitions by Cubicle By Design
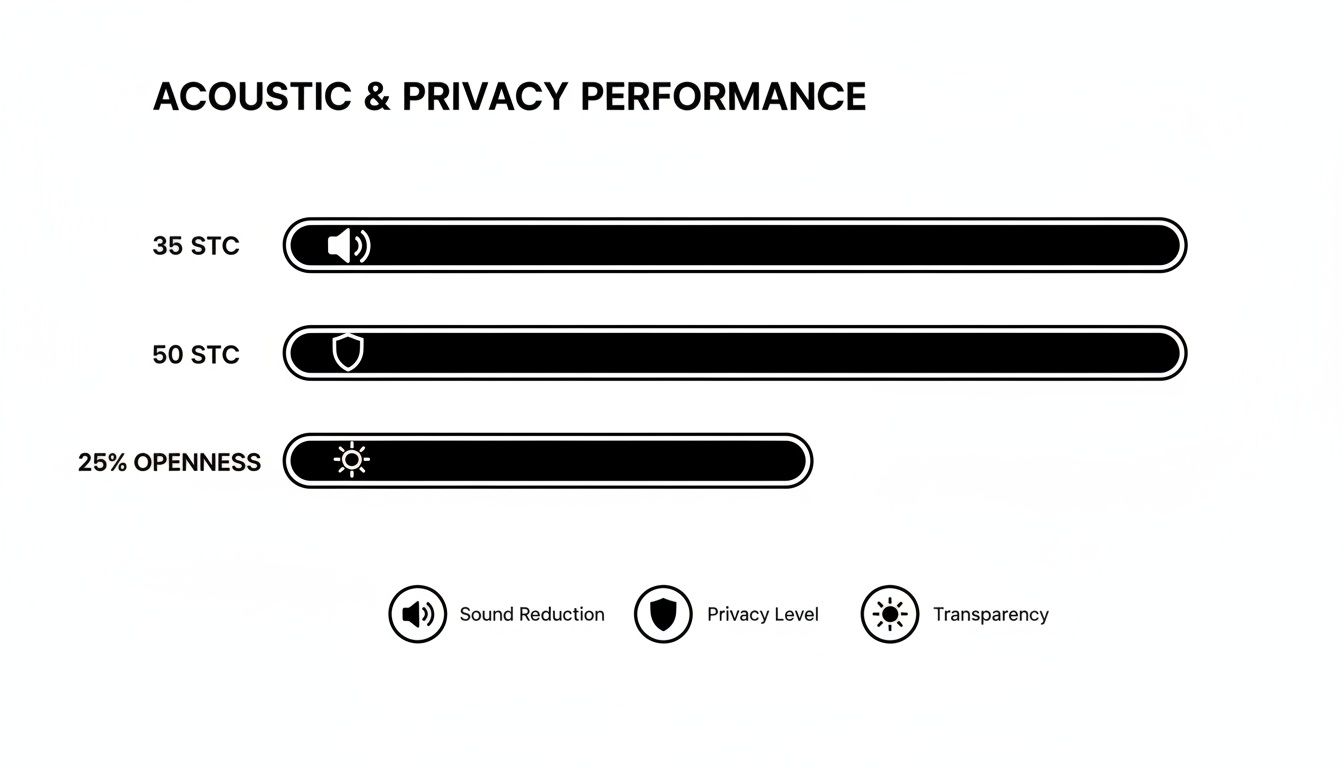
  • Double-glazed walls hit an STC rating of 50 and boost daylight by 25%.
  • Laminated panels typically land around STC 35, offering decent privacy on a tighter budget.

Best Practices For Budgeting

  • Secure Multiple Quotes: Compare framed versus frameless bids.
  • Factor In Change Orders: Budget an extra 10% for surprises.
  • Coordinate Trades: Sync electrical, data and structural work to cut revisions.
  • Schedule In Phases: Stagger installations to minimize business interruption.

“A well-planned glass wall install can deliver ROI in under two years when savings and productivity gains are accounted for.”
– Cubicle By Design Project Manager

Regional And Design Factors

  • Urban vs Suburban: Labor costs can swing by 15–25%.
  • Custom Finishes: Anodized frames add roughly 5–8% to material spend.
  • Building Height: Above three floors, lifts or scaffolding might be required.
  • Permit Fees: Local approvals can tack on 1–3% of total project cost.

Leveraging Scale For Savings

  • Bulk Material Purchase: Ordering in volume often drops glass costs by 10%.
  • Standardization: Repeating frame profiles slashes setup fees.
  • Phased Procurement: Lock in pricing for future phases under one contract.
  • Pre-Fabrication Savings: Off-site assembly can cut installation labor by 15%.

Tracking ROI Metrics

  • Monitor Energy Bills: Compare pre- and post-install lighting usage.
  • Survey Occupants: Simple feedback forms reveal privacy satisfaction.
  • Review Lease Rates: Track rent increases tied to your enhancements.
  • Audit Maintenance Costs: Log cleaning and seal replacement over time.

Combining these strategies makes your budget more reliable and boosts confidence in your ROI forecast.

Contact our team for a custom cost analysis and ROI prediction.

Start planning with Cubicle By Design today by exploring our homepage and product galleries.

Visit our cubicle category for integrated solutions.

Combine glass walls with private office cubicles or workstation cubicles to maximize functional design.

Discover full glass wall solutions at Cubicle By Design for confident budgeting.

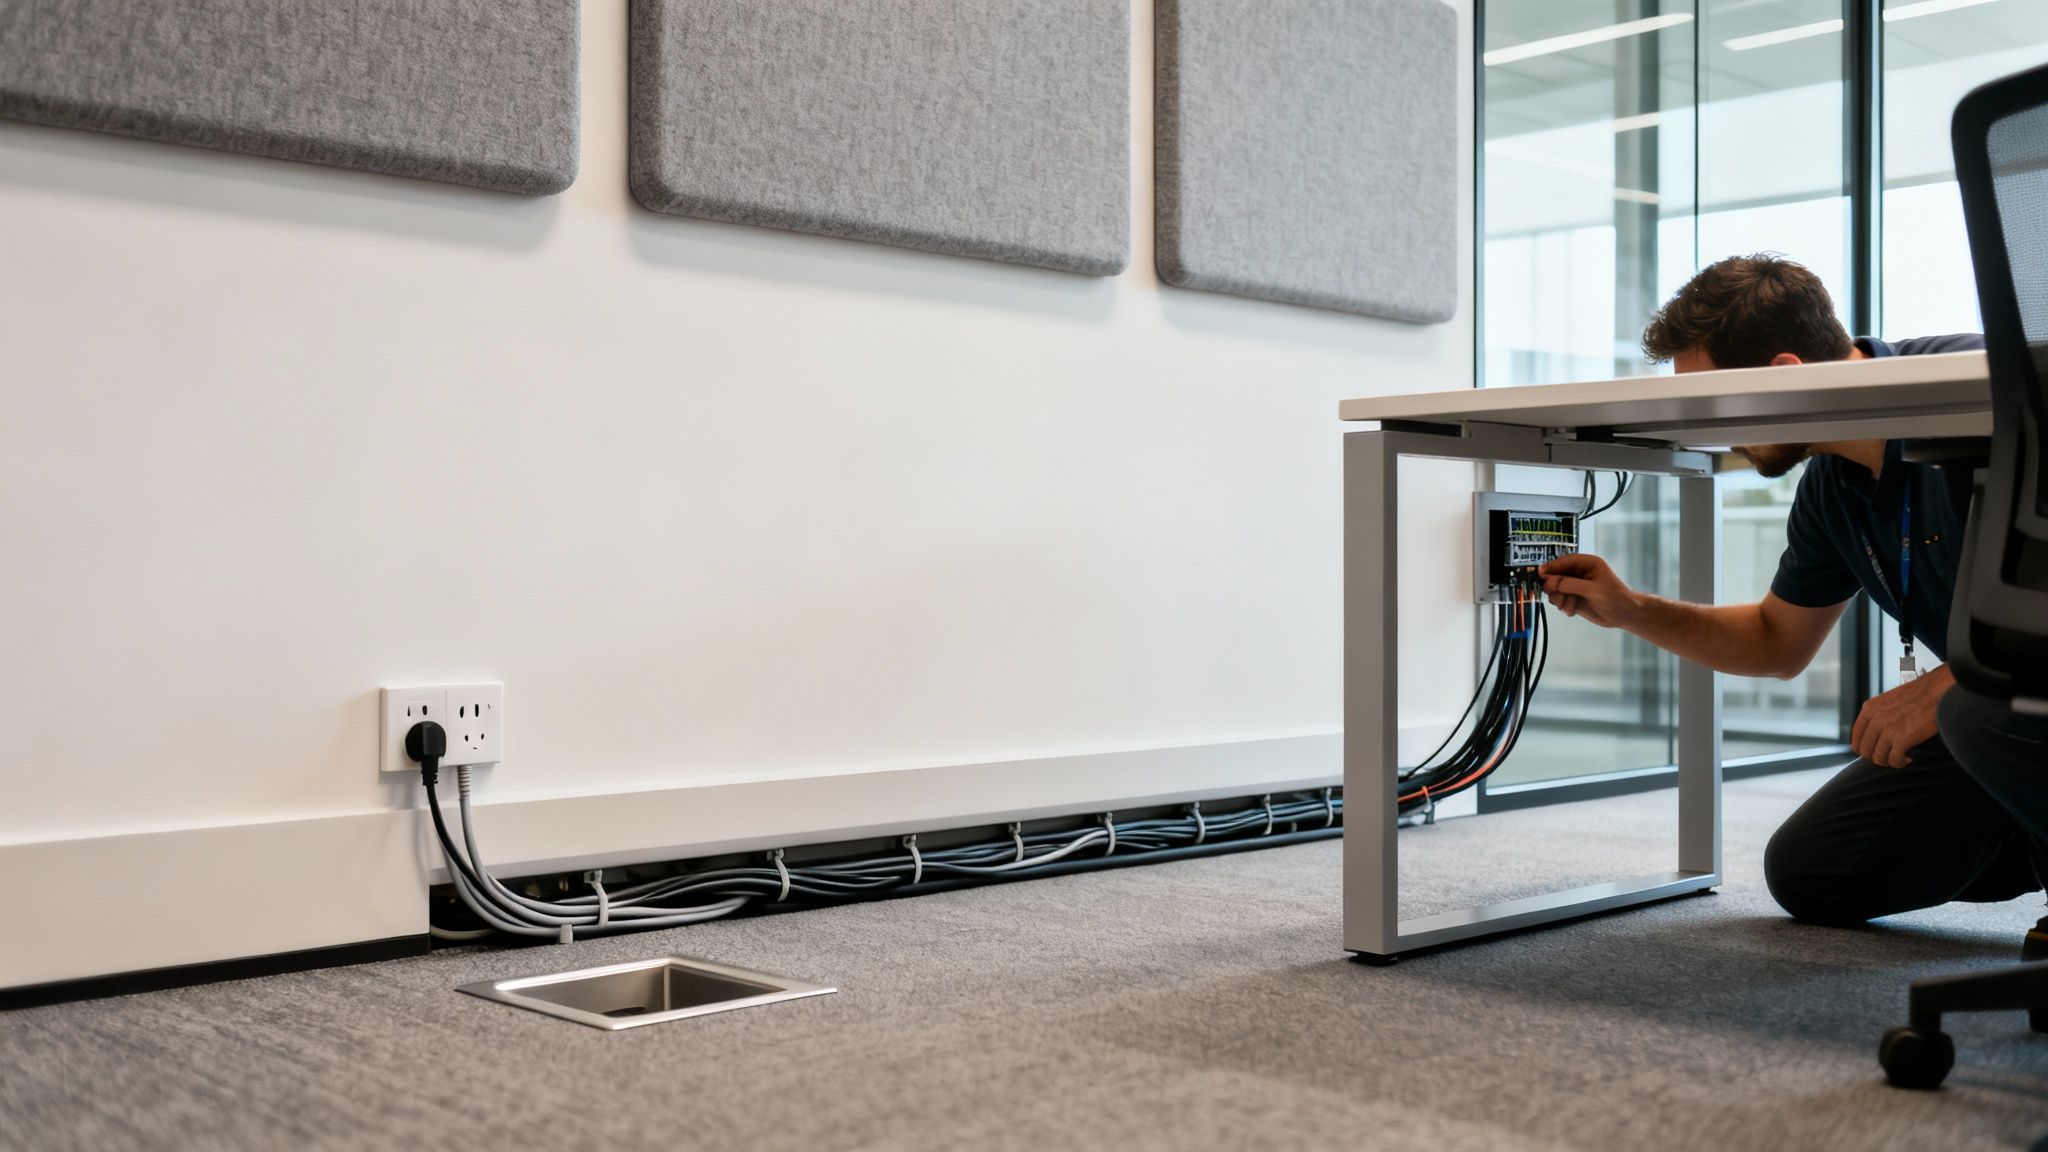
Installation And Compliance Best Practices

Every successful glass wall project begins well before the first panel arrives on site. It starts with rolling up our sleeves for a detailed site assessment to uncover hidden challenges underfoot.

Uneven floors or unexpected obstacles can bring a smooth schedule to a grinding halt and drive up costs. Catching those issues early sets the tone for a seamless install.

Site Assessment And Subfloor Preparation

Think of this step as laying the foundation of a sturdy house. We measure, inspect, and plan, so your glass walls stay true for years.

  • Check floor flatness within 5 mm over a 10-foot span
  • Verify that the subfloor can carry the weight of glass panels
  • Spot any ducts, wiring, or outlets that could get in the way
  • Confirm clear routes for moving materials and tools

Once we have a full picture, we might apply a leveling compound or add shims beneath track systems. That groundwork keeps panels aligned like perfectly stacked books on a shelf.

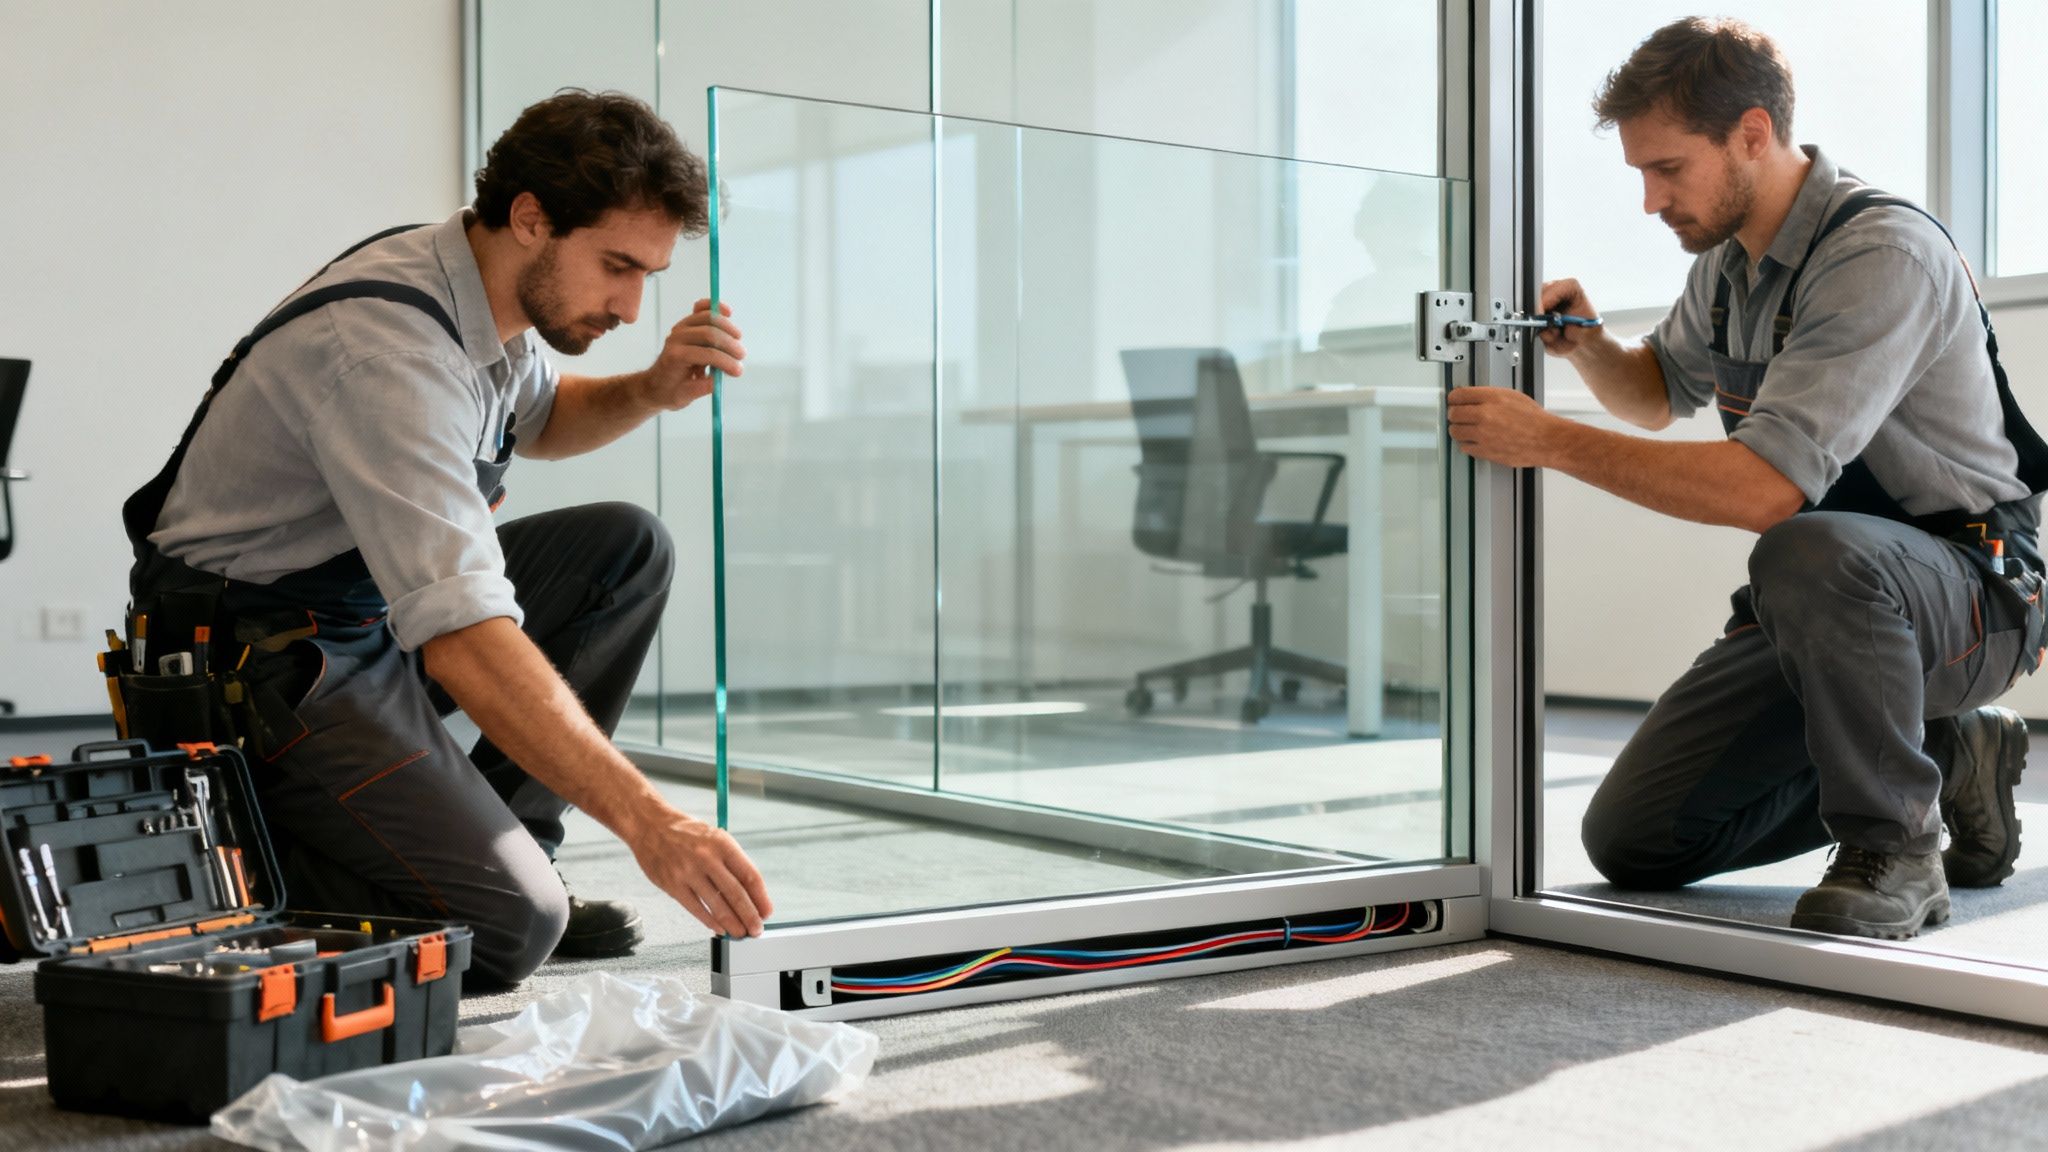
Modular Panel Assembly Steps

Modular glass walls click together almost like a giant, architectural jigsaw puzzle. Follow these steps and you’ll see why installers call it “a joy to assemble.”

  1. Lay out the track and mark anchor positions according to the plan
  2. Drill and secure base tracks with anchors, then apply sealant
  3. Position mullions, ensuring each vertical member is dead plumb
  4. Slide in glass panels or frames, double-checking alignment at every stage
  5. Seal all joints with fire-rated caulking or gasket systems

“A well-prepared subfloor and precise anchoring can reduce installation time by up to 20%,” says a Cubicle By Design project manager.

Code Requirements And Permits

Compliance isn’t optional—it’s your insurance against costly rework. We break down everything into clear checkpoints.

Permit Type Scope Typical Timeline
Building Permit Review of structural plans 2–4 weeks
Fire Department Sprinkler layout and safety 1–3 weeks
Accessibility Review ADA-compliant egress paths 1–2 weeks

Inspections usually happen at footing, framing, and final completion stages. By coordinating with local authorities early, we avoid last-minute snags. When your layout strays from standard modules, we bring in architects or engineers to certify everything meets structural and egress codes.

Demountable Systems And Future Moves

One of the biggest perks of demountable glass partitions is the ability to adapt. Think of them like LEGO® bricks—you can take them apart and rebuild as needs change.

This flexibility can trim up to 30% off the cost of future renovations compared to permanent drywall. For more hands-on tips, check out our guide on office furniture installation.

Keeping thorough records—permits, inspection reports, and as-built drawings—makes any future makeover a breeze. A final walkthrough confirms every seal, joint, and finish is spot on.

With these best practices in place, your glass wall project will hit deadlines, satisfy regulations, and stand the test of time. Partner with Cubicle By Design and let our experience guide you from start to finish. Schedule your site assessment today!

Space Planning And Case Studies

Real-world examples ground space planning in tangible results. We’ve mapped out three distinct scenarios—a retrofit, a new build and a hybrid workspace—to show you what’s possible.

  • Retrofit Example breathed new life into an existing floorplan, lifting daylight by 30% while tightening up sound control.
  • New Build Project used Series 7 framed partitions to fit 25 workstations with 100% visibility.
  • Hybrid Design blended private offices and open hubs with Series 500 frameless walls for a layout that adapts on the fly.

Layout Patterns And Metrics

In the retrofit job, we stretched glass panels along the window line to turn gloomy hallways into bright corridors. The change was dramatic—more natural light streamed in, and overhead lighting kicked in far less often.

Here’s how the numbers stack up:

  • Daylight Penetration: 10 to 28 feet depth
  • Lighting Reduction: 20% lower energy consumption
  • Headcount Density: bumped up 15% without crowding
  • Satisfaction Score: rose from 68% to 85%
Office glass wall partitions integrated with workstation cubicles by Cubicle By Design

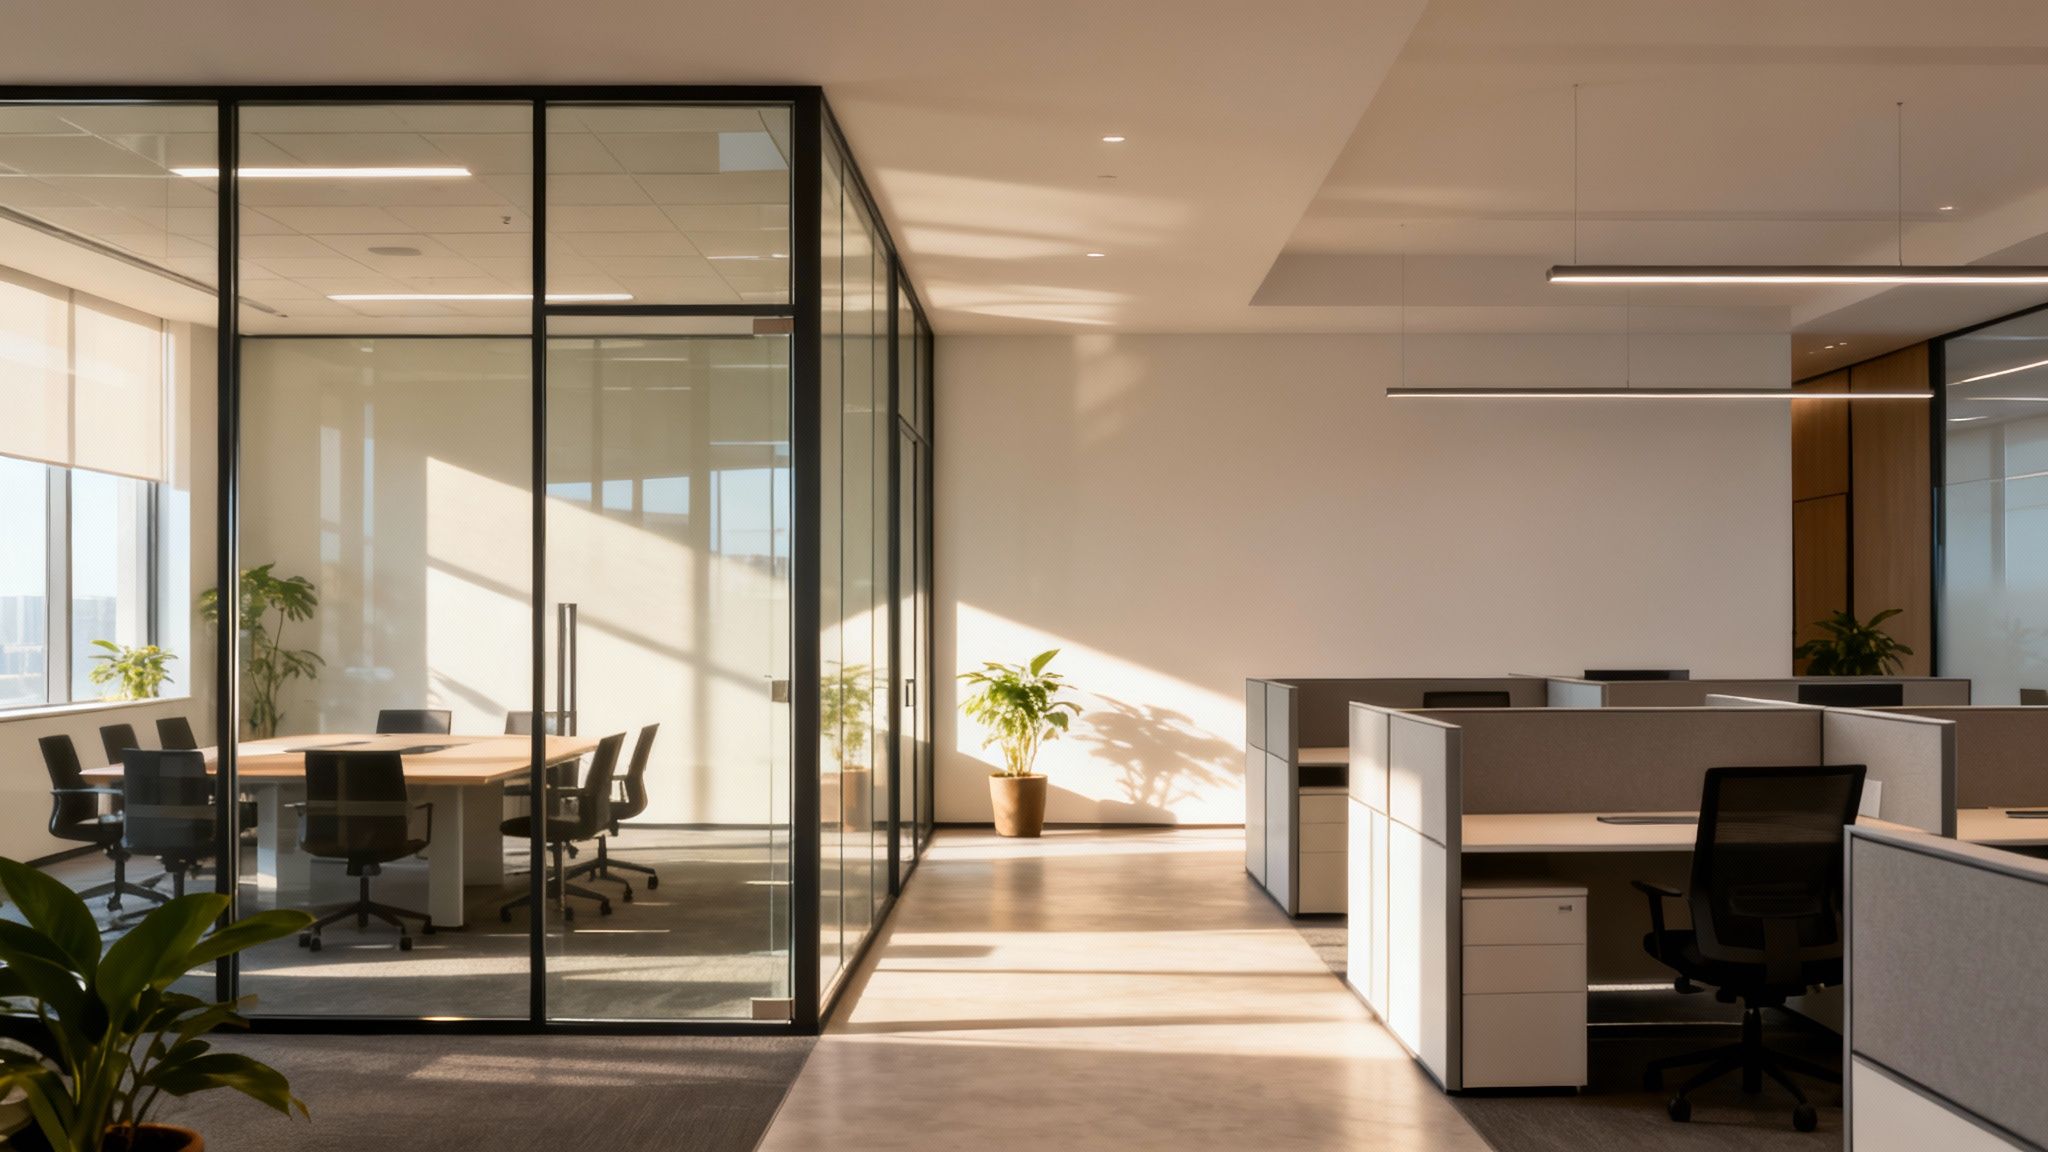
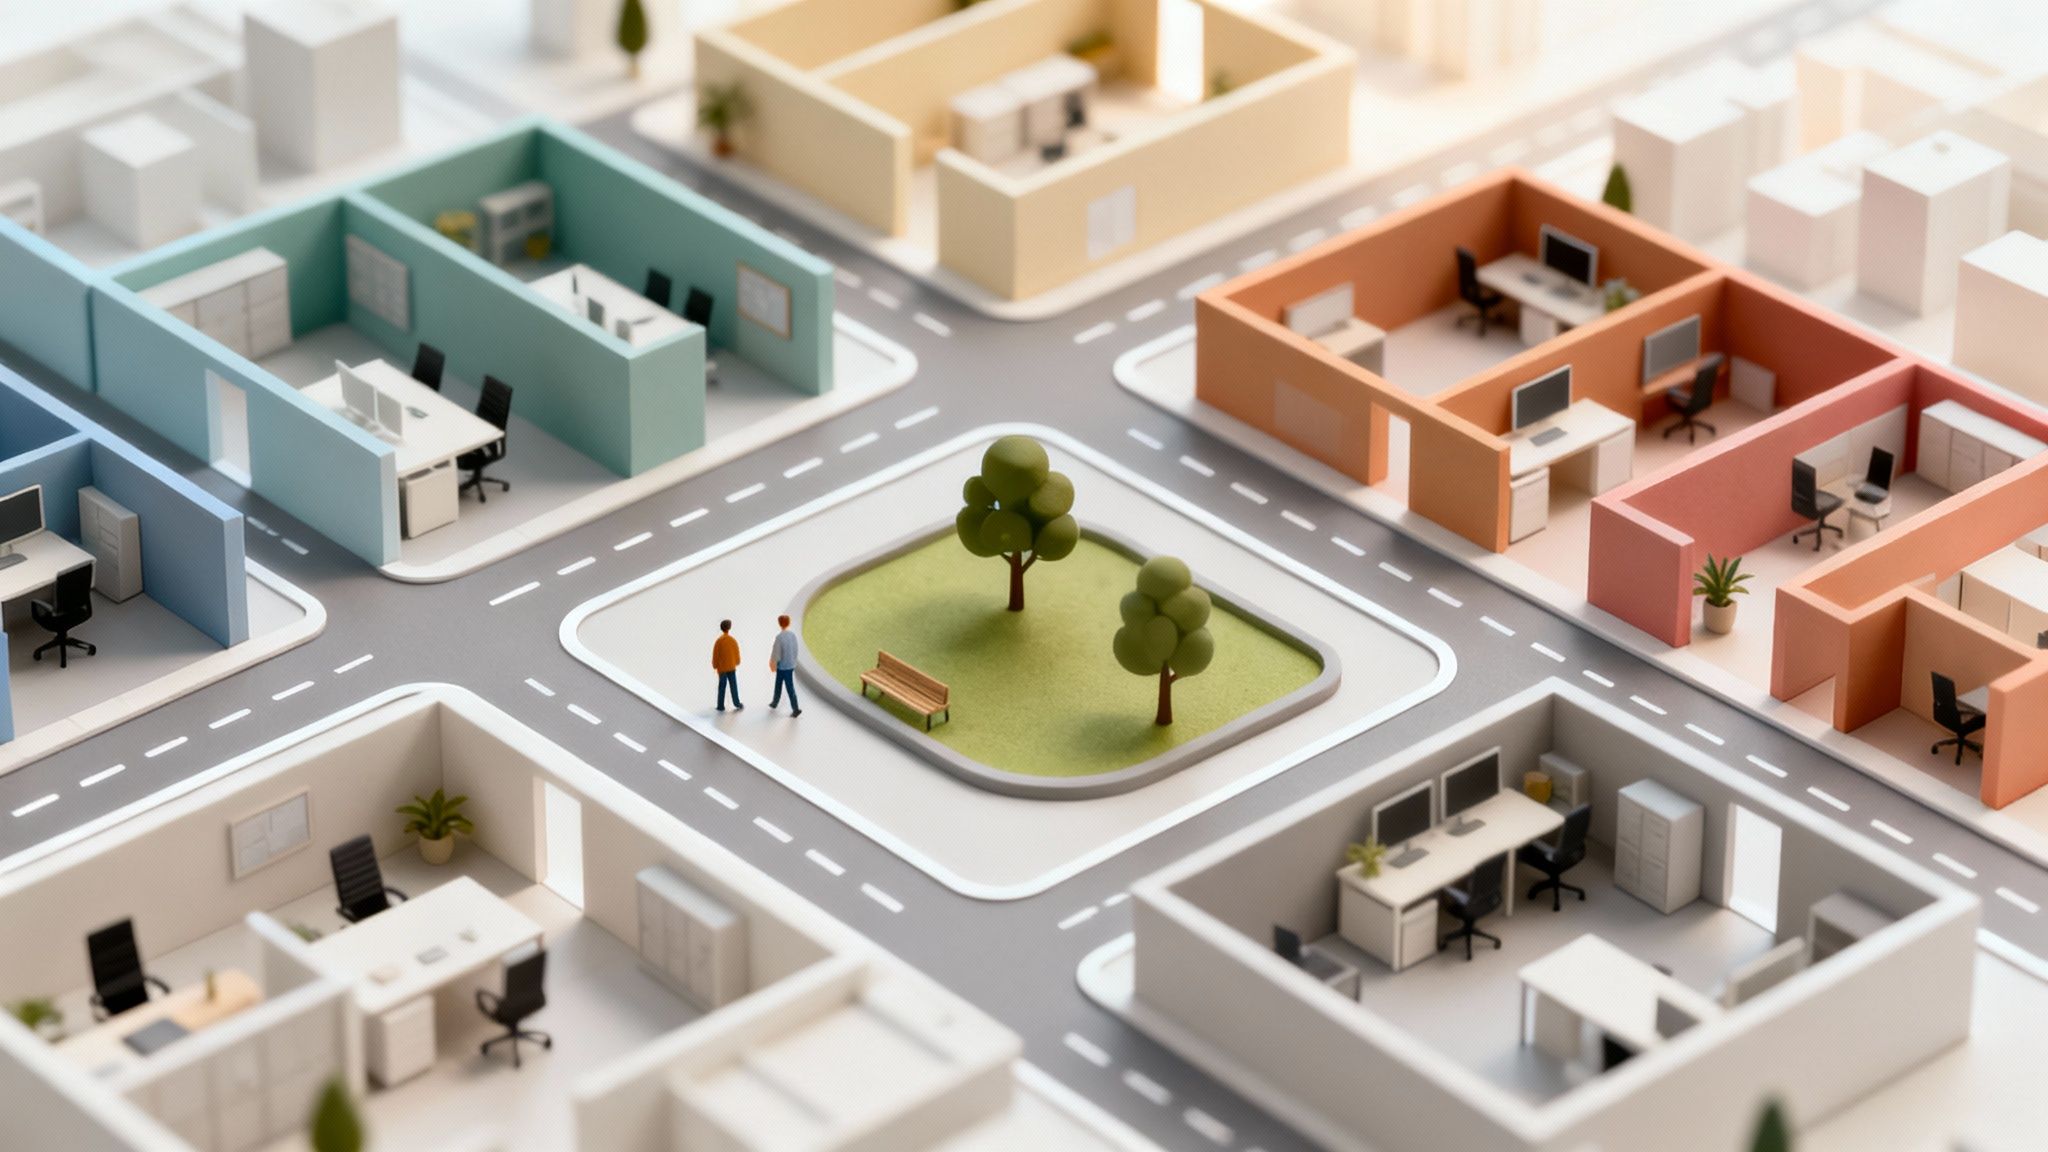
This shot highlights how transparent walls neatly define team zones while preserving open sightlines for quick standups.

Applying Lessons And Tips

  1. Assess natural light paths and place partitions close to window lines.
  2. Choose the right profile—Series 7 framed or Series 500 frameless—based on your design vision and budget.
  3. Track post-install metrics, focusing on daylight gains and user feedback.

“Mini case studies show the power of precise space planning in driving both efficiency and employee satisfaction.”

Each scenario proves that pairing glass partitions with cubicle systems balances privacy and collaboration effortlessly.

Case Study Takeaways

Matching your glass type to the use case is key. Retrofits often need extra acoustic seals to tame legacy HVAC noise, while new builds can hide wiring neatly inside mullions. Hybrid setups call for agile walls that shift from meeting nooks to open lounges in moments.

Key Metrics to Track for Your Project:

  • Monitor daylight penetration depth with a lux sensor, comparing before and after data.
  • Survey employee satisfaction on privacy and visual connection using simple, clear forms.
  • Measure space utilization by logging occupants per 1,000 sq ft over time.

Client feedback highlights 92% approval for these glass-and-cubicle layouts.

Ready to apply these design strategies? Visit Cubicle By Design to explore our custom solutions.

Read More
Glass Partition Walls for Office Design

A Guide to Glass Partition Walls for Office Design

Walk into any modern office, and you’ll probably feel a difference. The old, solid walls that boxed everyone in are disappearing, replaced by something much more open and alive. Glass partition walls for office spaces are no longer just a trend; they’re the standard for businesses that want to spark collaborative energy while still giving people space to focus. They create bright, connected workplaces without totally sacrificing acoustic privacy or the ability to concentrate.

Reimagining the Modern Office with Glass Partitions

For years, designers have been stuck on the classic open-office problem: how do you get people to collaborate without creating a non-stop distraction factory? Traditional drywall builds isolated silos, but wide-open floor plans often become a mess of noise and privacy issues. Glass partition walls are the elegant answer, striking a nearly perfect balance between the two extremes.

This guide is all about why these structures have become a cornerstone of today’s office design. Drawing on our experience here at Cubicle By Design, we’ll walk you through everything that matters—from the look and feel to the practical benefits and budget planning. Think of this as your roadmap for blending glass walls with your existing furniture, like the versatile cubicles we offer, to create a workplace that’s not just beautiful, but incredibly productive. To see how this fits into the bigger picture, check out our thoughts on current workplace design trends.

The Growing Demand for Flexible Spaces

The shift to glass isn’t just about looks; it’s a smart business move that reflects how work itself has changed. The market numbers back this up. The global glass partition market was valued at USD 4.8 billion in 2025 and is on track to hit USD 6.46 billion by 2035. This boom is driven by a massive demand for flexible, light-filled workspaces, which make up over 70% of the market’s growth.

By taking down solid walls, glass partitions build a culture of transparency and approachability. They let natural light flood the space, which is proven to lift moods, reduce eye strain, and just make people feel better at work.

This creates what we call “visual connectivity.” Your teams feel like part of a whole, even when they’re working in separate areas. The end result is a dynamic environment that works just as well for heads-down tasks in a private office as it does for those spontaneous brainstorming sessions that happen in shared spaces. For some great real-world examples of how glass can completely transform a professional space, take a look at these office building glass projects.

Choosing the Right Glass Partition for Your Needs

Not all glass partitions are built the same. When you start looking into them, it can feel a bit like choosing a canvas for a painting—each option sets a completely different tone and serves a unique purpose for your office culture. Getting familiar with the choices is the first step to finding the perfect fit.

Your first big decision is between framed and frameless systems. Think of framed glass partitions as having a classic, structured look, much like a framed picture. The aluminum frame gives a defined border and a sense of sturdiness, which works well in more traditional offices or can add a cool industrial vibe.

On the other hand, frameless glass partitions give you that seamless, ultra-modern feel. They create the illusion of a single, continuous wall of glass, opening up sightlines and making the whole space feel exceptionally bright and airy. It’s a minimalist approach that’s perfect for contemporary offices going for a sleek, clean design.

This decision tree shows how moving away from solid walls toward glass partitions fundamentally shifts an office toward a more open and collaborative feel.

A decision tree showing how solid walls lead to closed offices, while glass partition walls for offices create an open and modern feel.

As you can see, the choice between solid and glass is a major fork in the road that defines the entire atmosphere of a workspace.

Decoding Glass Types and Acoustic Performance

Once you’ve settled on the frame, the type of glass you choose has a huge impact on both privacy and productivity. The main options here are single-glazed and double-glazed glass, and the difference is all about sound control.

  • Single-Glazed Glass: Just like it sounds, this is a single pane of glass. It’s a budget-friendly choice that lets tons of natural light flow through, making it great for visually separating areas where top-tier acoustic privacy isn’t a must-have.
  • Double-Glazed Glass: This is the heavy-hitter for sound insulation. It features two panes of glass with an air or gas-filled gap in between that acts as a sound barrier, seriously cutting down on noise transfer. It’s the go-to for meeting rooms, executive offices, and any spot where conversations need to stay private or focus is key.

To get technical for a moment, sound insulation is measured with a Sound Transmission Class (STC) rating. The higher the STC number, the better the soundproofing. A typical wall might sit around an STC of 35, but specialized acoustic glass partitions can hit 50 or more, which is enough to make normal speech on the other side pretty much inaudible.

Choosing the right glazing is a strategic balancing act. You’re weighing the need for quiet, focused work against budget and aesthetic goals to create an environment where everyone can be productive.

To help visualize these options, here’s a quick comparison of the common types you’ll encounter.

Comparing Glass Partition Types

Partition Type Key Feature Best For Acoustic Performance
Framed Aluminum frame provides structure and a defined look Traditional or industrial-style offices needing durability Good to Excellent
Frameless Seamless, minimalist aesthetic for maximum light and openness Modern, contemporary spaces aiming for a sleek design Fair to Good
Single-Glazed A single pane of glass, cost-effective and bright Interior dividers where acoustic privacy is not critical Fair
Double-Glazed Two panes with an air gap for superior sound insulation Conference rooms, private offices, and quiet zones Excellent
Frosted/Etched Provides visual privacy while allowing light diffusion HR departments, meeting rooms, or branded applications Varies by glazing
Smart/Switchable Can switch from transparent to opaque on demand High-tech boardrooms and multi-purpose spaces Varies by glazing

Ultimately, the right choice depends on the specific needs of each space within your office, blending visual style with practical function.

Customization and Advanced Glass Technologies

Modern glass partitions are so much more than just clear panels. Customization options let you get creative and match the look and function to your brand and your team’s needs.

For instance, frosted or etched glass is a popular way to get visual privacy without sacrificing natural light, making it a favorite for conference rooms or HR departments. You can even have company logos or custom patterns etched right onto the glass for a unique, branded touch.

Technology is also changing what’s possible. Innovations like smart glass, which can go from clear to opaque with the flip of a switch, are really taking off. In fact, the switchable glass market is projected to grow from $6.42 billion in 2025 to $10.42 billion by 2030. While a top-tier soundproofed glass partition can run $140 to $300 per square meter, that investment in quiet can boost focus in an open office by as much as 15-20%.

These advanced systems work beautifully alongside other flexible office solutions. To see how these partitions fit into a bigger picture, you can explore our guide on modular office walls. The key is to match the right features to your unique needs to make sure your investment pays off in both style and function.

The Real-World Payoff of a Brighter Workplace

Glass partition walls do more than just look clean and modern. They bring some powerful, real-world changes to the daily work experience, turning your office layout from just a floor plan into a genuine asset for your company.

Modern office interior with glass partition walls for office, desks with computers, and plants enhancing the bright atmosphere.

The first thing you’ll notice is the flood of natural light. Sunlight isn’t just about brightness; it’s a huge factor in employee well-being. Study after study has shown that offices with plenty of natural light see major drops in employee eyestrain, drowsiness, and headaches.

This simple change leads directly to a more energized and focused team. When people feel better physically, their ability to concentrate and do deep work skyrockets, creating a more productive and positive atmosphere all around.

Building a Culture of Visual Connection

Glass partitions create what we call visual connectivity—a subtle but powerful tool for building a cohesive and transparent company culture. Unlike solid walls that chop up the office into isolated silos, glass lets team members actually see one another, which helps build a sense of community and shared purpose.

This connection makes it easier for people to collaborate on the fly. An employee can glance over and see if a manager is free for a quick question without having to interrupt, or team members can give a quick wave across the room, strengthening those professional bonds.

Glass walls hit a sweet spot. They give you the acoustic separation needed for focused work while getting rid of the psychological isolation that traditional walled-off offices are famous for.

This balance is the perfect solution to the old open-office debate. You get all the collaborative energy and transparency of an open plan, but without the constant noise and distractions that kill productivity. To see more about how physical design impacts work, check out our guide on how office trends boost employee productivity.

A Secret Weapon for Attracting Talent

In today’s job market, the office environment is a huge deal for top talent. A dated, dark, or boxed-in office can be a major turn-off for skilled professionals who have come to expect a modern and dynamic place to work.

A bright, open, and thoughtfully designed office with glass partitions sends a clear signal about your company’s values.

  • It Shows Transparency: A transparent office suggests a transparent culture where communication and collaboration aren’t just buzzwords.
  • It Puts Well-being First: When you invest in an environment that maximizes natural light, it shows you genuinely care about your employees’ health and comfort.
  • It Looks Forward-Thinking: The design itself becomes a recruiting tool, showing your company is a modern, innovative place to grow a career.

At the end of the day, glass partitions do more than just divide a room—they create an environment where people actually want to be. This not only helps you attract new talent but is also key to keeping your best employees, making your office a cornerstone of your company’s long-term success.

How to Plan Your Budget for Glass Partitions

Figuring out the costs for glass partition walls for your office is the first real step in getting your project off the ground. Budgeting for these systems isn’t like picking something out of a catalog; the final number is a mix of the materials you choose, how much you customize them, and the labor to put it all together. Once you get a handle on these pieces, you can make smart decisions that fit your budget and your design vision.

The total investment really comes down to a few key things. The specific type of glass, the framing system, the style of the door hardware, and any custom finishes—they all play a big part in the final cost. By breaking it down, you can see exactly where your money is going and find places to be strategic with your spending.

Breaking Down the Core Cost Factors

Think of budgeting for glass walls like customizing a new car. The base model has one price, but every feature you add or upgrade changes the final number. It’s the same idea here. Your biggest cost drivers will be the glass itself and the structure holding it up.

  • Glass Type: Your most budget-friendly option is standard tempered glass. If you need better soundproofing, upgrading to acoustic or double-glazed glass will increase the price. The same goes for specialty options like smart glass that can switch from clear to opaque with the flip of a switch.
  • Framing System: Frameless partitions look sleek, but they often need thicker, more expensive glass to keep everything secure. Framed systems, on the other hand, can work with a wider range of glass thicknesses. The material and finish of the frame—like standard aluminum versus a powder-coated black—will also impact your cost.
  • Doors and Hardware: The door you choose—swinging, sliding, or pivot—and the hardware that goes with it can add a surprising amount to the budget. Things like handles, locks, and hinges, especially high-end minimalist hardware, typically cost more than standard options.

Understanding Price Ranges and Installation Fees

Let’s talk numbers to give you a clearer picture. In 2025, you can generally expect pricing to range from $85 to $200 per square meter. This is influenced by how complex the job is and any high-end features you add. These systems are becoming incredibly popular. In fact, the U.S. Department of Energy reported that in 2023, over 25% of new commercial office buildings used glass partitions. They aren’t just for looks; they’re valued for their ability to cut energy use by up to 20-30% by letting in more natural light, a huge plus for getting green building certifications.

Beyond the materials, always budget for installation. This is not a DIY job. Professional installation is essential to ensure safety, perfect alignment, and a clean, finished look. This fee usually covers the site visit, delivery, the labor itself, and cleanup.

A common mistake is just looking at the material cost and forgetting about installation. A precise, professional installation is what makes your glass walls perform well and last for years, so it’s a critical part of your overall budget.

Smart Strategies to Maximize Your Investment

Budgeting well doesn’t mean just picking the cheapest option. It’s about making smart choices that give you the most bang for your buck. A well-thought-out layout can be the perfect balance of cost and function.

For instance, you could use premium, double-glazed glass for areas where quiet is a must, like boardrooms or Private Office Cubicles. Then, for other areas, you can use more cost-effective single-glazed panels. Another great approach is mixing glass walls with traditional systems. You can create focused work areas by combining glass fronts with budget-friendly workstation cubicles, giving you the best of both worlds: light, openness, and cost control.

For a deeper dive into how to budget for different office setups, our comprehensive workstation cubicles price guide has some great insights that can help shape your overall spending plan.

The Installation Process from Start to Finish

Bringing glass partition walls for office spaces to life is a precise, multi-step journey. It’s about turning a design concept into a functional, beautiful reality. Understanding the process from the get-go helps set clear expectations and ensures the project runs smoothly, causing as little disruption to your business as possible. Think of it as a carefully managed sequence designed to deliver a flawless result.

The real work begins long before a single tool arrives on-site. The first and most critical stage is the initial design consultation and planning. This is where your vision really starts to take shape.

Two professional installers fitting a glass partition wall for an office, ensuring a perfect and secure installation.

Step 1: Consultation and Precision Measurement

During this phase, our team works closely with you to understand your goals. Are you trying to improve acoustics, let more natural light in, or create defined zones for different teams? This is also when we take meticulous site measurements, which are absolutely essential for a perfect fit. Even a tiny error here can cause significant delays and extra costs down the line.

To help you visualize the final layout before committing, tools like our Cubicle Designer are invaluable. It lets you map out where the walls, doors, and even furniture will go, giving you a clear digital preview of how your new office will flow.

Step 2: Material Procurement and Lead Times

Once the design is locked in and measurements are confirmed, we move on to ordering the materials. The lead time—the wait between placing the order and the materials arriving—can vary. It all depends on factors like the type of glass, frame finishes, and any custom elements you’ve chosen.

On a typical project, you can expect a few weeks for material fabrication and delivery. This waiting period is actually the perfect time to prep your office space for the upcoming construction and coordinate with our team on the installation schedule.

Our project managers will keep you in the loop every step of the way, providing a transparent timeline so you know exactly what to expect. This proactive communication makes sure everyone is on the same page and ready for the on-site work. To get a more detailed breakdown of this phase, you can learn more about our specific glass architectural wall installation services.

Step 3: On-Site Installation and Integration

When installation day arrives, our professional team gets to work with a sharp focus on efficiency and minimizing disruption. We get it—your business needs to keep running. That’s why we coordinate our work schedule to fit your operational needs, often working during off-hours if that’s what it takes.

A key part of the installation is seamlessly integrating power and data cabling. The frames of our glass partition systems are specifically designed to discreetly house these essential wires. This gives you a clean, modern look with no messy, exposed cables, ensuring your new spaces are just as functional as they are beautiful.

The installation process itself typically involves:

  • Site Preparation: Clearing and preparing the installation area to ensure a safe and clean workspace.
  • Frame Assembly: Carefully building the foundational framework according to the approved design plans.
  • Glass Placement: Expertly lifting and setting each pane of glass into the frame, ensuring a secure and perfect fit.
  • Finishing Touches: Attaching door hardware, sealing joints, and performing a final quality check on every single component.

Finally, we do a thorough walkthrough with you to make sure every last detail meets your expectations. This transparent, professionally managed process guarantees that your new glass partition walls are installed correctly, safely, and ready to transform your workplace.

Putting It All Together: Your Project Checklist

Okay, turning that vision of a modern, light-filled office into a reality takes a solid plan. Think of this checklist as your roadmap. It pulls together everything we’ve talked about into a step-by-step guide to keep your glass partition walls for office project on track, from the first sketch to the final walkthrough. Let’s make sure you’re making confident, informed decisions every step of the way.

Each phase builds on the one before it, helping you nail down your needs, set a realistic budget, and pick the features that will create a workspace that’s not just beautiful, but truly functional.

Phase 1: Define Your Core Objectives

Before you even think about looking at glass samples, you need to know why you’re doing this. What’s the end goal? Getting clear on your objectives now will make every other decision down the line so much easier. What problems are you actually trying to solve?

  • What’s the Main Goal? Are you trying to flood a dim office with natural light? Do you desperately need better acoustic privacy for focused work? Or is the big push to foster a more open, collaborative culture?
  • What’s the Vibe? What look are you going for? Super sleek and minimalist with seamless frameless glass, or something a bit more structured and industrial with a black-framed system?
  • Who Needs What? Start mapping out which teams will use the new spaces. Are these client-facing conference rooms that need to impress? Private offices for executives who need confidentiality? Or flexible breakout zones for brainstorming?

Phase 2: Assess Your Space and Needs

With your goals in hand, it’s time for a reality check. Walk your current office layout and start identifying the specific requirements for different areas. This is where you connect your big-picture vision to the nuts and bolts of your floor plan.

This isn’t just about taking measurements. It’s about really understanding how your team gets work done and designing a space that supports them, whether they’re in deep-focus mode inside Private Office Cubicles or hashing out ideas in a team huddle.

A good assessment ensures your new glass walls solve existing headaches without creating new ones. A great place to start playing with ideas is our interactive Cubicle Designer—it can really help you visualize different layouts.

Phase 3: Plan Your Budget and Features

Now we get to the fun part: matching your needs with your budget. Having a clear financial picture from the start helps you prioritize what’s a “must-have” versus a “nice-to-have,” so you can make smart trade-offs without sacrificing your main goals.

Here’s a simple checklist to walk you through the key decisions for planning your glass partition project. It’s designed to break down a complex process into manageable steps.

Your Project Planning Checklist

Planning Step Key Consideration Action Item
Establish Budget What’s your total project budget? Remember to include materials, installation, and a 10-15% contingency for surprises. Start getting quotes based on linear footage and overall complexity.
Select Glass Type Do you need single-glazing for an open feel, or is double-glazing for acoustic control a priority? Assign glass types to different zones based on their privacy and sound-blocking needs.
Choose Frame System Are you going with framed partitions for a defined, industrial look, or frameless for that seamless, “barely there” aesthetic? Match the frame style to your office vibe and budget.
Finalize Doors Do you need space-saving sliding doors, or do traditional swinging doors fit the space and function better? Pick doors and hardware that complement the partition style and flow.
Consider Customization Will you need frosted or banded glass for privacy? How about adding your company logo or branding elements? Factor in any custom finishes to your final cost and timeline.

By working through these steps, you can move forward with confidence, knowing you have a solid plan in place. And of course, if you need a hand figuring out how to perfectly integrate your new glass walls with versatile cubicle systems, our team at Cubicle By Design is always here to help.

Your Top Questions About Glass Walls, Answered

When you’re thinking about bringing glass partitions into your office, it’s natural to have a few practical questions. How do they hold up day-to-day? Are they a smart long-term investment? Let’s walk through some of the most common questions we hear from office managers and designers.

How Hard Is It to Keep Glass Walls Clean?

This is one of the first questions people ask, and the answer is always a pleasant surprise: they’re incredibly easy to maintain. A quick wipe-down with a standard glass cleaner and a microfiber cloth is all it takes to handle daily smudges and fingerprints.

Concerns about cleaning are understandable, but knowing how to achieve streak-free windows is the only trick you need. Unlike drywall that gets scuffed and needs repainting every few years, glass is a tough, non-porous surface that looks brand new for years with minimal effort.

Can Glass Partitions Be Reconfigured Later On?

Yes, and this is where glass walls truly shine. Traditional construction is permanent, but modular glass walls are designed to be demountable. This means they can be taken down and reinstalled in a new layout with hardly any mess, dust, or downtime.

This flexibility is what makes them a future-proof investment for any growing business. As your team expands or your layout needs to change, your office can adapt right along with you, saving a small fortune on future renovation projects.

For companies planning to scale or those navigating hybrid work models, this agility is a game-changer. It ensures your office layout stays functional and relevant for years to come.

Are Glass Partition Walls Safe and Durable?

Absolutely. Safety is non-negotiable in a commercial space, and modern glass partition systems are engineered to meet tough building codes. We rely on specialized safety glass to make sure they’re as durable as they are beautiful.

You’ll typically see two types of glass used:

  1. Tempered Glass: This glass goes through a special heat-treatment process that makes it about four times stronger than regular glass. If it ever does break, it’s designed to crumble into small, dull-edged pebbles, which dramatically reduces the risk of injury.
  2. Laminated Glass: Think of this as a glass sandwich. It has a tough plastic interlayer that holds the pane together even if it shatters. The glass might crack, but the pieces stay bonded to the interlayer, preventing dangerous shards from falling.

Both of these options are incredibly resilient and meet all commercial safety standards, making them a secure and reliable choice for any busy office. They offer that perfect blend of sleek design and robust performance, whether you’re building out individual workstation cubicles or defining entire departments.


At Cubicle By Design, we specialize in creating flexible, modern, and productive workspaces. Our team is ready to help you plan and implement the perfect glass partition solution for your office. Explore our full range of products and design services at https://cubiclebydesign.com/.

Read More
Glass Wall Systems for Offices

Glass Wall Systems for Offices: Create Bright, Flexible Workspaces

Walk into an office where natural light spills from the windows all the way into the inner hallways. You see teams connecting, the whole space feels alive, and collaboration just seems to happen. This isn’t some far-off dream; it’s the reality that businesses are building right now with glass wall systems for offices.

For years, the typical office was a maze of drywall. It created isolated cubicles and private offices that felt dim, stuffy, and disconnected. That design choked off both light and interaction, putting up literal barriers to communication. But today, we’re seeing a huge shift away from that static, closed-off model.

Why Glass Walls Are Reshaping Modern Offices

Modern workplaces are all about being agile and looking after employee well-being, and glass walls are a perfect match. They let sunlight penetrate deep into the building, which is proven to boost mood and productivity. This move toward transparency also helps build a more open and inclusive company culture where people feel more connected.

In fact, one of the biggest modern workplace design trends is this very shift toward brighter, more adaptable spaces.

Embracing Flexibility and Light

This isn’t just about looking good; it’s a real business advantage. The market for glass partition walls is booming, projected to hit USD 3,880.4 million by 2031. A huge reason for this is the need for businesses to reorganize on the fly—over 60% of companies say it’s a top priority. In an age of hybrid work, being able to reconfigure your space in hours instead of weeks is a game-changer. You can find more on these market insights on Metastat Insight.

Glass wall systems are more than just glass and metal; they’re a strategic investment in culture, collaboration, and productivity. They represent a fundamental shift in how we think about the purpose and feel of a workspace.

At the end of the day, these systems are simply a smarter way to build. They fit the needs of modern companies that have to adapt quickly to changing markets and team structures. By swapping out fixed walls for movable, light-friendly partitions, companies like those we work with at Cubicle By Design are creating inspiring, dynamic environments built for the future.

Understanding the Different Types of Glass Wall Systems

When you first start looking at glass wall systems for your office, the sheer number of options can feel a bit overwhelming. But don’t worry—they all really boil down to a few key categories. Each one is built to solve specific challenges, whether you’re prioritizing style, long-term flexibility, or pure function. The easiest way to get a handle on them is to think about their structure and how they operate.

The biggest fork in the road is the choice between framed and frameless systems. It’s exactly what it sounds like. Framed systems have glass panels set inside a visible metal frame, usually aluminum. This gives you a classic, structured look that clearly marks out different areas. It’s also often the stronger choice for structural integrity and keeping sound where it belongs.

On the other hand, frameless systems ditch the bulky hardware. They connect glass panels directly to each other for that seamless, all-glass look. The effect is powerful—it creates a huge sense of openness and a sleek, modern vibe that makes any space feel bigger and more connected.

To help you get a quick read on which style might be a better fit, here’s a simple side-by-side comparison.

Framed vs Frameless Glass Walls: A Quick Comparison

Feature Framed Glass Walls Frameless Glass Walls
Aesthetics Defined, structured, classic industrial look. Sleek, minimal, modern, and seamless.
Best For Private offices, conference rooms, areas needing better sound control. Open-concept areas, collaborative zones, maximizing light.
Privacy Often better acoustic performance due to sealed frames. Can be enhanced with frosted or acoustic glass, but generally less soundproof.
Installation More forgiving of slight imperfections in floors and ceilings. Requires precise measurements and perfectly level surfaces.
Cost Typically more budget-friendly. Often a higher price point due to specialized hardware and glass.

Ultimately, the right choice depends entirely on what you’re trying to achieve with the space.

Digging into the Core Structures

Choosing between framed and frameless really comes down to balancing aesthetics with your day-to-day practical needs. Framed walls are often the go-to for private office cubicles where hushed conversations are the norm. Frameless systems, however, are unbeatable when you want to build collaborative zones without putting up visual barriers.

Beyond the frame, the next major player is the modular system. Think of these like office “Legos.” They’re panels designed from the ground up to be easily installed, taken down, and rearranged. This adaptability is their superpower. As your company grows or teams shift, modular walls can be moved to create new offices, shrink a conference room, or open up a space for a new project—all without the dust, disruption, and cost of traditional drywall construction. That flexibility makes them an incredibly smart long-term investment.

This decision tree gives you a simple way to think about the primary choice between flexible glass walls and static drywall.

The takeaway is pretty clear: if you can see your business changing its layout or team size down the road, glass wall systems offer an agility that old-school construction just can’t touch. You can learn more about how these adaptable solutions work in our complete guide to modular office walls.

How the Panels and Doors Actually Work

The last piece of the puzzle is figuring out how the glass panels and doors will function. The right mechanism is all about the flow of traffic and the purpose of the space you’re creating.

  • Fixed Panels: This is your simplest option. Fixed glass panels are stationary, used to create permanent dividers where you don’t need a door. They’re perfect for separating a hallway from a row of workstation cubicles while still letting tons of light pour through.
  • Sliding Doors: A huge space-saver and a very popular choice. Sliding glass doors glide along a track instead of swinging out, which makes them ideal for tight spots like small meeting rooms or individual private offices where a traditional door would just get in the way.
  • Pivot Doors: These doors create a more sophisticated, modern entrance. They swing open on a pivot hinge mounted at the top and bottom, which allows them to handle larger and heavier glass panels than standard doors. This can create a really grand sense of entry for a boardroom or reception area.

Once you understand these fundamental differences, you’re in a much better position to choose a glass wall system that actually fits your office’s look, culture, and daily operations. The next step is bringing that vision to life.

Solving for Privacy and Acoustics in Glass Offices

Let’s get right to the biggest question on everyone’s mind when they hear “glass wall systems for offices”: privacy. The “fishbowl office” is a real concern, but modern engineering has completely changed the game. You don’t have to sacrifice confidentiality and focus for that beautiful, light-filled aesthetic.

The key is a metric called the Sound Transmission Class (STC) rating. Think of it as a simple score—the higher the number, the better the wall is at stopping sound. A typical drywall office wall lands somewhere around an STC of 35-40, where you might hear muffled voices but can’t make out the words.

Many people assume glass is a poor sound blocker, but that’s an outdated idea. Today’s systems are designed to go toe-to-toe with traditional walls, and often, they win.

Achieving True Acoustic Separation

So, where does the magic come from? It’s all in the construction of the glass itself. While a basic, single pane of glass offers minimal sound control, advanced options can create remarkable acoustic privacy.

Here’s a quick breakdown of how different glass types stack up:

  • Single-Glazed Glass: This is your standard single pane. It provides some basic sound dampening, usually hitting an STC rating in the mid-30s. It’s fine for areas where total silence isn’t a priority.
  • Double-Glazed Glass: This is where things get serious. By using two panes of glass with an air gap in between, you create an insulating layer that deadens sound waves. This can boost the STC rating to 50 or even higher.
  • Laminated Glass: This type features a thin polymer layer sandwiched between two panes of glass. That inner layer is a rockstar at dampening vibrations, which is a huge factor in noise reduction.

An STC rating of 50 is a big deal. At this level, even loud conversations on the other side fade to a barely audible murmur. It’s the perfect solution for executive offices, HR departments, or any space where confidentiality is non-negotiable.

This kind of performance ensures sensitive discussions stay private and your team can get their deep work done without distractions.

Creating Visual Privacy Without Sacrificing Light

Of course, sound is only half the battle. You also need to control who can see what. Luckily, glass walls offer a whole menu of options to create visual separation while still letting that valuable natural light pour into the workspace.

Beyond just privacy, other challenges like glare or hotspots from the sun can be handled with specialized window tint solutions for commercial buildings, making the space more comfortable for everyone.

Some of the most popular choices for visual privacy include:

  • Frosted or Etched Glass: These treatments obscure the view while beautifully diffusing light. You can go for a full frost for total privacy or use custom patterns and branded designs.
  • Switchable Smart Glass: For the ultimate in flexibility, smart glass can shift from perfectly clear to fully opaque with the simple flip of a switch. It’s privacy on demand.

The demand for these solutions is clear. The global glass partition market was valued at USD 4.8 billion in 2025 and is projected to hit USD 6.46 billion by 2035. This boom is fueled by innovations that not only solve for privacy but also boost natural light, which can cut the need for artificial lighting by up to 30%.

By mixing the right STC-rated glass with smart visual privacy options, you get an office that feels open and collaborative without giving up the focus and confidentiality your business needs. It’s the same balance of openness and focus we aim for in our guide on how to improve office cubicle privacy.

How to Budget for Your Glass Wall Project

Let’s talk numbers—one of the most important steps in any office renovation. Budgeting for glass wall systems for offices can feel a bit daunting at first, but it gets a lot clearer once you know what actually drives the cost. Unlike putting up drywall, a glass wall system is really an investment in your office’s future flexibility and overall vibe.

The final price tag isn’t just about the glass itself; it’s a mix of materials, how much you customize it, and the labor to get it installed. I always tell clients to think of it like buying a car. The base model has one price, but as soon as you add premium finishes, a better engine, or high-tech features, that final sticker price starts to climb. It’s the same story here—your choices in glass type, hardware, and door styles will shape your project’s budget.

Key Factors That Influence Your Final Cost

A few key elements have a direct impact on what you’ll end up spending per linear foot. Getting a handle on these helps you make smart decisions that line up with both your budget and your design goals. It’s all about striking the right balance between looks, performance, and price.

The biggest cost drivers you’ll see are:

  • System Type: Frameless systems tend to cost more than their framed cousins. That’s because they need specialized hardware and some serious precision engineering to pull off that clean, seamless look.
  • Glass Specifications: The thickness and type of glass are huge factors. Standard tempered glass is your baseline, but if you upgrade to double-glazed or laminated acoustic glass for better sound control, the price will go up accordingly.
  • Hardware and Finishes: The little details matter. The material and finish of handles, hinges, and framing—think brushed nickel versus standard aluminum—can definitely affect the total cost.
  • Door Mechanisms: A simple pivot door is priced very differently from a sleek, space-saving sliding door system, which needs more complex track hardware to work.

Establishing a Realistic Budget Range

While every project is one-of-a-kind, you can generally expect glass wall systems for offices to run anywhere from $75 to over $250 per linear foot, installed. The lower end of that range usually gets you a basic framed system with standard glass. The higher end reflects frameless designs with acoustic glazing and premium hardware.

This is one of those investments that often pays for itself over time. Because these systems are modular, you can reconfigure your space down the road without the mess and expense of demolition and construction. That saves a ton of money on future layout changes, and the extra natural light can even help lower your electricity bills.

When you’re planning, it’s also smart to set aside a little extra for potential “hidden” costs. Things like site preparation, running electrical if you’re integrating power, or special permits depending on your city can pop up. The best way to avoid surprises is to get a detailed, itemized quote from your installer. For some helpful context on how different office furnishings are priced, check out our comprehensive cubicle price guide. It’s a great resource for overall project budgeting.

This strategic approach ensures you can effectively manage your budget for the glass walls alongside other important expenses like new cubicles. By understanding the cost factors upfront, you can confidently invest in a solution that elevates your workspace for years to come.

What to Expect During the Installation Process

The quality of your glass wall systems for offices isn’t just about the product itself—it’s equally about how smoothly the installation goes. Traditional drywall construction is a messy business, known for dust, noise, and dragging on for weeks. A modular glass installation, on the other hand, is designed from the ground up to be clean, fast, and incredibly efficient.

Knowing what’s coming helps set the right expectations and ensures your project runs like a well-oiled machine from day one.

The real work starts long before a single piece of glass arrives at your office. It all begins with painstaking planning and measurement. A good project manager will double-check every dimension, coordinating with your electricians and flooring crews to sidestep any potential headaches. This prep work is the bedrock of a flawless installation. Getting familiar with the process of professional installation services can also give you a great head-start on what to expect for your own project.

From Design Mock-Up to Final Inspection

With the plans locked in, the project moves into a clear, predictable timeline. Every step is carefully managed to cause as little disruption as possible to your daily operations. Your team can keep right on working.

Here’s a look at the key milestones you’ll see on-site:

  1. Site Preparation: The installation crew preps the area, making sure the floors and ceilings are clear and ready for the tracking systems. This is a crucial step to guarantee the walls are perfectly level and secure.
  2. Track and Frame Installation: Next, technicians install the slim aluminum tracks along the floor and ceiling. This framework is the skeleton that will hold every glass panel firmly in place.
  3. Glass Panel Placement: Once the frame is up, the precision-cut glass panels are carefully lifted and slotted into the tracks. It’s a delicate job, but it happens surprisingly fast.
  4. Door and Hardware Integration: To finish things off, doors are hung and all the hardware—handles, locks, and closers—is installed and tested to make sure everything works perfectly.

Why Modular Installation Is a Smarter Choice

The real magic of a modular glass installation is how clean and efficient it is. Because every component is manufactured to spec off-site, there’s practically no cutting, sanding, or painting happening in your space. This means a dramatic reduction in dust, debris, and fumes, which makes for a much healthier environment for your team.

The speed of a modular glass wall installation is a huge business advantage. A project that might take weeks with drywall can often be wrapped up in just a few days. That minimizes downtime and gets your team into their new space almost immediately.

This streamlined process is at the heart of how we work. We manage every detail, from the initial measurements to the final walkthrough, to make sure the installation is just as impressive as the finished product. To see exactly how we handle things, check out our guide on glass architectural wall installation.

This level of coordination ensures that from the first design mock-up to the final sign-off, your vision becomes a reality with minimal fuss.

Integrating Glass Walls into Your Office Design

Glass walls don’t exist in a vacuum. They work best when they’re a thoughtful part of your entire office ecosystem. The key is to integrate glass wall systems for offices with your existing layout and furniture, creating a space that feels both cohesive and genuinely functional. Think of them as a design tool that enhances your workspace, not just chops it up.

This means you have to look beyond the partitions themselves. How will they interact with desks, collaborative zones, and the natural flow of foot traffic? A well-placed glass wall can amplify all the benefits of an open office while still giving teams the structure and privacy they need to actually get work done.

Blending Transparency with Functionality

One of the smartest strategies is pairing different types of office furniture to strike the right balance. By combining full-height glass walls with low-profile furniture, you can define spaces without sacrificing those valuable sightlines or blocking precious natural light.

Here are a couple of practical ways this plays out:

  • Private Offices and Open Workstations: Imagine enclosing a row of private office cubicles with floor-to-ceiling glass. Right next to them, you place low-height workstation cubicles in the open area. It’s a popular setup for a reason—it gives leaders the privacy they need but keeps them visually connected to their teams, fostering an open and accessible culture.
  • Creating Zones Without Walls: You can use glass partitions to carve out distinct zones for different work styles. A frosted glass wall, for instance, can separate a quiet, heads-down focus area from a lively collaborative hub. It dampens noise and visual distractions without making either space feel boxed in.

This technique—using glass to define function while preserving an open feel—is a true hallmark of modern office design.

Maximizing Natural Light and Openness

The powerful impact of natural light on productivity and well-being is a major reason companies are ditching traditional opaque walls. In the commercial world, glass curtain wall systems are a dominant force, holding a massive 71.6% revenue share in office architecture. Why? Because they allow up to 70% more natural light to pour into a building’s interior, which can slash lighting energy costs by 25-40% in sustainable projects. You can read more about these commercial building trends at Grand View Research.

By strategically placing glass walls, you can guide that exterior light deep into the core of your office. This not only cuts down on energy use but also creates a more vibrant and energizing atmosphere for everyone, no matter where their desk is.

Thinking about your future layout from the very beginning is essential. You can map out how glass walls might work with your desired furniture arrangements using a tool like our Cubicle Designer. This helps you visualize the flow and make sure every single element works together.

Ultimately, integrating glass walls is about creating a smart, flexible environment that supports how people actually work. When you combine them with the right cubicles and office furniture from a trusted partner like Cubicle By Design, these systems become the backbone of a truly modern and adaptable workplace.

Your Questions About Office Glass Walls, Answered

Even after we’ve walked through the benefits, styles, and installation process, a few practical questions almost always come up. It’s totally normal. Let’s tackle the most common ones we hear to clear up any lingering doubts about things like durability, upkeep, and long-term value.

Just How Tough Are These Glass Walls?

When people hear “glass walls,” they often picture something delicate and fragile, but the reality is quite different. The glass used in modern office partitions is incredibly tough. It’s typically tempered glass, which gets its strength from a process of intense heating and rapid cooling.

The result? A panel that’s about four to five times stronger than the standard glass in your home’s windows. It can easily take the everyday bumps and knocks of a busy office. For high-traffic areas or places where you need a bit more security, we can use laminated glass, which adds another layer of safety and durability.

What’s Involved with Cleaning and Maintenance?

Honestly, this is one of the best parts. Glass walls are ridiculously low-maintenance. Unlike drywall that shows every scuff and needs a fresh coat of paint every few years, glass just needs a simple wipe-down.

  • For daily upkeep: A quick spray of glass cleaner and a pass with a microfiber cloth is all it takes to handle fingerprints and dust.
  • For a deeper clean: A simple mix of mild soap and water does the trick. Use a squeegee afterward to get that perfect, streak-free shine.
  • Hardware checks: Every so often, it’s a good idea to give the door handles, hinges, and sliding tracks a quick check to make sure everything is tight and moving smoothly.

Plus, since glass is non-porous, it won’t trap dust or allergens, which is a nice little bonus for your office’s air quality.

Can We Move or Change the Walls Later On?

Absolutely. In fact, this is one of the biggest selling points of modular glass wall systems for offices. They are specifically designed to be flexible. If your team structure changes, you expand, or you just want to try a new layout, the walls can be taken down and reinstalled in a new spot.

This adaptability is what makes glass walls such a smart long-term investment. You’re not just paying for a one-time construction project. You’re getting an asset you can reconfigure as your needs change, all without the mess, waste, and cost of tearing down and rebuilding traditional walls.

How Do Glass Walls Affect a Building’s Property Value?

Installing a high-quality glass wall system is a definite plus for your property value. They create that modern, high-end feel that today’s commercial tenants and buyers are looking for. The natural light, the open sightlines, and the flexible layouts they create are all premium features in the current real estate market.

An investment in this kind of adaptable infrastructure shows you’ve built a forward-thinking workspace, making the property far more attractive and competitive.

Will They Work with Our Existing Furniture?

Yes, they’re designed to play nicely with just about any office furniture you already have. We can use glass walls to enclose a cluster of existing workstation cubicles to create a quiet pod for a specific team, or we can build out a full conference room around your current tables and chairs.

The trick is all in the planning. When you work with a space planner, you can ensure the new glass partitions complement your current setup, creating a layout that feels intentional and works perfectly. It’s a great way to upgrade your space without having to scrap all your existing furniture. You can even use a tool like our Cubicle Designer to play around with layouts and see how it all fits together.


Ready to transform your workspace with the light, flexibility, and style of glass wall systems? The team at Cubicle By Design is here to help you plan, design, and install the perfect solution for your office. Explore our full range of office furniture solutions and start your project today.

Read More

How to Reduce Employee Turnover with Proven Strategies

To really get a handle on employee turnover, you have to look beyond just one single thing. It’s a mix of offering competitive pay, making sure your managers are actually good leaders, showing people a clear path forward in their careers, and building a genuinely positive place to work. When you focus on these areas, you stop reacting to people leaving and start building a proactive strategy that makes them want to stay and grow with you.

The Real Cost of High Turnover and Why It Matters

Let’s be real—losing a team member stings, and it hits a lot more than just morale. It’s a direct blow to the bottom line. The endless cycle of hiring, training, and waiting for new people to get up to speed isn’t just a hassle; it’s a massive drain on your money, productivity, and all the valuable knowledge that just walked out the door.

When someone leaves, their work doesn’t just disappear. It gets dumped on the rest of the team, and that’s a fast track to burnout, disengagement, and a serious dip in morale. Productivity naturally takes a hit while the new hire learns the ropes, trying to get to the same level as the person they replaced.

The Financial Drain of a Revolving Door

The cost of doing nothing is honestly staggering. Globally, companies lose an estimated $2.9 trillion a year because of voluntary turnover. Think about this: replacing just one employee can cost anywhere from 30% to a whopping 400% of their annual salary, especially for more senior or specialized roles.

This trend is even more obvious with younger workers. Millennials and Gen Z now make up 51% of the workforce, and on average, they switch jobs every 2.5 years. A huge reason they cite? Disengagement and frustration with bad managers.

This infographic really puts the financial and workforce impact of high turnover into perspective.

An infographic showing the true cost of employee turnover, including a $2.9 trillion global loss, replacement costs up to 400% of salary, and that 51% of the workforce changes jobs every 2.5 years.

The numbers make it crystal clear: turnover isn’t just an “HR problem.” It’s a critical business expense that eats directly into your profits. Getting a firm grip on these numbers is the first step to justifying any real investment in retention. This guide can help you calculate the true cost of employee turnover.

Core Pillars of a Retention Strategy

To fight back against these costs, you need a plan. When you treat retention as a core business function instead of an afterthought, you can build a workplace people don’t want to leave. At its heart, it all comes down to focusing on what your employees need to succeed.

“High turnover is a symptom of deeper organizational issues. Addressing the root causes—be it management, culture, or lack of growth—is the only sustainable solution. Retention isn’t about preventing people from leaving; it’s about creating an environment they don’t want to leave.”

To help you get started, we’ve broken down the foundational pillars every organization should be focusing on to build an engaged and resilient team.

Core Pillars of Employee Retention at a Glance

This table gives you a quick summary of the key strategic areas that are absolutely crucial for reducing employee turnover effectively.

Strategy Pillar Key Focus Area Primary Impact
Hiring & Onboarding Attracting talent that fits your culture and giving them a structured, welcoming first 90 days. Cuts down on early departures and makes new hires feel connected right from the start.
Compensation & Benefits Offering competitive pay, transparent salary ranges, and benefits that actually support modern life. Tackles one of the biggest reasons people job hunt and shows them they’re truly valued.
Career Development Creating clear growth paths, mentorship programs, and opportunities for people to learn new skills. Builds loyalty by showing employees they have a long-term future right where they are.
Workplace Environment Designing a physical and cultural space that supports well-being, focus, and collaboration. Boosts daily job satisfaction and helps prevent the kind of stress that leads to burnout.

Focusing on these pillars isn’t just about plugging holes; it’s about building a stronger, more stable foundation for your entire organization.

Building a Retention-Focused Hiring and Onboarding Process

If you think retention efforts start after an employee’s one-year review, you’re already behind. Great retention begins before they even see a job offer. The seeds of long-term commitment are sown the moment a candidate interacts with your company. A rushed or misleading recruitment cycle is one of the fastest ways to guarantee that new hire will be polishing their resume within a few months.

The goal isn’t just to fill a seat. It’s to find people who are not only skilled for the job but are genuinely a good fit for your company’s culture, mission, and pace. This means shifting your mindset from reactive hiring to proactive, retention-focused recruiting.

Two smiling businessmen shake hands in a modern office reception, symbolizing a professional welcome and successful hiring process.

Attracting the Right Candidates from the Start

Your hiring process kicks off the second a potential candidate reads your job description. This is your very first chance to set clear, honest expectations.

An effective job post does way more than list technical skills. It should paint an authentic picture of the day-to-day reality of the role. If your office is a fast-paced, highly collaborative environment, say that. If the job demands a lot of independent work, make that crystal clear.

During interviews, you have to dig deeper than the standard skill-based questions. I’m a big fan of behavioral questions that get candidates talking about how they’ve handled real-world challenges—the kind they’re likely to face in your workplace.

A few culture-fit questions I’ve found useful:

  • “Describe a time you had to adapt to a major change at work. How did you handle it?”
  • “Tell me about a project where you collaborated closely with a team. What was your role, and how did you contribute to the group’s success?”
  • “What kind of work environment helps you do your best work?”

The answers here reveal so much more about a candidate’s work style and resilience than a simple list of qualifications ever could. For more ideas on creating an environment that reflects your values, you can explore how to synchronize your office culture and office space.

Designing a 90-Day Onboarding Experience That Sticks

Once you’ve made the hire, the focus pivots to onboarding. This isn’t just about paperwork and getting their laptop set up. This is a critical period. A structured onboarding program is your best defense against early turnover, especially since many new employees decide whether they’ll stay long-term within their first six months.

A great onboarding experience validates a new hire’s decision to join your company. It confirms they made the right choice by showing them they are supported, valued, and have a clear path to success from day one.

A successful 90-day plan should immerse new hires in the company, connect them with their peers, and empower them to start contributing meaningfully. It’s not a week-long orientation; it’s a phased journey.

A Practical Roadmap for the First 90 Days

Trying to cram everything into the first week is a recipe for disaster. Breaking the onboarding process into manageable phases prevents information overload and builds momentum. Here’s a simple but effective structure that works.

  • Week 1: Orientation and Immersion. The first week is all about making the new person feel welcome. Focus on introductions, a tour of the office (or digital workspace), and a clear overview of the company’s mission. Assigning an “onboarding buddy” is a fantastic way to give them an informal, friendly resource for all those little questions they might be afraid to ask their manager.
  • First 30 Days: Learning and Training. Now, the focus shifts to role-specific training. Set clear, achievable goals for their first month. Schedule regular check-ins with their manager to review progress, answer questions, and offer constructive feedback. This is the time to build their foundational knowledge.
  • Days 31-60: Contribution and Integration. At this point, the new hire should start taking on more responsibility and contributing to team projects. Get them involved in cross-departmental meetings so they can see how their role fits into the bigger picture. The manager’s job here is to guide them while encouraging autonomy.
  • Days 61-90: Ownership and Future Planning. By the end of three months, your new employee should be operating with confidence and taking real ownership of their work. The final step is a formal 90-day review. This isn’t a performance critique; it’s a conversation to discuss achievements, address challenges, and set goals for the next six months. It solidifies their place on the team and shows you’re invested in their future.

Rethinking Compensation and Benefits for Modern Talent

In a fiercely competitive market, just offering a “fair” salary isn’t going to cut it anymore. While solid pay is the foundation, it’s really just the starting point. Today’s talent looks at their compensation as a total package—it’s a direct reflection of how much their employer genuinely values their skills, time, and overall well-being.

Ignoring this shift is a costly mistake. I’ve seen it time and again. Beefing up your pay and benefits is a surefire way to reduce turnover, especially since financial incentives are a huge driver for the 40% of employees who consider leaving their jobs.

With turnover rates averaging 13.5% in the US, 16.8% in the UK, and 11.9% in Canada, the costs add up fast. When you consider that replacing a key employee can cost up to 210% of their salary, getting proactive about compensation isn’t just nice—it’s a smart financial move.

To really get a handle on turnover, you have to build a rewards strategy that feels both fair and genuinely supportive of modern life. This means looking beyond the paycheck to create a holistic experience that makes people feel secure and truly appreciated.

Conducting Regular Salary Audits

So, how do you know if your pay is actually competitive? You can’t just guess. This is where a salary audit comes in. It’s the process of benchmarking your company’s pay against current market rates for similar roles, both in your industry and your city.

This isn’t a one-and-done task, either. The market is always moving, so you should plan on running these audits at least once a year. This regular check-in helps you spot pay gaps before they become the reason someone starts polishing their resume.

A transparent pay structure is a cornerstone of trust. When employees understand the “why” behind their compensation and see a clear path for salary growth, they are far less likely to feel undervalued or believe the grass is greener elsewhere.

Once you’ve done your audit, the next move is to build a transparent pay structure. This means setting up clear salary bands for different roles and experience levels. Making this information accessible demystifies compensation and builds a powerful sense of fairness, showing your team you’re committed to paying people equitably.

Building a Benefits Package That Actually Matters

While salary covers the bills, your benefits package is what really shows you’re invested in an employee’s quality of life. The old-school health-and-dental plan is just table stakes now. Today’s workforce expects—and deserves—a lot more.

High-impact benefits that really resonate with modern talent are all about flexibility, well-being, and personal growth. Think about adding some of these perks to your lineup:

  • Meaningful Mental Health Support: Go beyond a basic Employee Assistance Program (EAP). Offer access to therapy apps like Talkspace, cover counseling sessions with low or no co-pays, and give people company-wide mental health days. This demonstrates you’re serious about their psychological well-being.
  • Flexible Work Schedules: For many people, time is the new currency. Giving employees the autonomy to choose hybrid models, compressed workweeks, or flexible start and end times allows them to balance their work and personal lives on their own terms.
  • Professional Development Funds: People stay where they can grow. A dedicated fund for courses, certifications, or conference attendance is a clear signal that you’re invested in their career and long-term success with the company.
  • Generous Paid Time Off (PTO): A strong PTO policy that encourages employees to truly unplug is one of the best defenses against burnout—a major reason people quit.

If you want to make your offerings even more impactful, it’s worth exploring how a thoughtful approach can completely transform your workplace. Take a look at our guide on how to enhance your company culture with the right employee benefits.

Ultimately, a modern total rewards package sends a clear message: we see you as a whole person, not just a cog in the machine. This approach doesn’t just help you attract top talent—it gives them compelling reasons to stick around and build a future with your company.

Fostering Career Growth and Meaningful Work

Once you’ve nailed down competitive pay and solid benefits, the conversation has to shift. It needs to get deeper. The real, powerful driver of retention is purpose. People are wired to want to grow, to contribute, and to feel like their work actually matters.

If your team members feel like they’re stuck in a dead-end job with no clear future, even a great salary won’t keep them around for long. This is where you move beyond a simple transactional relationship and build a true partnership. Fostering career growth isn’t just about handing out promotions; it’s about showing your team you are genuinely invested in their long-term success. A lack of growth opportunities is one of the top reasons high-performers start polishing their résumés.

Two businessmen discuss a career map on a digital chart, planning for professional development and growth.

Implementing Growth-Focused Conversations

Let’s be honest, the annual performance review is often a source of anxiety. It tends to focus on past mistakes rather than future potential. To really get growth on track, you need to separate these conversations completely.

Start holding regular, future-focused career development check-ins that are totally distinct from performance evaluations. These discussions should happen at least twice a year. The whole point is to understand an employee’s personal and professional aspirations. You need to ask questions that open up a genuine dialogue about where they want to go and how the company can help them get there.

Some great questions to get the ball rolling include:

  • What skills are you most interested in developing over the next year?
  • What kind of projects would you be really excited to work on?
  • Where do you see your career heading in the next three to five years?

This simple shift proves you see employees as more than just their current job title. It shows you’re a partner in their journey. For anyone looking to take charge of their own trajectory, our guide offers some fantastic small business tips to climb the corporate ladder.

“When an employee sees a clear path forward within your organization, they stop looking for paths outside of it. Career development isn’t a perk; it’s a core retention strategy.”

Creating Mentorship and Upskilling Programs

Career conversations are great, but they need to lead to tangible action. That’s where formal programs come in. They provide the structure and resources people need for genuine skill development, which is a powerful way to keep turnover low.

A mentorship program is a fantastic, low-cost way to get started. Pairing junior employees with experienced senior leaders bridges knowledge gaps, builds a sense of community, and offers invaluable guidance. It helps newer staff figure out the company culture and see a real-life example of what long-term success looks like.

Beyond that, funding upskilling opportunities is a direct investment in your talent. This can take a few different forms:

  • Tuition Reimbursement: Offer support for employees pursuing degrees or certifications relevant to their field.
  • Learning Stipends: Give each person an annual budget to spend on courses, conferences, or workshops that they choose.
  • Internal Training: Develop your own in-house workshops to teach new software, leadership skills, or cross-departmental functions.

These initiatives do more than just build skills—they build loyalty. When you invest in your people’s growth, they invest their talent and commitment right back into your company.

Connecting Daily Tasks to the Bigger Picture

Finally, never underestimate the power of meaning. When people understand how their day-to-day tasks contribute to the company’s mission, they are significantly more engaged. It’s the difference between feeling like a cog in a machine and feeling like a valued contributor to a shared goal.

Managers are absolutely critical here. They need to consistently connect individual and team responsibilities to the bigger company objectives during meetings and one-on-ones. When someone on their team launches a new feature or closes a big deal, they should celebrate not just the task’s completion but its impact on the business.

Giving employees autonomy and ownership over their projects strengthens this connection even further. Trusting your team to make decisions empowers them and deepens their sense of responsibility. It transforms a job into a fulfilling career, creating a powerful reason for your best talent to stay and thrive.

Designing a Workplace That Supports Productivity and Wellbeing

Think about it: the physical space where your team spends 40+ hours a week is a huge part of their daily experience. If that space is cramped, noisy, or just plain uncomfortable, it’s more than a minor annoyance. It’s a constant source of friction that leads to distraction, stress, and eventually, burnout.

Over time, those daily frustrations add up. A great employee might start looking for a company that seems to care more about their well-being. That’s why strategic office design isn’t just a “nice-to-have” anymore—it’s a critical piece of the retention puzzle. When you invest in a thoughtfully crafted workspace from Cubicle By Design, you’re sending a clear message: we care about your comfort, your ability to focus, and your health.

A modern, well-lit office with ergonomic chairs, workstation cubicles, and acoustic panels, designed to reduce employee turnover by improving well-being.

Creating Zones for Different Work Styles

The modern workday isn’t one-size-fit-all, so why should your office layout be? A completely open floor plan can be a nightmare for someone who needs quiet to do deep, concentrated work. On the flip side, a sea of isolated cubicles can kill the collaborative spark.

The best solution is to offer a mix of zones tailored to different tasks. This approach, sometimes called “activity-based working,” gives people the freedom to choose the right setting for what they need to do at that moment. You’re giving your team the tools and the space to do their best work, however they work best.

If you need some inspiration, checking out different office cubicle design ideas can spark some great concepts for creating a more supportive and dynamic environment.

Here are a few key zones to consider:

  • Focus Zones: Think heads-down, uninterrupted work. These spots are perfect for private office cubicles with higher walls and sound-dampening materials to cut down on distractions.
  • Collaboration Hubs: These are your open, inviting spaces. Equip them with whiteboards, big monitors, and comfy seating to get the brainstorming and teamwork flowing.
  • Social and Break Areas: A comfortable lounge or a well-stocked kitchenette gives employees a place to decompress, connect with colleagues, and just recharge for a few minutes.

The Critical Role of Ergonomics and Acoustics

Two of the most overlooked—but absolutely crucial—elements of a great workspace are ergonomics and acoustics.

Poor ergonomics are a silent killer of productivity. An old, non-adjustable chair or a poorly positioned monitor can lead to chronic pain, discomfort, and more sick days. Investing in high-quality, adjustable furniture isn’t just an expense; it’s a direct investment in your team’s physical health and ability to do their job without pain.

And then there’s noise. Constant background chatter is a major source of stress and mental fatigue. One study found that office distractions can eat up more than two hours of an employee’s day. Improving your office acoustics doesn’t have to be a massive project. It can be as simple as:

  • Installing sound-absorbing panels or baffles on walls and ceilings.
  • Using carpeting and other soft materials to cut down on echo.
  • Arranging furniture strategically to create natural sound barriers.

Investing in the Right Workstations

An employee’s primary workstation is their home base. Getting it right is fundamental. Equipping them with the right workstation cubicles shows you respect their need for a comfortable, functional space.

Modern cubicles are a far cry from the soul-crushing boxes of the past. Today’s systems are designed to balance privacy with the need for connection.

When you’re choosing your office furniture, think about features that support both individual work and team needs. You can even use a cubicle designer tool to play with different layouts, ensuring everyone has enough personal space, integrated storage, and easy access to power.

A well-designed workstation is more than just furniture. It’s a tool that empowers employees, respects their need for focus, and tangibly demonstrates the company’s commitment to providing a superior work environment. This tangible support is a powerful factor in retention.

Ultimately, designing a supportive workplace is a proactive retention strategy. It directly addresses the daily pain points that can accumulate and drive your best people away. By creating an office that is comfortable, functional, and adaptable, you build a powerful, unspoken reason for your top talent to stick around.

Frequently Asked Questions About Reducing Employee Turnover

Diving into employee retention brings up a lot of questions. I get it. It’s a complex issue. Here are some of the most common ones I hear from managers and HR leaders, with some straight-to-the-point answers to help you sharpen your own strategy.

What Is the Single Most Effective Strategy to Quickly Reduce Employee Turnover?

If you want the biggest bang for your buck, focus on your front-line managers. Period. While a well-rounded strategy is best for the long haul, study after study confirms the number one reason people quit is their direct boss. A bad manager will torpedo all your other retention efforts, no matter how good they are.

Investing in solid leadership training for your managers will give you the fastest, most noticeable results. You don’t need a massive program; just focus on the core skills: clear communication, giving feedback that actually helps, genuinely recognizing people for their work, and leading with a bit of empathy. A great manager can make up for a heavy workload or slightly lower pay, but a bad one will chase off even your most loyal people.

To get started, try a few simple things:

  • Regular Manager Check-ins: Make one-on-one meetings a non-negotiable part of their week. And they can’t just be about project status—they need to cover career goals and how the employee is really doing.
  • Provide Coaching Resources: Give them access to leadership workshops, books, or even an external coach. Help them get better at their job.
  • Create a Feedback Loop: Use anonymous surveys so employees can give honest feedback about their managers without fear. This will show you exactly who needs more support.

How Can Small Businesses with Limited Budgets Compete on Retention?

Small businesses can absolutely hold their own against the big corporations; you just have to play a different game. You probably can’t win a bidding war on salary, so don’t even try. Instead, lean into what makes you unique: your culture, your flexibility, and your sense of community.

Focus on the high-impact, low-cost strategies that huge companies can’t easily replicate. Offer real work-life balance with flexible hours or hybrid schedules. Build a tight-knit team where every single person feels seen and heard—something that’s nearly impossible in a 10,000-person behemoth.

For small businesses, culture isn’t just a buzzword; it’s a competitive advantage. A supportive, flexible, and engaging environment can create a level of loyalty that a slightly higher salary elsewhere simply can’t buy.

Put a recognition program in place that isn’t just about money. Public praise, an extra day off, or the chance to take the lead on a cool new project can be incredibly powerful. Spend your time having real, personalized career conversations with your team. These are the things that build loyalty and often matter more than a small pay bump.

How Do I Measure the Success of My Employee Retention Initiatives?

You need to look at both the hard numbers and the softer, more human feedback. Combining quantitative and qualitative data is the only way to get the full picture of what’s working.

First, you have to track the key metrics. Look at your overall turnover rate quarterly and annually. But the real story is in the details, so you need to segment that data.

  • Voluntary vs. Involuntary Turnover: Are people choosing to leave, or are you letting them go? Big difference.
  • Department or Manager: Is one specific manager or team a revolving door? That’s a major red flag.
  • Tenure: Are you losing new hires in the first 90 days, or are your seasoned veterans heading for the exit?

Next, get qualitative feedback through employee engagement surveys and quick pulse checks. Are the scores for management, career opportunities, and job satisfaction trending up? Finally, conduct thorough exit interviews to find out why people are really leaving. Comparing this data from before and after you launch your new initiatives will tell you exactly how you’re doing. For a deeper look at what you can do, it’s worth checking out these proven strategies to reduce staff turnover.

Does Office Design Really Impact Employee Turnover?

Yes, absolutely. The physical workspace has a huge, direct impact on an employee’s daily life—their productivity, their stress levels, everything. An office with terrible acoustics, constant interruptions, or uncomfortable chairs is a recipe for burnout and frustration. Over time, those daily annoyances add up and make people start looking elsewhere.

A well-designed office provides different types of spaces for different kinds of work. You need quiet zones with private office cubicles for deep focus, open areas for collaboration, and comfortable break rooms where people can actually connect. The design of your office sends a message about what you value.

When you invest in ergonomic furniture and take steps to control noise, you’re showing your team that you care about their well-being. It’s a tangible way to boost job satisfaction and signal that your company is a great place to work. A thoughtful office layout is a powerful—and often overlooked—retention tool. You can explore a ton of modern cubicles and even use a cubicle designer to map out a space that helps you keep your best people.


Ready to create a workplace that makes your team want to stay? At Cubicle By Design, we specialize in designing functional and supportive office environments. Explore our workstation cubicles and start building a better workplace today.

Read More

A Practical Office Space Planning Guide for Modern Workplaces

Before you even think about floor plans or furniture catalogs, let’s get one thing straight: a great office design starts with data, not guesswork. At Cubicle By Design, we’ve seen it time and again—companies jump straight to the fun stuff and end up with a space that looks nice but doesn’t actually work. The most important step you can take is to first understand what your people, your company culture, and your business goals truly need from your office.

Setting the Stage for a Smarter Workspace

Skipping a proper needs assessment is a recipe for expensive mistakes. You end up with an office that frustrates employees and gets in the way of productivity. A real assessment translates your company’s unique DNA into a practical blueprint, making sure the final design supports how your teams actually operate day-to-day.

Think about it. A high-energy sales team that thrives on spontaneous huddles needs a completely different setup than a team of engineers who require deep, quiet focus. A one-size-fits-all approach just ends up fitting no one particularly well. Your goal is to create a workspace that feels custom-built for the people using it.

How to Find Out What Your Team Really Needs

To get real, actionable insights, you need to go beyond just asking people what they want. A mix of direct feedback and old-fashioned observation will give you the full picture.

Start with employee surveys, but ask smarter questions. Instead of a generic “Do you like the layout?”, get specific:

  • On a scale of 1-5, how easy is it to find a quiet spot for focused work?
  • What are the biggest roadblocks to collaborating with your team?
  • Walk me through your typical day. Where do you spend your time and what do you do there?

Questions like these uncover the real friction points. Then, back that up by just watching how people use the space. Where do meetings naturally happen? Are there high-traffic bottlenecks near the coffee machine? Which areas are ghost towns? You’ll often spot realities that people don’t even think to mention in a survey.

A well-executed needs assessment ensures every square foot has a purpose. It’s the difference between managing real estate costs and turning your office into a strategic asset that actively helps your business.

This isn’t just a nice-to-have anymore. In fact, 73% of corporate real estate leaders now rank optimizing their portfolio as their number one priority. Companies are focused on using their space more efficiently, which makes every design decision that much more important.

To make this process a bit more structured, here’s a table outlining the key areas you should be digging into.

Key Considerations for Your Needs Assessment

Assessment Area Key Questions to Ask Data to Collect
Workflow & Collaboration How do teams interact? Do they need ad-hoc meeting spaces or formal conference rooms? Employee surveys, observational notes on traffic flow, meeting room booking data.
Focus & Privacy What percentage of the day requires deep concentration? Are noise levels a problem? Survey results on distractions, requests for private spaces, decibel level readings.
Technology & Infrastructure Do teams have enough outlets and data ports? Is the Wi-Fi reliable in all areas? IT help desk tickets, employee feedback on connectivity, inventory of current tech assets.
Storage & Amenities Is there enough personal and departmental storage? What amenities (kitchen, lounge) are most valued? Physical audit of storage usage, employee wish lists, observation of common area use.
Future Growth What are the company’s growth projections for the next 1, 3, and 5 years? Headcount forecasts from HR, business expansion plans from leadership.

Gathering this information at the outset prevents costly changes down the road and ensures your final plan is grounded in reality.

Turning Your Findings Into a Plan

Once you’ve gathered all this info, patterns will start to pop. You might find your marketing team desperately needs a project hub with whiteboards, while the finance department is crying out for secure, private office cubicles. These insights are the foundation of your space plan. If you want to dive deeper into the fundamentals, check out our guide on what is space planning.

This prep work also includes practical operations. For example, now is the perfect time to develop an effective office recycling plan for all your old and new electronics.

By rooting your design in a solid understanding of your team, you create a workspace that doesn’t just look good—it actively boosts efficiency, collaboration, and morale from day one.

Getting Your Space Down on Paper

Now that you have a solid grasp of what your team needs, it’s time to get down to the brass tacks. We’re moving from ideas to the physical world, which means getting intimately familiar with every square inch of your office. A great layout isn’t just about dropping desks onto a floor plan; it’s about understanding the canvas you’re working with—from its permanent structures to its hidden infrastructure.

This all starts with a simple, essential tool: the tape measure. Seriously, don’t just trust old or estimated blueprints. You need to walk the floor and physically measure the entire space to create an accurate, up-to-date plan. This isn’t just about wall-to-wall dimensions. It’s about mapping every single element that will shape your final design.

Charting the Unchangeable Elements

Before you can dream up a flexible, modern workspace, you have to account for the parts of the building that aren’t going anywhere. These are the non-negotiable features that your entire layout must flow around. Trying to ignore them is a surefire way to create a plan that looks brilliant on a screen but completely fails in reality.

Your first pass should be to meticulously document these fixed features:

  • Structural Columns: Pinpoint their exact location and dimensions. These will directly impact where you can place furniture and how people will move through the space.
  • Windows and Doors: Measure their size and placement. Don’t forget to note which way the doors swing—it’s a small detail that makes a huge difference in ensuring proper clearance.
  • Load-Bearing Walls: Identify these critical structures. They cannot be moved or altered, period.
  • Ceiling Height Variations: Take note of any areas with lower ceilings, often due to ductwork or other utilities. This can affect everything from acoustics to lighting choices.

This detailed map of fixed elements becomes the foundational layer of your plan. It stops you from designing around spaces that simply don’t exist.

Identifying Your Office’s Nervous System

With the structural skeleton mapped out, the next critical step is to find the building’s infrastructure—its “nervous system.” Forgetting to map power outlets, data ports, and HVAC units is one of the most common and frustrating mistakes in office planning. It almost always leads to a tangled mess of extension cords and forces costly, last-minute electrical work.

Planning where your teams will sit without knowing where they can plug in is like designing a car without an engine. Your infrastructure map dictates the functional zones of your office long before any furniture arrives.

Walk the space and mark the precise location of every single power outlet and data jack. This information is non-negotiable and will heavily influence where you can place individual workstations, tech-heavy collaboration hubs, or even the office coffee machine. While you’re at it, find the thermostats and HVAC vents to avoid placing someone’s desk directly under a constant blast of cold air.

Bringing Your Vision to Life with Digital Tools

With your measurements and infrastructure map in hand, you can finally move from a static blueprint to a dynamic digital model. This is where the real fun begins.

Using a tool like the Cubicle By Design cubicle designer lets you build a 2D and 3D version of your space. This isn’t just for a pretty picture; it’s about practical, real-world testing.

A digital model lets you experiment with different furniture arrangements without moving a single heavy object. You can drop in various workstation cubicles to see how they fit or configure a block of private office cubicles for the management team. This process, often called a “test fit,” helps you immediately see how different layouts affect foot traffic, sightlines, and the overall feeling of spaciousness. It also helps you understand how different furniture sizes will work; for a deeper dive, check out our guide on standard cubicle dimensions.

This digital sandbox is where your raw data transforms into a workable, intelligent vision for your office, ensuring the final layout is perfectly aligned with the needs you identified from the start.

Picking a Layout That Actually Works for Your People

The layout of your office is so much more than where you put the desks. It’s the silent communicator of your company culture. It sets the tone for how people collaborate, focus, and interact, and it has a direct line to morale and productivity. Let’s get past the basic pros and cons and really dig into the three main models—open, private, and hybrid—to figure out what’s truly right for your team.

Making this decision is where your needs assessment starts to take physical shape, turning all that data into a real, functional environment.

Understanding the Open Office Concept

The open-plan office gets a lot of hype for a reason. It’s built to knock down walls (literally) and encourage transparency, spontaneous conversations, and team collaboration. For high-energy, fast-moving teams in sales or marketing, this kind of buzz can be exactly what they need to spark new ideas and solve problems on the fly.

Of course, the big elephant in the room is noise and distraction. Without a solid plan, an open office can quickly become a hotbed of frustration for anyone trying to do deep, focused work. The real trick is creating an open space that also has pockets of quiet—something the hybrid model tackles head-on.

This whole process of choosing a layout starts with understanding the space you have. You can’t just pick a style without knowing your physical constraints.

A flowchart illustrating the office mapping decision tree, showing steps from measuring space and identifying outlets to building a digital model for a test fit.

As you can see, everything from measurements to where the outlets are located has to be mapped out before you can seriously start building a model for your layout.

The Case for Private and Semi-Private Workspaces

On the other side of the coin, you have private layouts. These are all about focus, concentration, and confidentiality. This setup is a no-brainer for roles where deep work is the name of the game—think finance, legal, or engineering. Giving someone their own enclosed space cuts down on interruptions and provides a secure spot for handling sensitive information.

But “private” doesn’t have to mean “isolated.” For a detailed breakdown of these classic styles, check out our comparison of open plan offices vs. cubicles.

Embracing the Power of the Hybrid Model

For most companies we work with, the answer isn’t black or white. It’s a blend. The hybrid layout is the most flexible and realistic model because it acknowledges that work isn’t one-size-fits-all. The same person who needs to brainstorm with a team in the morning might need absolute silence to write a report in the afternoon.

This is where you get to be strategic by creating different zones for different kinds of work:

  • Collaboration Hubs: Open areas with whiteboards and comfy chairs for team huddles.
  • Focus Zones: Clusters of cubicles with higher walls for heads-down tasks.
  • Quiet Pods: Small, enclosed spots for private calls or one-on-one video meetings.
  • Social Areas: A kitchen or lounge that encourages those casual chats where some of the best ideas happen.

This approach gives your team the freedom to choose the right environment for the task at hand. It’s about empowering them to work smarter.

To help you decide, here’s a quick comparison of how these models stack up against each other.

Comparing Office Layout Models

Layout Type Best For Potential Challenges Cubicle By Design Solution
Open Plan Dynamic, collaborative teams (e.g., sales, marketing); fostering transparency and quick communication. High potential for noise and distractions; lack of privacy for focused tasks or confidential calls. Low-wall cubicles or benching systems that define personal space without completely isolating teams.
Private/Cubicle Roles requiring deep concentration and confidentiality (e.g., finance, legal, engineering). Can feel isolating if not designed well; may hinder spontaneous collaboration. Tall-walled private office cubicles with glass panels to maintain a sense of connection while providing acoustic privacy.
Hybrid Most modern businesses; teams with diverse roles and work styles; activity-based working. Requires careful planning and zoning; can be more complex to manage space utilization. A strategic mix of open-plan benching, mid-height workstation cubicles, and full-height glass office walls to create dedicated zones.

Ultimately, the hybrid model offers the flexibility that most modern teams need to thrive.

Our Takeaway: The best office layouts are designed around activities, not just job titles. When you give people a variety of spaces to choose from, you’re not just giving them furniture—you’re giving them control over their own productivity and building a culture of trust.

Getting the Infrastructure and Acoustics Right

A stunning office design is one thing, but if your team can’t plug in their laptops or hear themselves think on a call, that beautiful layout falls flat. This is where the real nitty-gritty comes in—the technical details of infrastructure and acoustics. They’re the invisible foundation that makes a workspace actually work.

A technician connects network and power cables to an outlet beneath a modern office desk with gray acoustic panels.

Think about your power and data distribution from the very beginning. You’ll save yourself a future tangled in extension cords and plagued by dead Wi-Fi zones. In the same way, getting a handle on sound from the start ensures your office is a hub of productivity, not a den of distraction.

Plan for Power and Seamless Connectivity

Let’s face it, every modern workstation runs on power and data. Your layout has to reflect that reality with easy, accessible connectivity for every single employee. Skipping this step often leads to costly retrofitting down the road and ruins the clean, organized look you worked so hard to create.

When you’re planning the electrical systems, bringing in an experienced commercial electrical contractor is non-negotiable. It’s a matter of safety, efficiency, and meeting building codes. They can help you map out a grid that handles what you need today and what you’ll need tomorrow.

Here are the key things to bake into your infrastructure plan:

  • Workstation Power: Make sure every desk or cubicle has multiple outlets and USB ports. Modular furniture, like the systems we offer at Cubicle By Design, often has integrated power solutions to keep cables completely out of sight.
  • Meeting Room Tech: Conference rooms are power hogs. They need dedicated juice for big displays, video conferencing gear, and all the laptops your guests will bring. Plan for floor boxes or wall-mounted outlets to keep things clean and trip-free.
  • Wi-Fi Coverage: Sit down with your IT team to figure out the best spots for wireless access points. Walls and even large furniture can create frustrating dead zones if you don’t plan the layout carefully.

A rookie mistake is underestimating how many devices one person uses. Think about it: a laptop, a monitor, a phone charger, and other gadgets. A single outlet just doesn’t cut it anymore. Plan for at least four to six power access points per person.

By mapping your power and data needs right alongside your furniture layout, you guarantee the office’s infrastructure can actually support your team from day one.

Master Office Acoustics for Focus and Privacy

In an age of endless Zoom calls and collaborative projects, noise is one of the biggest productivity killers out there. Any good office plan has to tackle acoustics head-on, especially in open or hybrid layouts. The goal isn’t to create total silence; it’s to control the sound.

You’ll need to attack this from a few different angles to create an acoustically comfortable space. Start by thinking about how sound travels through your office and pinpointing where the main noise sources are.

From there, you can bring in solutions that absorb, block, or mask distracting sounds.

  • Absorption: Use soft materials that literally soak up sound waves. Think acoustic wall panels, ceiling baffles, carpeting, and even furniture with sound-dampening fabric.
  • Blocking: Put up physical barriers to stop sound in its tracks. Strategically placed private office cubicles with high walls or glass partitions can create quiet zones for deep work without completely closing off teams.
  • Masking: Introduce a subtle, low-level ambient sound (like airflow) to make human speech less intelligible and, therefore, way less distracting. Sound masking systems are fantastic for open-plan areas.

When you blend these strategies, you can dial down the ambient noise and create an environment where people can actually concentrate. If you’re looking for more ways to boost focus, our article on achieving office cubicle privacy has some great insights. This thoughtful approach to sound ensures your office isn’t just a pretty space—it’s a comfortable, productive, and distraction-free place to get work done.

Managing Budgets, Timelines, and Installation

You’ve nailed down the perfect layout and figured out all the infrastructure details. Now comes the real test: execution. This is the part of the project where blueprints and plans become a physical reality, and it all comes down to sharp project management.

Getting this final phase right is all about mastering your budget, timeline, and installation. These are the three pillars that hold up a successful project. Without a firm grip on these practical details, even the most brilliant office designs can get completely derailed by surprise costs, frustrating delays, and logistical nightmares.

Building a Budget That Bends But Doesn’t Break

The first step toward a stress-free project? A realistic budget. The secret is to think beyond the obvious big-ticket items like desks and chairs. You have to account for all those smaller, easy-to-forget expenses that can sneak up on you and wreck your numbers.

A truly comprehensive budget is your best defense against scope creep. Your checklist should have detailed line items for everything:

  • Furniture and Fixtures: This is the core of it—all your desks, chairs, storage, and specialized pieces like cubicles.
  • Technology and Equipment: Think about any new computers, monitors, video conferencing systems, or network hardware you’ll need.
  • Labor and Installation: Don’t forget the pros. This includes installers, electricians, data cable technicians, and painters.
  • Shipping and Delivery: Freight charges can be a significant cost, especially for large furniture orders. Factor them in from the start.
  • Permits and Fees: A quick call to your local municipality can tell you if you need building or electrical permits.
  • Contingency Fund: This one is non-negotiable. Set aside at least 10-15% of your total budget for the unexpected. Trust us, something always comes up, and this buffer will save you from having to make painful compromises down the road.

A well-planned budget isn’t just a spending limit; it’s a strategic tool. It forces you to prioritize what’s most important and make smart trade-offs that align with your company’s goals without sacrificing quality.

When you break down costs this granularly, you get a crystal-clear financial picture from day one. It’s what empowers you to make smart, informed decisions as the project moves forward.

Mapping Out a Realistic Project Timeline

A detailed timeline is just as crucial as your budget. It’s the roadmap that keeps everyone—from your internal team to outside vendors—on the same page and helps manage expectations. The best timelines are built around clear, sequential milestones that create a logical flow from start to finish.

A solid project timeline should map out these key phases:

  1. Final Design Approval: Get that final sign-off before a single dollar is spent on furniture.
  2. Order Placement: Place all furniture and equipment orders and get firm lead times from every single vendor.
  3. Site Prep: This is for any painting, electrical work, or flooring updates that have to happen before the furniture arrives.
  4. Delivery and Staging: Coordinate a specific delivery window and have a designated area ready to stage the items for installation.
  5. Installation: The main event! This is when the physical build-out happens.
  6. Final Walkthrough: A thorough inspection to create a “punch list” of any issues that need fixing before you sign off on the project.

It’s also smart to keep an eye on the current office market. Recent indicators show the sector is stabilizing, with 10.3 million square feet of positive net absorption reported in Q4 2024 in the U.S.—the strongest demand we’ve seen in three years. For anyone planning a project, this signals a shifting environment where you might find opportunities to renegotiate a lease or invest in a great location as vacancy rates slowly dip.

Ensuring a Smooth and Compliant Installation

The installation phase is where all the puzzle pieces finally click together. A smooth process here is all about tight coordination and making sure you’re compliant with all the necessary standards.

Before a single box is opened, double-check that your plan meets key requirements:

  • ADA Compliance: Your layout must be accessible. This means proper clearances in walkways, at doorways, and around every workstation.
  • Fire Codes: Make sure your plan adheres to local fire safety regulations, which includes clear egress paths and proper clearance for sprinkler systems.

Once you’re ready for the build-out, communication is everything. Stay in close contact with your vendors, especially your furniture installation team. For more complex projects involving modular systems like workstation cubicles or private office cubicles, using professional assemblers is a must.

At Cubicle By Design, we know how critical this final step is. We’ve seen it all. That’s why we provide end-to-end support, including expert guidance on office furniture installation to ensure everything is put together correctly, safely, and exactly as you envisioned.

The very last step is the walkthrough. With your layout blueprint in hand, inspect every single detail. Test every outlet, check every drawer, and look for any scuffs or damage. This meticulous final check is what guarantees your new space is perfect from day one.

Common Questions We Hear About Office Planning

Jumping into an office redesign always kicks up a few questions. To help you feel more confident as you get started, we’ve pulled together some of the most common things we hear from facility managers and business leaders in the middle of the planning process.

How Much Space Do I Really Need Per Employee?

The old rule of thumb was a roomy 200-250 square feet per person, but that’s completely changed. With hybrid work and more dynamic layouts, the new target is much closer to 130-170 square feet per employee.

Honestly, the perfect number boils down to the kind of layout you choose. A wide-open floor plan will naturally have a smaller footprint per person than an office filled with private office cubicles. The real secret is to stop thinking about generic formulas and start looking at how your team actually works. People who need quiet for deep focus or have bulky equipment will always need more dedicated space.

What’s the Biggest Mistake People Make in Office Space Planning?

Easy. The most common—and most expensive—mistake is designing for right now with zero thought for what’s next. When you create a rigid plan that can’t handle company growth, new technology, or changing work habits, you’ve built an office that’s already on its way to being obsolete.

The only way to get ahead of this is to build flexibility into your design from day one. Using modular and adaptable furniture means you can reconfigure your layout with minimal fuss as your team evolves. Always plan with growth and change in mind.

How Can I Fix the Noise Problem in My Open Office?

Controlling the acoustics is make-or-break for a successful open-plan office. A little bit of everything is the best strategy for taming the noise and keeping distractions from derailing your team’s focus.

You’ll want to layer a few different tactics:

  • Soak up sound with absorptive materials. Think acoustic ceiling tiles, wall panels, and even carpeting.
  • Choose furniture that pulls double duty, like high-walled workstation cubicles or felt dividers that physically block sound waves.
  • Install a sound-masking system. These systems introduce a subtle, engineered background sound that makes nearby conversations less intelligible and much less distracting.
  • Create dedicated quiet zones. Give people an escape hatch with enclosed pods or designated quiet rooms for focused work and private calls.

What’s the Best Way to Get My Team on Board?

Involve them. Early and often. The shift to a new layout goes so much more smoothly when employees feel like they’re part of the conversation, not just having a change dictated to them.

Kick things off with a simple survey to find out what isn’t working for them now and what they need to do their jobs better. As you start mocking up ideas with a tool like our cubicle designer, share the concepts and ask for honest feedback. When your team feels heard—and actually sees their input reflected in the final plan—they’re way more likely to be excited about the new space.


Think of this Cubicle By Design guide as your starting point for creating a workplace that genuinely works for your people. Ready to make it happen? Explore our full range of flexible office solutions at https://cubiclebydesign.com/.

Read More

What Is Modular Furniture? A Guide to Flexible Office Design

Think of your office like a set of LEGOs. You can click them together, pull them apart, and build something entirely new whenever you need to. That’s the simple idea behind modular furniture: a system of individual pieces that you can arrange and rearrange to create truly custom workspaces. It’s a concept that frees your business from being locked into a rigid, static layout, giving you the power to adapt your space on the fly.

Redefining the Modern Workspace

For decades, office furniture was a permanent decision. Desks were heavy, unmoving fixtures. Walls were built-in. If you wanted to change the layout, you were looking at a disruptive and expensive construction project.

Modular furniture completely flips that script. Instead of a fixed environment, it gives you a dynamic ecosystem of interconnected parts, each serving a specific function.

Miniature office scene showing people working in modular cubicles with desks and laptops.

This approach is a massive strategic advantage, especially for businesses that are growing or constantly evolving. Having the ability to easily reconfigure your space is a game-changer for things like effective office relocation project management or just adjusting to new team structures without a huge capital investment.

To give you a quick snapshot of the differences, here’s a simple breakdown.

Modular vs Traditional Office Furniture At a Glance

Attribute Modular Furniture Traditional Furniture
Flexibility High Low
Installation Quick, minimal disruption Lengthy, disruptive construction
Scalability Easy to add or remove units Difficult and expensive
Relocation Simple to disassemble and move Often impossible; a sunk cost
Cost Lower upfront & long-term cost High upfront & modification costs
Customization Highly customizable finishes & layouts Limited to initial design

This table just scratches the surface, but it highlights the core reason why so many modern offices are making the switch.

The Power of Adaptability

The real strength of modular design is its incredible adaptability. It allows your physical space to evolve just as quickly as your business strategy does. No more being stuck with a layout that made sense two years ago but feels outdated today.

This agility is exactly why the global modular furniture market hit USD 55.2 billion in 2024 and is projected to climb to USD 86.15 billion by 2030. That growth is a direct reflection of how modern businesses need agile, multifunctional work environments to thrive.

Think about these real-world scenarios where modularity just makes sense:

  • Accommodating Team Growth: A startup hires five new developers. Instead of a major renovation, they can simply add a new cluster of workstations over a weekend, ready for the new team on Monday.
  • Creating Project Hubs: The marketing team needs a “war room” for a big product launch. They can set up a temporary, semi-private collaboration zone and then easily dismantle it when the project wraps.
  • Supporting Hybrid Work: As more employees split time between home and the office, you can create flexible “hot desking” areas alongside permanent private office cubicles to support everyone’s needs.

This shift from static to dynamic is all about matching the office environment to the way we actually work now. An office isn’t just a place to sit anymore—it’s a tool for collaboration, focus, and getting things done. A flexible layout empowers your team to shape their environment for peak performance.

Of course, a great modular setup starts with a great plan. To get the most out of it, you need a solid foundation. You can learn more by checking out our guide on what is space planning, which shows how a thoughtful layout truly unlocks the potential of these solutions. Whether you’re designing from scratch or rethinking your current space, modularity is a future-proof investment in your team’s success.

The Core Benefits of a Flexible Workspace

Knowing what modular furniture is is one thing, but the real “aha!” moment comes when you see how it can directly benefit your business. When you go modular, your office stops being a fixed, rigid expense and transforms into a dynamic asset—one that actively supports your company’s growth, efficiency, and even your team’s well-being.

At its core, modular furniture is about striking a perfect balance between adaptability, smart financial planning, and a genuinely better work environment. These aren’t just small perks; they represent a fundamental shift in how you can control and optimize your physical space.

Unlocking True Workplace Flexibility

If there’s one standout advantage to modular systems, it’s their incredible flexibility. Traditional office furniture locks you into a single layout. Any change, big or small, becomes a costly, disruptive headache. Modular components, on the other hand, are built from the ground up to be reconfigured with minimal fuss.

Imagine your sales team is about to grow by three people next month. With a fixed layout, that might mean starting a frantic search for more office space. With a modular system, you can simply rearrange existing workstation cubicles or add a new cluster over a weekend. No downtime, no drama.

This adaptability makes a difference in day-to-day operations, too. You can:

  • Create temporary project zones for a team on a tight deadline.
  • Set up quiet pods for deep, focused work.
  • Tweak layouts to improve the flow of communication between departments.

Achieving Significant Cost-Effectiveness

While the upfront cost of high-quality modular furniture can be similar to traditional options, the long-term savings are where it really shines. The magic word here is reusability. When your company grows, reorganizes, or moves, you don’t have to toss out all your old furniture and start from scratch. You simply reconfigure or add to what you already have.

This “buy it once, use it for years” approach completely breaks the expensive “rip and replace” cycle that plagues so many businesses. Over the life of your office, this can easily add up to tens of thousands of dollars in savings. Plus, since installation and reconfigurations are so much faster, you also slash labor costs and minimize business disruption.

Scaling Your Office with Ease

For any growing business, scalability is everything. Your office space should be an enabler of that growth, not a roadblock. Modular furniture allows your physical footprint to scale right alongside your headcount, seamlessly. You can begin with a small, focused setup and gradually add components as your team expands, ensuring you only pay for what you need, right when you need it.

This on-demand scalability makes modular furniture a smart, future-proof investment. It ensures your office can evolve from a small startup hub to a bustling corporate headquarters without requiring a complete and costly overhaul at every stage of growth.

This isn’t just a niche idea; it’s a global movement. The modular furniture market was valued at USD 81.3 billion in 2023 and is projected to hit USD 117.6 billion by 2032. Businesses everywhere are demanding spaces that can adapt on the fly, save space, and promote sustainable, reusable design.

Improving Acoustics and Privacy

It’s no secret: open-plan offices can be noisy and full of distractions, killing productivity. Modular systems give you the power to fight back by engineering acoustics and privacy directly into your floor plan.

Panel systems can be ordered at different heights and with sound-absorbing materials to create real acoustic barriers. Taller panels around a specific team’s area can instantly dampen chatter and create a more focused atmosphere. For total quiet, you can use modular walls to build fully enclosed private office cubicles without the mess, expense, and permanence of drywall construction.

This ability to tailor privacy levels across the office is a game-changer for supporting different work styles. To see how this fits into the bigger picture, you can learn more about how office trends boost employee productivity and help create a better work experience for everyone.

The Building Blocks of a Modular Office

Knowing the benefits of modular furniture is one thing, but the real fun begins when you see the actual pieces that make up this adaptable ecosystem. Don’t think of it as just buying a desk; it’s more like putting together a custom toolkit for your office. Every component, every “building block,” is made to fit together, giving you the power to build a workspace that’s a perfect match for your team.

So, what are these core components? They’re the versatile elements that let you build, adapt, and rebuild your office without the cost and headache of traditional construction. From lively collaboration hubs to quiet focus zones, these are the pieces that form the foundation of a truly flexible office.

Modular Cubicles and Workstations

The cornerstone of any modular office is the cubicle or workstation system. You can forget the old, soul-crushing cubicle farms with their monolithic gray walls. Today’s modular cubicles are sleek, incredibly customizable, and built for how people actually work now. They are your primary tool for carving out individual workspaces and defining team areas.

These systems are made of interlocking panels, work surfaces, and storage units that you can snap together in endless configurations. You can set up open-plan benching for a sales team that thrives on buzz, or you can build out stations with higher walls for an accounting department that needs to buckle down. And because nothing is permanently fixed, bringing in a new workstation for a new hire or rearranging a whole cluster of desks can be a simple weekend project.

Demountable Walls for Privacy on Demand

One of the most powerful building blocks in the toolkit is the demountable wall. These are non-load-bearing, movable wall systems—often made of glass—that let you create completely private offices or conference rooms without needing a contractor to put up drywall, studs, and paint. They deliver the same acoustic privacy as a traditional room but with the freedom to be moved or taken down as your needs shift.

This is a complete game-changer for any business trying to strike a balance between open, collaborative zones and quiet spaces for confidential meetings or deep-focus work. You can get a better sense of how these systems work by looking into modular office walls, which are quickly becoming a staple in smart office design. Best of all, unlike drywall, you can take these walls with you if you ever move, protecting your initial investment.

This image really drives home the core benefits these building blocks deliver.

A diagram illustrating the benefits of modular furniture: flexibility, scalability, and cost savings.

As you can see, the key advantages—flexibility, scalability, and cost savings—are all interconnected. They work together to support a smarter, more agile workplace strategy.

Configurable Desks, Tables, and Seating

Beyond the walls and cubicles, the furniture inside the space has to be just as adaptable. This category covers a whole range of components designed for movement and multiple uses.

  • Height-Adjustable Desks: These let employees easily switch between sitting and standing, which is great for health and accommodating different work styles.
  • Mobile Tables: Think lightweight tables on wheels that can be quickly rolled together for a training session, team huddle, or breakout meeting.
  • Modular Seating: This could be anything from sectional sofas in the reception area to soft seating pods that can be arranged to create casual meeting spots right in the middle of an open floor plan.

For a workplace that’s truly dynamic, smaller elements like standing desk converters can be fantastic building blocks, adding another layer of easy personalization to each workstation.

Integrated Power and Data Management

A modern office runs on technology, and a well-designed modular system plans for this right from the start. The final, and arguably most critical, building block is integrated power and data management. Modular furniture panels often come with built-in channels or “raceways” that neatly tuck away all the electrical wiring and data cables.

This isn’t just about looking tidy; it’s about pure function and safety. Integrated cabling gets rid of trip hazards and makes it incredibly simple to get power and network access right to each desk without a spiderweb of extension cords snaking across the floor.

When you decide to reconfigure your layout, the power and data infrastructure moves right along with the furniture. This pre-wired capability is what makes a modular office truly plug-and-play. It allows your business to adapt its physical space without being boxed in by the location of fixed electrical outlets. Together, all these building blocks create a cohesive system that lets you shape—and reshape—your workspace as your company grows.

Designing Your Custom Modular Workspace

Once you get a feel for the individual building blocks, you get to step into the role of an office architect. This is where the real potential of modular furniture comes alive—it’s not just about pushing pieces around, but about creating a workspace that’s a direct reflection of your team’s DNA and your company’s culture. Customization is what turns a pile of parts into a fully functional, branded environment.

This process is so much more than just picking a desk. It’s about intentionally engineering your floor plan for different work styles, from heads-down focus sessions to dynamic group brainstorms. By mixing and matching components, you can build a varied landscape inside your office that supports every single workflow.

Person holds a tablet showing a floor plan, surrounded by fabric samples and miniature modular office models.

Engineering Different Levels of Privacy

One of the first—and most important—decisions is figuring out the right privacy level for different teams and roles. A one-size-fits-all approach almost never works. Modular systems give you the tools to create a whole spectrum of privacy, all within the same office.

  • Low-Privacy Benching: Perfect for high-energy sales or creative teams. Benching systems use low or no panels at all to encourage constant communication and a shared sense of purpose.
  • Mid-Privacy Workstations: By using panels around 42-53 inches high, you can give seated privacy to employees in roles like customer service or marketing. This lets them focus but still easily see and talk to colleagues when they need to.
  • High-Privacy Cubicles: For jobs that demand deep concentration or confidentiality, like accounting or HR, taller panels of 65 inches or more create a serious acoustic and visual barrier. This design kills distractions and supports focused work.

For a deeper dive into making the most of a tight footprint, check out our guide on modular office furniture for small spaces. It’s packed with practical tips on maximizing every square foot without giving up an ounce of function.

Choosing Finishes and Materials

The look and feel of your office have a huge impact on morale and how clients see your brand. Modular furniture opens up a massive palette of finishes and materials, letting you line up your workspace with your company’s identity. You’re definitely not stuck with one color or texture.

You can customize:

  • Panel Fabrics: Pick from dozens of colors and patterns to match your brand, from calm, neutral tones to bold colors that create an energetic vibe.
  • Work Surfaces: Choose from a huge variety of laminates, including classic wood grains, solid colors, and modern patterns to fit your aesthetic.
  • Trim and Accents: Even the metal trim on panels and legs can often be specified in different finishes like black, silver, or white to pull the whole look together.

This level of detail ensures your office isn’t just a place to work, but a physical extension of your brand. It sends a powerful message to both your team and your visitors.

Integrating Storage and Technology

A great workspace is an organized one. Modular systems are brilliant at providing built-in storage solutions that keep clutter from taking over. You can add components like overhead flipper door units, mobile pedestals for personal items, or even full-height tower closets, all designed to fit seamlessly into the workstation.

It’s the same story with technology—planning for it is built right in. As you design your layout, you’ll specify exactly where power and data access points need to go. This proactive planning makes sure every employee has easy access to outlets for their computers and devices, all managed through clean, hidden channels inside the panels. No more messy extension cords tripping everyone up. Your office will be ready for the demands of a modern, tech-heavy workflow from day one.

Ready to see how all this works in the real world? The best next step is to start experimenting yourself. We invite you to explore the Cubicle Designer tool from Cubicle By Design, where you can move from learning to doing. This interactive tool lets you build a custom layout, select finishes, and bring your vision for the perfect modular workspace to life.

The Smart Investment in Modular Furniture

Choosing modular furniture isn’t just a design choice—it’s a strategic financial move that pays you back for years. While the upfront cost might look similar to a traditional office build-out, the real story unfolds over the long haul. That’s where modular systems pull way ahead, delivering a serious return on investment (ROI).

The secret is looking at the total cost of ownership. Traditional construction and fixed furniture have a nasty hidden price tag: the staggering expense of making changes later on. When your company needs to shuffle the floor plan, you’re often stuck with demolition, new construction, and the dead loss of tossing out perfectly good furniture.

Modular furniture completely sidesteps that wasteful “rip and replace” cycle. Since every single piece is designed to be taken apart and put back together in a new way, your initial purchase becomes a permanent asset. This incredible adaptability makes future layout changes faster, cheaper, and way less disruptive to your daily business.

Calculating the Long-Term ROI

The financial upside becomes crystal clear once you look past the first invoice. The real ROI of modular furniture comes from its power to adapt to your business as it grows and changes, all without hitting you with huge new expenses.

Think about these factors:

  • Slashed Reconfiguration Costs: Tweaking a modular layout takes just a fraction of the labor and material costs you’d face with a traditional renovation. You’re simply rearranging assets you already own.
  • Minimal Downtime: An office overhaul can happen in a few hours or over a weekend, not drag on for weeks. Your team stays productive and focused on their work.
  • Asset Retention: Modular parts are assets you can pack up and take to a new office, holding onto their value. Drywall and built-in fixtures? They just get demolished and become a total loss.

By investing in a system that can evolve with you, you’re essentially future-proofing your workspace against the costs of growth, reorganization, and shifting work styles. It’s a proactive way to manage your facility that treats your office furniture like the flexible, long-term asset it is.

The Powerful Sustainability Angle

Beyond the direct savings, modular furniture brings a powerful sustainability benefit to the table, which fits perfectly with modern corporate responsibility. Being able to reuse and reconfigure components drastically cuts down on the amount of waste headed for the landfill. Instead of junking old desks and partitions, you just give them a new purpose in a new layout.

This sustainable approach is a huge reason modular furniture is taking over globally. These solutions slash waste by design, helping companies hit their broader sustainability targets. In fact, manufacturers have reported 20-30% material savings just by using modular production methods, which really shows how efficient the whole system is.

This commitment to sustainability isn’t just good for the planet—it’s good for your brand. It shows a forward-thinking attitude that connects with employees and customers who care about being environmentally conscious. Of course, the installation is a key part of this smart investment, and you’ll want to know what to expect. For more on the logistics, you can learn about our professional office furniture installation process and how we make the transition totally seamless.

Your Top Questions About Modular Office Furniture, Answered

Making a big change to your office layout is a major decision, and it’s smart to have questions. You’re investing in your company’s future, and you need to feel confident about the path forward.

To give you that clarity, we’ve pulled together straight answers to the questions we hear most often from business owners and facilities managers. Think of this as a no-nonsense guide to the practical side of modular furniture, from setup and durability to acoustics and tech.

How Big of a Hassle Is Installation and Reconfiguration?

One of the most common myths we have to bust is that modular systems are complicated to put together. The reality is, a professional office furniture installation is incredibly fast and clean—especially when you compare it to the dust, noise, and weeks (or months!) of disruption that come with traditional construction.

A skilled crew can build out an entire office in a fraction of that time, which means you get back to business with almost no downtime.

But the real magic happens when your needs change. Reconfiguration is what these systems were born to do. What would be a massive renovation project with drywall and contractors becomes a simple weekend job for a small team. Your people can leave on Friday and come back Monday to a space that’s perfectly set up for their new workflow.

Is This Stuff Really Durable Enough for a Busy Office?

Absolutely. There’s a lingering concern that “modular” is just a code word for “flimsy,” but that couldn’t be further from the truth. Commercial-grade modular furniture is engineered specifically for the wear and tear of a high-traffic workplace.

We’re talking heavy-gauge steel frames, high-pressure laminates that resist scratches and spills, and tough fabrics designed to look good for years. The manufacturing standards for quality systems are incredibly strict, often blowing past what you’d find in conventional office furniture.

Here’s the key difference: reparability. If someone damages a single panel or a desktop, you just swap that one piece out. You don’t have to replace the entire workstation. This not only makes modular a smarter financial choice long-term, but it’s also a more sustainable one.

This built-in durability means your investment is secure, giving you a solid foundation for your office for years to come.

Can Modular Systems Keep Up With Our Tech Needs?

Modern modular systems are built from the ground up with technology in mind. You can forget about the messy jungle of extension cords and power strips you see in older offices. These systems are designed with built-in channels and raceways that hide all your power and data cabling.

This integrated approach delivers a few huge wins:

  • Convenient Access: Power outlets and data ports are brought right to the desk surface, exactly where your team needs to plug in laptops, charge phones, and connect to the network.
  • A Clean Look: All that wiring is tucked neatly out of sight, keeping your office looking professional and uncluttered.
  • A Safer Space: Getting loose cables off the floor eliminates one of the most common trip hazards in any office.

This isn’t an afterthought; it’s a core feature. It ensures your office isn’t just flexible in its layout, but also fully capable of supporting your team’s tech.

How Does Modular Furniture Help with Office Noise?

Noise is one of the single biggest complaints in today’s offices. A wide-open floor plan is an acoustic nightmare, but a modular layout gives you the power to control the soundscape.

The panels themselves are your first line of defense. You can specify them with sound-absorbing materials and choose different heights to create physical barriers that cut down on ambient chatter. Putting up taller, fabric-covered panels around a team that needs to focus can make a world of difference.

And for spaces where confidentiality is key, like HR or executive offices, you can go a step further. We can build in demountable walls or even full-height private office cubicles to create truly sound-insulated rooms—all without the cost and permanence of building with drywall. It’s all about finding that perfect balance between collaborative buzz and quiet concentration.


Ready to see how a modular approach could reshape your workspace? The experts at Cubicle By Design are here to help you plan, design, and install a flexible office that’s built for your business. Visit our homepage to see our solutions and start building a better office today.

Read More

Office Glass Partition Walls: Modern, Acoustic, and Cost-Effective Solutions by Cubicle By Design

Office glass partitions are room dividers made from glass panels, designed to create separate offices, meeting rooms, or zones within a larger space without sacrificing an open, light-filled feeling. They are a fantastic modern alternative to traditional drywall, offering far more flexibility and a much cleaner look. At Cubicle By Design, we help businesses leverage these systems to build dynamic and efficient workspaces.

Reimagining the Modern Workspace with Glass Partitions

Walk into a cutting-edge office today, and you’ll likely notice something different. The days of stuffy, solid-walled offices and isolating cubicles are fading fast, replaced by something brighter, more connected, and a lot more collaborative. Office glass partition walls are at the heart of this shift.

These aren’t just panes of glass; they’re strategic tools that fundamentally change how teams work together. They strike that perfect balance between the modern desire for open, light-filled spaces and the age-old need for quiet, focused work. Think of them as the key to unlocking a more dynamic and energized office. At Cubicle By Design, we’ve seen firsthand how these systems can turn a monotonous floor plan into a motivational powerhouse.

Why Glass Walls Are a Cornerstone of Modern Office Design

The move toward glass partitions isn’t just some passing fad—it’s a direct response to what today’s workforce needs to succeed. Companies are ditching opaque barriers that create silos, opting instead for solutions that foster a sense of community and well-being. This isn’t a new idea, but it’s gained serious momentum over the last decade.

In fact, the adoption of glass partitions has become a defining feature of modern office design. By 2023, over 40% of corporate offices worldwide had already integrated these systems. This isn’t just a local trend; it’s a global embrace of glass for its ability to promote both transparency and pure functionality. You can discover more insights on the glass partition market here.

By allowing natural light to flow deep into an office, glass walls don’t just cut down on energy bills—they make people feel better. Studies have consistently shown that good access to natural light can reduce eye strain, fight off afternoon drowsiness, and even cut down on headaches.

The Strategic Benefits Beyond Aesthetics

While they look incredibly sleek, the real value of glass walls goes far beyond just good looks. They offer seriously practical solutions to common workplace problems, making them a smart investment for any business looking to improve its space. These systems are a huge part of successful workplace design trends that put both employee experience and business efficiency first.

To make it simple, here are the core advantages in a nutshell.

Key Benefits of Glass Partition Walls at a Glance

Benefit Impact on Your Office
Enhanced Collaboration Visual connection encourages spontaneous chats and strengthens team spirit.
Improved Flexibility Modular systems can be moved and reconfigured as your company evolves.
Acoustic Privacy Double-glazed or laminated glass creates quiet zones without total isolation.
Increased Natural Light A brighter space leads to a healthier, happier, and more productive team.

Ultimately, glass partitions do more than just divide a room. They help you build a more adaptable, collaborative, and human-centric workplace.

Choosing Your Style: Framed vs. Frameless Systems

Picking between framed and frameless office glass partitions is a lot like choosing between a classic framed painting and a sleek, modern canvas print. They both look fantastic, but they create entirely different moods in a room. This isn’t just a minor detail; it’s a foundational choice that will shape your office’s atmosphere, workflow, and overall vibe.

Framed systems give you a strong, structured look—think industrial or traditional—while frameless systems deliver that seamless, all-glass aesthetic that feels open and cutting-edge. To figure out which is right for you, we need to dig into the practical differences in how they look, how they’re installed, how well they block sound, and what they cost.

The Bold Statement of Framed Glass Systems

Framed glass partitions are the workhorses of office design. They’re known for being incredibly durable and having a strong visual presence. The metal framing, which is usually aluminum, outlines each glass panel and creates a distinct grid-like pattern that can define a space with real authority and style.

You can think of these systems as having a visible skeleton. This structure adds to that classic or industrial feel, but it also provides serious support, making it a great choice for high-traffic hallways and busy common areas. The frames also create a tighter seal around the glass, which usually means better acoustic performance. This makes them perfect for carving out quiet spaces, like our Private Office Cubicles.

The Minimalist Appeal of Frameless Glass Walls

If your goal is to maximize natural light and create the illusion of a much bigger space, frameless glass partitions are the answer. These systems use the bare minimum of hardware. Glass panels meet edge-to-edge, held together by discreet clamps and nearly invisible seals. The end result is a stunning, uninterrupted wall of glass that feels both weightless and incredibly sophisticated.

This ‘all-glass’ look is a huge hit in modern office design because it builds a culture of transparency and connection. It lets sunlight pour across the entire floor plan, and studies have shown that more natural light can reduce employee drowsiness by 56% and headaches by 63%. It’s the go-to style for companies wanting to foster collaboration without putting up solid, view-blocking walls.

The demand for this clean look is so high that frameless glass partitions now command 42.8% of the market share. Companies are redesigning their spaces to find that sweet spot between collaboration and privacy, and this style nails it.

This decision tree can help you connect your main goal—whether it’s more light, better focus, or easier collaboration—with the right type of system.

As the flowchart suggests, if flooding your space with light is the top priority, a frameless system is your best bet. On the other hand, framed options are the clear winner for creating focused, quiet zones.

Framed vs. Frameless Glass Partitions Comparison

To make the choice even clearer, here’s a side-by-side comparison of the two systems. Think of this as a quick cheat sheet to see which style’s pros and cons align best with your office’s needs.

Feature Framed Glass Partitions Frameless Glass Partitions
Aesthetics Structured, bold, industrial look with visible aluminum frames. Sleek, minimalist, ‘all-glass’ appearance with minimal hardware.
Acoustics Generally superior soundproofing due to better seals from the frame. Good sound control, but the seals between panels are less robust.
Light Flow Excellent light transmission, but frames create visual breaks. Uninterrupted flow of natural light, making spaces feel larger.
Durability Extremely durable and well-suited for high-traffic areas. Very durable, but edges can be more vulnerable to direct impact.
Cost Often more budget-friendly for standard configurations. Can be more expensive, but installation may be faster.
Best For Private offices, conference rooms, and areas needing high noise control. Open-plan environments, collaborative spaces, and modern designs.

Ultimately, both are fantastic options. The decision comes down to what you’re trying to achieve: the robust, quiet focus of a framed system or the bright, open transparency of a frameless one.

Making the Right Choice for Your Space

Your final decision will come down to balancing looks, function, and budget. Here’s a quick breakdown to help you think it through:

  • For Acoustic Privacy: If keeping sound in (or out) is your top concern for meeting rooms or executive offices, a framed system is almost always the better choice. Double-glazed framed partitions offer the best soundproofing you can get.
  • For Maximum Openness: If you want a bright, airy, and visually connected office, a frameless system simply can’t be beaten. It’s the best way to make a smaller space feel much larger and more welcoming.
  • For Budget Considerations: Framed systems can sometimes be a bit easier on the wallet, especially for standard layouts. However, the installation for frameless systems can be faster, which might help balance out the total project cost.
  • For Installation Complexity: No matter which you choose, professional installation is a must to ensure everything is safe, secure, and performing as it should. To get a feel for the process, take a look at our guide on glass architectural wall installation.

The right system isn’t just a physical divider; it’s a tool that helps shape your company culture. A frameless wall sends a message of transparency and collaboration, while a framed wall can signify stability and focus.

The best way to really know what will work is to see it for yourself. You can play around with different layouts and see how these styles look in your space with our free Cubicle Designer tool. It’s a great way to turn an idea into a solid plan for your new workspace.

Mastering Acoustics and Privacy in Glass Offices

An open office aesthetic is fantastic, but it shouldn’t come at the cost of a chaotic, noisy environment. While office glass partition walls are celebrated for creating bright, connected workspaces, their real magic is how they deliver acoustic serenity and visual privacy right where you need it most. It’s all about choosing the right type of glass to transform an open floor plan into a collection of calm, focused zones.

Young man working on a laptop in a modern office with bright office glass partition walls behind him.

The key to unlocking this peace and quiet is a term you’ll hear a lot: Sound Transmission Class (STC) rating. Think of it as a noise-canceling score for your walls. The higher the STC number, the better the partition is at stopping sound in its tracks.

A standard, single-pane glass wall might have an STC rating in the low 30s. That’s enough to muffle conversations, but you’ll still hear what’s going on. But with the right technology, glass partitions can hit STC ratings of 40 or higher, putting them on par with traditional drywall and ensuring confidential conversations stay that way.

How Different Glass Types Control Sound

Not all glass is created equal when it comes to acoustics. The secret to serious sound control is in how the glass panels themselves are built. Different techniques are used to disrupt and absorb sound waves before they can travel from one room to the next.

Here are the main types you’ll run into:

  • Standard Tempered Glass: This is your baseline. It’s a strong, durable safety glass, but it offers only minimal acoustic help. It’s best for areas where noise just isn’t a major concern.
  • Laminated Acoustic Glass: This is a clever sandwich. It features a thin, invisible layer of plastic (polyvinyl butyral, or PVB) between two panes of glass. This middle layer acts as a vibration-dampening core, making it much better at blocking mid-to-high frequency sounds—like human speech.
  • Double-Glazed (Insulated) Glass: This system is the heavy hitter. It uses two separate panes of glass with an air or gas-filled gap in between. That gap creates a powerful insulating barrier that’s exceptionally good at blocking a wide range of sound frequencies, making it the top choice for executive offices or boardrooms.

The right choice really depends on the needs of the space. For a bustling sales floor, standard glass might be fine. But for sensitive HR meetings or legal consultations, investing in double-glazed systems is a must.

A well-designed office uses a mix of acoustic solutions. A high-STC glass wall for a meeting room combined with sound-absorbing ceiling tiles and carpets in the open area creates a balanced acoustic environment for everyone.

More Than Just Sound: Visual Privacy Solutions

Acoustic control is only half the battle. Visual privacy is just as important for creating comfortable and secure workspaces. Fortunately, glass partitions offer a whole spectrum of creative solutions to control who sees what, without having to resort to clunky blinds or curtains.

These options let you dial in the perfect level of privacy, from subtle obscurity to complete opacity. You can make sure your team has the confidentiality it needs to perform at its best. For a deeper dive into creating secluded spaces, our guide on achieving office cubicle privacy offers even more strategies.

Modern Solutions for Visual Privacy

Privacy Type How It Works Best For
Frosted or Etched Glass The glass is sandblasted or acid-etched to create a translucent, blurred effect. Conference rooms and individual offices where you want to hide details but still let light stream through.
Decorative Film A vinyl film with patterns, gradients, or branding is applied directly to the glass. Adding a layer of design and branding while providing partial or full visual privacy in a cost-effective way.
Switchable Smart Glass An electrical current passes through a film, turning the glass from clear to opaque with the flick of a switch. High-tech boardrooms and executive suites where on-demand privacy is needed for confidential meetings.

By combining advanced acoustic glass with these smart visual privacy options, you can design an office that feels open and collaborative yet provides the quiet and confidentiality that productive work demands. It’s this strategic blend that makes a workspace not just beautiful, but truly functional.

Strategically Planning Your Office Layout

Putting up office glass partition walls isn’t just about slicing up a room; it’s about designing a smarter, more productive workflow. A well-planned layout is more than just good looks—it actively supports how your team works day-to-day, encourages the right kinds of conversations, and shapes an environment where people can truly focus. Think of it as the blueprint for turning a basic floor plan into a dynamic, efficient workspace.

Modern office interior featuring bright office glass partition walls, a meeting room, and workstation cubicles.

The first step is to start thinking in zones, not just rooms. Every office has different kinds of activity, and your layout needs to serve all of them. By placing glass walls strategically, you can define these areas without throwing up solid barriers that kill collaboration and block off the space.

Designing Functional Zones with Glass

Your real goal here is to create a seamless flow between different work modes. Glass partitions are the perfect tool for the job. They give you the separation you need while keeping that feeling of openness and connection across the entire office.

Here’s a practical way to think about creating your key zones:

  • Collaborative Hubs: These are your high-energy spots for brainstorming and teamwork. You can use clear glass walls to enclose these spaces near common areas. This keeps the sound from spilling out but lets the creative energy stay visible, which can actually inspire others.
  • Deep Work Areas: Everyone needs a quiet place to get into the zone. Try to position these areas away from high-traffic paths and use acoustically rated glass partitions to cut down on distractions. Adding frosted or etched glass can give an extra layer of visual privacy without making the space feel dark. Consider layouts with our workstation cubicles to maximize focus.
  • Formal Meeting Rooms: When it’s time for client meetings or sensitive discussions, double-glazed glass walls are the way to go for maximum acoustic privacy. It sends a message of professionalism and security while still feeling connected to the rest of the office.

This kind of thoughtful space division is what makes a workspace truly successful. To really nail it, it’s best to consider the entire office building layout plan and see how glass elements fit into the bigger picture.

Harnessing Natural Light for a Better Workplace

One of the biggest wins you get from planning with glass is the ability to pull natural light deep into your office. Traditional walls are notorious for creating dark interior hallways and offices, making you rely on artificial lighting that can cause eye strain and that classic afternoon slump.

Glass partitions, on the other hand, act like channels for sunlight, letting it flood every corner. This one simple change can have a massive impact on both your team’s well-being and your bottom line. It’s been shown time and again that access to natural light boosts mood, sharpens focus, and even reduces absenteeism. It all adds up to a healthier, more productive crew.

The rise of rapid urbanization has made office space a premium commodity. By using glass, you can create a layout that feels expansive and bright, even in a smaller footprint.

In fact, you can see this trend in action—around 80% of new urban commercial buildings are now designed with glass partitions in mind. This approach allows for an average 20% space optimization compared to solid walls, which is a huge advantage when you’re trying to keep real estate costs down.

The Power of Modularity and Future-Proofing

Maybe the smartest reason to go with glass partition systems is their modularity. Unlike drywall, these walls aren’t a permanent decision. They are designed to be demountable, which means you can reconfigure them as your company grows and your needs evolve.

This flexibility is a massive asset. If a department suddenly expands or you need to carve out a new project room, the layout can be changed over a weekend with very little mess or disruption. This makes glass partitions a smart, sustainable investment that grows right along with your business.

For help creating a layout that works for you now and in the future, explore our expert office space planning and design services.

Navigating Costs, Installation, and Long-Term Care

So, let’s talk about the practical side of things. You see the appeal of office glass partition walls and how they can transform a space, but what’s the real story when it comes to the investment? From the initial quote to the installation day and beyond, getting a handle on the costs and logistics is key to smart planning. This is where we break down the numbers and the process, so you can feel confident your glass partitions will deliver value for years to come.

Breaking Down the Costs of Glass Partitions

The final price for a glass wall system isn’t a simple, one-size-fits-all number. It’s more of a recipe, where your design choices, performance needs, and the project’s complexity are all key ingredients. The best way to get a firm number is always a custom quote, but understanding what drives the cost will help you set a realistic budget from the get-go.

A few big factors will shape your total investment:

  • System Type: Frameless systems often carry a higher material cost because they require thicker, perfectly finished glass. On the flip side, their installation can sometimes be quicker, which helps balance out the overall project price.
  • Glass Specifications: The type and thickness of the glass are major variables. A standard single-pane tempered glass is your most budget-friendly option. If you need serious soundproofing or high-tech features, you’ll be looking at double-glazed acoustic glass or switchable smart glass, which represent a more significant investment.
  • Hardware and Finishes: Even the little things matter. The style and finish of frames, door handles, and hinges play a part. A standard brushed aluminum finish is going to be more economical than a custom powder-coated color or premium designer hardware.
  • Customization: Anything outside the standard playbook—like curved glass, custom-etched logos, or extra-tall panels—will naturally add to the final cost.

It’s easy to get fixated on the upfront price, but don’t forget the long-term ROI. Glass partitions are incredibly durable and low maintenance. You won’t be spending money patching and repainting drywall every few years, and their flexibility saves a fortune on future reconfigurations.

The Critical Role of Professional Installation

Here’s a piece of advice I can’t stress enough: installing glass partitions is a job for the pros. This is not a DIY weekend project. While it might look straightforward, getting a flawless, safe, and secure installation requires a level of precision and expertise that only comes with experience.

Professional installers are trained to handle every detail, from taking hyper-accurate site measurements to safely maneuvering heavy glass panels into place. They ensure every seal is perfectly aligned to block sound leaks and that the entire structure is solid. A proper installation is the difference between a system that looks incredible and performs perfectly for a decade, and one that causes headaches down the road.

At Cubicle By Design, our teams live and breathe this stuff. To get a better sense of what’s involved, you can learn more about our professional office furniture installation services.

Long-Term Care and Simple Maintenance

One of the best things about office glass partition walls is how ridiculously easy they are to take care of. Forget about drywall that gets scuffed, dented, and needs constant touch-ups. Glass is a tough, non-porous surface that asks for very little in return.

Keeping your partitions looking brand new is simple:

  1. Regular Cleaning: A simple mix of water and mild soap, or just a standard glass cleaner, is all you need. Use a soft, lint-free cloth to avoid streaks. Just steer clear of abrasive powders or scouring pads that could scratch the surface.
  2. Hardware Checks: Every once in a while, give the door handles, hinges, and other hardware a quick check to make sure everything is tight and secure. A quick turn of a screwdriver is usually all it takes.
  3. Seal Inspection: About once a year, take a quick look at the seals between the glass panels and where they meet the floor and ceiling. This makes sure the soundproofing is still holding up perfectly.

That’s pretty much it. With just a tiny bit of effort, your glass partitions will maintain their clean, modern look for years, making them one of the most sustainable and cost-effective choices you can make for a modern office.

Understanding Safety and Building Code Essentials

When you’re planning a modern office, it’s easy to get caught up in the look and feel of things like office glass partition walls. And while that’s the exciting part, safety is the foundation every great installation is built on. Diving into safety standards and building codes might sound intimidating, but it’s actually pretty straightforward once you know what to look for.

Getting this right isn’t just about ticking boxes. It’s about creating a genuinely secure environment for your team and protecting your business from liability down the road.

The heart of glass partition safety comes down to the glass itself. Your everyday window glass—known as annealed glass—has absolutely no place in an office wall. Regulations require specialized safety glass that’s engineered to prevent serious injury if it ever breaks. Working with an expert like Cubicle By Design means you can rest easy knowing every single panel we install meets these critical standards.

The Non-Negotiable Role of Safety Glass

Think of safety glass as an insurance policy. You hope you never need it, but you absolutely have to have it. Building codes demand its use in partitions, doors, and any large glass features where people might accidentally bump into it.

You’ll mainly come across two types:

  • Tempered Glass: This glass goes through a serious heating and rapid cooling process that makes it four to five times stronger than regular glass. But its real magic is in how it breaks. Instead of creating dangerous, sharp shards, it shatters into small, dull, pebble-like pieces that are far less likely to cause harm.
  • Laminated Glass: This is basically a glass sandwich. It’s made of two or more layers of glass fused together with a tough plastic interlayer (PVB). If laminated glass cracks, that interlayer does an amazing job of holding all the fragments in place, keeping the barrier intact and preventing glass from scattering everywhere.

Decoding Fire Ratings and Compliance

Beyond impact safety, fire resistance is another huge deal, especially in commercial buildings. Certain walls, particularly those along escape routes, might need to have a specific fire rating. This rating tells you exactly how long a partition can hold back a fire and stop it from spreading.

Fire-rated glass and framing systems are designed to contain a fire for a set amount of time—like 20, 45, or 60 minutes—giving everyone precious time to evacuate safely. When you’re picking materials, even decorative films for the glass, you have to be sure they don’t compromise the wall’s fire rating. It’s always a good idea to get familiar with understanding UL fire safety standards to make sure everything is compliant.

Ensuring Accessibility for Everyone

A modern workspace has to work for everyone. The Americans with Disabilities Act (ADA) lays out clear rules to make sure people with disabilities can move through and use the office without barriers. For glass partitions, this usually means focusing on a few key things:

  • Clearance Requirements: Doorways need to be wide enough for easy wheelchair access.
  • Door Hardware: Handles and levers should be easy to use with one hand, without needing to grip them tightly.
  • Visual Cues: Large, clear panes of glass need some kind of marking or “distraction graphic” at specific heights so people don’t accidentally walk into them.

Navigating all these codes and regulations is a core part of what we do. From our modular cubicles to complex glass wall systems, we make sure every component aligns with local building codes and ADA standards. The end result is a workspace that’s not only beautiful but also safe, compliant, and welcoming for every single person on your team.

Got Questions About Office Glass Walls? We Have Answers.

Making the move to a more modern, open-feeling office is a big decision, and it’s totally normal to have questions. When you’re thinking about integrating office glass partition walls, you need clear, straightforward answers. We’ve gathered the most common questions we hear from clients to give you the practical info you need to move forward with confidence.

Think of this as a quick-reference guide to reinforce some of the key ideas we’ve covered, helping you find what you need fast.

How Good Are Glass Partitions at Blocking Office Noise?

They are incredibly effective, but only if you choose the right type of glass. A basic, single pane of glass will only offer minimal sound reduction, but the specialized options can make a world of difference. For instance, acoustic glass—like laminated or double-glazed panels—can hit an STC rating of 40 or higher, which is right up there with traditional drywall.

The real secret is matching the glass specification to what the room will be used for. It’s also critical to have a professional installation that properly seals up any potential sound leaks around the frames and joints.

A lot of our clients are surprised when they learn that a double-glazed glass wall can be just as good at blocking sound as a standard insulated stud wall. It’s all about creating an air gap that disrupts the sound waves, which just goes to show you don’t have to sacrifice a quiet space for an open feel.

Are Office Glass Partition Walls Safe and Durable?

Absolutely. Any reputable supplier, including Cubicle By Design, will only use tempered or laminated safety glass, which is what building codes demand. These materials are specifically engineered to handle the demands of a commercial environment.

Tempered glass is roughly five times stronger than regular glass and is designed to crumble into small, dull-edged pieces if it ever breaks, which dramatically reduces the risk of injury. Laminated glass has a polymer layer sandwiched inside that holds the pane together even if it shatters, keeping the barrier intact. Both are built to handle the daily rigors of a busy office, from accidental bumps to frequent cleaning, making them a safe and long-lasting choice.

Can We Move or Reconfigure Glass Partitions Later On?

Yes, and this flexibility is honestly one of their biggest selling points. Many systems, often called “demountable walls,” are designed from the ground up to be non-permanent fixtures. This means they can be carefully taken down and reinstalled in a new layout with very little disruption, dust, or waste.

This modular design makes them a smart, sustainable investment, especially for businesses that expect to grow or change how they use their space. You can adapt your office as your team evolves without the high costs and mess that come with traditional demolition and construction.

How Much Natural Light Will We Actually Get with Glass Walls?

Glass partitions are simply unmatched when it comes to maximizing natural light in an office. A clear, full-height glass wall allows pretty much all the available sunlight to flow deep into your space, brightening up interior areas that would otherwise be stuck with artificial lighting all day.

This doesn’t just create a more vibrant and welcoming atmosphere; it has real, tangible benefits for your team. Studies have shown that employees who get more natural light report 56% less drowsiness and 63% fewer headaches. It’s a simple change that can lead to a healthier, more alert, and more productive group of people.


Ready to create a brighter, more flexible, and productive workspace? The experts at Cubicle By Design can help you plan, design, and install the perfect office glass partition walls for your unique needs. Explore our solutions and see how we can transform your office.

Explore our full range of modular cubicles and office solutions today!

Read More

Standard Cubicle Dimensions: Your Guide to Efficient Office Layouts

Walk into any office, and you’ll see that there isn't just one "standard" cubicle size. But if you look closely, you'll start to notice a few common footprints pop up again and again: 6'x6', 6'x8', and 8'x8'. The right choice always comes down to striking a balance between giving employees enough personal space and making the most of your office's square footage. For many roles, that 6'x6' size often hits the sweet spot.

Decoding Standard Cubicle Dimensions

Picking the right cubicle size is one of those foundational decisions in office design. It's a choice that ripples out, affecting everything from day-to-day productivity and your budget to the overall feel of your company culture. It’s way more than just a measurement—it’s about defining personal territory and setting the stage for collaboration.

When we talk about "standard" sizes, we're not talking about a mandatory, one-size-fits-all dimension. Instead, it's a range of common, field-tested footprints that have proven to work for different business needs. Getting a handle on these dimensions is the first real step toward building an office that just works. A layout that’s too tight can suffocate creativity, but one that’s too spread out is just a waste of expensive real estate. The goal is to land on that perfect equilibrium that actually supports how your team gets things done.

At Cubicle By Design, we spend our days helping businesses work through this puzzle, offering a wide range of cubicles that can be dialed in for just about any need.

Key Factors in Cubicle Planning

Before you even start looking at specific footprints, it helps to step back and consider the three big-picture elements that will shape your entire layout. Each one plays a critical role in figuring out what "just right" looks like for your space.

  • Team Needs: Think about what your people do all day. A software developer drowning in monitors needs a lot more surface area than a call center agent who just needs a headset and a screen. The job dictates the space.
  • Square Footage: Your office's physical blueprint is a hard reality. You'll always want to fit in as many people as you comfortably can, but that can't come at the cost of cluttered walkways and no room to breathe.
  • Company Culture: Is your vibe open and collaborative? You might lean toward lower panels and cozier footprints to get people talking. If deep, focused work is the name of the game, you'll probably want taller walls and more generous stations for privacy.

This is why we think of cubicle planning as a blend of these three core pillars: your team, your space, and your culture.

As the map shows, a great layout isn't just about plugging in dimensions. It's about taking a holistic approach that makes sure your physical office is perfectly aligned with your company's goals and your team's workflow.

Common Cubicle Footprints and Their Ideal Use Cases

To make things a little easier, here's a quick rundown of the most common cubicle sizes and where they tend to fit best. Think of this as a starting point to help you match a footprint to a specific role or work style in your office.

Cubicle Footprint Common Dimensions (Feet) Primary Use Case Space Profile
Call Center / Touchdown 4'x4', 5'x5' For short-term tasks, call centers, or temporary "hot desks." Compact and efficient. Best for task-oriented roles requiring minimal equipment.
Standard Workstation 6'x6' The versatile all-rounder. Great for most administrative and professional roles. Balances personal space with office density. A true middle-of-the-road solution.
Management / Professional 6'x8' For managers or staff needing extra surface area for documents or meetings. Offers more room for storage, guest seating, and a larger work surface.
Executive / Engineering 8'x8' For executives or specialized roles (e.g., engineers) who need space for large plans. Generous and private. Provides ample room for multiple monitors, files, and meetings.

This table should give you a solid frame of reference. The key is to see these sizes not as rigid rules, but as flexible templates you can adapt to build a truly functional and comfortable workspace for everyone on your team.

Choosing the Right Cubicle Footprint for Your Team

Picking the right cubicle footprint is about a lot more than just looking at numbers on a floor plan. You've got to understand how different standard cubicle dimensions translate into actual, usable space for your employees. Each size really serves a different purpose, built for specific work styles and job demands.

The whole idea behind the modern cubicle started back in the 1960s, born from a desire to make workers more comfortable and productive with things like adjustable desks and panels that muffled sound. Back then, sizes were all over the map—from tiny 5'x5' stations for focused tasks all the way up to huge 9'x12' executive cubicles with high walls for total privacy. It just goes to show that office design has always been about adapting to how people work, and that's a principle we still lean on heavily today.

Matching Footprints to Job Functions

The most successful office layouts always match the cubicle size to what an employee does all day. Think of a 4'x4' or 5'x5' station as a cockpit—it’s compact, efficient, and perfect for high-volume jobs like call center agents or data entry clerks. These smaller footprints keep distractions to a minimum and give just enough room for the essentials, without a lot of extra surface space to get cluttered.

As job needs get bigger, so do the dimensions. The 6'x6' office cubicle is pretty much the industry go-to, and for good reason. It hits that sweet spot, offering plenty of room for a desk, a good chair, and some must-have storage like a file pedestal, all without eating up a ton of your floor space.

For managers or anyone who needs to spread out blueprints, review documents, or have quick one-on-one meetings, a 6'x8' or 8'x8' footprint starts to feel more like a "mini-office." These larger stations can easily handle L-shaped desks, a chair for a guest, and more storage, creating a private and productive space for getting deep work done.

Modern Alternatives to Traditional Cubicles

Of course, we're not just limited to the classic four-walled workstation anymore. Many modern offices are shifting to more open, collaborative setups. Benching systems, which are essentially long, shared desks with low or no dividers, are a fantastic option for dynamic teams that thrive on communication. They really encourage that back-and-forth and can be an incredibly space-efficient way to go.

Key Takeaway: The best footprint isn’t automatically the biggest one you can fit. The real goal is to line up the workstation's size with the actual demands of the job, making sure every single employee has the right amount of space to do their best work.

At the end of the day, whether you stick with traditional sizes or look at options like modern workstation cubicles, the decision has to be driven by how your team truly operates. Thinking through these factors will help you build an office that’s not just efficient, but genuinely supportive of your team's success.

How Panel Height Shapes Your Office Environment

If the footprint of a cubicle sets the physical boundaries, the panel height is what truly defines the experience. Think of it like this: the footprint is the property line, but the panel height is the fence. One tells you how much space you have, while the other dictates privacy, sightlines, and even sound levels.

Getting the height right is a critical decision. It directly shapes your office's atmosphere, tipping the scale between a space that buzzes with collaborative energy and one that hums with quiet, focused work.

, mid (53-54 inches), and high (65+ inches)—demonstrating different levels of privacy.")

Ultimately, it’s a balancing act between openness and enclosure. Each height tier serves a different purpose, and knowing the difference is the key to creating a space where your team can thrive.

Low Walls for Collaboration

Low-height panels, typically in the 39 to 42-inch range, are built to encourage interaction. An employee has complete privacy when seated, which is great for getting work done without seeing their neighbors.

But the moment they stand up, they can easily see and chat with colleagues across the office. We call this the "prairie dog" effect, and it’s perfect for dynamic teams that need frequent, spontaneous conversations. These low walls also give the office an open, airy feel, making the entire space feel larger and more connected.

Mid-Height Walls for a Balanced Approach

The most popular choice for a reason, mid-height panels usually stand between 53 and 54 inches. This is the Goldilocks height—it offers a fantastic blend of privacy and accessibility.

It's high enough to block sightlines to neighboring workstations whether you're sitting or standing, which cuts down on distractions and helps people concentrate. At the same time, it’s not so tall that it isolates team members, so you still maintain a sense of community. For a deeper dive, check out our guide on enhancing office cubicle privacy.

Key Insight: Mid-height walls are the versatile workhorse of office design. They successfully support individual focus without completely sacrificing the collaborative spirit of an open-plan layout.

High Walls for Maximum Privacy

When focus and confidentiality are non-negotiable, high-walled panels are the only way to go. At 65 inches or taller, these panels create a true sense of enclosure, almost like a mini-office within the larger workspace.

This setup is ideal for roles that handle sensitive information, require frequent phone calls, or involve deep, uninterrupted concentration. The tall panels do a much better job of dampening sound and providing total visual separation, creating a quiet sanctuary for employees. High-walled stations, like our private office cubicles, are the ultimate solution for maximizing focus and keeping workplace disruptions to a minimum.

Navigating Walkways and ADA Compliance

A great office layout is about more than just cramming in desks—it’s about creating a space where people can move around safely, easily, and without bumping into each other. The paths between your cubicles, often called walkways or circulation paths, are just as critical as the workstations themselves. Getting these right from the start ensures a smooth flow of traffic and, more importantly, keeps you in line with legal accessibility requirements.

If you skimp on these measurements, you’ll end up with a cramped, frustrating workspace and could even run into legal trouble. By baking accessibility into your plan from day one, you build an inclusive office that genuinely works for everyone on your team. This is a fundamental part of smart office space planning and design—making sure your layout is both practical and compliant.

Establishing Clear Circulation Paths

Not all walkways serve the same purpose. To map out an effective layout, it helps to think of them in three different tiers, each with its own minimum width. These guidelines are your best bet for preventing bottlenecks and creating a natural rhythm of movement throughout the day.

  • Minor Walkways: Think of these as the local streets—the paths between individual cubicles. They need to be at least 36 inches wide so a single person can walk through comfortably and to meet basic accessibility standards.
  • Intermediate Walkways: These are the collector roads that connect different clusters of cubicles or lead to shared equipment like the office printer. You’ll want to aim for 42 to 48 inches here to handle more frequent foot traffic.
  • Major Walkways: These are the main highways of your office, connecting entire departments or funneling people to exits and break rooms. These paths should be at least 60 inches wide, giving enough room for two people to pass each other and for easy wheelchair navigation.

Understanding Core ADA Requirements

The Americans with Disabilities Act (ADA) has very specific rules to make sure workspaces are accessible to employees with disabilities. Following these isn't just about checking a box for compliance; it's about building an equitable environment where everyone feels welcome. Trust us, planning for ADA from the get-go is a lot easier than trying to fix it later.

Key Requirement: Under ADA guidelines, all accessible routes must have a minimum clear width of 36 inches. This ensures a person using a wheelchair can get through the office without hitting any roadblocks.

Beyond just the width of the path, there are a few other critical numbers you need to build into your layout:

  • Turning Space: You need to leave a 60-inch diameter circle (or a T-shaped space) in common areas and at the end of dead-end aisles. This gives a wheelchair user enough room to turn around completely.
  • Accessible Desk Height: For accessible cubicles, the work surfaces have to be between 28 and 34 inches off the floor, with proper knee and toe clearance underneath.
  • Clear Floor Space: Make sure there's a 30-inch by 48-inch clear patch of floor in front of desks and storage, which allows someone in a wheelchair to pull up to it.

By carefully weaving these walkway and accessibility rules into your plans, you’ll design an office that isn't just efficient, but also safe, compliant, and genuinely inclusive for your entire team.

Integrating Power and Data into Your Cubicle Plan

Let's face it: a modern workstation is basically a tech hub. That means getting power and data to each desk isn't just a nice-to-have, it's non-negotiable. If you don't plan for your electrical needs from day one, you're setting yourself up for a nightmare of tangled extension cords, connectivity headaches, and a messy, unprofessional look.

The secret to a clean, functional setup lies in powered panels. These are cubicle walls with built-in channels, called raceways, that hide all the electrical and data wiring. This keeps cables safely tucked away and off the floor, so you don't have to worry about trip hazards. For a deep dive into the specifics, check out our complete guide on cubicle electrical setup.

At the heart of a good power plan is an organized approach to your wiring. Understanding the basics of structured cabling will ensure your office can handle today's technology and whatever comes next.

Power Feed Options and Planning

First thing's first: how are you getting power to the cubicles? You really have two main choices. You can use floor feeds, which pull power up from junction boxes set into the floor, or you can use ceiling feeds, which bring the wiring down from above using "power poles." The layout and construction of your building will usually make this decision for you.

Once you know your source, it's time to figure out how many outlets each person needs. A good starting point is to plan for at least four outlets per workstation. That covers the essentials: a computer, a monitor, a phone, and a personal device charger. For tech-heavy roles, you might want to bump that up to six or more.

Key Takeaway: Always, always overestimate your power and data needs. It is so much easier and cheaper to add extra capacity during the initial installation than it is to try and retrofit everything later on.

This focus on integrated tech is a world away from where cubicles started. Back in the 1980s, when personal computers were just taking off, you needed massive 10'x10' cubicles to house all the bulky equipment. As tech got smaller and collaboration became more important, footprints shrank to 8'x8' in the 1990s and then down to the common 6'x6' in the 2000s. The design shifted from simply making room for technology to truly integrating it into the workspace.

Bringing Your Office Layout to Life

This is where the magic happens. Moving from a flat floor plan to a tangible vision for your office is easily the most exciting step. All the careful thinking you've done about standard cubicle dimensions, panel heights, and walkway clearances finally comes together in a dynamic, virtual space.

Instead of just relying on sketches and a bit of guesswork, you can now use an interactive tool to build, test, and tweak your entire office layout before you commit to a single thing. Taking this digital-first approach helps you dodge costly measurement mistakes and ensures the final design actually works for your team.

Visualize with the Custom Cubicle Designer

The best way to get started is by jumping into the interactive Custom Cubicle Designer from Cubicle By Design. This tool is a game-changer. It lets you experiment with different workstation footprints, play with panel heights to find that perfect balance of privacy and collaboration, and arrange layouts to see exactly how they’ll fit your floor plan. To really take your cubicle arrangement to the next level, you can even pull in some fresh office interior designing ideas to create a space that’s truly inspiring.

This visual approach is also invaluable for getting everyone on the same page. When you can show stakeholders a realistic 3D model, it's so much easier for them to grasp the vision and give you meaningful feedback. It’s the best way to make sure the final layout is a perfect fit for the whole team.

Key Advantage: Using a design tool empowers you to create a completely custom solution that’s built around your team’s specific workflow, all the way from picking finishes to integrating power and data exactly where you need it.

It’s really the next logical step in crafting the perfect office. By visualizing your space first, you can move forward with confidence, knowing your plan is practical, compliant, and ready to be built. For even more inspiration, check out our guide to modern office cubicle design.

Got Questions About Cubicle Dimensions? We've Got Answers.

As you start to map out your office, a few common questions always seem to pop up. Getting the dimensions right is a huge part of the puzzle, so let's walk through the practical answers you'll need to make smart decisions for your floor plan.

What’s the Best Cubicle Size for Balancing Comfort and Density?

This is the big one. For most companies, the 6'x6' cubicle is the undisputed champion. It hits that perfect sweet spot, giving employees enough personal space to work comfortably without eating up your entire floor plan. It’s got plenty of room for a desk, a good chair, and some storage—all without feeling cramped.

This footprint is incredibly versatile and supports a wide variety of roles. Of course, one size doesn't always fit all. If you're setting up a high-density space like a call center, a tighter 5'x5' footprint can work wonders. On the flip side, if you have team members who need extra room for equipment or small sit-down meetings, bumping up to a 6'x8' gives them that little bit of extra breathing room.

How Much Walkway Space Do I Really Need Between Cubicles?

Don't eyeball this one. Getting walkway spacing right is crucial for a safe, accessible, and comfortable office. You absolutely have to follow your local building codes and ADA (Americans with Disabilities Act) guidelines—they are the bare minimum.

Here are the key numbers to keep in your back pocket:

  • Minor Walkways: The little paths between individual workstations? Those need to be at least 36 inches wide to meet ADA standards.
  • Intermediate Aisles: For aisles that see a bit more foot traffic, you'll want to aim for 42 to 48 inches.
  • Major Circulation Paths: These are your main arteries that handle two-way traffic. Plan for 60 inches or wider. This also gives folks in wheelchairs a comfortable turning radius.

Think of well-planned walkways as a non-negotiable part of your layout. It’s what makes an office feel functional and open, not cluttered and chaotic.

Are Taller Cubicle Walls Actually Better for Blocking Noise?

In a word, yes. Taller walls—anything 65 inches and up—are significantly better at absorbing ambient office chatter and cutting down on visual distractions. They create a "heads-down" environment that's perfect for roles that require deep focus or privacy.

This added privacy can be a massive productivity booster. But, it's a double-edged sword; high walls can sometimes stifle the spontaneous, over-the-wall collaboration that some teams thrive on.

So what's the solution? A hybrid approach. We often see businesses use high-walled cubicles for departments like finance or HR that need quiet, while using mid-height panels in more collaborative areas. It's all about tailoring the environment to the work being done.


Ready to build an office that just works for your team? The pros at Cubicle By Design are here to help you nail every detail, from the first sketch to the final installation. Explore our cubicle solutions and let's bring your vision to life.

Read More

What Is Space Planning for Modern Office Design

Let's talk about space planning. Forget dusty blueprints and complicated software for a moment. At its heart, space planning is simply the art and science of making an interior space work for the people who use it. It’s far more than just deciding where to put the desks and the coffee machine. It’s about creating an environment that flows, functions, and feels right.

A thoughtful layout can make the difference between a team that collaborates seamlessly and one that feels disconnected, or between a retail store that guides customers effortlessly and one that feels chaotic. That’s why at Cubicle By Design, we see it as the foundation of any successful workplace.

The True Goal of Space Planning

An isometric view of a miniature city with various open-plan offices, roads, and a central park, illustrating the concept of office space planning.

When people hear "space planning," it's easy to picture someone just shuffling furniture on a floor plan. But the real goal runs much deeper. Think of it as crafting a physical roadmap for your business's success, one that directly impacts workflow, productivity, and even your company culture. It’s less about interior design and much more about operational architecture.

A great way to wrap your head around this is to imagine your office as its own little city.

  • Circulation paths are the city streets, making sure people can move from A to B without hitting traffic jams around the printer.
  • Department zones become distinct neighborhoods. Each has its own vibe and purpose but is logically connected to the others it depends on.
  • Common areas—like break rooms and lounges—are the public parks. They’re designed to spark those chance encounters and build a real sense of community.

Every single element is placed with a purpose. The result is an office that just works. Movement is easy, collaboration happens naturally, and the daily grind feels a little less like, well, a grind. To really dig in, it helps to understand what is space planning from a foundational level.

From Blueprint to Business Results

Here's where the rubber meets the road. Good space planning can take abstract company goals and turn them into tangible, everyday realities. When the sales team and marketing team are on opposite ends of the building, you're practically building communication silos. But put them near each other, and you might just find that a random coffee-break chat sparks the next big campaign idea.

To give you a clearer picture, here’s a quick breakdown of how strategic planning connects to real-world results.


At a Glance: The Goals and Outcomes of Space Planning

Core Goal Business Outcome
Optimize Workflow Increased productivity and less wasted time.
Enhance Collaboration More innovation and stronger team cohesion.
Improve Employee Well-being Better morale, lower stress, and reduced turnover.
Maximize Real Estate Efficient use of every square foot, lowering overhead.
Ensure Safety & Compliance A safe environment that meets all legal codes.
Strengthen Brand & Culture An office that reflects your company's values and identity.

As you can see, the layout is far from a trivial detail.

The core idea is that the physical environment is not a passive backdrop; it is an active tool that can either help or hinder your organization's performance. A well-planned space removes physical barriers to success, making work more intuitive and efficient.

Ultimately, this whole process is about creating a space that actively champions your team’s success. When you stop and consider what your employees need to succeed, you’ll quickly realize that a well-designed workspace isn’t a perk—it’s a necessity. It’s a direct investment in your people's ability to shine, turning your office from a line item on the budget into a powerful business asset.

The Seven Pillars of an Effective Space Plan

A truly great office layout doesn’t just happen by chance. It’s built on a solid foundation of seven distinct pillars, each one tackling a critical piece of how your team actually works, moves, and connects. When you start thinking through these pillars, abstract ideas turn into a practical checklist. This ensures your final design is a strategic asset, not just a room full of furniture.

Think of it as a system where every element leans on the others. If you drop the ball on one pillar—say, you totally misjudge your workflow—you’ll see a domino effect. Suddenly, your circulation routes are a mess, and teams that need to be together are on opposite sides of the floor.

Pillar 1: Workflow Analysis

Before you even think about placing a single desk, you have to understand how work gets done. Workflow analysis is really just mapping out the daily operational dance of your teams—how information, tasks, and people move through your company.

Picture a software development team. The project manager is constantly checking in with the lead developer, who needs to be in close contact with the QA testers. A layout that separates these people with long hallways or, even worse, different floors, is actively working against their natural process. A solid workflow analysis spots these critical connections and makes sure the physical space helps them, not hinders them.

Pillar 2: Occupancy Planning

Next up, you have to figure out who needs space and when. Occupancy planning is way more than just a headcount; it’s about building a model that reflects how people work today. In a hybrid world, not every employee needs a dedicated desk from Monday to Friday.

This pillar helps you answer the big questions:

  • On an average day, how many people will actually be in the office?
  • What kinds of spaces do they need? Think focus pods, big collaborative zones, or just a few touchdown desks for drop-ins.
  • How can the space adapt to future growth or a shift in work styles?

For example, your data might show that even with 100 employees, you never have more than 65 in the office at one time. That insight alone saves you from overspending on desks and frees up budget for things people will actually use, like project rooms or a quiet library zone.

Pillar 3: Adjacency Needs

Once you know how your teams operate and who’s coming in, you can figure out where they should sit. Adjacency needs are all about creating strategic "neighborhoods" in your office, placing teams and people who rely on each other close together.

A classic example is the bond between sales and marketing. When those teams are within earshot, a quick, spontaneous chat can spark a brilliant campaign idea or align their strategies in minutes. On the flip side, bad adjacency kills communication, forcing everyone to rely on emails and scheduled meetings for simple questions. The office itself becomes a source of friction.

Pillar 4: Circulation Routes

With your office neighborhoods mapped out, you need to design the "streets" that connect them. Circulation routes are simply the pathways that guide people through the office. The goal is to create intuitive and efficient corridors that prevent traffic jams and just feel natural.

A poorly planned path might force people to cut right through a quiet, heads-down work zone just to get to the coffee machine, creating constant distractions. A smart layout directs foot traffic logically, separating the busy "highways" from the quiet "residential streets." Designing these paths is a massive part of finding the perfect office layout for your business.

Pillar 5: Acoustic and Visual Privacy

A productive office has to strike a balance between collaboration and concentration. This is where acoustic and visual privacy come in. It’s about creating a varied landscape of environments, because not every task is meant for a loud, open area.

A successful space plan provides a spectrum of zones. It offers vibrant, open areas for team brainstorming, semi-private nooks for small group work, and fully enclosed pods or private offices for deep, focused tasks. This variety empowers employees to choose the environment that best suits their immediate needs.

This means being smart about using partitions, sound-absorbing materials, and designated quiet zones so that productivity isn’t sacrificed for an open-plan aesthetic. For example, well-placed private office cubicles can create necessary sanctuaries for concentration.

Pillar 6: Technology and Infrastructure

Modern offices run on power and data. The sixth pillar, technology and infrastructure, is about weaving power outlets, data ports, and Wi-Fi access right into the space plan from the very beginning. You have to make sure the layout supports the tech your team uses every single day.

Forgetting this pillar leads to a hazardous mess of extension cords or forces you to place furniture in awkward spots. A forward-thinking plan anticipates where people will plug in their laptops, where you'll need presentation screens, and where servers should live, building a seamless tech backbone into the office itself.

Pillar 7: Compliance and Accessibility

Finally, your space must be safe, inclusive, and legal for everyone. This last pillar is all about meeting building codes, fire safety regulations, and accessibility standards, like those outlined in the Americans with Disabilities Act (ADA). To get more ideas on building efficient and compliant spaces, looking into optimal space planning strategies can offer some great frameworks.

This covers everything from ensuring aisles are wide enough for wheelchair access to planning proper emergency exit routes and providing ergonomic workstations. A layout that isn’t compliant isn’t just a legal risk; it’s a failure to create a welcoming and fair environment for your employees and visitors.

Your Step-by-Step Space Planning Process

Jumping into a space planning project can feel like a huge undertaking, but breaking it down into a structured process turns a mountain into a series of manageable hills. Instead of just guessing, this step-by-step approach makes sure every decision is thoughtful, backed by data, and directly supports your business goals. A clear roadmap is the best way to prevent expensive mistakes and ensure the final layout actually works for your team.

We can boil the whole thing down to three core phases: Analysis, Design, and Compliance.

A process diagram for space planning, illustrating three steps: Analyze (magnifying glass), Design (blueprint), and Comply (shield with check).

This simple visual nails a key point: great space planning starts with deep analysis long before anyone picks out furniture, and every design choice has to be double-checked against compliance rules.

Let’s walk through the six practical steps that bring a truly functional office to life.

Stage 1: Discovery and Goal Setting

First thing's first: you have to define what success looks like. This initial stage is all about deep conversations with the people who matter—from the C-suite to department heads—to really get to the heart of the project's objectives.

You need to ask the big questions. Are you trying to spark more hallway conversations and collaboration? Do you need to make room for a growing team or figure out a new hybrid work model? Getting these goals down on paper creates a North Star that will guide every single decision you make from here on out.

A project without clear goals is like a ship without a rudder. The objective here is to create a unified vision, ensuring that the final space plan is a direct answer to the company's most pressing needs and future aspirations.

Stage 2: Data Collection and Workspace Analysis

With your goals set, it’s time to gather the facts that will shape the design. This is about more than just a headcount. It means getting a real, honest look at how your current space is actually being used day-to-day.

This critical phase often involves:

  • Employee Surveys: Asking your team about their daily workflow, what drives them crazy about the current setup, and what they need to do their best work.
  • Observation Studies: Simply watching how people move, where they congregate, and how they interact within the office.
  • Utilization Data: Looking at hard numbers, like meeting room booking rates, to see which areas are packed and which are gathering dust.

For example, you might find that your massive boardroom is only booked 30% of the time, while the small two-person huddle rooms are always full. That’s a game-changing insight. It stops you from wasting money on another huge conference room and points you toward building the smaller, flexible spaces your team is crying out for.

Stage 3: Schematic Design and Block Planning

Now the fun begins. In this stage, you start turning all that data and all those goals into a high-level visual plan. We're not talking about specific desks or paint colors yet.

Instead, block planning is like creating a basic neighborhood map for your office. You’ll sketch out a simple floor plan, assigning general zones or "blocks" for different departments, common areas, and quiet-work zones. It's all about making sure teams that need to be close are neighbors and that the main walkways (or circulation paths) feel natural and intuitive.

Stage 4: Detailed Layout Creation

Once the block plan gets the thumbs-up, it’s time to zoom in. This is where you move from those broad zones to a precise floor plan showing the exact placement of every single desk, chair, and filing cabinet.

This is where the right tools make a world of difference. Using something like the Cubicle By Design Cubicle Designer lets you play around with different setups for workstation cubicles and private office cubicles, seeing how it all fits together in 3D before you commit. You’ll lock in everything from desk dimensions to where the power outlets and storage units need to go.

Stage 5: Implementation and Project Management

This is where the plan becomes reality. It’s all about coordinating with vendors, contractors, and installers to bring the detailed layout to life. Solid project management is absolutely essential here to keep everything on schedule and on budget.

This phase covers furniture orders, managing any construction, and overseeing the final installation. Clear, constant communication between everyone involved is the key to a smooth transition from a blueprint to a physical workspace.

Stage 6: Post-Occupancy Review

The job isn’t done when everyone moves in. A few months after your team has settled into the new space, a post-occupancy review is a must. This final step is about circling back to gather feedback and see if the new design is hitting the mark.

Are those new collaboration zones actually getting used? Has the new layout solved the problems you identified back in Stage 2? This feedback is pure gold. It allows you to make small tweaks and gives you invaluable lessons for any future projects. It helps you learn what went right and avoid making the same mistake twice. You can learn more by exploring some of the common mistakes in office planning and how to avoid them in our detailed guide.

Solving Today's Hybrid Workplace Challenges

The days of the static, one-size-fits-all office are long gone. The biggest puzzle we're all trying to solve now is how to design for a hybrid workforce, where the number of people in the office can swing wildly from one day to the next. The real win is creating an agile, flexible space that can handle both heads-down focus work and lively collaboration, no matter who’s clocked in.

A modern open-plan office featuring people working in collaborative booths and an enclosed pod, perfect for a hybrid work model.

This new reality has brought ideas like hot-desking (unassigned seats) and hoteling (reservable desks) from the fringe to the mainstream. Instead of giving every single person a permanent desk, companies are creating shared resources for whoever needs them. It’s a smarter way to use your real estate and finally acknowledges that the office is just one of many places where work gets done.

Designing a Landscape of Work Zones

The secret to a great hybrid office is variety. Forget the monotonous sea of desks. Today's best layouts create a diverse ecosystem of "work zones," each built for a specific kind of task. This gives people the power to pick the right spot for the job at hand.

A well-planned office landscape usually includes:

  • Focus Zones: Quiet nooks with individual workstations or pods, perfect for deep concentration.
  • Collaboration Zones: Open, energetic spaces with whiteboards and flexible furniture to get team brainstorms going.
  • Social Zones: Comfy lounge areas and coffee bars that spark those informal chats where great ideas are often born.
  • Private Zones: Enclosed rooms or booths for confidential calls or one-on-one meetings.

When you take this zonal approach, the office stops being a place people have to be and becomes a valuable resource—a destination they choose to use for things they can't do as well at home. It’s about offering different types of cubicles and spaces to match every task.

The goal is to build an environment so intuitive and supportive that it becomes a competitive advantage. When employees have the autonomy to choose their ideal work setting, engagement and productivity naturally follow.

The Power of Data-Driven Decisions

Guesswork is the enemy here. You can't just eyeball it when deciding on the right mix of shared and dedicated spaces—you need real data. While corporate real estate leaders are increasingly tracking how their offices are used, there’s a big difference between having the numbers and knowing what to do with them.

A global occupancy planning report found that while 74% of companies now collect utilization data, only 7% feel they're excellent at analyzing it. This really highlights the challenge, but also the huge opportunity. If you're curious about the trends, you can dive into the full occupancy benchmarking report to see what others are learning.

Embracing Modularity and Flexibility

For this agile model to work, the furniture has to be just as adaptable. Modular systems are the foundation of a future-proof office, letting you reconfigure layouts on the fly as your team’s needs change, all with minimal disruption.

For instance, you can arrange adaptable Workstation Cubicles into a team pod for a big project, then easily break them apart into individual stations once it's done. For those times when true privacy is a must, Private Office Cubicles offer an enclosed, quiet space without the headache and permanence of traditional construction.

Even creating new zones or adjusting department footprints is made simpler with solutions like modular office walls, which give you separation without calling in the renovation crew. When you prioritize scalable solutions, you're building a workspace that can grow and change right alongside your business, making sure it stays a valuable asset for years to come.

How Technology Is Reshaping Space Planning

Technology hasn't just tweaked space planning; it's completely flipped the script. We've moved from a static, one-and-done project to a living, breathing strategy. Gone are the days of rolling out old blueprints and doing a simple headcount. Now, smart tools feed us real-time data, taking the guesswork out of the equation and helping businesses make much sharper decisions.

This whole evolution is powered by tech that gives us a deep, honest look at how a workspace is actually being used. These tools help companies cut down on energy waste, make the office a better place for employees, and pivot their physical environment at a speed that was once unimaginable. Investing in space management technology isn't a luxury anymore—it's how you stay competitive.

The Rise of Data-Driven Design

The biggest game-changers here are Internet of Things (IoT) sensors. These are small, discreet devices you can stick under desks, in meeting rooms, and throughout common areas to see what’s happening in real time. Instead of just guessing which spots are popular, you get cold, hard data. You can see exactly which desks are getting used, how often conference rooms are actually booked, and where people tend to congregate.

This kind of information is pure gold for understanding what your office truly needs. For example, if the data shows that your massive 12-person conference room sits empty most of the week while your small huddle rooms are always packed, you know exactly where to put your money in the next office refresh. This data-first approach makes sure your decisions are grounded in reality, not just assumptions. You can read more about how these shifts are changing offices in our guide to workplace design trends.

AI and Predictive Analytics

Just collecting data is only half the story. The real magic happens when you start analyzing it, and that’s where Artificial Intelligence (AI) steps in. AI-powered software can chew through huge amounts of occupancy data to spot patterns and even predict what you'll need next. It can forecast which days will be busiest in the office, suggest the best desk-to-employee ratio for your hybrid setup, and help you make smarter long-term decisions about your real estate.

By looking at how your space has been used in the past, AI can anticipate future demands. This lets you get ahead of the curve and adjust your layout proactively instead of just reacting to problems after they pop up. It’s what separates a good space plan from a great one.

This blend of IoT and AI is the engine behind "smart spaces"—environments that are adaptive, efficient, and built for how we work today. The global smart space market is expected to skyrocket from USD 17.85 billion in 2025 to a staggering USD 74.51 billion by 2035, which just goes to show how quickly companies are jumping on board. You can dive deeper into this growth in the smart spaces market report.

Ultimately, tools and expertise from firms like Cubicle By Design are making offices more responsive, efficient, and much better aligned with what people actually need to do their best work.

Finding the Right Partner for Your Office Design

Let’s be honest: taking a space plan from a drawing to a fully built-out office is a huge undertaking. It’s tempting to try and manage it all yourself, but bringing in a professional partner is often the single best decision you can make. It can be the difference between a frustrating, flawed layout and a seamless one that actually helps your business run better.

An experienced vendor isn't just selling you furniture. They bring years of know-how, access to powerful design software, and the project management skills to save you time and prevent expensive do-overs. Think of them as the translators who turn your team’s wish list into a real, functional, and code-compliant workspace. At Cubicle By Design, this is what we live and breathe—guiding clients from that first rough idea to the final, finished office.

Vetting Your Potential Partner

To make sure you’re choosing the right team, you need to dig a little deeper with your questions. A great choice starts with knowing exactly what to ask.

Before you sign on the dotted line, make sure you get clear answers on these points:

  • Workflow Analysis: How will you get to know our team’s day-to-day work to make sure the new layout actually helps us?
  • Visualization Tools: Can you show us what the office will look like in 3D before we commit? A good partner will have something like a Cubicle Designer tool that brings the plan to life.
  • Product Flexibility: Show us how your systems, whether it's workstation cubicles or private office cubicles, can grow and change with us down the road.
  • Project Management: What’s your process for handling everything from the order to the final install, and who is our go-to person through it all?

The right partner acts as an extension of your team. Their job is to listen to your problems, use their expertise to solve them, and handle all the complicated details so you can stay focused on your business.

At the end of the day, working with a seasoned professional turns your office design into a smart investment in your team's productivity and happiness. By asking the right questions upfront, you can find a vendor who will deliver a space truly built for your success.

Common Questions We Hear About Space Planning

Diving into a new office layout always sparks a few questions. It's a big project, and it's smart to get a handle on the basics before you start. Let's walk through some of the most common questions we get from clients to help clear things up.

Costs, Timelines, and Key Considerations

1. How much should I budget for professional space planning?

There's no single price tag, because every project is different. The cost really depends on the size and complexity of your space, how detailed the design needs to be, and exactly what services you're looking for. Some firms charge a percentage of the total project cost, others bill by the hour, and some work on a fixed fee.

The best way to figure it out is to get a few detailed quotes from potential partners, like us here at Cubicle By Design, so you can find a good fit for your budget.

2. How long does the space planning process typically take?

Timelines can be all over the map. A simple office refresh might only take a few weeks, but a major, down-to-the-studs renovation could stretch over several months. The process moves through a few key phases: discovery, data gathering, design, and finally, implementation.

Clear goals and quick, decisive feedback from your team are the two biggest things that will keep your project on track and moving forward.

3. What are the most common mistakes to avoid?

We see two big missteps that can really derail a space planning project. The first is failing to plan for future growth. Boxing yourself in with a layout that only works for today can force you into another expensive redesign way sooner than you'd like.

The second is ignoring employee feedback. This is a huge one. If you don't understand how your team actually works, you're almost guaranteed to create a layout that frustrates them. You have to build in flexibility and get your people involved right from the start.

A well-executed space plan directly addresses how people feel at work. Thoughtful design that reduces friction, provides choice, and supports different work styles sends a clear message that employee well-being is a priority.

4. Can a better layout actually improve team morale?

Absolutely. Think about it—an office that's frustrating to move through or doesn't have the right mix of spaces for focus and collaboration adds a low-level of stress to every single workday.

On the flip side, a well-designed office that gives people variety and a sense of control over their environment can be a massive boost for job satisfaction and morale. A good layout can improve everything from workflow in workstation cubicles to providing quiet spaces with private offices. It shows your team you’re invested in giving them a great place to work.


Ready to transform your office with a layout designed for success? The team at Cubicle By Design is here to help. Explore our full range of cubicles or bring your vision to life with our free cubicle designer tool today.

Read More

A Smart Guide to Finding Used Office Cubicles Near Me

Kicking off your search with the phrase "used office cubicles near me" is one of the smartest first moves you can make when furnishing a new space. Why? Because it puts you on the fast track to finding high-quality, durable workstations at a fraction of what they'd cost new. This isn't just about being frugal; it's a strategic decision that stretches your budget further without making you compromise on a professional look and feel. It’s a win-win, blending financial savvy with a bit of environmental responsibility.

Why Starting Local Just Makes Sense

The allure of brand-new, shrink-wrapped furniture is undeniable, but the real-world advantages of buying used are often far more compelling. When you source locally, you tap into tangible benefits right away. We're talking about dodging hefty shipping fees, getting your furniture much faster, and—most importantly—the chance to inspect everything in person.

This hands-on approach is where the real value lies. You get to see, touch, and measure the exact pieces you're thinking of buying. It completely removes the guesswork and risk that comes with clicking "add to cart" on a website. A small scratch that looks like a deal-breaker in a high-res photo might be completely unnoticeable in person. On the other hand, a subtle wobble in a desk frame that you'd never spot online could be an instant red flag. By keeping your search local, you gain a level of certainty and control that's priceless.

The Growing Market for Used Office Furniture

The demand for functional and well-designed office setups is absolutely booming. The global office furniture market was valued at around USD 101.46 billion in 2024 and is expected to surge to USD 183.53 billion by 2032. This isn't just a random spike; it reflects a major shift toward creating more modern and ergonomic workspaces, with modular cubicles at the heart of the trend. You can dive deeper into this trend by checking out the full office furniture market analysis.

What does this mean for you? As companies upgrade, downsize, or relocate, a constant stream of excellent-condition used furniture hits the secondary market. This creates incredible opportunities for sharp buyers to snag premium pieces.

The choice to buy used isn't just a cost-saving tactic. It's a smart, sustainable investment in your workspace. It's how you can afford premium brands like Herman Miller or Steelcase—known for their legendary durability and design—for the same price as entry-level new furniture.

Where to Begin Your Search

Your local area is probably buzzing with a few key channels for finding used cubicles. Each one offers a different kind of buying experience, so knowing where to look will help you focus your energy.

A great first step is to get familiar with your local sourcing options. Each has its own rhythm and set of expectations.

Local Sourcing Options for Used Cubicles at a Glance

Here’s a quick rundown of the most common places to find used cubicles locally. Understanding the pros and cons of each will help you tailor your search and find what you need faster.

Sourcing Channel Best For Potential Challenges
Office Furniture Liquidators Large quantities of matching cubicles, consistent quality, and professional services (delivery/installation). Prices might be slightly higher than private sales, but the convenience often justifies it.
Online Marketplaces Finding smaller quantities, unique pieces, or rock-bottom deals from motivated sellers. You're on your own for logistics (disassembly, transport). Quality can be a mixed bag.
Direct Business Sales Scoring the best deals by cutting out the middleman, especially from companies needing to clear out space quickly. Can be hit-or-miss to find, and you'll need to be ready to move fast and handle everything yourself.

Knowing who to call first depends entirely on your project's scale and your willingness to handle the logistics.

No matter where you start, remember that keeping your search for "used office cubicles near me" local gives you a tactical advantage. For a deeper dive into weighing your options, our guide on whether to buy new or used cubicles offers even more insights to help you make the perfect choice for your business.

The Essential In-Person Inspection Checklist

So, you've shortlisted a few local sellers and you're ready to see some "used office cubicles near me." This is where the real work begins. A quick glance isn’t going to cut it; this is your chance to separate the genuine bargains from the future headaches. Going in with a solid plan helps you evaluate every critical piece, from the frame's integrity to the smallest scuff mark.

A little prep work goes a long way. Before you even head out the door, have a clear layout of your own office in mind. You can even use a free tool like the Cubicle By Design Custom Cubicle Designer to map everything out. This gives you the exact measurements you need, turning a casual walkthrough into a targeted mission.

This flow chart breaks down the key stages of finding used cubicles, from figuring out your budget to the final hands-on vetting.

A flowchart illustrating the process of acquiring used office cubicles near me, from setting a budget to inspecting the furniture in person.

As you can see, a successful buy depends on a structured approach. That in-person inspection is the most critical step to make sure you're getting quality furniture that will last.

Measure Twice, Buy Once

The first thing you should pull out is your tape measure. Seriously. You need to confirm the dimensions of every panel, desktop, and connector match what the seller told you and—more importantly—what your office can actually accommodate. A cubicle that’s just two inches too wide simply won't fit, turning a great deal into a useless pile of parts.

Measure everything:

  • Panel Height and Width: Do they offer enough privacy for your team? Will they clear low ceilings, sprinklers, or window sills?
  • Work Surface Depth and Width: Is there really enough room for dual monitors, a keyboard, and paperwork? A desk surface that's too shallow is an ergonomic nightmare waiting to happen.
  • Overall Footprint: Get the complete assembled dimensions to ensure it fits your floor plan while leaving proper walkways.

Inspecting Structural Integrity

Next, get hands-on with the cubicle's skeleton. The frame and panels are the foundation, and any weakness here is a massive red flag. Don't be shy—give the panels a firm but gentle push to check for wobbling or instability.

Look closely for subtle clues of bigger problems. Check the base of the panels for any rust or water damage, especially if they were stored in a damp warehouse or basement. A few small spots of rust can easily spread and compromise the whole structure.

A wobbly frame or a panel with hidden water damage isn't a cosmetic flaw; it's a safety and longevity issue. These are the kinds of problems that are difficult and expensive to fix, often costing more than the cubicle itself.

Assessing Surfaces and Finishes

Now it's time to judge the book by its cover. Run your hands over the laminate desktops. You're feeling for any peeling, deep scratches, or bubbling, which is a classic sign of moisture getting under the surface. For the fabric panels, check for stains, rips, or any lingering funky odors that might be impossible to get out.

Also, look for consistency. If you're buying a set of five matching cubicles, are all the fabric panels really the same color? Fading from sun exposure is incredibly common and can leave you with a mismatched, unprofessional look once you get everything assembled back at your office.

Checking Electrical and Data Components

This part is non-negotiable, both for safety and for your team's sanity. Most modern cubicles have built-in electrical raceways. Visually inspect every outlet, data port, and all the wiring for signs of fraying, cracking, or shoddy-looking repairs.

Ask the seller if you can plug in a phone charger to test the outlets. Faulty wiring isn't just an inconvenience; it's a serious fire hazard. If the electrical components look damaged or are an older standard, you'll need to factor in the cost of hiring an electrician to fix or replace them.

If you’re leaning toward professional setup, it helps to understand what the pros look for. Reading up on the details of professional office furniture installation gives you a better sense of what installers need to work with, which sharpens your eye during the inspection.

Navigating Logistics and Hidden Costs

So you've found the perfect set of used office cubicles. That’s a huge win, but don't pop the champagne just yet. The next phase—getting those pieces from their current location to your office—is where a great deal can turn into a logistical nightmare.

It’s an easy trap to fall into. You get so focused on the killer upfront price that you completely forget about disassembly, transportation, and installation costs. To make sure your budget-friendly find actually stays that way, you need a solid plan for what comes next.

Two professional movers loading used office cubicle panels into a moving truck, a key part of the logistics process.

Planning for Disassembly and Transport

Before you shake hands on the deal, your very first question should be, "Who's taking these apart?" Some liquidators might roll this into the price, but if you're buying from a private seller, expect to be on your own. If that's the case, get your phone ready. You'll want to take pictures of everything and label every single part—panels, screws, connectors—to have any hope of putting it all back together again.

With the cubicles broken down, you need to get them moved.

  • Hire the Right Movers: Don't just call any moving company. You need pros with experience moving commercial furniture. They’ll know how to stack panels without scratching them and secure everything so it doesn't get damaged in transit.
  • Get the Right Truck: A standard pickup isn't going to work for more than a station or two. You're looking at a box truck, and trust me, it’s always better to have a little too much space than not enough.
  • Check Their Insurance: Make sure any company you hire has solid insurance. Accidents happen, and the last thing you want is a pile of busted parts with no way to get your money back.

And don't forget to budget for putting it all back together. Paying for professional cubicle assembly services can feel like an extra expense, but it’s a smart investment to ensure everything is built correctly and safely.

Understanding Installation and Compliance

Getting the cubicles into your building is only half the battle. Now you have to reassemble them correctly—and legally. This is where a lot of unexpected headaches pop up, especially depending on the complexity of the cubicles you bought.

It's precisely these kinds of logistical puzzles that lead many businesses to a full-service provider like us. Our team at Cubicle By Design handles all the heavy lifting, but if you're going it alone, you absolutely have to think about compliance.

One of the biggest—and most overlooked—hurdles is compliance with local building codes and the Americans with Disabilities Act (ADA). Getting this wrong can mean failed inspections and having to tear down and rebuild everything.

Keep these key factors on your radar:

  • Walkway Clearances: ADA has strict rules about how wide walkways must be to ensure everyone can get around.
  • Electrical Codes: If your cubicles are powered, the wiring has to meet local codes. You'll likely need a licensed electrician to sign off on the final setup.
  • Fire Safety: Your new layout can't block any sprinkler heads, fire exits, or emergency signs.

This intense focus on flexible, compliant office design is a big reason why North America commands 43% of the global cubicle market. As business hubs grow, so does the demand for layouts that can change on a dime while still meeting tough safety and accessibility rules.

Getting this right from day one is critical. Working with a team that has deep experience in professional office furniture installation and disposal gives you the peace of mind that your new workspace isn't just functional, but fully compliant.

How to Negotiate and Finalize Your Purchase

You’ve done the legwork. The cubicles have been inspected, the measurements are confirmed, and you have a solid logistics plan. Now for the make-or-break moment: striking a deal that works for your budget and protects your business.

Negotiating for used office furniture isn't about lowballing or being confrontational. It’s about making a fair, informed offer backed by the detailed inspection you just completed.

Turn Your Inspection Findings into Leverage

This is exactly where that meticulous checklist you made becomes your most powerful tool. Every little flaw you documented—a noticeable scratch on a worksurface, a drawer that doesn't quite close right, a slightly faded fabric panel—is a legitimate point for discussion.

The key is to present your findings calmly and professionally to justify your offer. A respectful, fact-based approach almost always gets a better result than an aggressive one.

For example, you could open with something like, "I'm definitely interested in this set of four cubicles. I did notice the fabric on two of the main panels is torn, and one of the overhead storage bins is a bit sticky. I'd be willing to offer X, which takes into account the cost and time for me to get those things fixed." This shows you're a serious buyer who has done their homework.

Making a Smart Offer on a Large Lot

If you're buying a significant number of "used office cubicles near me," expecting a bulk discount is perfectly reasonable. Sellers, especially liquidators, are almost always motivated to clear out large chunks of inventory in one go. A single transaction saves them a ton of time and hassle chasing down multiple buyers.

When you make your bulk offer, calculate a fair price per unit and present the total. Frame it as a win-win situation: you get a better price for taking everything, and they get a fast, clean sale. This tactic is especially powerful when you're dealing with a business that's moving or closing and is up against a hard deadline to clear the space.

Your purchase agreement is the single most important tool you have for preventing problems down the road. Never, ever rely on a verbal agreement, no matter how friendly the seller seems. Getting every detail in writing is what protects you and ensures the deal you agreed to is the deal you actually get.

Crafting a Purchase Agreement That Protects You

Once you've settled on a price, it's absolutely critical to get everything down in writing. A simple, clear purchase agreement is non-negotiable. It doesn't need to be a 20-page legal epic, but it must clearly outline the key terms of the sale. This is what saves both you and the seller from "he said, she said" arguments later.

Make sure your written agreement includes these key elements:

  • Final Agreed-Upon Price: List the total cost clearly, along with any taxes or fees.
  • Detailed Inventory: This is huge. Itemize every single component included—panels, connectors, screws, worksurfaces, storage bins, keys. Be painfully specific.
  • Condition of Items: A simple "sold as-is" clause is standard practice. It makes it clear the seller isn't offering a warranty.
  • Logistics and Responsibilities: Spell out who is responsible for disassembly, moving, and loading. Lock in the final pickup date and time.

A solid contract prevents major headaches and makes sure everyone is on the same page. For some more great advice, check out these helpful 5 tips for buying office furniture and cubicles to make sure your purchase is a success from start to finish.

How to Refurbish and Customize Used Cubicles

Scoring a great deal on "used office cubicles near me" is a huge win for the budget, but let's be honest—they might not perfectly match your company's vibe right away. This is where the fun really starts. Refurbishing those pre-owned workstations is your chance to transform a bargain into a custom solution that looks and feels brand new.

It’s all about bridging the gap between the smart savings of used furniture and the polished, cohesive look you want for your office. You're taking solid "bones" and giving them a fresh, new identity.

A furniture professional reupholsters a used office cubicle panel, with fabric and wood samples on a workbench.

Simple DIY Fixes for a Fresh Look

You don't need a professional crew to make a huge difference. Some of the most effective upgrades are well within reach for a determined team and can completely change the feel of a used cubicle.

Here are a few simple but powerful DIY projects:

  • A Serious Deep Clean: Never, ever underestimate the power of a good scrub. Specialized fabric cleaners can lift years of dust and minor stains, while the right cleaners for laminate can bring back a surface's original shine.
  • Paint the Metal Components: The metal frames, legs, and trim on most cubicles are easy to update. A fresh coat of a modern matte black or a clean metallic silver can instantly make an older station look sharp and current.
  • Swap Out the Hardware: Replacing old, dated drawer pulls and cabinet handles is a quick, cheap fix that adds an immediate touch of modern style.

When to Call in the Professionals

While a little elbow grease goes a long way, some jobs just demand a specialist's touch to get right. Knowing when to hand over the reins ensures you get a high-quality, durable finish that will stand the test of time.

It’s probably best to get professional help for these tasks:

  • Reupholstering Fabric Panels: This is way more complex than it looks. A pro has the right equipment to stretch and secure fabric perfectly, avoiding the wrinkles and sags that are a dead giveaway of a DIY job.
  • Replacing Worksurfaces: If the desktops are badly scratched, stained, or peeling, a full replacement is your best bet. A professional can source, cut, and install new surfaces that fit the existing frames flawlessly.
  • Any Complex Electrical Work: This is non-negotiable. If you need to upgrade or reconfigure the built-in electrical systems, always hire a licensed electrician to keep everything safe and up to code.

When deciding between tackling a task yourself and hiring it out, it helps to weigh the costs, time commitment, and the quality of the final result.

Refurbishment Options Cost vs. Benefit

Refurbishment Task DIY Approach (Pros & Cons) Professional Service (Pros & Cons) Best For
Painting Metal Trim Pro: Very low cost. Con: Time-consuming, potential for drips/uneven finish without proper prep. Pro: Perfect, factory-like finish. Con: Higher cost, especially for electrostatic painting. DIY: Small touch-ups or small batches of cubicles. Pro: Large projects where a uniform, durable finish is critical.
Replacing Drawer Pulls Pro: Extremely easy and inexpensive. Con: Limited to standard-sized hardware to match existing holes. Pro: Can drill new holes for any style. Con: Overkill for a simple task; not a typical standalone service. DIY: Almost always the best approach for this simple cosmetic upgrade.
Reupholstering Panels Pro: Lowest material cost. Con: Very difficult to get a tight, professional look. High risk of wrinkles and poor finish. Pro: Flawless, durable results. Access to commercial-grade fabrics. Con: Labor costs are significant. Pro: Any project where the visual quality of the panels is a priority for your brand image.
Installing New Worktops Pro: Cheaper if you can source and cut the material yourself. Con: Requires precision tools and skill to avoid gaps. Pro: Perfect fit and finish, professional installation. Con: Can be one of the more expensive refurbishment tasks. Pro: When worksurfaces are heavily damaged or you're changing the entire color scheme.

Ultimately, the choice comes down to your team's skills, your budget, and how polished you need the final product to be.

Refurbishment is where you truly get the best of both worlds—the cost savings of used furniture combined with the tailored finish of a brand-new product. It's how you create a workspace that actually reflects your company's culture.

The Power of Professional Refurbishment and Customization

This is exactly where a full-service dealer like Cubicle By Design shines. We specialize in taking high-quality used cubicles—the ones with great bones—and transforming them into bespoke workstations. When you opt for a professional refurbishment, you get to handpick the fabrics, finishes, and surfaces that match your office design perfectly.

Despite shifts in work models, the demand for functional, well-designed cubicles remains incredibly strong—they still make up about 40% of the furniture in new commercial setups. Professional refurbishment just makes these premium solutions more accessible.

Whether you're looking for sleek private office cubicles or more open collaborative workstation cubicles, our process allows for total customization. As you're planning the new look, getting ideas from guides on reimagining your office space can help you see the bigger picture.

If you want to see how this all fits together, you might want to read our article on why custom-fit cubicles are more affordable than you think.

Your Top Questions About Buying Used Cubicles, Answered

If you're diving into the world of pre-owned office furniture, you've probably got a few questions. That's completely normal. As you search for "used office cubicles near me," things pop up about pricing, what to expect in terms of quality, and how the heck you'll get them into your office.

Getting clear, straightforward answers is key to feeling good about your purchase. Let's tackle some of the most common questions we hear from business owners every day.

What’s a Fair Price for a Used Office Cubicle?

This is almost always the first question, and for good reason. While there isn't a universal price tag, a solid rule of thumb is to expect to pay between 20% and 50% of the original retail price. That massive discount is exactly why savvy businesses go this route.

Of course, that's a big range. The final price depends on a few key things, and knowing them helps you spot a good deal.

  • The Brand Name: Big names like Herman Miller or Steelcase are built to last, so they hold their value much better and will naturally cost more, even used.
  • The Condition: A cubicle that looks like it just came out of the box will command a higher price than one with noticeable scuffs, dings, or stained fabric.
  • Age and Features: Is it a newer model with built-in power and data ports? That'll be more expensive than a basic, older design.
  • Where You're Located: Simple supply and demand. In a big city with lots of office turnover, you might find better deals and more options.

Do Used Cubicles Come with a Warranty?

This is a huge one, and it directly impacts your peace of mind. The short answer is: it depends on where you buy them. If you're buying from a private seller or an office that's closing down, the answer is almost always no. Those sales are "as-is," meaning once you've paid, any problems that crop up are yours to handle.

This is where working with a professional dealer makes all the difference. Reputable companies that refurbish and resell cubicles stand behind their work.

For example, a company like Cubicle By Design often includes a limited warranty on our refurbished products. That little piece of paper is our promise that we're confident in the quality and durability of our furniture—a safety net you just won't get from a private sale.

That extra layer of protection can be a lifesaver, especially when you're outfitting a whole office and need to know your investment is solid.

How Do I Make Sure the Cubicles Will Actually Fit?

There's no worse feeling than scoring a great deal on furniture only to find out it won't fit through the door or leaves no room to walk. You can't just eyeball this. Avoiding this costly mistake comes down to two things: accurate measurements and a solid space plan.

Start by getting out a tape measure. Meticulously measure your office, noting where every door, window, support column, and power outlet is. Then, sketch out a to-scale floor plan to see how the cubicles will sit. You need to account for ADA-compliant walkways and common areas, not just the cubicles themselves.

To take the guesswork out of it, we built a tool specifically for this. Our free Custom Cubicle Designer lets you plug in your room's dimensions and play around with different layouts virtually. You can move things, try different configurations, and nail down the perfect fit before a single piece of furniture arrives. It's a simple step that can save you from a massive headache.


Ready to find the perfect cubicles without the guesswork? The team at Cubicle By Design offers expertly refurbished workstation cubicles and private office cubicles that combine the value of used with the quality of new. Explore our full range of cubicles and start designing your ideal workspace today.

Read More