Discover used office furniture buyers: Your Guide to Profitable Asset Sales

Before you even think about listing your used office furniture, remember this: a little prep work upfront can make a massive difference in your final payout. This isn't just about wiping down desks. It's about professionally staging your assets to show buyers their true value.

When you take the time to document everything properly, you send a clear signal that you're an organized, serious seller. That alone sets the stage for a much smoother—and more profitable—deal.

Preparing Your Furniture for a Profitable Sale

Selling used office furniture is a lot more than just finding someone to haul it away. A smart approach can turn those depreciated assets into a surprising amount of cash for your business. The secondary furniture market is huge and only getting bigger as more companies lean into sustainability and cost-effective outfitting.

Globally, the second-hand furniture market was valued at around $37.19 billion and is on the rise, with about 36% of consumers happy to buy used items. You can dive deeper into the market's growth over at Research Nester. By getting your inventory ready the right way, you're tapping directly into that demand.

This whole process really boils down to two things: creating a detailed inventory and taking great photos. Put yourself in the buyer's shoes for a second. They need to see what you have, its condition, and if it fits their needs—fast. A vague list with blurry photos? That goes straight to the bottom of the pile. A detailed spreadsheet with clear, well-lit images gets an immediate, serious look.

Create a Detailed and Professional Inventory

The absolute foundation of a successful sale is a comprehensive inventory list. Professional buyers, especially liquidators handling big projects, depend on this document to give you an accurate quote. Without it, they're just guessing, and when people guess, they always lowball to protect themselves. Your job is to remove all the guesswork.

Your inventory should be a simple spreadsheet, but it needs to have the right details. Don't just write "50 desks." Break it down. Do you have high-end pieces from sought-after brands like Haworth or Steelcase? Call those out specifically—they command a premium.

Here's what a professional inventory looks like:

  • Item Type: Get specific. Think "ergonomic task chair," not just "chair." Is it an "L-shaped desk" or a "3-drawer lateral file cabinet"?
  • Brand/Manufacturer: This is a huge value driver. List names like Herman Miller, Haworth, Steelcase, or Knoll if you have them.
  • Quantity: The exact count of each identical item.
  • Dimensions: Length, width, and height. Buyers need this for truck and space planning.
  • Condition: Be honest and consistent. A simple "Excellent," "Good," "Fair," or "Poor" system works well. Add short notes for transparency, like "minor scuff on left leg."
  • Location: Note the floor or specific room. This helps buyers calculate the labor needed for removal.

A detailed inventory isn't just for getting quotes; it's your best negotiation tool. When a buyer can see exactly what you have, down to the brand and condition, your asking price is suddenly backed by hard data.

Having this information compiled and ready to go is a game-changer. It shows buyers you're organized and respects their time, which immediately builds trust and encourages better offers.

Pre-Sale Inventory Checklist

Use this checklist to gather all the essential information buyers need. Having this ready will streamline the quoting process and demonstrate your professionalism.

Information Point Why It's Critical Real-World Example
Item Type & Name Allows buyers to identify and categorize items quickly. "Herman Miller Aeron Chair, Size B" instead of "Office Chair"
Brand/Manufacturer Directly impacts the resale value and buyer interest. "Steelcase Leap V2" or "Knoll Reff Series"
Quantity Available Essential for bulk buyers and liquidators to assess project size. "42 units"
Dimensions (WxDxH) Needed for logistics, space planning, and truck loading. "60"W x 30"D x 29"H" for a desk
Condition Rating Manages buyer expectations and prevents disputes later. "Good: minor scratches on legs, upholstery clean"
Age/Year of Purchase Helps determine depreciation and remaining lifespan. "Purchased Q2 2019"
Current Location Affects labor costs and removal logistics (e.g., stairs, elevator). "5th Floor, West Wing Conference Room"

Compiling this table before you make the first call puts you in the driver's seat. You'll get faster, more accurate quotes and have a much smoother negotiation process.

Photograph Your Assets to Showcase Their Value

Once your inventory spreadsheet is done, it’s time to bring it to life with pictures. Good photos are non-negotiable. They are your first, and often best, sales pitch, allowing buyers to visually confirm the quality and condition you’ve documented.

You don’t need to hire a pro. Your smartphone is perfectly capable, but you have to use it right. Pay attention to lighting—natural light is always best—and take shots from multiple angles. Clear, bright photos can be the difference between a great offer and getting completely ignored.

For bigger projects, a well-managed cleanout process makes everything easier, including taking photos. You can learn more in our guide to responsible office cleanouts. Taking a little extra time to present your furniture in its best light directly impacts the quality and quantity of the offers you'll get.

Finding the Right Buyer for Your Specific Needs

Not all used office furniture buyers are created equal. The "best" one for your business really depends on your specific situation. A startup clearing out a 10-person office has completely different needs than a corporation decommissioning two entire floors.

Figuring out the right type of buyer from the get-go will save you a ton of time and frustration. More importantly, it can make a huge difference in your final financial return.

So, the first question to ask is: what’s our main goal here? Are we on a tight deadline and just need the space cleared out ASAP? Or do we have the flexibility to wait for the best possible offer? Your answer will point you in the right direction.

Large-Scale Office Furniture Liquidators

Think of liquidators as the rapid-response team of the used furniture world. Their entire business is built on speed and volume. If you’re dealing with a large quantity of furniture and have a move-out date that absolutely cannot be missed, a liquidator is often your safest bet.

Their model is pretty straightforward: they buy everything in one lump sum—the good, the bad, and the slightly worn-out—and they manage the entire removal process. That all-in-one approach is their biggest selling point. You get one point of contact, one transaction, and a guaranteed empty space by your deadline.

But that convenience comes at a cost. Because they’re taking on the risk of the entire inventory, their offers are typically lower than what you might get from other buyers. They have to factor in the expense of hauling away and disposing of items that have no real resale value.

Real-World Scenario: A financial firm is relocating its 200-person call center in 30 days. Their top priority isn't squeezing every last dollar out of the old furniture; it's making sure the office is completely empty to avoid paying hefty holdover rent. A liquidator comes in with a single, guaranteed offer to clear every desk, chair, and filing cabinet, hitting that tight deadline without any hassle.

Resellers and Refurbishers

This is where companies like us at Cubicle By Design come into the picture. Resellers and refurbishers are a lot more selective than liquidators. We’re on the lookout for quality, brand-name pieces—think ergonomic chairs from Haworth or modular systems from Steelcase—that we can bring back to life and sell to new customers.

Because we’re focused on desirable assets, we can often pay more per item than a liquidator would. We see the potential in a slightly used Herman Miller chair or configurable cubicles that just need a little TLC. This route is ideal if your inventory is mostly made up of good-quality, commercial-grade furniture.

If you have a mix of high-value and lower-value items, these buyers might offer to purchase the premium pieces and then give you a separate quote for removing the rest.

The broader office furniture market was valued at around $57.51 billion and is expected to keep growing. This growth is fueled by businesses upgrading to modern, ergonomic setups, which in turn feeds a steady supply of high-quality used assets into the secondary market for buyers like us.

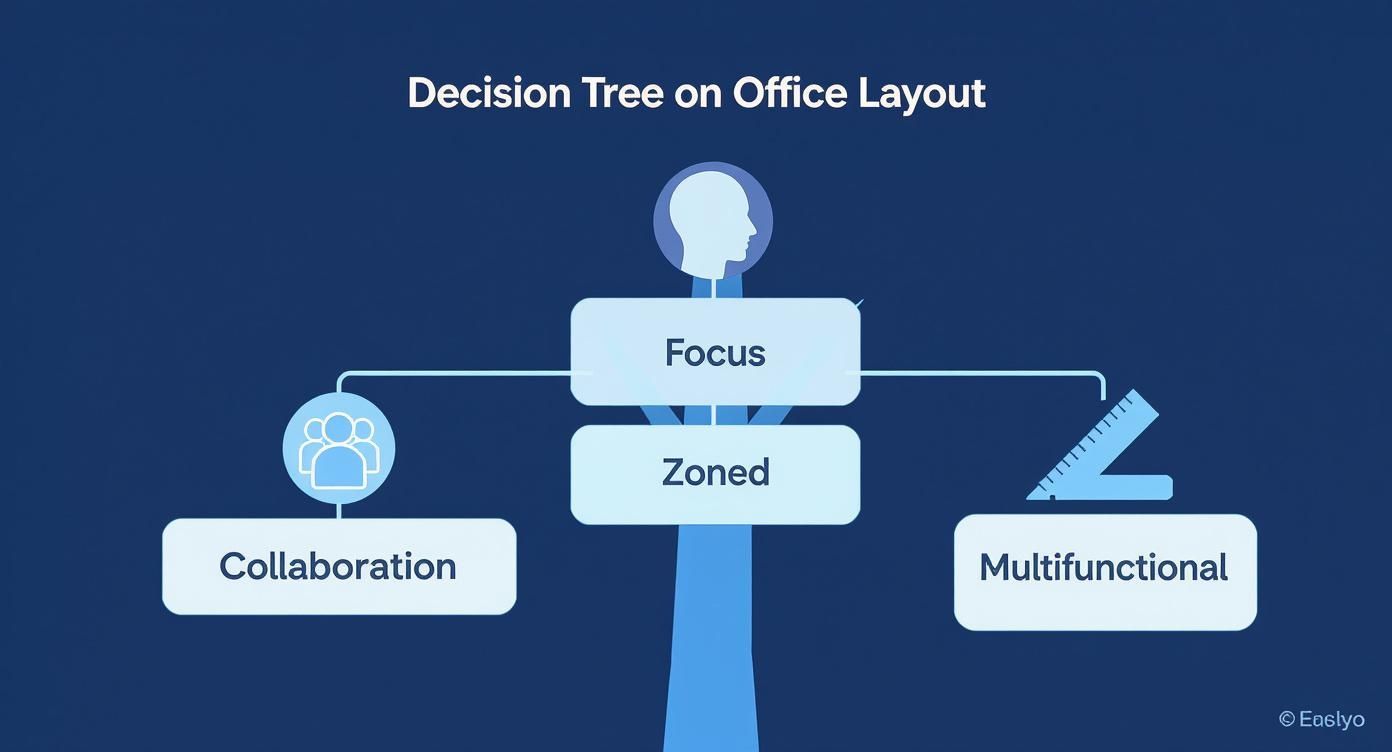
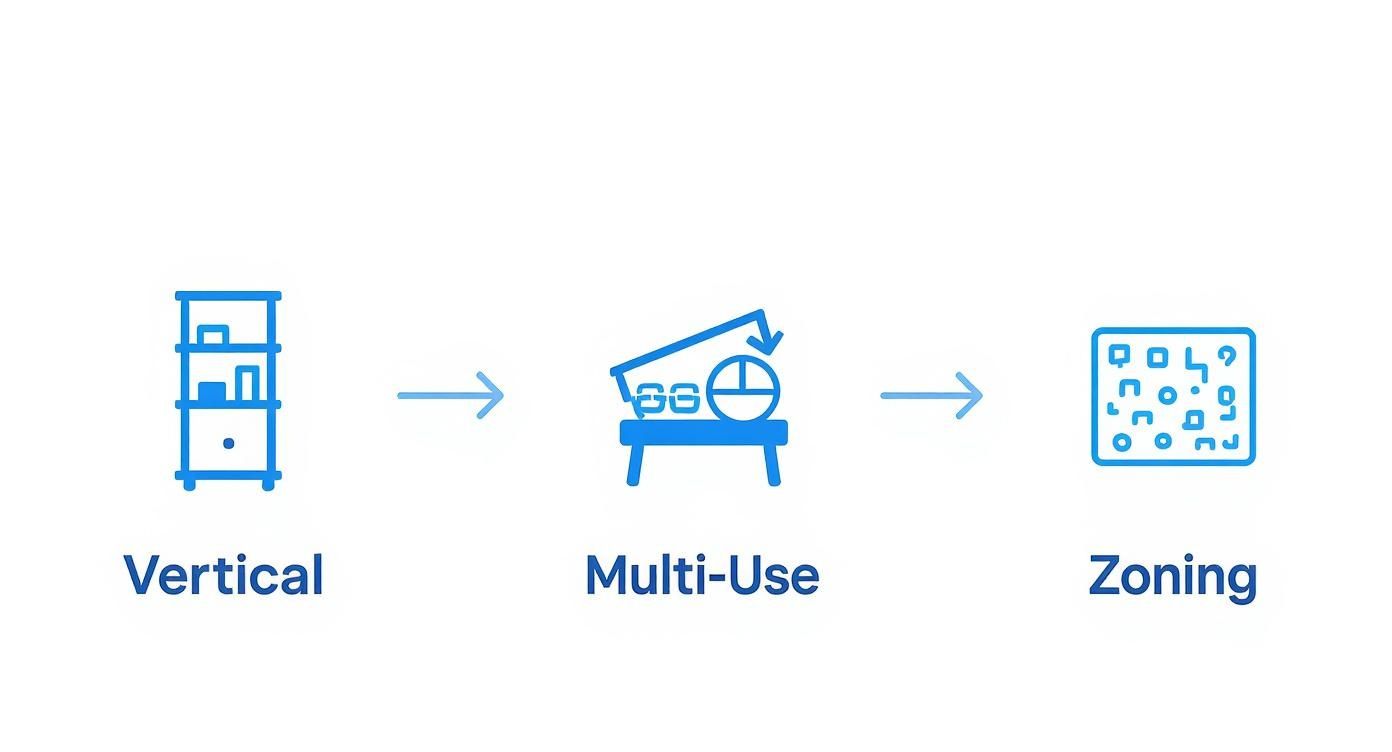
This flowchart can help you visualize the first few steps, no matter which type of buyer you approach.

As you can see, a successful sale always starts with good prep work. A detailed inventory and quality photos are critical, especially when you’re trying to attract more selective buyers.

Direct Sales and Donations

You also have a couple of other avenues: selling directly to another business or donating the furniture.

Selling directly can sometimes bring in the highest price since you’re cutting out the middleman. The catch? You’re responsible for everything—finding a buyer, negotiating the price, and coordinating all the logistics. For most busy office managers, that’s just too much of a time sink.

Donating to a qualified non-profit is a fantastic option for furniture that’s still perfectly functional but doesn’t have a high resale value. You won’t get cash in hand, but you can receive a tax receipt for the fair market value of the items. In some situations, the tax deduction can actually be more financially beneficial than a low liquidation offer, and you get to support a great cause in the process.

Vetting Potential Buyers and Negotiating a Fair Deal

Once you have a handful of potential used office furniture buyers, the real work begins. This is where you’ll separate the seasoned professionals from the folks who might cause you a world of hurt down the road. A solid vetting process is your best defense against last-minute surprises, making sure the deal you shake on is the one you actually get.

With your shortlist ready, it's time to do some digging into each company's reputation. Don't just take their website's star rating at face value; get into the nitty-gritty of reviews on third-party platforms. You're looking for patterns. Are clients consistently happy with their timeliness, professionalism, and communication? Or do you see a trail of complaints about damaged property, hidden fees, or crews who leave a mess in their wake?

A single bad review isn't always a deal-breaker, but a recurring theme of shoddy service is a massive red flag. This initial homework can save you from a logistical nightmare.

Asking the Right Questions

After you've checked them out online, it's time to get them on the phone. Think of this as more than just getting a quote—it's an interview. You need to feel confident that they are a legitimate, professional outfit that can actually handle your project.

Here are the non-negotiable questions you should ask every single potential buyer:

  • Can you provide a Certificate of Insurance (COI)? This is an absolute must. The buyer needs to have liability insurance to cover any potential damage to your building during the removal. Get a copy and check that it’s current.
  • Do you have references from recent, similar projects? Any company worth its salt will be happy to connect you with past clients. When you call, ask about their punctuality, the crew's professionalism, and whether the final price was what they were originally quoted.
  • What’s your process for items that have no resale value? A true professional offers a total solution. They’ll assess what they can resell and give you a clear plan (and a separate cost) for recycling or properly disposing of everything else.
  • Who will be my single point of contact? For anything but the smallest jobs, having one dedicated project manager is crucial. It ensures clear communication and accountability from start to finish.

The answers you receive—and just as importantly, how you receive them—will speak volumes about their experience and transparency. If they get dodgy or vague, consider it a warning sign.

Decoding the Offer and Negotiating Terms

With your vetting out of the way, you can step into negotiations with confidence. Remember that detailed inventory you put together earlier? That's now your most powerful tool. It gives you hard data to back up your asking price and shows buyers you’ve done your homework.

When an offer comes in, don't just fixate on the final number. A high offer can get whittled down fast by hidden costs and bad terms. A genuinely good deal covers the entire scope of the project and protects your interests from beginning to end.

The best negotiations go beyond the price tag. Clarifying who is responsible for disassembly, removal, and cleanup costs is just as important as the cash offer. A seemingly lower bid from a buyer who handles all logistics at no extra charge might actually be the more profitable deal.

Before you sign anything, make absolutely sure these points are spelled out in writing:

  • Scope of Work: The contract must list exactly which items are being purchased and which are being hauled away for disposal.
  • Logistical Responsibilities: Who is on the hook for disassembly, packing, booking elevators, and protecting the floors?
  • Timeline: The agreement needs to specify the exact dates and times for the removal and a firm deadline for completion.
  • Site Condition: Insist that the contract states the buyer will leave the space in "broom-swept" condition, free of all debris.
  • Payment Terms: Get clarity on when and how you'll be paid. Is it a deposit upfront with the balance on completion, or full payment when the last item leaves?

A solid partner, like a trusted commercial real estate professional, knows how vital these details are. For more on this, check out our guide on the pros of securing a top office furniture partner. Taking the time to nail down these terms protects your business from surprise costs and ensures a smooth, predictable exit.

Managing the Logistics of Furniture Decommission

Striking a great deal with a buyer is a fantastic start, but it's only half the job. A sale can quickly unravel if the actual removal process isn't handled with total precision. Poor planning leads to damaged property, unexpected downtime, and surprise fees that chip away at your profit. This is your game plan for a seamless, professional furniture exit.

It’s worth noting that the global market for second-hand office furniture is booming—it's estimated at around $5 billion and still growing. That means professional buyers are busy, which makes nailing down the logistics even more critical.

Coordinate With Building Management

Before a single desk gets touched, your very first call should be to your building or property manager. I've seen it happen too many times: a crew shows up ready to work, only to be turned away because they didn't follow the building's rules.

You'll need to get a few key details sorted out ahead of time:

  • Book the Service Elevator: Freight elevators often have specific time slots. You need to book these well in advance to line up with your buyer's schedule.
  • Confirm Access Hours: Most commercial buildings restrict large moves to after-hours or weekends to avoid disrupting other tenants. Get those "move-out" windows on the calendar.
  • Provide Insurance Docs: The building will absolutely require a Certificate of Insurance (COI) from the buyer’s removal team. Make sure your buyer sends this to management a few days before the move.

A little proactive communication here prevents a world of headaches on moving day.

Prepare the Physical Space

On removal day, your office essentially becomes a construction site. Taking a few preparatory steps can prevent costly damage to the property—damage you could be on the hook for. Any professional buyer will handle this, but it’s always smart to confirm their plan.

Start by protecting the exit path. This means laying down Masonite or other protective floor runners in hallways and high-traffic areas. Corner guards should be placed on walls, especially around tight turns, and the inside of the elevator should be padded to prevent dings and scratches. For a move this complex, a solid plan is a must; you can see what a full-scale project looks like in our guide to professional office decommissioning.

A smooth decommission isn't just about speed; it's about precision. The buyer's ability to protect the building's infrastructure—from flooring to elevator cabs—is a clear indicator of their professionalism and respect for your property.

This prep work doesn't just protect the building; it helps the crew work faster and safer.

The Final Walkthrough and Sign-Off

Once the buyer’s crew tells you the job is done, you have one last critical step. You or a trusted representative needs to do a final walkthrough of the space with the crew leader before they pack up and leave. This is your last chance to make sure everything was done right.

During the walkthrough, check that every single item from the sale has been removed. Look in closets, corners, and small offices for any forgotten pieces. Just as important, make sure the space is left in "broom-swept" condition—free of all debris, leftover hardware, and trash. This final check ensures you can hand over the keys without any lingering issues or cleanup costs.

Unlocking Hidden Value Beyond the Cash Offer

Sure, getting a decent cash offer from used office furniture buyers is what everyone aims for. But the real win isn't always about the check you cash. Smart business owners know that a simple office decommission can become a strategic financial and reputational victory if you look beyond the immediate sale price.

This means thinking about alternatives like donation. It’s a move that can unlock serious value through tax deductions and give your company’s public image a real boost. When you think holistically about your used furniture, the benefits can last long after the office is empty.

The Strategic Advantage of Donating Furniture

Let's be honest—sometimes the liquidation offer for older, but still perfectly good, furniture is just plain disappointing. In these situations, donating the items to a qualified 501(c)(3) non-profit can actually be the more profitable route. This strategy lets you claim a tax deduction for the fair market value of the goods you donate.

To make this work, you have to get your paperwork in order. It's non-negotiable.

  • Find a Qualified Charity: Make sure the organization is a registered 501(c)(3). They must be able to provide the necessary documentation.
  • Get a Fair Market Appraisal: For a big donation, you'll likely need an independent appraisal to back up the value you're claiming.
  • Receive a Donation Receipt: The charity has to give you a formal, dated receipt that details every single item you donated.

Getting the tax side of things right is key to making this worth your while. For a better handle on the financial details, it's worth checking out some expert tips for tackling tax season for small business owners. This ensures your good deed is also a smart financial decision.

Boosting Your Corporate Social Responsibility Profile

Beyond the tax benefits, donating used office furniture is a fantastic way to strengthen your company’s Corporate Social Responsibility (CSR) efforts. We're in an era where customers and potential hires really care about sustainability. Proving you’re committed to the community and the environment gives you a serious edge.

Keeping tons of usable furniture out of a landfill is a tangible environmental win. That’s a story you can proudly share in your annual reports, on your website, and in marketing materials. It shows your company is actually doing the work, not just talking about it.

When you donate furniture, you're not just clearing out an office. You're giving a local school, a community center, or another non-profit the tools they need to help others. That creates a positive community impact and builds incredible goodwill for your brand.

This approach turns a logistical headache into a powerful story. Instead of a simple transaction, the decommission becomes part of your company's legacy of community engagement and environmental care. For many businesses, the positive PR and reputational lift from a well-publicized donation can be worth far more than a modest check from a liquidator. It’s a strategic move that pays off in both public perception and employee morale.

Got Questions About Selling Your Office Furniture? We’ve Got Answers.

Even with a great plan, jumping into the world of office furniture liquidation can feel a bit overwhelming. I've worked with countless facility managers and business owners, and I can tell you, you're not alone. Most people run into the same handful of questions when they start the decommissioning process.

Let's clear the air and tackle some of the most common ones I hear.

What Kind of Used Office Furniture Do Buyers Actually Want?

Not all furniture is created equal on the secondhand market. The big names—Herman Miller, Steelcase, and Haworth—are always in demand. They have a reputation for quality that buyers trust, making them a much easier sell.

Certain pieces are consistently hot commodities:

  • Ergonomic Chairs: A high-quality ergonomic task chair is the holy grail. Their comfort and durability make them a quick sell, every time.
  • Height-Adjustable Desks: The sit-stand desk trend isn't going anywhere. These are a huge value-add and one of the first things liquidators look for.
  • Modular Systems: Flexible workstations are gold. Things like private office cubicles or adaptable workstation cubicles are prized because the next owner can reconfigure them to fit their own space. Use our free cubicle designer tool to see how layouts can be reimagined.

It really boils down to this: the better the brand and the better the condition, the more money you'll get back. No surprises there.

How Long Is This Whole Process Going to Take?

This is a classic "it depends" situation, but I can give you some real-world timelines. The scale of your project is everything.

For a small office with maybe 10 to 20 workstations, you could be done in as little as one to two weeks. That covers everything from the first call to the final truck pulling away. But if you're clearing out a huge, multi-floor office, you need to budget a month or more for the project to be done right.

The biggest variable, honestly, is you. If you have a detailed inventory list ready to go with good, clear photos, you can get a quote in hours instead of days. That single step shaves a massive amount of time off the front end.

Always, always be upfront about your move-out deadline. A good buyer will tell you straight up if it’s realistic and will work with you to build a logistics plan that hits your date.

Should I Sell Piece-by-Piece or to One Liquidator?

I know it’s tempting to think about selling items individually on Facebook Marketplace or Craigslist to maximize your return. Don't do it. For any real quantity of furniture, it’s a logistical nightmare you don't have time for.

Imagine trying to manage dozens of separate inquiries, scheduling appointments, and coordinating pickups while you're also trying to run a business. It's a full-time job in itself.

For anything more than a few chairs, a single professional buyer is the only sane option. They give you an all-in-one service that handles everything in one clean, coordinated sweep. They guarantee your space will be empty on schedule, and you won’t have to lift a finger. The time and headache you save is worth its weight in gold.

What if Some of My Stuff is Junk?

This happens on literally every single job. It’s incredibly rare for an office to be filled exclusively with high-value, A-grade furniture. Every company has older pieces, a few damaged items, or stuff that simply has no market demand anymore.

A professional buyer expects this.

They’ll assess your entire inventory and make a fair offer on the assets they can actually resell. For everything else, they'll give you a separate, transparent quote for removal and disposal. This often includes responsible recycling of materials like metal and wood. It’s a clean, total solution that gets the space completely empty, so you aren't left holding the bag on a few random, worthless desks.


At Cubicle By Design, we do more than just sell new and refurbished office furniture. We’re also seasoned used office furniture buyers who can help you navigate your entire office transition. Whether you’re upgrading, downsizing, or moving, our team provides a straightforward assessment and professional decommissioning services to make your life easier.

Learn more about our office furniture solutions at Cubicle By Design

Read More

The Ultimate Guide to Office Furniture for Small Business

Picking the right office furniture for a small business is much more than just filling an empty room. It's about building the engine for your company's productivity. A thoughtfully planned office directly impacts workflow, keeps your team happy, and ultimately helps your bottom line. It transforms a major expense into a smart, long-term investment.

Your Blueprint for a Productive Small Office

Before you start browsing desks and chairs, you need a solid blueprint. Just as an architect wouldn't dream of building a house without a detailed plan, you shouldn't furnish your office without a clear strategy. This is where you translate your company’s culture and daily workflow into a physical space, making sure every piece serves a purpose.

Taking this strategic approach helps you dodge common small-business pitfalls, like ending up with a cramped, awkward layout or buying furniture that doesn't fit how your team actually works. A good plan ensures your workspace can grow and adapt right alongside your business.

Overhead shot of an architect's desk with blueprints, a tablet, ruler, and a plant, symbolizing office furniture planning.

Defining Your Core Needs

The foundation of your blueprint comes down to answering a few critical questions about your team and how they operate. This isn’t just about a simple headcount; it’s about really understanding the dynamics of your daily operations.

Getting these fundamentals right from the start will guide every decision you make, from the overall layout to the specific furniture you choose. It can feel like a lot to juggle, which is why the experts at Cubicle By Design are here to help you navigate the process with our office space planning and design services.

So, where do you begin? Start by getting clear on these essential questions:

  • Current and Future Headcount: How many employees do you have right now? More importantly, where do you realistically see that number in the next two or three years? Planning for that growth now saves you from expensive and disruptive rearrangements down the road.
  • Work Styles and Collaboration: Does your team thrive on constant interaction, needing open, shared spaces to bounce ideas around? Or do they need quiet, focused areas for deep work? Most small businesses find they need a mix of both.
  • Essential Adjacencies: Who needs to sit near whom? Mapping out which departments or team members need to be close to each other is a simple but powerful way to create a smooth, efficient workflow.

Getting these basics down on paper is the first step toward a functional office. The table below breaks down the key questions you should be asking yourself.

Initial Office Planning Checklist for Small Businesses

Planning Area Key Questions to Consider Why It Matters for Your Business
Headcount & Growth How many people now? How many in 2-3 years? Will you use freelancers or hybrid staff? Prevents overcrowding and ensures you're not paying for unused space. Scalability is key.
Team Workflow Do teams need to collaborate constantly or work in quiet focus? Are meetings frequent? The layout should support your work style, not fight against it. A mismatched layout kills productivity.
Department Adjacency Which teams need to be close for efficiency (e.g., Sales and Marketing)? A logical flow between departments reduces wasted time and improves communication.
Shared Resources Where will printers, scanners, and break areas go? How accessible do they need to be? Central, easy-to-access resources prevent bottlenecks and keep things running smoothly.

Answering these questions honestly gives you a rock-solid foundation for designing a space that truly works for your team.

The Growing Importance of Smart Office Design

Investing in a well-designed office isn't just a modern trend; it’s a smart business move. The global office furniture market was valued at $57.51 billion in 2024 and is on track to hit $99.58 billion by 2032.

What does that tell us? It shows a massive shift toward creating better, more ergonomic workspaces. Businesses of all sizes are realizing that the right environment is a genuine competitive advantage. This makes your planning phase more critical than ever. For more on this trend, check out the market analysis from Fortune Business Insights.

Designing a Smart and Efficient Small Office Layout

Now that you've got your needs on paper, it's time to turn that vision into a physical space. Designing a great office layout is a bit like city planning—every pathway and zone needs a clear purpose to keep things from grinding to a halt. For a small business, this is even more critical. Every single square foot has to pull its weight.

A smart layout isn't just about squeezing everyone in. It's about actively improving how your team works, encouraging the right conversations, and just making the office a better place to be. The goal is a space that feels intentional, not like a random collection of desks. This means thinking hard about how your team actually moves, talks, and concentrates during a typical day.

Mastering Space and Flow

The first rule of small office design is managing traffic flow. Picture the paths your team walks every day: to the printer, the coffee pot, or over to a coworker's desk. These "highways" need to be wide open to prevent traffic jams and interruptions.

A classic mistake is shoving desks too close together or blocking a natural walkway with a filing cabinet. As a rule of thumb, shoot for at least 36 inches of clearance for your main walkways. It's a simple guideline that prevents that cramped, cluttered feeling and makes the whole office feel more organized and professional.

A well-planned layout can increase employee productivity by up to 20%. This isn't just about making things look nice; it's about removing the little frustrations that get in the way of real work. When your team isn't constantly navigating a crowded floor, they can focus on what actually matters.

Another piece of the puzzle is workstation density. It’s tempting to cram in as many people as possible, but that’s a quick recipe for noise, distraction, and chaos. Finding that sweet spot is a balancing act, and the right office furniture for your small business is what helps you get there.

Creating Dedicated Zones for Different Tasks

Even the tiniest office gets a huge boost from "zoning." This strategy is all about recognizing that different tasks require different environments. By carving out specific areas for specific activities, you support the diverse needs of your team.

  • Focus Zones: These are your library-quiet spots for deep work. You don't need full walls—you can create the feeling of a focus zone with taller cubicle partitions or by simply positioning desks against a wall, away from the main hustle and bustle.
  • Collaboration Zones: This is where the magic of teamwork happens. It could be as simple as a small cluster of armchairs, a high-top table for quick stand-ups, or a corner with a big whiteboard. The key is making it an obvious and inviting spot for those impromptu brainstorming sessions.
  • Break Zones: Giving people a dedicated place to step away from their screens is non-negotiable for preventing burnout. It doesn’t have to be a sprawling cafeteria. A small kitchenette counter or a cozy corner with a sofa can make a world of difference for team morale.

Zoning helps manage the overall noise level and gives people subconscious cues about how to use the space, making the whole office run more smoothly for everyone.

Visualizing Your Plan Before You Build

Sketching a layout on paper is one thing, but actually seeing it come to life is another. This is where you can lean on modern tools to save yourself a ton of headaches. Instead of just guessing how that new desk pod will fit, you can build a digital mock-up and test-drive different arrangements.

Our online Cubicle Designer tool is perfect for this. You can drag and drop furniture, play with different workstation setups, and see exactly how your choices will affect the flow and feel of the room. This step alone can save you from costly mistakes and gives you total confidence before you order a single piece of furniture. For more inspiration, check out our guide on office design ideas for small spaces for some practical tips you can use right away. Using a visual planner turns your abstract ideas into a concrete, actionable blueprint for a workspace that truly works.

Choosing the Right Furniture for Your Team's Workflow

Once you’ve sketched out a layout, it’s time to pick the furniture systems that bring that vision to life. This isn't just about picking out desks and chairs that look good. The right office furniture for a small business is about matching the physical tools to the way your team actually works.

Today, you have a ton of options, and each one is built for different work styles and company priorities. Your choice will shape the entire vibe of your office, from noise levels to how easily people can get things done. Are you building a quiet, focused library or a bustling, interactive workshop? Let's dig into the most common setups.

This decision tree can help you visualize how your main priority points toward different furniture solutions.

Decision tree illustrating office furniture options based on company needs: Focus, Zoned, Collaboration, and Multifunctional spaces.

The takeaway here is simple: let your top priority—whether it’s heads-down focus, teamwork, or just making every square foot count—drive your furniture decisions from the start.

The Flexible Power of Modular Systems

For a growing business, things change. Fast. Modular office furniture is built for exactly that reality, offering flexibility that’s hard to beat. Think of it like a set of building blocks—you can add, remove, and rearrange pieces as your team grows or your needs shift. This keeps you from getting stuck with a rigid layout that stops making sense a year down the road.

This adaptability makes modular systems a smart long-term play. Instead of a massive overhaul when you hire a few new people, you can just tack on another workstation or some storage. These systems are especially powerful for small businesses trying to squeeze maximum value out of a tight space. To see them in action, check out some of our modular office furniture for small spaces.

Finding the Balance with Workstation Cubicles

The classic cubicle isn't the soul-crushing gray box it used to be. Today's workstation cubicles have evolved to strike a really nice balance between having your own space and feeling connected to the team. With lower walls and options for glass panels, they give employees a defined personal area for focus without totally cutting them off from everyone else.

Well-designed cubicles provide a sense of personal territory, which can cut down on distractions by over 40% compared to a completely open office. That boost in focus goes straight to the quality of work and keeps your team happier.

This setup is perfect for teams with different kinds of roles. Some people need quiet time for deep work, while others need to chat with their neighbors. Cubicles give you a structured environment that helps manage noise and visual clutter, making the whole office feel more pulled-together and professional.

When Private Office Cubicles Make Sense

Some roles just demand more privacy. Think leadership, HR, or anyone handling sensitive information. For them, a private office cubicle is the answer. These are essentially mini-offices, built with taller walls and often a lockable door, creating a fully enclosed, quiet space right within your main office floor.

They give you the privacy and status of a traditional walled office but with the flexibility and lower cost of a cubicle system. It's a savvy move for a small business that needs to create an executive suite or a confidential meeting area without calling in the contractors for a full build-out.

Deciding which way to go means weighing all these factors against your budget, your floor plan, and your company culture. To make it easier, here’s a quick side-by-side comparison.

Furniture Solution Comparison for Small Businesses

This table breaks down the most popular furniture types, helping you see at a glance which one aligns best with your team's needs, space, and budget.

Furniture Type Best For Space Efficiency Cost Level Privacy Level
Modular Benching Highly collaborative teams, high-density layouts, and tech startups. Very High Low-Medium Very Low
Workstation Cubicles Teams with mixed roles, balancing focus and collaboration. High Medium Medium
Private Office Cubicles Leadership, HR, or roles requiring confidentiality and deep focus. Medium Medium-High High
Glass Partitions Creating separate zones while maintaining an open, light-filled feel. High High High (Acoustic)

Ultimately, the best choice is the one that removes friction and helps your team do its best work. Whether that’s the high-energy buzz of benching or the quiet hum of private workstations, the right furniture is a powerful tool for growth.

Investing in Ergonomics and Employee Well-Being

Let's be honest: for any small business, your team is everything. Investing in their comfort and health isn't just a "nice to have" perk; it's a direct investment in your company's productivity and long-term success. Focusing on ergonomics is about creating a physical environment that cuts down on fatigue, prevents nagging workplace injuries, and keeps morale from taking a nosedive.

When your people are comfortable, they can focus better and work more efficiently. They're also far less likely to miss days due to back pain or discomfort. This makes choosing the right office furniture for a small business a strategic decision, one that pays you back in both output and employee retention.

Modern home office with ergonomic chair, standing desk, monitor, and plant, demonstrating an ergonomic setup.

The Core Components of an Ergonomic Workstation

Building an ergonomic workspace doesn't need to be complicated. It really just comes down to a few key pieces of furniture designed to support the body’s natural posture and movements throughout the day. Getting these fundamentals right is your first real step toward a healthier office.

Start with the most critical elements that form the foundation of any productive desk setup. Our guide on ergonomics as the secret to a happy workplace goes much deeper into these principles.

Here are the essentials to focus on:

  • The Ergonomic Chair: This is the absolute centerpiece. You're looking for chairs with adjustable height, solid lumbar support to protect the lower back, and adjustable armrests to take the strain off the shoulders. The right chair encourages good posture and can dramatically reduce the physical stress of sitting for hours on end.
  • Sit-Stand Desks: The ability to switch between sitting and standing is a total game-changer for well-being. Adjustable-height desks fight the fatigue and health risks that come with sitting all day, boosting energy levels and focus.
  • Monitor Arms and Stands: Hunching over a laptop screen is a fast track to neck and shoulder pain. A monitor arm or stand lets each employee position their screen at the perfect eye level, promoting a neutral neck and spine. It’s a simple fix with a huge impact.

Setting Up for Success

Just having the right furniture isn't quite enough; it has to be set up correctly for each person. A few simple tweaks can make a world of difference. When you empower your team with the knowledge to adjust their own space, you ensure they get the full benefit of your investment.

A properly configured ergonomic workstation can increase employee productivity by as much as 18%. This boost comes from eliminating physical distractions and improving focus, letting your team perform at their best.

A well-adjusted workspace is where the real value of ergonomics is unlocked. It turns a static desk into a personalized tool for better, more comfortable work.

An Investment Recognized Globally

The push for better, more supportive offices is a worldwide trend. The global office furniture market is projected to hit about $51.8 billion in revenue by 2025, with a huge chunk of that growth driven by the demand for ergonomic solutions.

This shows a broad understanding among businesses of all sizes that investing in employee comfort is essential for productivity. By focusing on ergonomics now, your small business can gain a serious competitive edge in attracting and keeping top talent.

Making Smart Budgeting and Purchasing Decisions

Office furniture is a major investment, and for a small business, every single dollar has to count. When you're ready to buy, it’s tempting to just hunt for the cheapest option. But the goal isn’t just about spending less upfront; it’s about securing the best long-term value for your growing company.

Thinking strategically about your budget means balancing initial costs with the kind of durability and quality your business deserves. This approach ensures your furniture supports productivity for years to come, rather than becoming a costly headache you have to solve all over again.

Calculating Your Total Furniture Budget

One of the most common missteps small businesses make is focusing only on the price tags of desks and chairs. A real-world budget has to account for the entire project, leaving no room for surprise expenses that can completely derail your plans. A good rule of thumb is to plan for $500 to $2,000 per employee, but treat that as a starting point.

To get a much clearer picture, you need to think in terms of cost-per-workstation. This calculation should cover not just the main furniture pieces but all the associated expenses that come with them.

  • Delivery and Freight: The cost to get everything from the warehouse to your front door.
  • Professional Installation: This is non-negotiable. Proper assembly ensures safety and stability, and it's almost always required to keep your warranty valid.
  • Ancillary Costs: Don't forget taxes, any electrical work needed for new outlets, and a contingency fund of 10-15% for those inevitable "just in case" moments.

Tallying up these factors gives you a comprehensive budget that reflects the true investment, letting you move forward with confidence.

New vs. Refurbished: Which Is Right for You?

With a budget in place, the next big question is whether to buy new, used, or refurbished office furniture. Each path has its own distinct advantages, and the right choice really hinges on your specific priorities, budget, and timeline. No matter which route you take, working with a trusted provider like Cubicle By Design ensures you get quality pieces you can depend on.

A common misconception is that "used" and "refurbished" are the same thing. They're not. Refurbished furniture from a reputable dealer is professionally restored to like-new condition—often with new fabric, fresh finishes, and inspected components—offering a much higher standard of quality and reliability than a typical second-hand find.

This distinction is critical. It’s the difference between buying someone’s leftovers and getting a premium product at a fantastic value.

Comparing Your Purchasing Options

Option Key Advantages Best For
New Furniture Full customization of finishes and fabrics, pristine condition, and comprehensive manufacturer warranties. Businesses that need a very specific aesthetic, have a longer lead time, and want the longest possible product lifespan.
Refurbished Furniture Significant cost savings (30-50% less than new), like-new appearance, and environmentally friendly. Often comes with a dealer warranty. Budget-conscious businesses that want high-quality, durable furniture without the new price tag and need a faster turnaround.

Choosing refurbished furniture, like expertly restored workstation cubicles, gives you access to premium, commercial-grade brands that might otherwise be completely out of reach. It's a financially savvy way to furnish your office without compromising on quality or ergonomics.

Thinking About Long-Term Value

The smartest purchasing decisions always look beyond the initial invoice. For any small business, the total cost of ownership is a crucial concept. This isn't just the purchase price; it includes durability, potential maintenance costs, and the length of the warranty.

Think about it: a cheap, flimsy chair that needs to be replaced in two years is far more expensive in the long run than a durable, warrantied chair that lasts for a decade. Investing in commercial-grade furniture—whether it’s new or refurbished—ensures you get products built to withstand the daily wear and tear of a real office. This long-term thinking protects your investment and frees up your capital for other business needs down the road.

Bringing Your New Office Space to Life

You’ve made the plans, set the budget, and picked out your furniture. Now for the exciting part: bringing that vision to life. This is where an empty room transforms into a buzzing, productive workspace, but success hinges on getting the final steps right.

Professional Installation Is Non-Negotiable

Trying to assemble everything yourself might seem like a clever way to trim the budget, but it's a huge gamble for a small business. Think of professional installation less as a luxury and more as an essential part of your investment.

Trained technicians know exactly how to build complex systems, ensuring everything is sturdy, safe, and built to last. A wobbly desk or an unstable partition isn't just an annoyance; it's a safety hazard.

More importantly, most furniture warranties are only valid if certified installers do the work. A DIY job could void your coverage entirely, leaving you on the hook for any future repairs or replacements. It’s just not worth the risk. You can get the full rundown in our guide on office furniture installation.

Infusing Your Brand Through Customization

Your office furniture is more than just a place to sit; it's a massive, three-dimensional billboard for your brand. This is your chance to create a space that feels uniquely you, moving beyond off-the-shelf options to inject your company’s personality into every corner.

It’s easier than you might think:

  • Fabrics and Finishes: Start by choosing panel fabrics, laminates, and metal finishes that align with your brand's color palette. This one step creates a cohesive, professional look that instantly impresses both clients and new hires.
  • Smart Storage Solutions: Do your people need lockable drawers, overhead bins for binders, or open shelving for collaborative projects? Custom storage can be integrated to fit the actual workflow of your team.
  • Glass and Acrylic Panels: Using frosted or clear glass panels is a fantastic way to balance the need for privacy with a modern, open-air aesthetic.

These aren't just minor tweaks. They transform standard furniture into a bespoke environment that genuinely reflects your company's culture and what you stand for.

The days of drab, one-size-fits-all office furniture are over. Businesses now recognize how much ergonomic and customizable setups impact employee well-being and productivity, and it’s driving a massive shift in the market.

This isn't just a hunch; the numbers back it up. The global office furniture market hit an estimated $107.26 billion in 2024 and is projected to climb to $180.20 billion by 2032. This boom shows that small businesses are serious about investing in workspaces that are both functional and inspiring.

Integrating Power and Data Seamlessly

Nothing kills a professional vibe faster than a messy tangle of cords under every desk. It’s not just ugly; it's a tripping hazard waiting to happen. The best office furniture for a small business is designed with this in mind, offering built-in solutions for managing power and data cables.

Look for systems with integrated electrical raceways. These are essentially hidden channels, usually built into the base of cubicle panels, that conceal all your wiring. They allow you to run power outlets and data ports directly to each desk, keeping cables completely out of sight. It’s a simple feature that makes a world of difference, ensuring your team stays connected in a clean, safe, and efficient space.

Common Questions About Outfitting a Small Business Office

Jumping into the world of office furniture for the first time? It can feel like a lot. To help you feel more confident about your decisions, we've put together some straightforward answers to the questions we hear most often from small business owners.

How Much Should We Really Budget for Office Furniture?

This is the big one, isn't it? A solid starting point is to plan for $500 to $2,000 per employee. That range typically gets you a good desk, a supportive chair, and some basic storage. Of course, this can swing depending on the quality, brand, and any custom touches you want.

To get a sharper estimate, think in terms of cost-per-workstation. And here’s a pro tip: always add an extra 10-15% to your final number. This little buffer covers delivery, professional installation, and those inevitable surprises, like realizing you need more power outlets. If you want to see what fits your budget, you can browse our full range of cubicles to get a feel for the options.

What's the Best Way to Squeeze the Most Out of Our Floor Plan?

When space is tight, modular benching systems or low-walled workstation cubicles are your best friends. Benching is fantastic because it minimizes the footprint of each desk, creating a more open, collaborative vibe.

The real secret to maximizing your space is to measure everything twice and use a layout planning tool before you buy a single thing. Being able to visualize different setups with a tool like our free Cubicle Designer helps you nail the balance between headcount and usable common areas.

A little planning upfront prevents that cramped, overcrowded feeling and ensures your layout actually helps people work better from day one.

Should We Go for an Open Plan or Stick with Cubicles?

Honestly, the right answer comes down to your team's day-to-day work and the culture you're building. Open-plan layouts are great for teams that are constantly bouncing ideas off each other. They can make a small office feel much bigger, but the trade-off is often more noise and distraction.

Cubicles, on the other hand, offer that much-needed privacy for roles that demand deep focus. Many small businesses we work with find their sweet spot with a hybrid approach. They might use low-walled cubicles or benching for the main floor and then add a few private office cubicles for quiet work, confidential calls, or leadership. It’s a smart way to get the best of both worlds, supporting different work styles in one cohesive space.


Ready to design a workplace that helps your small business thrive? The team at Cubicle By Design is here to help you plan, source, and install the perfect furniture for your needs.
Start building your ideal office today.

Read More

10 Workplace Design Trends Shaping Offices in 2025

The modern office is no longer just a place to house employees; it has evolved into a strategic asset for productivity, collaboration, and talent retention. As companies adapt to hybrid work models and a heightened focus on employee experience, the physical workspace has become a critical tool for success. Staying current with emerging workplace design trends is no longer a luxury but a necessity for organizations looking to foster innovation, attract top talent, and build a resilient culture. A well-designed office sends a clear message about a company's values and its commitment to its people.

This comprehensive guide moves beyond theory to provide a practical roadmap for implementation. We will explore the ten most impactful trends shaping the future of work, from biophilic design to technology-enhanced smart offices. For each trend, we will break down not just the "what" and "why," but also the crucial "how." You will find actionable steps, realistic budget considerations, and specific ways to implement these powerful ideas using flexible, modular solutions.

Whether you're an office manager outfitting a new space or a facilities leader reconfiguring an existing one, this article provides the insights you need. Discover how to create an environment that doesn't just function but truly inspires, supports diverse needs, and aligns with your business objectives. By leveraging modular systems from Cubicle By Design, you can build an agile and future-proof workspace that adapts as your company grows and its needs change.

1. Hybrid and Flexible Workspaces

The seismic shift toward remote work has fundamentally redefined the purpose of the physical office. Leading the charge in modern workplace design trends is the hybrid and flexible model, an approach that directly addresses the needs of a workforce split between in-office and remote environments. This design philosophy abandons the one-size-fits-all layout, instead creating an agile ecosystem of spaces that support diverse activities.

This isn't just about having fewer desks. It’s about creating an intentional destination that fosters collaboration, focused work, and social connection. Companies like Microsoft and Google have pioneered this by replacing rows of identical desks with dynamic "neighborhoods" or "zones" dedicated to specific tasks. An employee might start their day in a quiet "focus pod" for deep work, move to a collaborative lounge for a team brainstorm, and take a video call from a private, sound-proofed booth.

Why It Matters

A flexible workspace acknowledges that the office's primary role is no longer just to house employees, but to facilitate interaction and provide resources that home offices cannot. This adaptability boosts morale and productivity by giving employees autonomy over where and how they work best. The result is a more efficient use of real estate and a more engaging, purpose-driven employee experience. For an in-depth look, explore how these trends enhance the hybrid work environment.

How Cubicle By Design Can Help

Achieving this level of flexibility requires modular and adaptable furniture.

  • Modular Cubicles: Use our versatile workstation cubicles to create easily reconfigurable "touchdown" spots for hybrid employees.
  • Glass Wall Systems: Install sleek glass partitions to define zones for quiet work or team meetings without sacrificing an open, airy feel.
  • Private Offices: For tasks requiring high concentration or confidentiality, our private office cubicles provide necessary seclusion and acoustic control.
  • Flexible Seating: Incorporate a mix of lounge seating, cafe-style tables, and high-top counters in common areas to support impromptu collaboration and social interaction.

2. Biophilic Design

As our connection to the digital world intensifies, there is a growing counter-movement to bring the natural world back into our daily lives. Biophilic design is a powerful workplace design trend that integrates natural elements and patterns into the built environment. It’s based on the idea that humans have an innate tendency to seek connections with nature, and that satisfying this need in the office can significantly enhance wellbeing and cognitive function.

This goes far beyond simply placing a few potted plants on a windowsill. True biophilic design involves a holistic approach, incorporating elements like living green walls, natural materials such as wood and stone, water features, and maximizing natural light. Companies like Amazon, with its iconic "Spheres" conservatory, and Interface, with its nature-inspired Atlanta headquarters, have demonstrated that this approach creates not just a workplace, but an experience. The goal is to create a calming, restorative, and inspiring atmosphere that reduces stress and boosts creativity.

Why It Matters

Workspaces that connect employees to nature are proven to lower stress, improve cognitive performance, and increase creativity. By mimicking the restorative effects of being outdoors, biophilic design directly addresses employee burnout and mental fatigue. This results in a healthier, more engaged, and more productive workforce, making the office a place people genuinely want to be. The investment in natural elements yields tangible returns in employee satisfaction and retention.

How Cubicle By Design Can Help

Integrating biophilic principles doesn't require a complete overhaul. Modular systems can be strategically combined with natural elements.

  • Natural Finishes: Customize our workstation cubicles with wood-grain laminates and earth-toned fabrics to bring a natural, warm aesthetic to individual workspaces.
  • Maximize Light: Use our glass wall systems to create office fronts and partitions that allow natural light to flow deep into the floor plan, ensuring everyone benefits.
  • Green Dividers: Incorporate planters and green dividers alongside our cubicle systems to define spaces while adding life and improving air quality.
  • Create Restorative Zones: Designate quiet zones or break areas using our modular furniture, complementing them with water features, natural textures, and comfortable seating to create spaces for relaxation and mental recharge.

3. Wellness-Focused Workspaces

The conversation around workplace design has expanded beyond pure functionality to embrace a more holistic view of employee well-being. A leading trend is the creation of wellness-focused workspaces, environments intentionally designed to support the physical and mental health of the workforce. This approach integrates elements that combat burnout, reduce stress, and promote a healthy lifestyle directly into the office fabric.

This trend goes far beyond simply offering a gym membership. It's about a foundational commitment to creating a supportive atmosphere. Companies like LinkedIn and Apple exemplify this by incorporating on-site fitness centers, quiet rooms for meditation or prayer, and spaces with ample natural light and biophilic (nature-inspired) elements. The goal is to design a space where employees feel cared for, enabling them to bring their best, most resilient selves to work each day.

Why It Matters

A wellness-focused design is a direct investment in your most valuable asset: your people. By prioritizing health, companies can see a tangible reduction in absenteeism, an increase in employee engagement, and improved retention rates. When employees feel that their employer genuinely cares about their well-being, it fosters a powerful sense of loyalty and boosts overall morale. This is a key differentiator in today's competitive talent market. Explore how ergonomics is the secret to a happy workplace and a cornerstone of this trend.

How Cubicle By Design Can Help

Building a wellness-centric environment starts with foundational furniture choices that prioritize physical health and mental clarity.

  • Ergonomic Seating: Provide adjustable, supportive chairs that promote good posture and reduce physical strain throughout the workday.
  • Sit-Stand Desks: Integrate height-adjustable desks into workstation cubicles to encourage movement and combat the negative effects of a sedentary work style.
  • Quiet Zones: Use our acoustic panels and private office cubicles to create designated "recharge rooms" or quiet areas for meditation, focused thought, or simply a moment of peace.
  • Natural Light Integration: Our glass wall systems can be used to partition spaces while maximizing the flow of natural light, a proven mood and productivity booster.

4. Diversity and Inclusive Design

Moving beyond mere compliance, a truly modern workplace embraces diversity and inclusion as a core design principle. This essential entry in our list of workplace design trends involves intentionally creating environments that welcome and support people of all backgrounds, abilities, ages, and neurotypes. The goal is to build spaces where every employee feels a sense of belonging and can perform their best work without physical or psychological barriers.

This approach translates into tangible design choices. Instead of a uniform layout, an inclusive office might feature adjustable-height desks, varied lighting options, and quiet zones for neurodivergent employees who are sensitive to stimuli. Companies like Microsoft have led this charge, designing offices with sensory rooms and clear, logical pathways that accommodate different cognitive and physical needs. It’s about creating an equitable experience by offering choice and control over one's immediate environment.

Why It Matters

Inclusive design is not just a moral imperative; it's a strategic business advantage. When workspaces are designed to accommodate a wider range of people, companies can attract and retain a more diverse talent pool, which is proven to drive innovation and problem-solving. It sends a powerful message that the organization values every individual, boosting morale, engagement, and overall productivity by removing unnecessary friction from the workday.

How Cubicle By Design Can Help

Creating a physically and psychologically inclusive space requires thoughtful, flexible furniture solutions.

  • Customizable Layouts: Use our cubicle designer tool to plan layouts that include wider walkways for accessibility and designated quiet zones away from high-traffic areas.
  • Acoustic Privacy: Install our private office cubicles to serve as focus rooms, prayer or meditation spaces, or wellness rooms, providing necessary seclusion and sound control.
  • Varied Workstation Options: Offer a mix of open workstation cubicles and more enclosed setups to cater to both collaborative and independent work styles, accommodating different sensory needs.
  • Ergonomic Integration: Our cubicles can be equipped with ergonomic accessories and adjustable-height desks, allowing employees to tailor their personal space for maximum comfort and physical well-being.

5. Activity-Based Working (ABW)

Taking the concept of flexible workspaces a step further, Activity-Based Working (ABW) is a dynamic model where employees choose from a variety of settings based on the task at hand. This approach moves beyond assigned desks entirely, empowering individuals to select an environment specifically designed for collaboration, concentration, communication, or learning. As a key workplace design trend, ABW transforms the office from a static floor plan into a fluid, purpose-driven ecosystem.

Instead of a single desk, an employee's "office" becomes the entire workplace. They might start their day in a quiet library-style zone for focused report writing, transition to a collaborative lounge with whiteboards for a team brainstorm, and later take client calls from a private phone booth. Companies like Deloitte and Philips have embraced ABW, creating diverse zones that directly support their employees' daily workflows, ultimately optimizing both space utilization and individual performance.

Why It Matters

ABW fosters a culture of autonomy, trust, and intentional work. By providing a diverse palette of spaces, it acknowledges that different tasks require different environments, leading to higher engagement and productivity. This model also encourages movement and cross-departmental interaction, breaking down silos and sparking spontaneous innovation. The result is a more vibrant, agile, and efficient workplace built around how people actually work.

How Cubicle By Design Can Help

Executing an effective ABW strategy requires a sophisticated mix of furniture solutions to create distinct, functional zones.

  • Collaborative Hubs: Use our open-plan workstation cubicles to create team-oriented project areas where colleagues can easily gather and share ideas.
  • Focus Zones: Install private office cubicles with high walls and acoustic panels to create "library" or deep-work zones free from distraction.
  • Glass Meeting Pods: Define semi-private areas for small group meetings or video calls with stylish glass wall systems, maintaining an open feel while providing acoustic separation.
  • Social and Casual Areas: Furnish common areas with a mix of comfortable lounge seating and cafe-style tables to support informal conversations and breaks, which are crucial for building community.

6. Sustainability and Green Office Design

Environmental responsibility has moved from a niche interest to a core business imperative, making sustainability a pivotal element in contemporary workplace design trends. Green office design is a holistic approach focused on reducing environmental impact by prioritizing energy efficiency, using renewable and recycled materials, minimizing waste, and promoting a healthier indoor environment for occupants. This philosophy extends beyond simple recycling programs to influence every aspect of the office, from construction to daily operations.

This trend is about creating spaces that are not only good for the planet but also for people. Industry leaders exemplify this commitment: Apple Park operates as a net-zero carbon campus, while companies like Interface have set ambitious zero-waste goals for their headquarters. These initiatives demonstrate that sustainable design is a powerful statement of corporate values, attracting top talent and appealing to environmentally-conscious clients. The focus is on creating a symbiotic relationship where the workplace supports both ecological health and human well-being.

Why It Matters

A green office design directly impacts the triple bottom line: people, planet, and profit. It reduces operational costs through lower energy and water consumption, enhances employee health and productivity with better air quality and natural light, and strengthens brand reputation. Pursuing certifications like LEED (Leadership in Energy and Environmental Design) provides a clear framework for these efforts and publicly validates a company's commitment to sustainability. To get started, you can transform your small business and go green with foundational strategies.

How Cubicle By Design Can Help

Building a sustainable office starts with smart, long-lasting furniture choices.

  • Durable Workstations: Our robust workstation cubicles are built to last, reducing the need for frequent replacement and minimizing landfill waste.
  • Remanufactured Options: We specialize in high-quality remanufactured and used cubicles, offering a cost-effective and environmentally friendly alternative to buying new. This circular economy approach conserves resources and reduces your carbon footprint.
  • Modular and Reconfigurable Systems: The adaptability of our systems means you can reconfigure your space as needs change instead of discarding old furniture. This extends the life cycle of your investment and prevents unnecessary waste.
  • Efficient Space Planning: Using our cubicle designer tool, we can help you create an efficient layout that maximizes natural light, which can reduce reliance on artificial lighting and lower energy costs.

7. Technology-Enhanced Smart Offices

The next frontier in workplace design trends is the integration of intelligent technology directly into the physical environment. Smart offices utilize Internet of Things (IoT) devices, sensors, and AI-powered systems to create responsive, data-driven workspaces. This approach moves beyond basic connectivity to build an ecosystem that actively enhances efficiency, comfort, and collaboration by understanding and adapting to how people use the space.

This trend is about creating a frictionless employee experience. Imagine a workplace where conference rooms can be booked automatically via a mobile app, lighting and temperature adjust based on occupancy, and real-time data helps facilities managers identify underutilized areas for reconfiguration. Companies like Cisco and Siemens are leading the way, using sophisticated sensor networks to optimize energy consumption and space utilization, ultimately creating a more sustainable and user-centric office.

Why It Matters

A technology-enhanced office provides invaluable insights into workplace dynamics, allowing for smarter, evidence-based decisions about real estate and layout. For employees, it translates to a more seamless and personalized work environment, reducing common frustrations like finding available desks or meeting rooms. This data-driven optimization leads to significant operational cost savings and a more productive, satisfied workforce.

How Cubicle By Design Can Help

A smart office requires a physical infrastructure that can support advanced technology and adapt to data-driven changes.

  • Integrated Power and Data: Our cubicle systems are engineered with built-in power and data access, providing the essential backbone for smart devices and connected workstations.
  • Adaptable Layouts: Use our cubicle designer tool to plan layouts that can easily be modified based on occupancy data, ensuring your office evolves with your team's needs.
  • Sensor-Ready Spaces: Create dedicated zones for different activities using our modular walls and workstations, which can easily accommodate the installation of sensors for lighting, climate control, and occupancy tracking.
  • Tech-Focused Meeting Rooms: Equip collaborative spaces with our furniture solutions designed to support large screens, video conferencing hardware, and interactive whiteboards for a fully integrated smart meeting experience.

8. Community and Social Spaces

As the office evolves into a destination for connection rather than just work, another key workplace design trend is the intentional creation of community and social spaces. This moves far beyond the traditional break room, focusing instead on designing vibrant social hubs that foster a sense of belonging, encourage spontaneous interaction, and strengthen company culture. These are not afterthoughts; they are central to the employee experience.

This approach transforms underutilized areas into dynamic environments for both formal and informal gatherings. Think of Google’s famous themed cafes or the community-focused lounges in WeWork spaces. The goal is to create a "positive friction" where employees from different departments can naturally cross paths, share ideas, and build relationships. These spaces become the heart of the office, supporting everything from a quick coffee chat to a company-wide town hall.

Why It Matters

In a hybrid work model, fostering a strong sense of community is more critical than ever. Well-designed social spaces combat the isolation that remote work can create, reinforcing team cohesion and improving employee morale. They provide a tangible reason to come into the office, offering an environment for connection that a home office simply cannot replicate. The result is a more engaged, collaborative, and loyal workforce.

How Cubicle By Design Can Help

Creating these inviting social hubs requires versatile and comfortable furnishings that can adapt to different needs.

  • Reception and Lobby Areas: Use our stylish and comfortable seating to turn your reception area from a simple waiting room into a welcoming first impression and informal meeting spot.
  • Modular Seating: Arrange modular lounge furniture in open areas to create flexible zones for team huddles, casual conversations, or individual relaxation.
  • Breakroom Furniture: Equip your breakroom or cafe with a mix of cafe-style tables, high-top counters, and durable chairs to accommodate both solo lunches and group gatherings.
  • Workstation Cubicles: Strategically place our low-walled workstation cubicles near social hubs to allow easy transitions between focused work and collaborative breaks.

9. Agile and Modular Office Design

Going beyond simple flexibility, an agile and modular design treats the office as a living entity that can be reconfigured on demand. This approach uses furniture and architectural systems that are not fixed, allowing for rapid transformation without costly, time-consuming renovations. It’s a core component of modern workplace design trends because it prepares businesses for the one constant: change. Whether scaling a team, launching a short-term project, or adapting to new work styles, a modular design ensures the physical space is an asset, not a limitation.

Companies like Haworth and Steelcase have championed systems that allow workspaces to be assembled and disassembled with ease, much like Lego bricks. This enables a facilities manager to convert a series of individual workstations into a large collaborative zone in a matter of hours, not weeks. The entire office layout can shift to meet the evolving needs of the organization, providing unparalleled adaptability for dynamic business environments.

Why It Matters

Agile design future-proofs your real estate investment. Instead of being locked into a static floor plan, your office can evolve alongside your company, supporting growth, project-based work, and shifting team structures. This nimbleness reduces long-term costs associated with renovations and minimizes workplace disruption, empowering organizations to respond quickly to new opportunities and challenges. The result is a highly efficient, perpetually optimized work environment.

How Cubicle By Design Can Help

Our systems are engineered for agility and modularity, making reconfiguration simple and intuitive.

  • Modular Walls: Use our modular office walls to create and dissolve private offices or meeting rooms as needed. These systems offer the permanence of traditional walls with the flexibility of furniture.
  • Reconfigurable Workstations: Our workstation cubicles are designed for easy assembly and adjustment. You can change panel heights, add or remove surfaces, and alter layouts with minimal effort.
  • Casters and Mobile Furniture: Equip lounge seating, whiteboards, and storage units with casters to allow employees to create their own temporary collaborative spaces on the fly.
  • Integrated Power and Data: Plan your power and cabling infrastructure to support multiple configurations, ensuring technology access is never a barrier to a new layout.

10. Neurodiversity-Friendly Workspace Design

A truly inclusive workplace acknowledges that not everyone processes sensory information in the same way. One of the most forward-thinking workplace design trends is creating spaces that are neurodiversity-friendly, accommodating employees with autism, ADHD, dyslexia, and other neurological differences. This approach moves beyond a one-size-fits-all model to offer an environment that minimizes sensory overload and supports different working styles.

This isn't about silent, barren offices. It’s about providing choice and control. Pioneering companies like Microsoft and EY are actively redesigning their spaces to include a spectrum of sensory experiences. An office might feature designated "quiet zones" with low lighting and sound-dampening materials for focused work, alongside more stimulating collaborative areas with dynamic seating. The core principle is allowing individuals to find an environment that matches their sensory needs, whether that means reducing visual clutter, avoiding fluorescent lighting, or having access to a private, enclosed space.

Why It Matters

Designing for neurodiversity is not just an accommodation; it is a strategy to unlock the full potential of every employee. By reducing environmental stressors, companies can improve focus, reduce anxiety, and significantly boost productivity and job satisfaction for their neurodivergent talent. This inclusive approach broadens the talent pool and fosters a culture of psychological safety, where all employees feel supported and valued.

How Cubicle By Design Can Help

Creating a sensory-supportive environment is achievable with thoughtful, modular furniture solutions.

  • Private Offices: Our private office cubicles offer essential acoustic and visual separation, creating controlled environments for employees who need to minimize distractions and sensory input.
  • High-Panel Cubicles: Use workstations with higher panels to reduce visual clutter and background noise, offering a simple yet effective way to create focus-friendly zones. You can explore the importance of cubicle privacy for focused work.
  • Customizable Layouts: Work with our team to design layouts that incorporate quiet corners, defined pathways, and separate zones for different types of work, providing the clear structure many neurodivergent individuals find helpful.
  • Glass Wall Systems: Frosted or partially covered glass partitions can define spaces and reduce visual noise without completely closing off an area, balancing privacy with a sense of connection.

Top 10 Workplace Design Trends Comparison

Trend Implementation Complexity 🔄 Resource Requirements ⚡ Expected Outcomes 📊 Ideal Use Cases 💡 Key Advantages ⭐
Hybrid and Flexible Workspaces Medium–High: scheduling, policies, and AV integration required Moderate–High: flexible furniture, booking systems, conferencing tech Improved satisfaction, productivity, and reduced real estate costs Distributed teams, post‑COVID hybrid models, large offices Flexibility, talent attraction, space optimization
Biophilic Design Low–Medium: design integration and building constraints to manage Moderate: plants, materials, lighting, ongoing maintenance Better wellbeing, reduced stress, ~15% cognitive boost in some studies Offices prioritizing wellness, creative HQs, daylight‑rich sites Enhanced mood, air quality, creativity
Wellness-Focused Workspaces Medium–High: facilities plus program implementation and policies High: fitness spaces, ergonomic furniture, staffing and services Lower absenteeism, improved retention and productivity Large employers, benefits‑focused organizations, campuses Health outcomes, employee loyalty, reduced healthcare costs
Diversity and Inclusive Design Medium–High: research, accessibility design, staff training Moderate: accessibility features, signage, training programs Broader talent pool, higher innovation and belonging Organizations aiming for inclusive hiring, regulated sectors Legal compliance, increased diversity and inclusion
Activity-Based Working (ABW) High: significant change management and cultural shift Moderate: varied zones, booking tech, flexible furnishings Higher utilization, productivity gains, real estate savings Dynamic project teams, firms needing flexible space use Optimized environments for tasks, autonomy
Sustainability and Green Office Design High: technical systems, certifications, design tradeoffs High: renewable systems, sustainable materials, monitoring Lower operational costs long‑term, stronger ESG reputation Companies with net‑zero goals, high‑profile campuses Energy savings, certifications, attraction of green talent
Technology-Enhanced Smart Offices High: IoT/AI integration, data governance, systems support High: sensors, platforms, continuous IT support Real‑time space insights, automation, improved hybrid experience Data‑driven real estate portfolios, large campuses Actionable analytics, improved efficiency, automation
Community and Social Spaces Low–Medium: programming and acoustic/traffic planning Moderate: furniture, hospitality, event support Stronger culture, cross‑functional collaboration, reduced isolation Creative firms, hybrid teams, companies focusing on culture Enhanced engagement, memorable workplace experiences
Agile and Modular Office Design Medium: upfront planning for flexible infrastructure Moderate: modular walls, movable furniture, power distribution Rapid reconfiguration, lower future renovation costs Fast‑growing companies, startups, frequently changing orgs Scalability, quick layout changes, cost avoidance
Neurodiversity-Friendly Workspace Design High: specialized expertise, personalized solutions Moderate–High: sensory controls, adjustable stations, training Higher accuracy/performance for neurodivergent staff, better retention Employers recruiting neurodiverse talent, precision roles Inclusive talent access, improved focus and performance

Design Your Future-Ready Workplace Today

The journey through the top workplace design trends of today reveals a powerful, undeniable truth: the office is no longer just a place to work. It has evolved into a dynamic ecosystem designed to support the whole person. From the flexible arrangements of hybrid models and Activity-Based Working to the calming influence of Biophilic Design and the crucial considerations for neurodiversity, the central theme is a profound shift toward human-centric, adaptable, and purpose-driven environments. The monolithic, one-size-fits-all office is officially a relic.

The future of work is not about predicting a single, definitive layout. Instead, it’s about building in the capacity for change. The trends we've explored, such as agile modularity and technology-enhanced smart offices, underscore the need for physical spaces that can evolve alongside your business and your people. A successful modern workplace is one that can be easily reconfigured to support a collaborative project one day and provide deep, focused work areas the next.

Key Takeaways for Building a Better Workplace

As you consider how to implement these ideas, remember these core principles that weave through all of the most impactful workplace design trends:

  • Flexibility is Non-Negotiable: Your team's needs are diverse and can change daily. Your office must offer a variety of settings, from quiet Private Office Cubicles to collaborative zones, allowing employees to choose the best environment for their specific task.
  • Well-being Drives Performance: A focus on wellness, inclusive design, and biophilia is not a luxury; it's a strategic investment in your greatest asset. When employees feel physically and psychologically supported, engagement, creativity, and retention naturally follow.
  • Modularity is Your Strategic Advantage: The ability to adapt without undertaking a massive, costly renovation is critical. Modular systems, from movable glass walls to reconfigurable Workstation Cubicles, provide the agility needed to future-proof your investment and respond to changing business demands.
  • Community is the New Cornerstone: The office’s most unique value proposition is its ability to foster connection and a shared culture. Intentional social spaces and community hubs are essential for building the strong interpersonal bonds that remote work can sometimes strain.

Your Actionable Next Steps

Translating these trends from concept to reality can feel overwhelming, but it doesn't have to be. Start small and build momentum. Begin by surveying your employees to understand their biggest pain points and what they value most in a physical workspace. Use this data to prioritize your efforts. Perhaps the first step is creating a dedicated wellness room or piloting a new neighborhood of unassigned desks for a specific team.

You don't need a complete overhaul to make a significant impact. With the right partners and solutions, you can implement these powerful workplace design trends incrementally. The goal is progress, not immediate perfection. By embracing a mindset of continuous improvement and adaptation, you create an environment that not only attracts top talent but empowers every individual to do their best work. The future-ready workplace is within your reach, and the first step is simply deciding to build it.


Ready to transform your office from a static space into a dynamic, future-proof environment? Cubicle By Design offers the modular and adaptable solutions you need to bring these leading workplace design trends to life. Explore our versatile systems or start creating your ideal layout with our free online Cubicle Designer today.

Read More

Modular Office Furniture for Small Spaces Guide

Trying to fit a functional office into a tight space can feel like an impossible game of Tetris. But there's a secret weapon: modular office furniture. It's the key to creating a productive, adaptable workspace without the bulk of traditional, heavy-handed desks. It’s all about using flexible, reconfigurable pieces to make every single square inch count.

Why Modular Furniture Is the Smart Choice for Small Spaces

If you're staring at a cramped room and wondering how you'll ever make it productive, you're not alone. The old way of thinking—shoving heavy, fixed desks into corners and hoping for the best—just doesn't cut it anymore. Today's workplace, whether it’s a corporate satellite office or a home setup, demands agility. This is where modular office furniture really shines.

Forget bulky, immovable desks. Think of flexible, interconnected systems you can reconfigure on the fly as your needs evolve. This adaptability is the game-changer that sets modular solutions apart from the rest.

A bright, modern L-shaped office cubicle with light wood desk and mobile cabinets, a key piece of modular office furniture for small spaces.

Unpacking the Core Benefits

The move toward hybrid and remote work has only accelerated this trend. We see companies downsizing their physical footprints and individuals needing to get more out of their home offices every day. It’s no longer just about fitting in a desk; it’s about creating a multi-functional environment that can support different kinds of work.

The core benefits of going modular are pretty clear:

  • Scalability: You can start with a single workstation and easily add more as your team grows. You’re not locked into a fixed layout, which saves a ton of money and headaches down the road.
  • Cost-Efficiency: Instead of gutting the entire office and buying new furniture sets, you can just add or swap out individual components. That long-term value is a huge advantage over traditional pieces.
  • Smart Design: These systems are engineered for efficiency. They often build storage, privacy panels, and power solutions right into the workstation, which kills clutter and frees up precious floor space.

The most successful workspaces aren’t necessarily the largest, but the most intentional. The goal is to use every square foot to support collaboration, culture, and flexibility.

This shift in strategy is backed by the numbers. The global office furniture market, which includes these flexible solutions, was valued at USD 59.7 billion in 2025 and is projected to skyrocket to USD 134.8 billion by 2035. This growth is being driven almost entirely by the demand for adaptable systems that fit how we work now.

Real-World Scenarios

Picture a small startup that needs to rearrange its layout overnight to bring in a new project team. With a modular setup, they can reconfigure their workstation cubicles in a few hours, not days. Or think about a home office that needs to be a quiet focus zone by day, a professional video call background in the afternoon, and a family study area by night. Components like modular office walls can create that crucial sense of separation and order without any permanent construction.

At Cubicle By Design, we see these scenarios play out every single day. Our job is to provide solutions that solve these real-world problems. By embracing modularity, you're not just buying furniture—you're investing in a system that grows and changes right alongside you.

Mastering Your Small Space Measurement and Layout

Before you even think about picking out modular office furniture for small spaces, we need to talk about the single most important step: getting to know your room. An accurate plan is the bedrock of a functional workspace. It’s what separates a confident design project from a chaotic mess of furniture that just doesn't fit.

Guesswork is your enemy here. It leads to cramped layouts and costly returns. So, let’s grab a tape measure and do this right.

The Devil Is in the Details: Measuring Like a Pro

Start with the basics: measure the room’s length and width to get your total square footage. But don't stop there. In a compact office, every inch counts, and it’s the little things that will trip you up.

A common mistake is just measuring from wall to wall. You have to account for every single obstacle and quirk of the room. Get specific and document the precise location and size of:

  • Doors: Measure the door itself, but don't forget the swing path. A standard door that swings inward can gobble up nearly nine square feet of what you thought was usable floor space.
  • Windows: Note their width, how high they are from the floor, and the depth of the sill. This will dictate where you can place taller items like filing cabinets or cubicles with higher walls.
  • Power Outlets & Data Ports: Mark every single one on your sketch. There's nothing worse than designing the perfect layout only to realize your desks are a jungle of extension cords away from the nearest outlet.
  • Structural Elements: Columns, radiators, awkward jutting corners—these things aren’t moving. Measure them and plan around them from the start.

The goal isn’t just seeing if furniture will fit. It’s about figuring out how people will actually move and work in the space. A great design isn't measured in square feet, but in how it feels to use it every day.

Once you have these numbers, sketch out a simple floor plan. You can use graph paper or a free online tool—it doesn’t have to be fancy. This visual map becomes your single source of truth and prevents expensive mistakes down the line. If you want to dive deeper into creating a truly effective workspace, our guide on comprehensive office space planning and design is packed with expert strategies.

Zoning: Your Secret Weapon for Small Spaces

With your floor plan in hand, it's time to think like a designer. Don't see one small room; see several distinct, functional zones. "Zoning" is just a simple way of dedicating specific areas to different activities, and it brings a sense of order to even the tightest floor plan.

Even in a tiny office, you can carve out clear zones for:

  1. Focus Work: These are the spots for heads-down, concentrated tasks. Ideally, you’ll place these away from the main walkway, maybe near a window for some natural light.
  2. Collaboration: It doesn't need to be a full conference room. A small shared table or a cluster of two workstations can create a natural spot for quick team sync-ups without derailing everyone else.
  3. Storage: Group all your storage into one consolidated area. This is where you can make vertical space your superpower. Think tall, narrow shelving or overhead bins built right into your cubicles.

This strategy stops the entire room from feeling like a jumbled, chaotic free-for-all. It creates clear pathways and helps different work styles coexist peacefully.

Choosing the Right Layout for Your Small Office Shape

The actual shape of your room plays a huge role in what layout will work best. A long, skinny room needs a totally different approach than a square one.

To help you visualize what might work, here’s a quick comparison of a few common modular layouts and the room shapes they’re best suited for.

Layout Template Best For (Room Shape) Pros Cons
Perimeter Layout Square or Rectangular Maximizes open central space, which makes the room feel much larger and more open. Can feel a bit formal and isn't always the best for encouraging spontaneous collaboration.
Linear "Galley" Long and Narrow Creates a very clear, efficient walkway and makes the most of the room's length. Can feel cramped if the aisle becomes too narrow; furniture placement is less flexible.
Cluster or "Pod" Square or Wide Fantastic for small teams. It fosters easy communication and a strong sense of teamwork. Can eat up central floor space and might feel crowded if not planned with enough breathing room.
L-Shape Corner Any Shape A brilliant way to make use of corner space that often gets completely wasted. Can create a "dead zone" in the deep corner if you don't plan for accessible storage.

Each option has its trade-offs, but seeing them laid out like this can spark ideas you might not have considered for your specific footprint.

By nailing your measurements and thinking strategically about zones and layouts, you’re building a solid foundation. This is the prep work that ensures your investment in modular office furniture for small spaces pays off, creating a workspace that doesn't just work, but helps your team do their best work.

Okay, you've got your floor plan dialed in. Now for the fun part: picking the actual furniture that brings your small office to life.

This isn't just about grabbing a few desks and chairs. It's about being clever and choosing multi-functional pieces that work harder for you. When you get the right modular office furniture for small spaces, you'll be amazed at how a tight room can suddenly feel organized, efficient, and even spacious.

Think of it like this: every piece of furniture is a tool. A simple hammer does one thing. A multi-tool does a dozen. We're hunting for the multi-tools of the office world.

Private Focus vs. Collaborative Workstations

First thing's first—what kind of work actually happens in this space? Answering this one question will point you to the right core components. Do people need to bury their heads in deep, uninterrupted work, or is the team constantly bouncing ideas off each other?

  • Private Office Cubicles: These are built for concentration. With higher walls and a more defined personal bubble, private office cubicles are the go-to for roles that demand quiet. They create a mental barrier against distractions, which is gold in a busy, compact office.

  • Workstation Cubicles: On the flip side, workstation cubicles usually have lower panels and feel more open. They're designed to encourage chatter and are perfect for teams that need to communicate on the fly. This setup helps keep a small space from feeling cramped or stuffy.

This simple process flow breaks down the planning into three core stages, helping you see the path from an empty room to a finished workspace.

A three-step process flow showing measure, zone, and optimize with icons for planning a modular office.

As you can see, choosing the right components is that final "optimize" step that makes all your careful measuring and zoning pay off.

The Power of Multi-Functional Heroes

In a small office, every single piece of furniture has to earn its keep. Single-use items are a luxury you just can't afford. The trick is to find components that pack multiple functions into one streamlined footprint.

Mobile pedestals are a classic example. These rolling file cabinets tuck right under a desk, giving you secure storage without eating up more floor space. But they can also be pulled out to serve as a temporary extra surface or shifted around to make room for a new team member. Easy.

Smart design isn’t measured in square footage, but in experience. By choosing multi-functional components, you’re designing for efficiency and a better daily workflow, not just filling a room.

The industry numbers back this up. The North American modular furniture market was a USD 30.3 billion business in 2023 and is expected to grow to USD 43.6 billion by 2032. Why? Because businesses everywhere are demanding these kinds of space-efficient designs.

Materials and Ergonomics Matter

Don't forget that how furniture looks is just as important as how big it is. Dark, heavy materials can make a small room feel like a cave. You want to create an illusion of space, and that means choosing lighter finishes.

Keep these material options in mind:

  • Light-Colored Laminates: Think white, light gray, or natural wood tones. They reflect light and make the whole space feel brighter and bigger.
  • Glass Panels: Using frosted or clear glass for cubicle dividers keeps sightlines open while still giving people a bit of acoustic and psychological separation.
  • Slim Profiles: Always go for desks and panels with thin, clean lines. Bulky, thick furniture will just swallow up your space.

Finally, and this is a big one, never sacrifice ergonomics to save a few inches. A compact setup still has to support your team's health and well-being. Look for adjustable-height desks, chairs with solid lumbar support, and monitor arms that get screens off the desk surface while promoting good posture.

We've put together a helpful guide on finding good desks for small spaces that nails this balance between ergonomics and efficiency. When you're ready to start playing with ideas, our interactive Cubicle Designer tool lets you experiment with every component to see what works best for you.

Solving Noise and Privacy in a Compact Workspace

Let's be honest: one of the biggest challenges in a small office is dealing with the constant buzz of activity. When everyone’s elbow-to-elbow, a single phone call can easily break the concentration of the entire room. This is where modular office furniture for small spaces really shines, going beyond just saving space to become a crucial tool for productivity.

It’s not just about the furniture itself, but how you put it to work. Certain modular pieces, like high-walled cubicles or panels wrapped in sound-absorbing fabric, are absolute game-changers for office acoustics. These components act as physical barriers, blocking sightlines and, more importantly, disrupting the path of sound waves to create much-needed pockets of quiet.

A man in a modular office pod, demonstrating a private furniture solution for small spaces.

This kind of intentional separation fosters a sense of psychological privacy, letting employees focus without feeling like they’re constantly being watched or overheard. The real goal is to build an environment where deep, focused work can happen, even when a teammate is just a few feet away.

Using Modular Components for Acoustic Control

The true beauty of modular systems is how you can configure them to tackle your specific acoustic issues. You get to mix and match components to create a custom-fit solution for your office's unique noise profile—a targeted approach you just can't get with traditional furniture.

Think about incorporating these strategies:

  • High Panels for Focus Zones: For areas meant for heads-down work, use cubicle panels that are at least 65 inches high. That height is incredibly effective at blocking most line-of-sight distractions and significantly muffling conversational noise from nearby workstations.
  • Fabric-Covered Panels: Always opt for panels covered in acoustic-grade fabric when you can. Hard surfaces like laminate or glass bounce sound around the room, but these soft materials absorb it, which helps lower the overall ambient noise level.
  • Staggered Layouts: Try to avoid lining up desks in long, straight rows. A staggered or offset layout naturally breaks up the direct path sound travels, stopping noise from ricocheting from one end of the office to the other.

The most productive small offices aren't the quietest ones—they're the ones that give people control over their sensory environment. Smart furniture choices provide that control without sacrificing a collaborative atmosphere.

This is a core principle we build into our designs at Cubicle By Design. We know a great layout balances the need for both collaboration and quiet focus, which is why our systems offer such a wide range of panel heights and materials.

A Holistic Approach to a Quieter Office

While your furniture is your first line of defense, creating a truly focused workspace requires a multi-layered plan. You can boost the acoustic performance of your modular setup with a few simple environmental tweaks that work together to soak up and mask distracting sounds.

Think beyond the cubicle walls and try these complementary tactics:

  1. Soften the Surfaces: Hard floors and bare walls are basically echo chambers. Adding soft materials like area rugs, curtains, or even fabric-covered art can absorb a surprising amount of ambient noise.
  2. Add Acoustic Wall Panels: If your room has a serious echo problem, dedicated acoustic panels mounted on the walls can make a world of difference. They come in all sorts of styles and colors, so they can double as a design element.
  3. Introduce White Noise: A simple white noise machine or a sound masking system creates a gentle, unobtrusive background hum. This raises the ambient noise floor just enough to make human speech less intelligible and, therefore, far less distracting.

By combining smart modular furniture choices with these simple environmental adjustments, you create a complete acoustic solution. You can transform your compact office from a place of constant interruption into a genuine haven for productivity. Getting this balance right is everything, and you can learn more about creating that separation by exploring the fundamentals of office cubicle privacy.

Bringing Your Vision to Life with a Custom Cubicle Designer

You've done the hard work of measuring, sketching layouts, and figuring out which components you need. Now it's time to bridge the gap between that vision in your head and a concrete, visual plan. This is where a lot of people get stuck, trying to imagine how all the pieces will fit together in the real world.

Thankfully, you don't have to guess anymore. Modern design tools let you move your ideas from a napkin sketch to a dynamic, interactive model. You can build your exact room digitally, play with different configurations, and see the results instantly. It’s all about confirming your layout works before a single box shows up at your door.

Translating Your Plan into a 3D Model

The first move is to take your precise room measurements and create a digital canvas. A powerful, free tool like the Cubicle By Design Custom Cubicle Designer makes this surprisingly simple. You just plug in your wall dimensions, mark where the doors and windows are, and—voilà—you have a digital twin of your office.

Once the room is built, the real fun starts. You can begin dragging and dropping different modular components right into your layout. This is a hands-on way to test all your theories. Will that L-shaped desk really fit best in the corner? Are those panels high enough to give people the privacy they need? You get immediate, visual answers to these critical questions.

This screenshot from the Custom Cubicle Designer shows the tool's intuitive drag-and-drop interface, where you can select and place various cubicle components.

This visual approach lets you experiment with different arrangements and see exactly how each piece impacts the flow and feel of your office.

A Practical Walkthrough: A Tiny 10×12 Foot Office

Let’s put this into practice. Imagine you’ve got a tiny 10×12 foot room (that’s just 120 sq. ft.) and you need to fit three people in there comfortably. Sounds like a nightmare with traditional desks, but it’s a perfect puzzle for a modular system.

Here's how we'd tackle it with the designer tool:

  1. Define the Room: First, we'd build the 10×12 foot digital room, making sure to add the door swing and any windows. This immediately shows us the true usable footprint we’re working with.
  2. Select Core Components: To save space, we’d probably go for a back-to-back or clustered "pod" layout instead of lining desks up against the walls. We could grab three compact workstations and start arranging them.
  3. Add Panels and Storage: Next, we'd drop in low divider panels between the stations. This gives everyone their own defined space without making the room feel like a closet. For storage, we'd use mobile pedestals that tuck under each desk and add some integrated overhead shelving to take advantage of vertical space.
  4. Integrate Power: Finally, we can map out where electrical hookups are needed. This ensures everyone has clean, accessible power without tripping over a jungle of extension cords.

What felt like a daunting challenge becomes a manageable, step-by-step project. You're not just hoping it works; you're building a proven solution piece by piece. To see more about how it works, you can transform your office with our interactive cubicle designer.

Customizing Finishes and Generating a Realistic Rendering

A great layout isn’t just about function—it's also about how the space feels. Once the configuration is locked in, you can start playing with finishes. The ability to toggle between light wood tones, crisp whites, or modern grays helps you see how your choices will impact the room's brightness and perceived size. You can even swap out fabric colors for the panels.

A 3D rendering does more than show you what fits. It gives you the confidence that you've made the right choices for your space, your team, and your budget before committing to a purchase.

The rise of modular furniture is directly tied to this kind of smart planning. These systems can reduce the need for excessive office space by up to 30%—a huge win for any small business.

After you've finalized everything, the tool generates a realistic rendering. This isn't just a flat floor plan; it’s a 3D image that shows you what your new office will actually look like. This final visualization is the perfect tool for getting buy-in from your team and moving forward with total confidence.

Still Have Questions About Modular Furniture?

Even the best-laid plans can leave you with a few lingering questions. When you're making an investment in modular office furniture for small spaces, it's smart to iron out the practical details. Let's tackle some of the most common questions we hear from business owners just like you.

How Hard Is It to Put This Stuff Together?

This is probably the number one question we get, and for good reason. The good news is that one of the biggest draws of modular furniture is its straightforward assembly. Most systems are designed with simple, intuitive connectors that don't require a whole workshop of specialized tools. Putting together a single workstation on your own is usually no big deal.

However, when you're talking about a full office installation with multiple cubicles, we really do recommend bringing in the pros. This makes sure every panel is perfectly stable, every connection is rock-solid, and all the electrical components are wired correctly and safely—a service we're proud to offer at Cubicle By Design.

The real magic, though, happens later. When your team grows or your workflow shifts, reconfiguring your layout is a world away from the hassle of traditional furniture. Instead of starting over, you just adapt what you already have. It's a far more flexible and cost-effective approach for a growing business.

Will I Actually Have Enough Storage?

Absolutely. In fact, this is where modular systems truly shine. They're engineered to think vertically and integrate storage in clever ways that get rid of those bulky, space-hogging filing cabinets of the past.

Instead of separate pieces, you get components that build storage right into the workstation.

  • Overhead Storage Bins: These are perfect for using the empty air above the desk, keeping things accessible but out of your immediate workspace.
  • Integrated Shelving: Some divider panels can be fitted with shelves, turning a simple wall into a functional spot for binders, books, or displays.
  • Mobile File Pedestals: These are the unsung heroes of the small office. They slide right under the desk and can be rolled out when needed, giving you secure storage without taking up a permanent chunk of your floor plan.

By building storage into the furniture, you end up with a more organized space that feels open and uncluttered. You can see some of these smart solutions in our collection of workstation cubicles.

Good design in a small office isn't measured in square footage, but in experience. The right modular furniture creates a workspace that feels intuitive, organized, and supportive of daily tasks.

This approach makes every square foot work harder for you, keeping things orderly and productive.

What’s the Real Long-Term Value Here?

While the initial price tag for modular and traditional furniture can look similar, the long-term value is in a completely different league. It all comes down to one word: adaptability. A traditional desk is just a desk. It's never going to be anything else.

A modular system, on the other hand, is a flexible asset that evolves with you. When you hire more people, launch a new team, or need more collaborative zones, you just add, subtract, or rearrange your existing pieces. You’re not stuck throwing out perfectly good furniture and starting from scratch.

This built-in scalability saves a ton of money over the life of your office. Instead of facing a huge capital expense every few years for a total overhaul, you make small, smart adjustments as you go. It's a forward-thinking approach that helps you plan for the future, whether you need private office cubicles or more open stations.


Ready to design a smarter, more flexible workspace? At Cubicle By Design, we specialize in creating modular office solutions that make every square foot count. Explore our full range of cubicles or bring your vision to life with our free Custom Cubicle Designer today.

Read More

Office Design Ideas for Small Spaces: Maximize a Tiny Office

The secret to unlocking great office design ideas for small spaces isn't about finding more square footage—it's about a smarter strategy. It all comes down to three simple but powerful principles: thinking vertically to make the most of your wall space, picking multi-functional furniture to keep clutter at bay, and zoning the area to carve out distinct, productive work environments.

Get these right, and even the most compact office can become a powerhouse of efficiency and style.

Rethinking Your Small Office For Big Results

Staring at a small floor plan can feel like a major limitation. But what if you saw it as an asset instead? A compact space forces you to be intentional. Every single design choice has a real impact, making it an opportunity to create something truly purposeful.

With hybrid and flexible work models becoming the norm, making every square foot count is more important than ever. The mission is to build a space that feels open, stays organized, and is primed for deep, focused work.

This means moving past the clunky, traditional layouts of yesterday and embracing solutions built for modern flexibility. Today’s teams need environments that can pivot and adapt. A thoughtfully designed small office can actually boost communication and create a much stronger sense of community than a sprawling, impersonal one. Here at Cubicle By Design, we specialize in transforming these tight quarters into highly functional workspaces that people love to be in.

The Foundation of Smart Small Space Design

A successful project starts with understanding the core principles that make a small office not just work, but thrive. These aren't just little decorating tips; they are foundational strategies that directly shape how productive and happy your team will be. By focusing on these key areas, you can create a workspace that punches well above its weight class.

To get you started, here is a quick-reference table summarizing these core ideas.

Core Principles for Small Office Design

Principle Key Action Primary Benefit
Think Vertically Use tall shelving, wall-mounted storage, and high-back cubicles. Frees up valuable floor space and reduces physical clutter.
Embrace Multi-Functionality Choose furniture that serves two or more purposes (e.g., storage benches). Maximizes utility without adding more items to the room.
Zone Strategically Use partitions, rugs, or paint to define separate functional areas. Creates psychological separation for focus, collaboration, and breaks.
Master Light & Color Prioritize natural light and use a light, neutral color palette on walls. Makes the space feel significantly larger, brighter, and more open.

These principles are the bedrock of any effective small office layout. A well-executed plan addresses each one right from the start.

For a much deeper dive into the nuts and bolts of structuring your layout, our guide on office space planning and design gives you a complete framework for mapping out your vision from start to finish.

A thoughtfully designed small office proves that you don’t need a massive footprint to achieve big results. It's about making smart, efficient choices that support your team's workflow and well-being, turning limitations into an advantage. This guide provides actionable strategies to help you get there.

Creating Your Blueprint For Productivity

Before you even think about ordering furniture, the first step to a great small office is a smart plan. This is where you map out your space with purpose, making sure every single decision you make down the line actually helps your team get their work done and moves your company forward.

Think of yourself as an architect for a moment. You have to start by measuring everything—the exact dimensions, where the windows and doors are, and where you've got power outlets. But this blueprint is about more than just measurements; it's about figuring out how your team really works day-to-day.

Mapping Your Team's Workflow

To get a layout that truly functions, you have to watch how the space is used. Think about the natural pathways people will take. Where do they walk? Where does someone need to sit for quiet, heads-down work? And where can a couple of people have a quick chat without derailing everyone else's focus?

One of the most effective tricks for small spaces is creating distinct zones for different kinds of work. You don't need to build walls to do this. Something as simple as an area rug, a change in lighting, or clever furniture placement can signal that you're moving from a collaborative area to a quiet zone.

This kind of thoughtful planning helps you sidestep common small-office headaches, like traffic jams next to desks or loud conversations happening right beside someone trying to concentrate. The goal is a layout that feels natural and helpful, not like an obstacle course.

Planning for Modern Flexibility

Today's workplace, especially a smaller one, has to be able to change on a dime. With hybrid teams and projects that shift constantly, a rigid layout just won't cut it. The real trend isn't just about downsizing; it's about making a smaller footprint work smarter. In fact, around 77% of businesses are rethinking their office layouts to make every square foot more flexible. For companies where only about 30% of the team is in the office on a given day, shared desks are quickly replacing dedicated ones to maximize space. You can get more great insights on space planning trends from this guide by Coram.ai.

A flexible blueprint might include:

  • Modular Furniture: Pieces that can be easily moved and reconfigured, like the workstation cubicles we offer. They can adapt as your team shrinks or grows.
  • Hot-Desking Areas: Unassigned desks that different employees can use when they're in the office.
  • Multi-Purpose Zones: A small meeting spot that can double as a quiet lunch area or a casual place to catch up.

This infographic really nails down the core ideas of optimizing your space.

Icons illustrating a progression from vertical storage to multi-use concepts and efficient space zoning.

It shows you how to layer these strategies perfectly—start by thinking vertically, bring in multi-use items, and then zone the whole layout for peak efficiency.

Visualizing Your Future Workspace

The final step is turning your rough sketches and ideas into a solid plan you can actually see. This is where your vision for a smarter small office really comes together. And you don't need to be a professional designer to pull this off.

By visualizing your layout before you commit, you can catch potential issues, experiment with different arrangements, and refine your plan until it's perfect. This step saves both time and money down the line.

To bring your ideas to life, we highly recommend using a visual tool. You can start playing around right now with our free Cubicle Designer tool. It lets you test different layouts and see how our various cubicles and private office cubicles can fit into your unique space. It's a hands-on way to design a better workplace with total confidence.

Selecting Furniture That Works Harder

When you're working with a small office, your furniture can't just look good—it has to be a strategic tool. The right pieces can make a compact area feel surprisingly spacious and hyper-functional. Get it wrong, and you've got instant clutter. Honestly, smart furniture choices are the secret sauce to unlocking the full potential of your limited square footage.

Bright, minimalist office corridor with a semi-enclosed work pod, desk, and storage bench.

This means every single desk, chair, and partition has to pull its weight. Think of your furniture as an active player in your office workflow, not just a passive object sitting there. Each item should either save space, serve multiple roles, or help create distinct work zones without boxing everyone in.

Embracing Modularity and Flexibility

If there's one quality that matters most for small-office furniture, it's adaptability. A static, one-size-fits-all approach is a recipe for frustration as your team grows and projects change. This is exactly where modular systems prove their worth.

Modular furniture is like a professional-grade LEGO set for your office. You can arrange it, reconfigure it, and add to it as your needs shift, which means you're never locked into a layout that no longer works.

Our workstation cubicles, for example, are designed for this exact problem. You can set them up as individual pods for deep focus, then easily reconfigure them into collaborative clusters for a new project. For a growing business, that kind of flexibility isn't just nice to have—it's essential.

A recent study on office design found that flexible, reconfigurable furniture is a top priority for 68% of facility managers in small spaces. They know that the ability to adapt is a real competitive advantage, letting them get the most out of every square foot.

Balancing Privacy and Openness

One of the trickiest parts of designing a small office is giving people privacy without making the space feel like a shoebox. Your team needs quiet spots to concentrate, and managers need places for confidential chats. But building traditional drywall offices? That's often a non-starter due to space and budget.

This is where modern cubicles and partitions offer the perfect middle ground.

  • Private Office Cubicles: These solutions create a self-contained "room-within-a-room," giving you the acoustic and visual privacy needed for leadership or sensitive work. Modern private office cubicles can even feature tall walls and a door for that true office feel, without the construction crew.

  • Glass Panels and Partitions: Using glass is one of the best moves you can make in a small space. Glass walls keep the atmosphere feeling open and airy, letting natural light flood the entire office and making it feel significantly larger. You get the sound separation you need without losing that visual connection.

  • Low-Wall Dividers: Got a team that needs some personal space but thrives on easy collaboration? Low-wall dividers are perfect. They define individual workstations and cut down on desk-level distractions, but team members can still talk to each other just by looking up.

The right balance really comes down to your team's workflow. A sales team might need more acoustic separation for all their calls, while a design team could benefit from a more open, collaborative vibe. For a deeper dive into workstation options, check out our guide on good desks for small spaces.

Choosing The Right Solution For Your Team

Not all furniture solutions are created equal, and the "best" choice is the one that fits your team's day-to-day reality. Do you need to prioritize heads-down focus, or is your success built on constant collaboration? Thinking through these questions will point you toward the ideal setup.

To help you decide, we've put together a simple breakdown of the most common furniture types.

Furniture Solutions for Small Office Spaces

Furniture Type Best For Space Impact Cubicle By Design Solution
Modular Workstation Cubicles Teams needing a mix of collaborative access and individual focus. Highly efficient and adaptable to changing team sizes or project needs. Workstation Cubicles
Private Office Cubicles Managers, HR, or any role requiring high confidentiality and concentration. Creates defined, private spaces within a larger open-plan area. Private Office Cubicles
Glass Partitions/Walls Creating distinct zones while maximizing natural light and an open, airy feel. Visually expands the space and promotes a sense of transparency. Custom Design Options
Benching Desks Highly collaborative teams, creative agencies, and hot-desking environments. Maximizes the number of seats in a linear footprint for high-density areas. Custom Design Options

By being selective and choosing furniture that truly works harder, you can transform your small office from a place of limitation into a strategic asset. Each piece will contribute to a more organized, productive, and comfortable environment for everyone.

Winning The War Against Clutter

Clutter is the ultimate productivity killer in a small office. It makes the space feel chaotic, cramped, and frankly, stressful. Winning the war against clutter isn't just about a quick tidy-up; it's a strategic battle for focus and efficiency. The goal is to move beyond old-school filing cabinets and embrace creative, space-saving organization.

A minimalist office storage room with shelves, document boxes, and a doorway to another workspace.

It all starts by rethinking how you use every surface. By finding and using those hidden storage opportunities, you can create a workspace that not only looks cleaner and feels larger but actually functions more smoothly for your whole team.

Think Vertically To Maximize Your Walls

The most underused real estate in any small office is right there on the walls. When your floor space is at a premium, the only way to go is up. This simple shift in perspective unlocks a huge amount of organizational potential and keeps your floors clear and open.

Thinking vertically means drawing the eye upward with tall, narrow shelving units, which also has the nice effect of making the room feel higher. Wall-mounted organizers, floating shelves, and even pegboard systems can turn an empty wall into a command center for supplies, documents, and tools.

An organized space is a productive space. Studies show that physical clutter actively competes for your attention, resulting in decreased performance and increased stress. By clearing the clutter, you're clearing the way for better focus.

Well-designed cubicles are a cornerstone of this strategy, often coming with integrated overhead bins and pedestals right out of the box. Even better, you can add specialized storage to make them work even harder. You can learn more about how to get the most out of your vertical cubicle space by exploring cubicle hanging shelves that add tons of storage without taking up a single inch of desk surface.

Find Hidden Storage In Plain Sight

Beyond the walls, some of the best storage solutions are hiding in your furniture. Multi-functional pieces are a must-have in any small office design because they pull double duty without adding more bulk to the room.

Keep an eye out for opportunities to introduce clever, dual-purpose furniture:

  • Storage Ottomans: These are perfect as extra seating for a quick chat and can easily store blankets or less-used equipment out of sight.
  • Benches with Built-in Storage: A great fit for a reception area or a small breakout zone, these provide seating and a spot to tuck away bags, supplies, or even shoes.
  • Desks with Integrated Shelving: Look for desks that have built-in vertical storage or hutches to keep essential items within arm's reach but off the main work surface.

Digitize Your Documents And Reduce Paper

Let's be honest: a huge source of office clutter is paper. Stacks of documents, old files, and random printouts can quickly overwhelm a small space. A key part of modern organization is shifting from a paper-first to a digital-first mindset.

Encourage your team to use cloud storage for documents, digital note-taking apps, and collaborative online platforms. This doesn't just cut down on physical clutter—it also makes information way easier to find and share. When you do need to print, make sure you have a clear and simple filing system in place to prevent those dreaded piles from forming.

This approach lines up perfectly with modern workplace trends, where every inch has to be optimized. As hybrid work models drive tighter space utilization, efficiency is everything. Between 2021 and 2024, the average space per employee in the U.S. tightened by a whopping 27%, with workstations between 35 and 49 square feet becoming the new normal. By digitizing your workflow, you directly support this need for a leaner, more organized office.

Controlling Light And Sound To Enhance Focus

In a small office, light and sound are two of the most powerful—and most ignored—ingredients for success. Their impact gets amplified in a tight space. When you get them right, a cramped room suddenly feels open and a chaotic one feels calm, directly helping your team focus and do their best work.

A bright and modern home office with a minimalist desk, chair, window, and acoustic panels.

Think of these elements as tools. By shaping the light and sound in your workspace, you’re shaping the psychological experience for everyone in it. A well-lit, acoustically balanced office isn't just a perk; it's a place where deep work can actually get done.

Let There Be Light

Natural light is your secret weapon in a small office. It has an almost magical ability to make a space feel bigger than it is while lifting everyone's mood and alertness. The number one rule? Never, ever block your windows.

Instead, build your layout around them. Position desks to catch the sunlight, but be smart about it—use low-profile furniture that doesn’t cut off the view. A big mirror on the wall opposite a window can work wonders, bouncing light around the room and creating a feeling of depth.

Of course, the sun isn't always out. That's where a layered lighting strategy comes in, keeping the office functional and inviting all day long. This just means mixing three types of light:

  • Ambient Lighting: This is your general, all-over light from ceiling fixtures or recessed cans. It fills the room and sets the base level of brightness.
  • Task Lighting: This is focused light for getting work done, like an adjustable desk lamp for each person. It’s a must-have for reducing eye strain.
  • Accent Lighting: This is the fun stuff. Use it to highlight cool features like a piece of art or your company logo. It adds personality and character.

Taming The Noise

Noise is the arch-nemesis of a small office. One phone call can throw the entire room off track. Sound loves to bounce off hard surfaces—walls, floors, ceilings—turning your space into an echo chamber where focus goes to die.

The fix is to bring in materials that absorb sound instead of reflecting it. You don't need to tear down walls or get into a major renovation. A few simple, affordable tweaks can make a massive difference.

A workplace study found that out-of-control noise is a top complaint for office workers, with distractions eating up an average of 86 minutes per day. In a small office, sound control isn't a luxury—it's a requirement for getting anything done.

Start by adding soft surfaces anywhere you can. Area rugs on bare floors, fabric curtains instead of blinds, and upholstered furniture are all great places to start. Even something as simple as a felt or canvas wall hanging can help soak up ambient noise. For a more targeted approach, acoustic panels are designed for exactly this purpose and come in all sorts of styles to match your look.

Creating Zones of Quiet

While absorbing general noise helps, the best way to protect your team’s focus is to create dedicated quiet zones. This is where modern cubicles really shine. They aren’t just dividers; cubicles with sound-dampening fabric walls create individual bubbles of quiet, shielding people from conversations and a a flurry of activity just a few feet away.

These systems are one of the smartest ways to give people the separation they need for deep work without putting up permanent walls. They can turn a loud, open-concept room into a collection of productive sanctuaries.

To see how these solutions can transform a workspace, it’s worth exploring the principles of office cubicle privacy to understand how different materials and wall heights contribute to a quieter, more focused environment. By mastering both light and sound, you can turn your small office from a challenge into a major asset.

Bringing Your Small Office Vision to Life

You've got the playbook. You know the strategies to turn a tight space into a productive powerhouse. A thoughtfully designed small office isn't just a dream; it's an achievable goal that pays dividends in team morale, focus, and raw efficiency. It all comes down to being intentional with every square foot.

The core ideas are simple: plan your layout like an architect, pick smart, multi-functional furniture, conquer clutter by thinking vertically, and nail the vibe with the right lighting and sound control. Now for the fun part—turning those concepts into a real, working space.

Turning Ideas Into Reality

The journey from a floor plan to a fully built-out office is where your vision really comes alive. You don't have to look far to see how important smart design is, especially with the boom in flexible work environments. The coworking and small office industry has exploded, now covering over 150 million square feet in the U.S. alone. This isn't just a fad; it’s a clear signal that companies are getting serious about adaptive designs that squeeze maximum value out of every inch. You can learn more about national coworking space trends to see how this movement is shaping modern offices.

At Cubicle By Design, we live for this stuff. Our team is here to help you bridge that gap between a great idea and a finished space that perfectly meets your team's needs. The final steps are all about careful selection, visualization, and professional execution to pull it all together.

A great small office design isn't just about fitting everything in. It's about creating a space that feels intentional, supports deep work, and makes your team feel valued and productive from day one.

Your Next Steps to a Better Workplace

With a solid plan in hand, you can move forward with confidence and build the small office your business deserves. Here’s how you can get started today:

  1. Experiment with Your Layout: Use our free Cubicle Designer tool to play around with different setups. See how workstation cubicles or even private office cubicles might fit your floor plan. It's a no-risk way to see what's possible and refine your blueprint.

  2. Browse Real Solutions: Take a look through our full catalog of cubicles to get a feel for the different styles, heights, and finishes out there. Sometimes, seeing real-world examples is the best way to spark a new idea for your own space.

  3. Consult with the Experts: Let our design team help you put it all together. We can walk you through every decision, from the first sketch to the final touches. Getting the final pieces in place correctly is crucial, and our expert team provides professional office furniture installation services to make sure everything is perfect. Let's create a space you and your team will absolutely love.

Common Questions About Small Office Design

Even the most thorough plan can leave you with a few nagging questions. When it comes to designing a small office, some challenges pop up time and time again. Let’s tackle some of the most common ones head-on so you can keep your project moving with confidence.

How Can I Make My Small Office Look Bigger?

Making a small space feel bigger is all about mastering a few key illusions with light and verticality.

First, embrace natural light like it’s your best friend. Keep your windows completely clear of any obstructions. Then, hang a few well-placed mirrors to bounce that light around the room, which instantly creates a feeling of depth.

Your color choices matter, too. Stick with a light, neutral palette for walls and big furniture items. This makes the whole space feel more open and breezy. And when you're picking out furniture, look for pieces with a smaller physical footprint and exposed legs. Seeing more of the floor tricks the eye into thinking there’s more space than there is.

Finally, get people to look up! It’s a simple trick that makes any room feel taller. Use tall, narrow bookshelves, vertical stripes on an accent wall, or wall-mounted storage to draw the eye upward.

What Is The Best Layout For A Small Rectangular Office?

For those long, skinny rectangular rooms, the best bet is to line the desks up along the longer walls. This strategy keeps a wide, clear path down the middle of the office, which is crucial for avoiding that cramped, bottleneck feeling when people are walking around.

Tuck shared equipment, like printers and scanners, into a corner on a dedicated stand to keep them out of the main traffic path. If you need to add some separation between desks but don’t want to block light, low-profile cubicle partitions or frosted glass dividers are perfect.

Need a small meeting spot? A round table in a corner is a fantastic choice. It takes up much less visual and physical space than a square one, making it far easier to navigate around.

Are Cubicles A Good Idea For A Small Office Space?

Absolutely. But you have to forget the bulky, drab boxes from the past. Modern cubicles are a whole different ballgame—they’re specifically designed to be space-efficient, flexible, and look great.

Modern modular cubicles give you the best of both worlds in a tight space. They deliver the privacy and sound dampening people need for focused work, while options with glass panels or lower walls keep the office feeling bright, connected, and open.

For example, the workstation cubicles we offer at Cubicle By Design can be configured to fit your room’s exact measurements, so not a single inch goes to waste. They give every team member their own designated space, which is a proven way to cut down on distractions and help people concentrate.

How Do I Add Personality Without Creating Clutter?

This is where you get to have some fun, and it’s all about being strategic. To add personality without the mess, start with your walls—they’re your biggest canvas and don't take up any floor space.

  • Make Decor Functional: Instead of just art, hang a stylish whiteboard for brainstorming or a big corkboard for pinning up inspiration.
  • Bring in Some Green: Plants add so much life and color. Use hanging planters or wall-mounted pots to keep your desks and floors clear.
  • Create an Accent Wall: A single wall painted with a bold color or featuring a branded graphic makes a massive impact without adding a single object to the room.
  • Stick to a Cohesive Palette: Pick just one or two accent colors for small things like desk organizers, mouse pads, or chair cushions. This creates a unified, vibrant look that feels intentional, not messy.

By focusing your efforts, you can inject tons of character into the office, making it a space people actually enjoy coming to.


At Cubicle By Design, we're ready to help you turn these ideas into a reality. Take a look at our full range of cubicles or jump right in and start playing with layouts using our free Cubicle Designer tool today.

Read More

A Complete Guide to Sliding Keyboard Trays by Cubicle By Design

You might think a keyboard tray is just a simple add-on, but this little accessory can make a world of difference for posture and comfort throughout the workday. Essentially, a sliding keyboard tray is a platform that mounts right under your desk, letting you place your keyboard and mouse at a more natural, comfortable height. This guide from Cubicle By Design will walk you through everything you need to know.

Why Sliding Keyboard Trays Are Essential Ergonomic Tools

Think about it this way: trying to drive a car when the seat and steering wheel are stuck in a single, awkward position. It wouldn't take long before your back and shoulders started to ache. A standard desk often creates the same problem for office workers, forcing their arms and wrists into unnatural angles just to type. This can lead to nagging discomfort and, over time, more serious injuries.

A sliding keyboard tray puts you back in control. It lets you position your keyboard at or just below elbow height—the sweet spot for ergonomic typing. This simple adjustment helps keep your wrists in a neutral, straight posture, which is crucial for staving off conditions like carpal tunnel syndrome.

More Than Just an Accessory

It’s a common mistake to see a keyboard tray as an optional extra. It's better to view it as a fundamental part of a healthy, productive workstation. By helping employees achieve proper alignment, these trays deliver real benefits that go way beyond just feeling a little more comfortable.

  • Reduces Physical Strain: When your keyboard is at the right height, you don’t have to hunch forward or hike up your shoulders. This takes a lot of stress off your neck, back, and shoulders.
  • Improves Typing Posture: It naturally encourages that straight-wrist position that ergonomists are always talking about, which is your best defense against repetitive strain injuries (RSIs).
  • Maximizes Desk Space: Tucking the keyboard away under the desk surface frees up a ton of valuable real estate for paperwork, notes, or just a less cluttered mind.

We're not the only ones who see the value. The market for these products is booming. The global keyboard tray market was valued at USD 1.2 billion and is on track to hit USD 2.5 billion by 2033, growing at a compound annual rate of 8.5%. This isn't just a trend; it's a clear signal that modern workplaces are finally getting serious about ergonomics.

Investing in proper ergonomics isn’t just about comfort; it's a strategic decision that impacts employee well-being and the company's bottom line. A well-equipped workstation leads to fewer health complaints, reduced absenteeism, and higher overall productivity.

Ultimately, giving employees the right tools, like sliding keyboard trays, is a proactive move. It shows you're invested in their health and long-term performance. In fact, you can explore our detailed guide on how good ergonomics can save you money to see just how tangible the financial benefits are. We believe in creating complete office solutions that support a healthier, more efficient workforce.

The True Ergonomic Benefits of a Proper Keyboard Tray

You might think that ergonomic gear like a sliding keyboard tray is just about employee comfort. It's much more than that. It’s a strategic move that has a real, measurable impact on your business, from productivity and focus right down to employee retention and healthcare costs. The simple act of moving a keyboard off the desktop can send positive ripples across the entire company.

Think about it: when a keyboard sits right on a standard desk, it's almost always too high. This forces people to hunch their shoulders and crane their wrists up at a weird angle just to type. Day in and day out, this posture puts a huge amount of strain on the neck, shoulders, and wrists, basically paving the road for repetitive strain injuries (RSIs).

A sliding keyboard tray is the solution. It lets the user drop their keyboard to, or just below, elbow height. This one small change is the secret to achieving a neutral wrist posture, where the hands, wrists, and forearms fall in a nice, straight line. Keeping this posture is a game-changer for reducing the risk of painful—and expensive—conditions like carpal tunnel syndrome.

Reducing Strain and Preventing Injury

Getting the keyboard in the right spot doesn't just save your wrists; it creates a positive chain reaction all the way up your body. When the keyboard is lower, people don't have to hike up their shoulders to reach the keys anymore. This simple adjustment releases the tension that so many of us feel building up in our neck and shoulder muscles as the day wears on.

This drop in physical stress has some very real benefits:

  • Fewer Aches and Pains: A correctly installed keyboard tray can cut down on discomfort in the neck, shoulders, and upper back by up to 60%.
  • Lower Risk of Chronic Issues: Getting ahead of bad posture helps prevent the long-term problems that lead to more sick days and rising insurance premiums.
  • Better Employee Focus: When your team isn't constantly distracted by nagging aches, they can put all that mental energy into their actual work. The result is better quality and more focus.

Boosting Productivity and Well-being

The link between physical comfort and productivity is crystal clear. An employee who isn't in pain is far more likely to stay focused and engaged with their tasks. A sliding keyboard tray is a key piece in building out high-performance workstation cubicles that actually support your team instead of getting in their way.

By allowing a more natural and sustainable way to work, keyboard trays get rid of those tiny discomforts that pile up throughout the day. They stop small annoyances from snowballing into productivity-killing distractions, which means fewer unscheduled breaks and a much smoother workflow.

At the end of the day, a well-thought-out ergonomic setup sends a clear message to your employees: their well-being matters. To learn more about setting up your whole office for health and productivity, check out our guide on how to maximize the ergonomics of your office. This kind of commitment doesn't just boost morale; it also cuts down on the costly employee turnover that comes from a poor work environment. It makes a sliding keyboard tray one of the smartest investments you can make in your team's long-term success.

A Closer Look at Different Sliding Keyboard Tray Types

Picking the right sliding keyboard tray isn't a simple one-size-fits-all decision. The best fit for your office really comes down to the kinds of desks you have, what your team actually does all day, and how much adjustability they truly need. Getting to know the key differences between the models available is the only way to ensure you're investing in a solution that genuinely improves your workspace ergonomics.

Just like a mechanic has a whole toolbox for different jobs, keyboard trays come in several designs, each built for a specific environment. You'll mainly run into three categories: standard track-mounted trays, fully articulating models, and specialized solutions for those tricky corner desks. Each one offers its own unique mix of simplicity, flexibility, and compatibility.

Standard Track-Mounted Trays

You can think of the standard track-mounted tray as the reliable workhorse of the keyboard tray world. These models are mounted directly to the underside of a desk on a straight track, letting the tray glide smoothly in and out. They are almost always the most straightforward and budget-friendly option, making them perfect for standard rectangular desks and uniform office layouts.

  • Best For: Uniform desk setups, call centers, and any environment where the main goals are basic under-desk storage and a better typing height.
  • Key Feature: Simple slide-in, slide-out functionality. Many models will offer some basic height adjustment, but you won't get much in the way of tilt.
  • Trade-off: It's missing advanced ergonomic adjustments like negative tilt or a side-to-side swivel. That makes it less than ideal for users who have very specific ergonomic requirements.

Fully Articulating Keyboard Trays

When you need the absolute pinnacle of ergonomic customization, fully articulating trays are the only way to go. These models are mounted on an adjustable arm that gives you a massive range of motion—up, down, forward, back, side-to-side swivel, and that all-important negative tilt. This level of fine-tuning lets every single user dial in their perfect typing position, making it an incredibly powerful tool for preventing repetitive strain injuries.

This kind of adjustability is a huge deal in modern workplaces. In fact, if you look at the wider market, adjustable sliding keyboard trays are the fastest-growing segment. They command a higher price, but organizations that are serious about ergonomics are more than willing to invest. You can learn more about under-desk keyboard tray market trends to see the data for yourself.

A fully articulating tray gives users the power to adapt their workstation throughout the day. This flexibility is critical for accommodating different body types and work styles, making it an essential feature for dynamic office environments like those found in our Private Office Cubicles.

Solutions for Corner Desks

Corner workstations have always been a unique challenge because of their shape and the awkward, limited space underneath. Specialized corner keyboard trays were designed specifically to solve this headache. They often have extended articulating arms or uniquely shaped platforms that can navigate the corner, bringing the keyboard and mouse into a comfortable, easy-to-reach position for the user. Without one, people at corner desks often end up in some seriously awkward and straining postures.

Sliding Keyboard Tray Mounting Options

The way a tray mounts to the desk is just as important as the tray itself. This quick comparison breaks down the most common methods to help you match the right tray to your office furniture.

Mounting Type Best For Installation Method Key Advantage
Track-Mounted Standard rectangular desks with ample flat space underneath. Screws directly into the underside of the desk along a fixed track. Simple, stable, and cost-effective for uniform layouts.
Articulating Arm Any desk type, especially for users needing maximum adjustability. A single mounting point is screwed under the desk, with an arm extending out. Unmatched ergonomic control over height, tilt, and swivel.
Corner Sleeve/Adapter L-shaped or corner workstations where a standard track won't fit. Uses a special bracket or an extra-long arm to navigate the corner. Makes unusable corner space functional and ergonomic.
Clamp-On Desks where drilling is not possible (e.g., glass tops, historic furniture). Attaches to the edge of the desk using adjustable clamps; no tools required. Damage-free installation and easy to move between desks.

Ultimately, choosing the right mounting style ensures the tray you select will actually work with your existing setup and deliver the ergonomic benefits you're looking for.

Proper selection and installation are what unlock all these benefits. Whether you're planning a brand-new office layout or retrofitting an existing space, our team at Cubicle By Design can help you find the perfect ergonomic solutions. You can even start to visualize your ideal setup with our powerful Cubicle Designer tool.

How to Measure Your Desk for a Perfect Fit

Nothing torpedoes a simple upgrade faster than realizing the new gear doesn't fit. When it comes to sliding keyboard trays, a few quick measurements up front will save you from a world of installation headaches and ensure you get a solid, wobble-free setup. It's a simple step that guarantees the tray will actually work with your existing desks.

Think of it like getting a picture frame; you wouldn't just eyeball it and hope for the best. A few key dimensions will tell you exactly which keyboard trays are a go and which ones you need to skip. The three big ones are desk thickness, the clearance underneath, and the available width.

Pre-Purchase Measurement Checklist

Before you even think about adding a tray to your cart, grab a tape measure and jot down these numbers. Trust me, spending two minutes on this now will save you a massive amount of time and the pain of processing a return.

Here's a quick checklist to make sure you've got all your bases covered before you order.

Measurement What to Measure Why It Matters
Desk Thickness The vertical thickness of your desktop surface. This dictates screw length for track mounts and ensures clamp-on models will actually fit.
Underside Clearance The clear, flat space from the front edge of the desk to the back. The sliding track needs an unobstructed path. Watch out for hidden support bars or frames.
Available Width The side-to-side space where you plan to install the tray. You need to account for desk legs or filing cabinets that could block the tray's movement.

Once you have these numbers, you can shop with confidence, knowing exactly what will and won't work for your space.

One of the most common mistakes we see is people forgetting to check for a support beam running right down the middle of the desk's underside. A hidden beam can stop an installation dead in its tracks. Always slide your hand along the entire mounting area to feel for any obstructions.

Tackling Common Measurement Challenges

Of course, not all desks are perfectly flat, simple rectangles. You might run into beveled edges, metal support frames, or other quirks that make measuring a bit tricky. Don't worry—there’s usually a workaround for these common issues.

If you’ve got a support bar in the way, some manufacturers offer specialized brackets or shims designed to create a level mounting surface. For desks with a rounded or beveled front edge, just be sure to measure from the flattest part of the underside to give the track a solid surface to grab onto.

Sometimes, in really tight situations, a trackless model or a tray with a shorter track is the best bet. These considerations are especially critical when you're working with good desks for small spaces, where every single inch of real estate counts.

Getting these measurements right is the first, most important step toward a more comfortable and ergonomic workstation. Once you have your numbers, you can confidently find a sliding keyboard tray that feels like it was made just for your desk.

Choosing the Right Materials for Durability and Style

A sliding keyboard tray isn't just an accessory; it's a long-term investment in your office infrastructure. The material it's made from directly impacts its lifespan, stability, and how it looks in your space. Choosing the right one means you're getting a product that not only holds up to daily use but also fits right in with your office aesthetic.

You want a material that provides a solid, stable platform—one that doesn't bounce or flex under the pressure of someone typing all day. That stability is key for comfort and focus, eliminating the small but persistent annoyances that can completely derail an employee's workflow. Let's break down the most common options you'll come across.

Common Tray Materials and Their Benefits

Each material offers its own unique blend of durability, cost, and style. Understanding these differences will help you match a tray to your specific needs, whether it's for a high-traffic call center or a quiet executive suite.

  • Phenolic Resin: Think of this as the workhorse. It's a high-pressure laminate that's incredibly durable and rigid. It’s thin, strong, and resistant to scratches and stains, making it a fantastic choice for tough environments. Its slim profile is also a huge plus for maximizing knee clearance.
  • MDF with Laminate: Medium-Density Fiberboard (MDF) is a really cost-effective core material, usually finished with a laminate surface. This is your go-to for variety, as it comes in countless finishes, including realistic wood grains that can perfectly match your existing desks. While it’s plenty durable, it can be susceptible to moisture damage over time.
  • Steel: When you need maximum strength and rigidity, nothing beats steel. Steel trays give you an exceptionally stable typing surface with absolutely zero flex. They are built to last a lifetime, but they're often heavier and can come with a higher price tag.

When you're picking a material, think about the daily wear and tear it's going to face. A busy, shared workstation, for example, would really benefit from the scratch-resistance of phenolic resin. On the other hand, the refined look of a wood-grain laminate might be the perfect complement for one of our elegant glass top desk with drawers.

This infographic shows the key measurements you'll need—which we walked through in the previous section—to guarantee a perfect fit, no matter the desk material.

As the diagram makes clear, compatibility—checking thickness, clearance, and width—is every bit as important as the material you choose.

In the end, the best sliding keyboard trays strike a balance between robust construction and a professional look. It's about finding that sweet spot where your investment not only improves ergonomics but also enhances the overall quality and feel of the workspace itself.

Installation and Maintenance Best Practices

A sliding keyboard tray's lifespan really comes down to two things: a solid installation and a bit of simple, ongoing care. When you get the setup right from the get-go, you sidestep all those common headaches like wobbly platforms or tracks that just won't glide. A little attention after that protects your investment for years.

While every model has its own quirks, most track-mounted trays follow a pretty similar installation process. The real goal is to give the tray a secure, perfectly level foundation to slide on. The most frequent mistake we see is misalignment, which causes the tray to stick or slide unevenly, but it’s an easy fix with careful measuring before you even pick up a drill.

A correctly installed keyboard tray should feel like a natural extension of the desk—stable, smooth, and silent. If you notice any binding, wobbling, or scraping sounds, it's often a sign that the tracks are not perfectly parallel or that the screws need tightening.

Protecting Your Investment with Proactive Care

Once the tray is in place, a simple maintenance routine can head off most problems before they even start. Think of it like any other piece of equipment with moving parts; a little proactive attention goes a long way. This doesn't need to be a major task—a quick check every few months is usually all it takes.

Here’s a simple routine to keep things running smoothly:

  • Check for Tightness: Give the mounting screws a check every so often to make sure they're snug. The daily vibrations of typing and sliding can sometimes work them loose over time, leading to a bit of a wobble.
  • Clean the Tracks: Dust and office grime love to build up in the sliding mechanism, which can cause it to grind or stick. A quick blast from a can of compressed air, followed by a wipe-down with a dry microfiber cloth, will keep those tracks clear.
  • Wipe Down Surfaces: Clean the tray itself based on its material. For most laminate or phenolic resin trays, a simple damp cloth is all you need. Steer clear of harsh chemical cleaners that could damage the finish.

For larger rollouts involving dozens of workstations, having a professional team handle the assembly ensures every single tray is installed perfectly and efficiently. You can learn more about our expert office furniture installation services to see how we guarantee a flawless setup from start to finish. Following these straightforward practices ensures your sliding keyboard trays will remain a reliable and valuable ergonomic tool for your team.

Got Questions About Sliding Keyboard Trays? We've Got Answers

Even after going through all the specs, a few questions usually pop up. Here are some quick, practical answers to the most common things we hear from office managers and the people using the new equipment.

What’s the Right Height for My Keyboard Tray, Really?

The sweet spot is when your keyboard is right at, or even a smidge below, your resting elbow height. This is the magic position that lets your forearms stay parallel to the floor, keeping your wrists perfectly straight and neutral. That's the whole secret to preventing nagging wrist and shoulder strain.

Can a Keyboard Tray Actually Hold Both My Keyboard and Mouse?

You bet. Almost any modern sliding keyboard tray you’ll find today is a single, wide platform. They’re specifically designed with enough real estate for a full-size keyboard and a mouse right alongside it. This keeps your mousing hand at the exact same ergonomic level as your typing hand, which stops you from unconsciously hiking up one shoulder.

This Feels Weird. How Long Does It Take to Get Used to a New Ergonomic Tray?

Switching from typing on your desktop to a new tray setup can feel a little strange at first. That's totally normal. Just give yourself a few days to settle into the new posture.

A good starting point is to consciously relax your shoulders and check that your wrists aren't bending up or down. You’ll likely make tiny adjustments to the height and tilt over the first week until you find the position that feels just right for you.

The real goal here is to find a setup that feels completely natural, like you're not even trying. If anything feels awkward or you notice any discomfort, that's your cue to make a small tweak to the height or tilt. A truly neutral posture should feel effortless.


Ready to build a workspace that's more comfortable and helps everyone get more done? At Cubicle By Design, we're experts in creating ergonomic office solutions that are just right for your team. Take a look at our high-quality cubicles and see for yourself how the right furniture can make all the difference.

Read More

Choosing the Best 10 Foot Power Strip for Your Office

A 10-foot power strip is one of those simple, essential tools that makes a world of difference in office workstations. It gives you the length you need to safely connect multiple devices without yanking on cords or creating a spaghetti monster of trip hazards. With that extra reach, you gain a ton of flexibility in where you place your desks, leading to a much cleaner and more efficient workspace by bringing power right where it’s needed. At Cubicle By Design, we see how this small detail can transform an office layout.

Why Your Office Needs a 10-Foot Power Strip

We’ve all seen it. The distance between a desk and the nearest wall outlet can sometimes feel like a canyon. This is when employees start getting creative—and not in a good way. They’ll stretch standard-length cords across walkways or, even worse, plug multiple power strips into each other. These “solutions” are not just messy; they’re serious safety risks.

This is exactly where the strategic advantage of a 10-foot power strip comes into play. It’s more than just a longer cord; it’s a foundational piece for building a safe, organized, and truly productive office environment.

The biggest benefit is immediate flexibility. With ten feet of cable, you can finally arrange workstation cubicles and desks based on how your team actually works, not just where the outlets are. This simple change eliminates cord tension, cuts down on the risk of accidental unplugging, and neatly contains cables, preventing those hazardous tangles that cause trips and falls. A well-placed power strip is a surprisingly big part of an ergonomic setup. For more ideas on this, check out our guide on how to maximize the ergonomics of your office.

Solving Common Power Distribution Headaches

For any office or facilities manager, a long power strip solves a handful of persistent problems. Think of it as the simple, elegant answer to the logistical headaches that come with powering a modern, dynamic workspace.

  • Puts an End to “Daisy-Chaining”: Plugging power strips into one another is a major code violation and a genuine fire hazard. A 10-foot cord provides the necessary reach to connect directly and safely to the wall outlet.
  • Clears Away Trip Hazards: By running the cord neatly along walls or tucked under desks, the extra length keeps high-traffic walkways clear and safe for everyone.
  • Supports Flexible Office Layouts: As teams grow and priorities shift, furniture needs to move. A longer power strip allows you to reconfigure your space without calling in an electrician to relocate outlets.
  • Protects Your Valuable Equipment: Many models come with built-in surge protection, which is critical for safeguarding computers, monitors, and other sensitive electronics from damaging voltage spikes.

The widespread use of these devices really highlights their importance. In 2024, common power strips, including 10-foot models, grabbed a dominant market share of about 56.7% of the industry’s revenue, a trend driven by their sheer affordability and versatility. Read the full research about power strip market trends.

Ultimately, picking up a few high-quality 10-foot power strips is a small investment that pays you back in a big way through improved safety, organization, and operational agility. It’s a non-negotiable component for any business looking to create a smarter workspace. We know from experience that smart power management is the unsung hero of a well-designed workplace.

Getting to Grips with Power Strip Specs

Choosing the right 10-foot power strip can feel like trying to decipher a secret code. You’ll see terms like amps, joules, and UL ratings thrown around, but what do they actually mean for your office? Getting these details right is about more than just convenience; it’s critical for protecting your expensive equipment and preventing dangerous electrical overloads.

Think of your office’s electrical system like the plumbing in your house. The specs on a power strip are just telling you how much electrical “current” can flow through it safely. Once you understand a few key concepts, you can confidently pick a power strip that can handle the real demands of a modern workspace.

This infographic neatly summarizes the common power challenges that a well-chosen power strip can solve, focusing on safety, efficiency, and flexibility.

An infographic titled 'The Office Power Problems' shows a power outlet linked to Safety, Flexibility, and Efficiency.

As you can see, a quality power strip is more than just an extension cord. It’s a central hub that addresses these key pain points, creating a much more stable and productive work environment.

Power Strip Technical Specifications Explained

Let’s break down the jargon you’ll find on the packaging. This table cuts through the noise and tells you exactly what to look for.

Specification What It Means Recommended for Office Use
Amperage (Amps) The maximum electrical current the strip can safely handle. Standard is 15 amps. This is suitable for most workstation setups.
Voltage (Volts) The “pressure” of the electrical circuit. In the U.S., this is always 120V for standard outlets. 120V is the U.S. standard.
Joule Rating How much energy the surge protector can absorb from a power spike. A higher number means better protection. Look for at least 600 joules. For workstations with high-end computers, 1,000+ joules is even better.
UL Listing A certification from Underwriters Laboratories, an independent safety science company. Non-negotiable. Only buy power strips that are UL Listed or ETL Listed to ensure they meet safety standards.

These four specs are your North Star when shopping. If a power strip meets the recommendations above, you’re on the right track.

Amps: The Real Bottleneck

Let’s stick with that plumbing analogy. If electricity is water flowing to your computer, then:

  • Voltage is the water pressure. In the U.S., it’s a steady 120 volts. You don’t need to worry much about this number.
  • Amperage (Amps) is the flow rate—how much water is actually moving through the pipe. This number is critical.

Most office power strips are rated for 15 amps. The danger comes when you plug in too many devices that draw a lot of current, like multiple high-performance PCs, large monitors, and maybe a laser printer. Exceeding that 15-amp limit is like forcing too much water through a small pipe. It causes the strip to overheat, creating a serious fire hazard.

How to Calculate Your Power Needs

So, how do you avoid overloading a 10-foot power strip? It’s simple math. The amperage draw is usually printed right on the power adapter or on a sticker on the back of each device. Just add up the amps for everything you plan to plug into a single strip.

As a solid rule of thumb, the total amperage of all your devices should never exceed 80% of the power strip’s rating. For a typical 15-amp strip, that means you should keep the total load under 12 amps to be safe.

Can’t find the amps? Look for the wattage (W). You can figure out the amps with a quick calculation: Watts / 120 Volts = Amps. For example, a 240-watt computer monitor will draw 2 amps (240 / 120 = 2). This easy check ensures all the equipment in your workstations operates well within safe limits.

Joules and UL Listings: Your Safety Nets

Beyond just delivering power, two other specs are absolutely non-negotiable for any office: surge protection and safety certification.

  • Joule Rating: Think of this as the strength of a shield protecting your electronics. A joule rating tells you how much energy a surge protector can absorb before it fails. A sudden power spike can fry sensitive computer components instantly, so a higher joule rating means better protection. For an office with valuable equipment, look for a rating of at least 600 joules—though more is always better.
  • UL Listing: This is arguably the most important safety feature of all. A UL (Underwriters Laboratories) mark means the power strip has been independently tested and certified to meet rigorous safety standards for its wiring, materials, and construction. An unlisted power strip is a total gamble. There’s no guarantee it was built with fire-resistant materials or can actually handle the load it claims to.

Choosing the right equipment can feel a bit overwhelming, but breaking it down makes it perfectly manageable. For a wider view on outfitting your space, our comprehensive office furniture buying guide offers even more valuable insights. Making an informed choice on something as simple as a 10-foot power strip is a small step that pays huge dividends in office safety and efficiency.

Smart Placement and Cable Management Strategies

So you’ve got a 10 foot power strip. That’s a great start, but its real magic isn’t just the outlets—it’s the freedom that long cord gives you. With a little strategic thinking, you can go from a tangled, hazardous mess to a clean, professional, and efficient workspace. The whole idea is to get power exactly where you need it while making the cords themselves practically disappear.

This is where you shift from just having the right tool to using it like a pro. Instead of letting wall outlets dictate your office layout, you’re now in control, placing desks and equipment based on workflow, not cord length. That extra reach is your ticket to a much cleaner and safer setup, helping you dodge the dangerous practice of “daisy-chaining” power strips and keeping walkways clear of trip hazards.

A tidy desk setup featuring two power strips, excellent cable management, and braided cables for a clean workspace.

Finding the Perfect Mounting Spot

Let’s be honest: the best place for a power strip is usually out of sight. When you hide the power source, you cut down on visual clutter, which helps create a more focused, less distracting atmosphere. Luckily, there are a few tried-and-true ways to mount them that work perfectly with modern office furniture.

  • Under-Desk Mounts: This is hands-down the most popular and effective method. By securing the 10 foot power strip to the underside of a desk, you create a central, hidden power hub. Cords for monitors, computers, and phone chargers can all be plugged in discreetly, leaving only the main cord to run neatly to the wall. We have a whole guide on how to set up an under desk power strip if you want to dive deeper.
  • Vertical Panel Mounting: In a cubicle setup, those vertical panels are prime real estate. Mounting a strip vertically on a cubicle wall or leg keeps outlets easily accessible without hogging any desk space. It’s a great solution for shared workstations or any spot where people need to plug and unplug things often.
  • Inside Cable Trays: A lot of modern desks and cubicle systems come with built-in cable trays or raceways. A slim power strip can often be tucked right inside these channels, keeping it completely hidden while delivering power along the length of the desk.

Taming the Cable Chaos

Once the power strip is mounted, the final step is wrangling all the cords that connect to it. This is what really gives your workspace that polished, professional look. It’s amazing what a few simple accessories can do to transform a tangled bird’s nest of wires into something clean and organized.

Think of it as the finishing touch that ties the whole setup together. A few minutes spent here will pay off big time in both looks and long-term safety.

The demand for flexible power solutions like the 10 foot power strip is growing rapidly. Driven by trends like remote work and automation, the global market for power and extension cords is projected to grow at an annual rate of about 10.1% from 2025 to 2032. This reflects a clear need for longer, more versatile power options in all types of workplaces. Discover more insights about these electrical industry trends.

Consider these simple but incredibly effective tools to finish the job:

  • Cable Clips: These little adhesive clips are a lifesaver. Stick them to the underside of the desk or along the legs to guide cords neatly from your devices to the power strip.
  • Velcro Straps or Zip Ties: Perfect for bundling up any excess cable. This stops long loops of cord from dangling down where they can get snagged or just look messy.
  • Cable Sleeves: For the cleanest possible look, a fabric or plastic sleeve can wrap around multiple cords running in the same direction, turning them into one tidy tube.

By combining a 10 foot power strip with these simple cable management tricks, you can create a truly streamlined workspace. You can even map out your ideal layout and power distribution with our interactive Cubicle Designer tool to see how it will all come together.

Ensuring Office Safety and Electrical Code Compliance

While a 10 foot power strip is an incredibly handy tool for office flexibility, it comes with some serious responsibilities. Safety isn’t just a friendly suggestion; it’s a legal and ethical duty to protect your employees and your business. For any office manager, getting a handle on the basic rules of electrical code compliance is absolutely non-negotiable.

If you remember one thing, make it this: power strips are designed for temporary use only. They are not, and never should be, a substitute for permanent wiring. Using them as a long-term solution to snake a cord across the room to a distant outlet is a direct violation of guidelines from organizations like OSHA and the National Electrical Code (NEC). Why? Because over time, that prolonged use dramatically increases the risk of cord damage, overheating, and fire.

This distinction is crucial. A power strip is perfect for setting up a temporary project desk or for a visiting employee who needs to plug in their laptop. But if a workstation is a permanent fixture in your office, like our private office cubicles, it needs a permanent power source—installed by a qualified electrician—to keep things safe and compliant.

Key Electrical Code Guidelines to Follow

Trying to navigate electrical codes can feel a bit overwhelming, but a few core principles will keep your office out of trouble. These rules are put in place to prevent the most common—and most dangerous—electrical hazards you see in a commercial space.

Following these standards protects your team and can save you from costly fines or even a denied insurance claim if an incident occurs. It’s a fundamental part of managing any office responsibly. For a deeper look at professional setups, you might find our expert guide to office furniture installation useful, as it touches on many related safety topics.

Here are the non-negotiable rules for using any power strip in your workplace:

  • Never Plug a Power Strip Into Another Power Strip: We’ve all seen it, but this practice, known as “daisy-chaining,” is strictly forbidden. It’s an easy way to overload the first strip and the wall outlet, creating a major fire risk.
  • Do Not Run Cords Under Rugs or Carpets: Covering a power strip cord traps heat. It also hides any fraying or damage, turning a small, fixable issue into a hidden danger.
  • Avoid High-Wattage Appliances: Power strips are meant for low-power devices like computers, monitors, and phone chargers. Never plug in space heaters, coffee makers, or microwaves. They draw way too much current and can easily cause the strip to overheat.
  • Use Only UL or ETL Certified Strips: Make sure every 10 foot power strip has a certification mark from a recognized safety organization like Underwriters Laboratories (UL). This is your proof that it’s been properly tested for safety.

Actionable Checklist for Regular Inspections

Being proactive is your best defense against electrical accidents. A simple, routine inspection can help you spot the signs of wear and tear before they become serious problems. This check should be done at least twice a year and any time you reconfigure a workstation.

Use this quick checklist to see how your power strips are holding up:

  1. Inspect the Cord: Look for any cracks, fraying, or exposed wires along the entire ten-foot cord. If you find any damage, replace the strip immediately.
  2. Check the Plugs: Make sure the plug’s prongs are straight and secure. A loose or bent prong can create a bad connection and generate dangerous heat.
  3. Examine the Casing: Look for any signs of melting, strange discoloration, or cracks on the power strip’s plastic housing. A hot or discolored outlet is a serious red flag.
  4. Test the Outlets: When you plug something in, does it fit snugly? Loose connections can cause electrical arcing, which is a significant fire hazard.

Investing in high-quality, certified products isn’t just a good idea—it’s essential for protecting your people and your business. With our growing reliance on electronics, safe power distribution has never been more critical.

The global power strip market, which includes essential devices like the 10 foot power strip, was valued at approximately USD 13.43 billion in 2025 and is projected to reach about USD 22.30 billion by 2034. This growth is a direct result of the increasing number of electronic devices used in commercial and residential settings worldwide. Learn more about the power strip market findings here.

By prioritizing safety and sticking to the established codes, you can enjoy the convenience of a 10 foot power strip without putting your workplace at risk. It’s a simple but vital part of responsible facility management.

Integrating Power Strips with Your Cubicle System

A well-designed office isn’t just a collection of furniture; it’s a fully functional ecosystem where every single piece works in harmony. Think of a 10-foot power strip as the final, flexible link in a much bigger power distribution chain, perfectly complementing the structured electrical systems already built into your office furniture.

It helps to imagine your office’s power grid like a city’s road system. The building’s permanent wiring is the main highway, and the integrated power options inside your cubicle systems are the major streets branching off from it. Together, they form the backbone of your office’s electrical infrastructure, designed from the ground up for safety and efficiency.

A tidy office cubicle with a laptop, mouse, and power strip on a clean desk.

The Backbone of Office Power

Modern cubicles are engineered with power management as a core feature. They aren’t just dividers and desks—they are sophisticated systems designed to deliver electricity safely and discreetly to each workstation. This foundational power is usually handled by two key components:

  • Raceways: These are the hidden channels, often found at the base of cubicle panels, that house the main electrical wiring. They act as protected conduits, keeping high-voltage cables safely enclosed and out of sight while distributing power down a whole row of desks.
  • Power Poles: In open-plan offices where cubicles don’t touch a wall, power poles are the vertical channels that bring electricity down from the ceiling grid directly into the cubicle raceways. This clever solution prevents dangerous cords from being stretched across open floors.

This built-in infrastructure does all the heavy lifting, powering the core components of a workstation like the main computer tower and large monitors. It’s robust, code-compliant, and built to last.

Where the 10-Foot Power Strip Fits In

If the built-in system is the highway, then the 10-foot power strip is the local access road that gets power to specific destinations right on the desk. It provides that crucial “last-mile” connectivity for all the personal and peripheral devices your team uses every single day. This supplemental approach is what makes a workspace truly user-friendly.

To get a better handle on how these systems are planned and installed, our guide to cubicle electrical setup offers essential insights for office managers. Understanding this foundation helps you appreciate the synergy between the permanent and flexible power solutions.

This layered strategy means you don’t have to call in an electrician for disruptive, costly work every time an employee needs to plug in a new device. Instead of a major project, you simply add a power strip.

By planning your power distribution from the start, you create a workspace that is not only functional today but also scalable for tomorrow. This dual approach of integrated power plus flexible strips allows you to adapt to changing technology and team needs without a complete overhaul.

Customizing Individual Workstations

This hybrid model really shines when you start customizing different types of workspaces. For instance, in private office cubicles, the built-in power might handle the desktop computer and main task lighting. Meanwhile, a strategically placed 10-foot power strip mounted under the desk can service a laptop, phone charger, and a personal desk lamp with zero fuss.

This approach gives you the best of both worlds:

  1. System-Level Power: Your core electrical needs are met by a safe, permanent, and integrated system that follows all building codes.
  2. User-Level Flexibility: Your employees get the freedom to power their personal devices conveniently, without overloading the main circuits or creating a tangled mess of cords.

By integrating supplemental power strips into a well-planned cubicle system, you build a more functional, organized, and adaptable office environment. It’s a smart strategy that balances a robust infrastructure with the practical, everyday power needs of your team.

Your Top Questions About 10-Foot Power Strips

Even with all the technical specs figured out, real-world questions always pop up when you’re trying to get a busy office running smoothly. From what you can (and can’t) plug in to how often you need to replace them, getting straight answers is key to a safe and productive workspace.

Let’s dive into some of the most common questions we hear from office managers. Think of this as your go-to guide for those day-to-day “what-if” moments.

Can I Plug a Space Heater or Coffee Maker Into a Power Strip?

This is probably the most critical safety question we get, and the answer is a hard no. You should never plug high-wattage appliances like space heaters, coffee makers, toasters, or microwaves into any standard power strip.

These devices pull a massive amount of power—way more than your typical office gear. Plugging one in can easily overload the power strip, causing its internal wiring to overheat. This creates a serious fire hazard. The only safe way to power these appliances is by plugging them directly into a dedicated wall outlet. A 10-foot power strip is built for low-power electronics like computers, monitors, desk lamps, and phone chargers.

What Is the Difference Between a Power Strip and a Surge Protector?

They might look identical on the outside, but their internal functions are worlds apart. Understanding this difference is crucial for protecting your company’s expensive electronics.

A basic power strip is really just an extension cord with a few extra outlets. It lets you plug in more devices, but it offers zero protection against electrical surges or voltage spikes. It’s simply a pass-through for electricity.

A surge protector, however, has special internal components designed to absorb and block excess voltage during a power surge, protecting your connected equipment. For any office setup with computers, servers, or other sensitive electronics, you absolutely want a 10-foot power strip that is also a surge protector. You can tell by the “joule” rating on the packaging—the higher the joules, the more protection you get.

How Often Should Office Power Strips Be Inspected or Replaced?

Making a quick inspection part of your regular office maintenance is a smart move. At least twice a year, give every power strip a visual once-over. You’re looking for any signs of damage, like a cracked case, a frayed cord, or loose-fitting plugs.

Pay close attention to how the strip looks and feels during use. If a power strip ever feels hot to the touch or you see any discoloration or scorching around the outlets, unplug it and get rid of it immediately. Those are red flags for a dangerous internal failure.

While there’s no official expiration date, the protective bits inside a surge protector do wear out over time, especially after taking a hit from a big power spike. As a general rule of thumb, it’s a good idea to replace your office surge protectors every 3-5 years. This ensures your gear always has the protection it needs.

Is It Safe to ‘Daisy-Chain’ Power Strips?

Absolutely not. Plugging one power strip into another, or “daisy-chaining,” is never safe. This is a major fire hazard and is strictly forbidden by both OSHA (Occupational Safety and Health Administration) and the National Electrical Code (NEC).

Daisy-chaining creates a massive risk of overloading the first strip and the wall outlet it’s plugged into. This can quickly lead to overheating, melting plastic, and a potential fire. If you need more outlets or a longer reach than a single 10-foot power strip offers, the only safe solution is to have a licensed electrician install more wall outlets. This is a non-negotiable safety rule for any workplace.

At Cubicle By Design, we help businesses plan their power and data needs right from the start, ensuring a safe, compliant, and efficient workspace. Whether you’re mocking up a new layout with our Cubicle Designer tool or outfitting brand-new workstation cubicles, we’ve got the expertise to get it right. From complete cubicle systems to specialized private office cubicles, all our solutions are designed with proper power management in mind.


Ready to build a smarter, safer, and more flexible workspace? The experts at Cubicle By Design can help you integrate the right power solutions for your office layout, ensuring your team has the connectivity it needs to thrive.

Explore our office furniture solutions and start planning today!

Read More

Choosing the Best Under Desk Power Strip for Your Office by Cubicle By Design

You’ve seen them before: the tangled nest of wires and the dusty power strip hogging floor space under a desk. It’s a classic office problem. But what if the solution was as simple as looking up? An under-desk power strip does exactly what its name suggests—it’s a centralized power source that mounts directly beneath your worksurface, getting everything up and away from the floor.

This isn’t just about hiding a few cables. It’s about creating a clean, safe, and surprisingly organized hub for all your desktop tech at Cubicle By Design.

Transforming Your Workspace with Smart Power Management

A neat office setup featuring a wooden desk, laptop, monitor, and an illuminated under desk power strip mounted underneath.

Think of an under-desk power strip as the command center for your workstation. It quietly and efficiently manages the power for your monitors, laptop, phone charger, and desk lamp, all without a single wire cluttering up the floor. In a busy office, this moves beyond simple convenience and becomes a core part of a truly productive and safe workspace.

That old power strip on the floor? It’s a magnet for dust, a trip hazard waiting to happen, and it’s all too easy to accidentally kick the plug out mid-task. By lifting this essential piece of equipment off the ground, you instantly reclaim that floor space and create a much cleaner, more professional look. This small shift makes a huge difference, especially in modern offices with flexible layouts and collaborative zones where people are always on the move.

To put it in perspective, let’s look at a quick comparison.

Under Desk Power Strips vs Traditional Floor Strips

This table breaks down the practical advantages of upgrading to an under-desk power solution for any modern office environment.

Feature Under Desk Power Strip Traditional Floor Strip
Location Mounted out of sight under the desk Lies on the floor, often in the way
Safety Eliminates trip hazards from cords Creates a significant trip hazard
Cable Management Keeps all cables neatly contained and organized Leads to tangled messes of wires
Aesthetics Promotes a clean, minimalist desk and floor Contributes to a cluttered, unprofessional look
Protection Safe from kicks, spills, and accidental unplugs Vulnerable to damage, dust, and spills
Cleaning Makes sweeping and vacuuming effortless Obstructs cleaning crews, gathers dust bunnies

As you can see, moving power management from the floor to the desk is a simple change that delivers an immediate impact on daily operations, safety, and office design.

The Core Benefits of an Under-Desk Power Solution

This isn’t just about tidiness; it’s a strategic upgrade that pays off in multiple ways.

Here are the key benefits you’ll notice right away:

  • Enhanced Safety: Getting cables off the floor completely removes one of the most common workplace trip hazards. It’s a simple fix that reduces liability and keeps your team safer.
  • Improved Aesthetics: A clutter-free floor and an organized desk create a more professional and focused atmosphere. It’s amazing how a clean workspace can boost morale and productivity.
  • Easier Cleaning and Maintenance: Without a web of wires to navigate, cleaning crews can work much more efficiently. Plus, your IT staff can access connections without getting on their hands and knees.
  • Protection for Your Equipment: Mounted power strips aren’t getting kicked around or accidentally unplugged. This means a more stable power supply for your valuable computers and monitors.

The growing focus on ergonomics and clean desk policies has made these power solutions more popular than ever. In fact, the market for under-desk power strips is booming, projected to hit nearly USD 3.75 billion by 2033. This isn’t just a fleeting trend; it’s a fundamental shift in how modern offices are designed for efficiency.

Supporting Modern, Flexible Work Environments

Today’s offices are dynamic. With the rise of adjustable-height desks and modular furniture, you need a power solution that can keep up. If you’re curious about this trend, you can learn why your business needs sit-stand desks in our detailed guide. An under-desk power strip moves right along with the desk, ensuring all your connections stay secure and within reach whether an employee is sitting or standing.

This flexibility is crucial for making spaces truly functional, from individual workstation cubicles to large, open-plan areas. A well-designed office considers every detail—and that absolutely includes how it’s powered. By planning for smart power solutions from the start, you can build an office that’s not just stylish, but also safe, efficient, and ready for whatever the future of work holds.

Getting to Grips with Electrical Safety and Office Compliance

Picking an under-desk power strip is about more than just how many plugs it has. It’s fundamentally a decision about electrical safety and compliance—one that protects your pricey office equipment and, more importantly, your people. For facility managers, the technical jargon can feel like a foreign language, but the core concepts are actually pretty simple once you break them down.

Think of your office’s electrical system like plumbing. The voltage is the water pressure, a constant force just waiting to flow. The amperage (amps) is like the diameter of the pipe, controlling how much electricity can move through the circuit at once. Finally, the wattage (watts) is the total amount of water used, which is just a product of the pressure and flow rate. Overloading a circuit is like trying to force a fire hose worth of water through a garden hose; eventually, something is going to burst.

Decoding Key Electrical Specifications

Getting a handle on these terms is the first step to making a smart choice. Every spec on a power strip tells a crucial part of its safety story.

  • Amperage (Amps): Most office circuits are rated for either 15 or 20 amps. A golden rule is to never plug a power strip into a circuit with a lower amperage rating. A standard under-desk power strip is typically rated for 15 amps, which is plenty for most workstation setups.
  • Wattage (Watts): This number tells you the total power load the strip can safely handle. To stay on the right side of safety, just add up the wattage of every device you plan to plug in. A typical office computer might pull 300 watts and a monitor 50 watts, so keeping a running tally helps you prevent a dangerous overload.
  • Joule Rating: Think of this as the surge protector’s armor. It measures how big of a power spike the strip can absorb before it fails and lets the surge through to your devices. For expensive office equipment, you want a higher joule rating—ideally 1,000 joules or more—for real protection.

Understanding these details is fundamental. For a deeper dive into the specifics of wiring your workspace, our guide on cubicle electrical setup offers a ton of valuable insights for a safe and efficient office.

Why UL Certification Is Non-Negotiable

When you see a UL (Underwriters Laboratories) or ETL (Intertek) mark on a product, it means it’s been independently tested and meets tough, nationally recognized safety standards. This isn’t just a friendly suggestion; it’s a hard-and-fast requirement for any commercial space. An uncertified power strip is a black box—you have no idea if it’s safe, and it could be a serious fire risk.

An uncertified power strip is a massive liability. If an electrical fire happens, using non-certified equipment can get your insurance claim denied and land you in hot water with local building and fire codes.

Always look for the holographic UL or ETL sticker right on the product itself, not just on the box. It’s your proof that the device is legitimate and that you’re committed to a safe workplace.

Essential Safety Features for Your Checklist

Beyond the core electrical ratings, today’s power strips come with features specifically designed for the office environment. When you’re sourcing them, make sure these items are on your list.

Your Office Power Strip Safety Checklist:

  1. Circuit Breaker: This is a must-have. If the power strip gets overloaded, this switch automatically trips, cutting off the power to prevent overheating and a potential fire. It’s a modern failsafe that’s far more reliable than old-school fuses.
  2. Surge Protection: As we touched on, a high joule rating is key. This feature is what stands between your equipment and a damaging voltage spike from a lightning storm or power grid issue, saving you a fortune in replacement costs.
  3. Durable Housing: Look for power strips built with impact-resistant, fire-retardant materials. In a busy office, things get kicked and bumped. You need a unit that can take some abuse without cracking or becoming a hazard.
  4. Proper Cord Length: The cord needs to be long enough to comfortably reach the wall outlet without being stretched tight, but not so long that it becomes a trip hazard. And whatever you do, never plug a power strip into an extension cord.

The demand for these safer, more robust units is a big reason the power strip market is growing. Valued at roughly USD 12.7 billion, the global market is expected to hit around USD 20.7 billion by 2033, with businesses driving the need for surge-protected and heavy-duty models. You can dig into the full research on power strip market trends here. Choosing the right power strip isn’t just an IT task; it’s a strategic investment in your office’s safety and ability to stay up and running.

How to Select the Right Mounting Option for Your Desks

An under-desk power strip is only as good as its mount. If it’s not secure, it can sag, drop, or become an even bigger headache than the cable clutter it was supposed to fix. The right choice comes down to your specific office furniture—from what the desks are made of to how permanent you want the installation to be.

The main goal here is to keep your power source stable, safe, and tucked completely out of sight. Whether you’re setting up modern workstation cubicles or traditional executive desks, the right mount is what makes the whole setup clean and functional. Let’s walk through the common options to find the perfect fit.

This decision tree shows how to quickly verify the safety essentials for any power strip before installation.

A flowchart illustrating power strip safety steps, including checking the safety label and verifying UL approval for an under desk power strip.

The flowchart reinforces a simple but crucial process: always start by confirming a recognized safety certification like UL, check its power capacity, and only proceed once you’ve verified it’s safe for office use.

Permanent Screw-In Mounts

For a rock-solid, long-term solution, you can’t beat a direct screw-in mount. This method is exactly what it sounds like: drilling small pilot holes and fastening the power strip or its bracket directly to the underside of the desk.

It’s by far the most robust option you can choose, making it ideal for desks made of solid wood or thick particleboard. Once it’s in, it’s not going anywhere. This makes it a perfect choice for permanent setups in private office cubicles where workstations aren’t being reconfigured all the time.

But that permanence is also its biggest downside. You are putting holes in the furniture, so it’s a definite no-go for glass tops, thin laminate surfaces, or any desk you might want to move or repurpose down the line.

Flexible Clamp-On Brackets

If you need a strong hold without the commitment of drilling holes, clamp-on brackets are an excellent middle ground. These versatile mounts attach to the edge of a desk, a lot like a monitor arm, using a C-clamp that you tighten with a thumbscrew.

This approach gives you a few key advantages:

  • No Damage: They leave the desk surface completely unharmed.
  • Adjustability: Clamps can be easily moved to a new spot or a different desk entirely.
  • Versatility: They work with all sorts of desk thicknesses and materials, including some metal frames.

Clamp-on brackets provide a secure grip that’s more than strong enough for even the larger power strips. They’re especially useful for sit-stand desks, since you can attach them to the frame or desktop without getting in the way of the height adjustment.

A secure yet non-permanent solution like a clamp-on bracket is perfect for flexible office layouts where teams and desk arrangements may change. It provides stability without limiting future space planning options.

Simple Adhesive Solutions

For the quickest and easiest installation possible, adhesive mounts are a popular drill-free alternative. These usually involve high-strength double-sided tape or special adhesive strips designed to hold the weight of a power strip. This method is best for lightweight power strips and smooth, non-porous surfaces like metal or sealed laminate.

The main benefit is speed and simplicity—you can get one installed in minutes. However, their reliability can be a mixed bag. Things like heat, humidity, and the texture of the desk can weaken the bond over time, which means the power strip could eventually fall.

For this reason, adhesive mounts are best for light-duty applications or as a temporary fix. When you’re tackling a large-scale project, consulting with experts on professional office furniture installation can ensure you pick and implement the most durable mounting solutions for your entire fleet of desks.

Choosing the right mounting option from the start prevents a lot of headaches later on, making sure your under-desk power strip remains a helpful tool instead of a maintenance issue.

Creating Your Under Desk Power Installation Plan

A great office-wide power upgrade doesn’t start with a drill and a box of screws. It starts with a smart, practical plan. If you just jump straight into installation, you’re setting yourself up for headaches like mismatched gear, wasted time, and a whole lot of disruption for your team. This whole phase is about mapping out exactly what you need to ensure a smooth, efficient rollout that supports every single workstation.

Think of it like creating a blueprint for your office’s electrical nervous system. An architect wouldn’t start building without a plan, and you shouldn’t start mounting power strips without one either. A solid plan stops you from making those classic mistakes, like ordering a power strip with too few outlets or finding out the cord is six inches too short to reach the wall.

Auditing Each Workstation

First things first: you need to do a simple but crucial device census at every single desk. Don’t guess. Walk the floor and get an accurate count of every single thing that needs to be plugged in. This audit is the foundation for your entire project.

At each desk, make a quick list of all the devices that require power. This should include:

  • Primary Equipment: The computer itself (whether it’s a desktop or a laptop docking station) and all its monitors.
  • Peripherals: Don’t forget the desk lamps, speakers, and any personal printers.
  • Charging Needs: Phone chargers, tablet chargers, and any other personal adapters employees use daily.

Once you have your count, here’s a pro tip: add at least two extra outlets to your final number for each power strip. This gives you built-in flexibility for the future. That little bit of foresight is what prevents dangerous daisy-chaining when someone gets a new monitor or a second phone.

Determining Ideal Placement and Measurements

Now that you know what needs power, it’s time to figure out where to put it. The perfect spot for an under-desk power strip is easily accessible but completely out of sight. You want it positioned where someone can plug in a new device without becoming a contortionist, but tucked away so it won’t get kicked or bumped.

Strategic placement isn’t just about hiding a power strip; it’s about making the workspace better. When it’s easy to reach, employees are more likely to unplug things like laptop chargers at the end of the day, which can genuinely add up to energy savings over time.

Before you even think about placing an order, grab a tape measure and get two critical measurements for each workstation:

  1. Power Strip to Wall Outlet: Measure the distance from where you plan to mount the strip to the nearest wall or floor outlet. This tells you the minimum cord length you need for the power strip itself, ensuring it reaches without being pulled taut.
  2. Device to Power Strip: Check the cord lengths on the biggest pieces of equipment, like monitors and computers. Make sure they can comfortably reach the mounted power strip, especially if you’re using height-adjustable desks that move up and down.

These simple planning steps are fundamental to successful office space planning and design. They make sure the infrastructure you’re building actually supports the way your team works.

To help you stay organized, use a simple checklist for each workstation. It’s a great way to make sure nothing gets missed as you move from desk to desk.

Workstation Installation Planning Checklist

Use this checklist for each desk to ensure a smooth and effective installation process across your entire office floor.

Planning Step Key Consideration Status
Device Audit Count all computers, monitors, peripherals, and chargers.
Outlet Count Total devices + 2 extra outlets for future needs.
Placement Identify a safe, accessible, and hidden mounting location.
Measure to Wall Record distance from mounting spot to the nearest wall outlet.
Measure to Devices Confirm device cords can reach the mounting spot easily.
Desk Type Note if the desk is fixed or height-adjustable.

This checklist turns a potentially chaotic process into a series of simple, repeatable steps, guaranteeing consistency across the entire project.

Coordinating with Your Office Layout

The last piece of the puzzle is making sure your power plan fits your physical office layout. This is especially critical in offices with modular cubicles or wide-open floor plans. If you’re designing from scratch, using a tool like our Cubicle Designer can be a huge help in visualizing where power needs to go and how it all connects with your furniture.

It’s no surprise that commercial offices are the biggest users of power strips, accounting for about 28.1% of global demand. This trend is all about the need to power a ton of devices in modern open-plan offices and cubicle farms. If you want to dive deeper, you can read the full research on power strip market dynamics to see where the industry is heading.

By taking the time to create a detailed plan, you’re not just buying equipment—you’re aligning your project with proven best practices and setting your office up for success.

Mastering Cable Management for a Professional Look

Installing an under-desk power strip is a great first step, but it really only solves half the problem. If you don’t have a plan for the wires themselves, you’re just trading a mess on the floor for a tangled mess under the desk. Real mastery comes from good cable management—the art of turning that potential “cable spaghetti” into a clean, organized, and totally professional setup.

An organized office desk with a laptop, monitor, and neatly managed cables using wraps and an under desk power strip.

This isn’t just about looking good, either. A well-managed cable system prevents people from accidentally unplugging critical equipment, makes the cleaning crew’s job much easier, and boosts safety by getting rid of tripping hazards. It’s all about creating a clear path for every single cable, from device to power strip and from the strip to the wall.

The Right Tools for Taming the Wires

Before you start wrestling with cords, it helps to have the right gear. You don’t need to spend a fortune; a few simple accessories can make a huge difference in tidying up a workstation.

Here are the most effective tools we see used in office environments:

  • Velcro Straps and Cable Ties: These are the absolute workhorses of cable management. Velcro straps are fantastic because they’re reusable, making them perfect for bundling cables you might need to adjust later. Zip ties offer a more permanent, tighter hold for bundles that won’t change.
  • Cable Sleeves: Think of a cable sleeve as a jacket for your wires. Usually made of neoprene or a woven fabric, it wraps around a whole bundle of cords to create one neat tube. This is the perfect solution for hiding the mess of cables running from the desk to the wall outlet.
  • Adhesive Cable Clips: These little clips are surprisingly strong. They stick right to the underside of your desk or along the legs, giving you a perfect way to guide individual cords along a specific path and keep them pinned down, completely out of sight.

By using a mix of these tools, you can build a flexible and effective system for routing and securing every wire connected to your under-desk power strip.

Techniques for a Flawless Setup

With your tools ready, it’s time to think strategically. The trick is to plan in terms of pathways. Group cables that are all heading in the same direction and secure them every foot or so. A little planning now saves you from a massive headache later.

A clean cable setup is a sign of a well-organized office. It reflects attention to detail and a commitment to creating a productive, distraction-free environment for everyone.

Follow these simple, practical steps to get your cables in order:

  1. Bundle by Destination: Grab all the cables coming from desktop devices—monitors, speakers, desk lamps—and use Velcro straps to bundle them into one group. This creates a single, manageable trunk line that leads right to your under desk power strip.
  2. Route Along Edges: Guide that main bundle along the back edge or underside of the desk. Use your adhesive clips every 12-18 inches to keep the bundle tight against the surface and invisible from the front.
  3. Contain the Power Bricks: Those bulky power adapters are always the awkward ones. You can either secure them directly to the underside of the desk with heavy-duty adhesive strips or, better yet, place them inside a cable management tray to keep them all contained.
  4. Create a Clean Drop: For the final stretch from the power strip down to the wall outlet, use a cable sleeve. A single, tidy sleeve looks infinitely better than a dozen loose cords dangling in plain sight.

This methodical approach makes sure every wire has a designated place, turning chaos into clean, professional lines. A tidy workspace not only looks better but also improves airflow and makes it easier to add other functional pieces, like cubicle hanging shelves. By following these techniques, you’ll complete the final step in creating a truly efficient workstation.

Common Under Desk Power Strip Mistakes to Avoid

A smart power management upgrade is about more than just adding outlets; it’s about sidestepping the common tripwires that can mess with safety, function, and even how your office looks. Learning from the mistakes others have made means your project will go smoothly from the get-go, saving you from headaches and costly fixes down the road. A well-chosen under desk power strip is a fantastic tool, but only when you use it right.

So many offices stumble over simple but critical miscalculations. By getting ahead of these common errors, you can make sure your power setup is safe, effective, and ready for whatever comes next. Let’s walk through the big ones and how to dodge them.

Ignoring Future Power Needs

Easily one of the most frequent blunders is picking a power strip with just enough outlets for what’s on the desk today. An employee might start with a computer and one monitor, but what about next month when they get a second monitor? Or a desk lamp, a phone charger, and a powered USB hub? Suddenly, they’re out of plugs.

This simple oversight almost always leads directly to the next, much more dangerous problem. To prevent it, you have to plan for growth.

Pro-Tip: As a solid rule of thumb, always choose a power strip that has at least two more outlets than you currently need for that workstation. This little bit of buffer gives you critical flexibility for new equipment without ever compromising safety.

The Dangers of Daisy-Chaining

Daisy-chaining is what happens when you plug one power strip into another to get more outlets. It might seem like a clever hack in a pinch, but it’s an incredibly dangerous fire hazard. In fact, it’s flat-out prohibited by OSHA and the National Electrical Code for a very good reason.

Each power strip is rated to handle a specific electrical load. When you link them together, you’re forcing all that electrical demand through a single, overworked bottleneck. This is a recipe for overheating, short circuits, and potentially a catastrophic fire. The only real solution is to make sure every workstation has enough outlets from the start, removing any temptation to daisy-chain. For any major office reconfiguration, the expert team at Cubicle By Design can help you plan your power needs safely from the ground up.

Underestimating Surge Protection

Here’s a hard truth: not all power strips are created equal. That cheap, basic strip you can get anywhere might give you extra outlets, but it offers zero protection against voltage spikes. A sudden power surge—from a lightning strike or a problem with the utility grid—can instantly fry expensive computers, monitors, and other sensitive electronics.

Always, always check the joule rating on any power strip you’re considering. For the valuable equipment in your office, you’ll want a rating of 1,000 joules or higher. Spending a little more on a strip with proper surge protection is a tiny investment compared to the massive cost of replacing an entire workstation’s worth of fried hardware. From designing efficient workstation cubicles to implementing safe power solutions, every detail matters.

A Few Common Questions About Under-Desk Power

Even with the best planning, a few practical questions always come up when you’re rolling out a new power setup. Here are some straightforward answers to the things office managers ask us most when choosing and installing under-desk power strips.

Can I Just Plug an Under-Desk Power Strip into an Extension Cord?

That’s a definite no. You should never plug a power strip into an extension cord. This is what folks in the industry call “daisy-chaining,” and it’s a major fire hazard because it can easily overload both the extension cord and the wall outlet it’s plugged into.

To keep everything safe and up to code, your power strip needs to plug directly into a permanent wall outlet. If your outlets are just too far away, the only right way to fix it is to have an electrician install new ones closer to the workstations. We often run into this when planning layouts for cubicles, and getting the wiring right from the start is key.

So, How Many Things Can I Actually Plug In?

This is a great question because it’s not about the number of outlets—it’s all about the wattage rating. Before you plug anything in, you need to do a little math. Add up the total wattage of every single device you plan to connect.

That total number has to be less than the power strip’s maximum rating. For most standard 15-amp units you’ll find in an office, that magic number is around 1,800 watts.

A classic mistake is to see an empty outlet and assume it’s free to use. But a couple of high-draw items, like a personal space heater or a big laser printer, can max out a power strip all by themselves, even if other outlets are still empty.

Is Surge Protection Really Necessary for Office Gear?

Yes, absolutely non-negotiable. Think about it—your computers, monitors, and all your networking gear are sensitive, expensive electronics. A sudden power surge, even a small one, can fry them in a split second.

A power strip with built-in surge protection is your insurance policy. Look for a joule rating of at least 1,000 joules to provide solid protection. Spending a little extra upfront can literally save you thousands in replacement costs, whether you’re setting up a row of workstation cubicles or furnishing a few private office cubicles.


At Cubicle By Design, we help you think through every last detail of your workspace to make sure it’s safe, efficient, and ready for work—from the big picture layout down to the power and data hookups. Let’s work together to design a smarter office.

Start designing your ideal office with our Custom Cubicle Designer

Read More
Perfect Size of a Conference Room

A Guide to the Perfect Size of a Conference Room

Trying to figure out the right size for a conference room can feel like you’re doing complicated math, but it’s usually more straightforward than it seems. As a good starting point, we always recommend planning for about 20-25 square feet per person. This simple rule of thumb gives everyone enough elbow room and space for equipment without feeling cramped.

Why the Right Conference Room Size Matters

Getting the dimensions of your conference room right is so much more than a detail on a floor plan. Think of it as a strategic investment in your team’s productivity and your company’s culture. A well-sized room means no awkward shuffling to get to a seat and meetings that just flow without unnecessary distractions. It’s the difference between a frustrating, stuffy experience and a comfortable, collaborative space where great ideas can actually happen.

This guide is your roadmap to creating a room that just works. We’ll dig into why the right dimensions are so critical for everything from productive brainstorming sessions to basic employee comfort, framing it as a smart move for your company’s future.

The Impact of Poor Sizing

An incorrectly sized room, whether too big or too small, creates persistent headaches that get in the way of daily work. Knowing these common pitfalls makes it obvious why getting it right from the start is so important.

  • Underutilized Space: A massive boardroom that’s too large for your typical meetings just becomes wasted real estate. We’ve seen it time and again. In fact, research shows that a whopping 75% of meetings involve three people or fewer, which means those giant, empty rooms are often just inefficiently used by small groups.
  • Reduced Productivity: On the flip side, a room that’s too small creates a cramped, uncomfortable vibe. It can easily stifle creativity, kill attention spans, and make even short meetings feel like they drag on forever.
  • Accessibility Challenges: Not having enough clearance makes it tough for team members to move around, especially for anyone with mobility needs. Proper planning ensures that everyone can participate easily and feel included.

At Cubicle By Design, we believe a great office starts with smart planning. A conference room should be a hub of innovation, not a source of frustration. Getting the size right is the first step toward building a better workplace.

Effective office space planning and design looks at more than just the room itself; it considers how that room fits into the overall flow of your office. By carefully thinking through capacity, technology, and circulation, you can create a space that truly supports your team’s best work. From small, agile huddle rooms to impressive boardrooms, every space should have a clear purpose.

Diving Into the Core Sizing Principles

Moving beyond quick estimates, it’s time to understand the ‘why’ behind the numbers. Figuring out the right size for a conference room is a lot like planning a perfect dinner party—you need enough space for your guests, clear paths for people to move around, and designated spots for all the essentials.

You’ve probably heard the industry guideline to allocate 20-25 square feet per person. But where does that number actually come from?

This benchmark isn’t just pulled out of thin air. It’s a calculated balance of comfort, function, and collaboration that has held firm for years. Workplace demands are always evolving, but this standard ensures there’s enough room for both people and the technology they use. In markets like North America and Europe, a typical small-to-medium room for 6 to 12 people runs from 150 to 400 square feet. Larger boardrooms for 20 or more can easily top 1,200 square feet. That 20 to 25 square feet per seat is the constant that makes it all work.

To really get it right, you have to break the space down into three distinct zones. The total square footage is just the sum of its parts.

The Three Foundational Zones of a Conference Room

Think of your conference room as having three invisible layers of space, each with its own job. If you neglect any one of them, the room will feel awkward and impractical, no matter how big it is.

  1. The Table Zone: This is the heart of your meeting space—the actual footprint of the conference table itself. Its size and shape set the stage for everything else.
  2. The Personal Space Zone: This is the “elbow room” for each person. It includes the chair and the immediate area needed to comfortably take notes, use a laptop, or just sit without feeling jammed in.
  3. The Circulation Zone: These are the critical pathways around the table and chairs. It’s the space people use to get in and out of the room or walk to a whiteboard without tripping over their colleagues.

A well-planned conference room respects all three zones equally. It ensures the table fits, people are comfortable, and movement is effortless. This balanced approach is the secret to creating a space that feels both spacious and efficient.

Understanding how these zones interact is the first real step toward a smart layout. A wider table, for instance, doesn’t just take up more floor space; it demands a larger room to keep those circulation paths clear and usable. Our cubicle designer tool can help you visualize these layouts effectively.

Calculating Your Space Needs

Let’s put this into practice. The 20-25 square foot rule is a great starting point because it automatically accounts for these three zones. For a 10-person meeting, you’d be looking for a room somewhere between 200 and 250 square feet.

But other factors can completely change a room’s feel. The shape of the table and where the door is located can make or break the layout.

A long rectangular table, for example, creates very different traffic patterns than a round one. Likewise, a door that opens directly behind a chair can make that seat practically unusable, which instantly shrinks your room’s real capacity. For a deeper dive, check out our guide on conference tables dimensions to see how different shapes impact your layout.

This foundational logic will empower you to look at any potential space and make smart decisions that go way beyond simple measurements. By keeping these core principles in mind, you’ll design a conference room that truly works for your team and becomes a real hub for collaboration.

Designing for People and Easy Movement

A conference room that looks perfect on paper can be a total failure if people are constantly bumping chairs or squeezing past each other. The real measure of a room’s design is how it feels when people are actually using it. This is where we move past simple square footage and get into the nitty-gritty measurements that guarantee comfort and an intuitive flow.

The whole point is to create a space that feels open and is a breeze to navigate, not some kind of obstacle course. When you plan for circulation from the get-go, you’re making sure the room helps collaboration, rather than getting in the way. A meeting space should make movement easy, not restrict it.

The Golden Rule of Clearance

The single most important measurement in your conference room isn’t the length or width—it’s the clearance around the furniture. This is that invisible buffer zone that lets people pull out their chairs, walk behind seated colleagues, and move around without causing a fuss. Without enough of it, even a huge room will feel cramped and awkward.

Here’s the non-negotiable standard: you absolutely need 36 to 48 inches of clearance behind every occupied chair. This isn’t just a friendly suggestion; it’s the bare minimum for comfortable, disruption-free movement. This “circulation path” is what allows someone to slip in late or step out for a call without making the whole table shuffle around.

Think of it this way: 36 inches (3 feet) lets one person carefully walk behind someone who’s seated. Bumping that up to 48 inches (4 feet) gives enough room for two people to pass one another without doing the awkward side-step. For rooms that see a lot of traffic, that extra foot makes a world of difference.

Ensuring Accessibility for Everyone

A truly great conference room works for every single member of your team. That means designing your space to meet—or, even better, exceed—the standards set by the Americans with Disabilities Act (ADA). Getting accessibility right isn’t a box to check at the end; it’s a fundamental part of inclusive, smart design.

Planning for ADA compliance means factoring in a few key numbers that directly impact your room’s size:

  • Doorways: Your entrance needs a clear width of at least 32 inches when the door is swung open 90 degrees.
  • Pathways: All the main walkways inside the room have to be at least 36 inches wide.
  • Turning Space: The room must have a clear floor space of 60 inches in diameter (a 5-foot circle) or a T-shaped area so a wheelchair can turn around easily.
  • Table Access: Make sure you have enough knee and toe clearance under the conference table for wheelchair users to pull up comfortably.

By making these accessibility standards a priority, you’re not just complying with regulations—you’re creating a more welcoming and functional space for all your employees. It’s a core part of designing a better workplace, which is something we’re passionate about at Cubicle By Design.

Sightlines and the Surrounding Office

Beyond just letting people walk around, a well-designed room considers visual flow. Every single person in that meeting should have a clear, unobstructed view of the main screen, the whiteboard, or whoever is speaking. This is absolutely critical for keeping people engaged and making sure no one feels like they’re stuck with the bad seat.

Before you lock in your layout, do a simple test: sit in every chair. Can you see the presentation screen without craning your neck? Is a support column blocking half the whiteboard? These little details feel minor on a floor plan but can kill the effectiveness of a meeting.

And don’t forget to think about how the conference room fits into the rest of the office. The flow of foot traffic from nearby workstation cubicles can dictate the best place for the door and how the interior should be arranged. A room that’s easy to get in and out of without disturbing neighboring work areas makes for a more productive and harmonious office for everyone.

How Technology Shapes Your Room Dimensions

Let’s be honest: in today’s world, a conference room without technology is just a box with a table. The right audiovisual (AV) tools have gone from a “nice-to-have” to a core part of how we collaborate. That means their physical footprint has a direct impact on the size of a conference room you’ll need.

It’s a classic mistake to design the room first and try to cram the tech in later. That’s a recipe for a cluttered, hazardous mess of tangled wires and equipment that doesn’t quite work right. When you plan your room dimensions around your tech stack from the start, you create a space that’s clean, functional, and ready for action.

The market is screaming this from the rooftops. The global conference room solutions market was pegged at USD 1.9 billion in 2025 and is on track to hit USD 7.6 billion by 2035. This explosion shows just how critical it is to design rooms that can handle advanced AV equipment, which all begins with thoughtful sizing.

Planning for Screens and Sightlines

The first domino to fall in your layout is almost always the main display. Whether it’s a massive monitor, a projector screen, or an interactive whiteboard, its size and placement dictate the entire room’s orientation and, most importantly, its depth.

Here’s a simple rule of thumb: the person sitting farthest away should be no more than four to six times the height of the screen. For a standard 55-inch display (which is about 27 inches high), that means your back row can’t be more than 13.5 feet from the screen. This one calculation is a crucial starting point for figuring out the minimum length of your room.

Think of your screen as the anchor point of the entire room. The right viewing distance ensures that everyone, from the head of the table to the person in the back corner, can clearly see the content without straining their eyes.

Allocating Space for AV Hardware

It’s not just about the screen. Your video conferencing gear needs its own real estate. That high-quality PTZ (pan-tilt-zoom) camera needs a clear line of sight, usually mounted right above or below the display. Microphones, whether they sit on the table or are installed in the ceiling, also have specific placement requirements to capture clear audio from everyone.

You’ll need to account for the space these common components take up:

  • Cameras: Wall-mounted cameras need solid support and the right angle to capture the whole room.
  • Microphones: Tabletop mics eat up valuable surface area, while ceiling mics need to be clear of noisy HVAC vents.
  • Control Panels: A touchscreen controller needs to be within easy reach on the conference table.
  • Credenzas: Many rooms use a credenza to hide away equipment racks, mini-PCs, and other hardware, which adds to the room’s overall footprint.

The Critical Role of Power and Cabling

This is the big one that everyone forgets: the power outlets and data ports that make everything run. Nothing ruins the look of a sleek, modern conference room faster than a tangle of extension cords snaking across the floor. They’re not just ugly—they’re a major tripping hazard.

You have to plan your power and data needs from day one. That means outlets near the display, power integrated directly into the conference table for laptops, and data ports for a rock-solid wired connection. Planning this infrastructure in advance is the only way to get a clean, professional, and safe environment. If you’re laying out your whole office, understanding the basics of a proper cubicle electrical setup gives you a huge head start on managing power everywhere. This proactive thinking ensures your room works today and can adapt to whatever tech comes next.

Looking Beyond Square Footage

Getting the dimensions right for your conference room is a huge step, but it’s really just the beginning of the story. A room with the perfect square footage can still be a total dud if the environment itself is distracting. To create meeting spaces that people actually want to use, we need to look at three critical, and often forgotten, elements: acoustics, lighting, and ventilation.

Think of these as the finishing touches that transform a functional box into a genuinely productive workspace. Without them, even the most meticulously planned layout can leave your team feeling drained and unfocused.

Taming Sound and Echoes

Ever been in a meeting where every little cough echoes off the walls? Or you struggle to hear the person across the table over the low hum of the air conditioning? That’s the classic sign of a room with bad acoustics. Hard surfaces like glass, concrete, and even drywall are notorious for bouncing sound waves around, creating an echo chamber that makes it tough to hear.

This gets even worse on video calls, where all that background noise can make your team sound like they’re in a cave. The room’s shape plays a part, too. Long, narrow rooms can create a weird “flutter echo” that is especially grating.

The good news? You don’t have to tear down walls to fix it. Here are a few simple but effective solutions:

  • Acoustic Panels: These are your best friend for soaking up excess noise. You can mount them on walls or ceilings, and they come in tons of designs to match your office vibe.
  • Soft Furnishings: It’s amazing what a difference a rug, some fabric chairs, or even curtains can make. They give sound waves something soft to land on, instantly cutting down on reverb.
  • Strategic Layout: Think about what’s next door. A well-placed bank of private office cubicles can act as a natural sound buffer, helping to quiet the entire floor.

Lighting That Engages, Not Drains

Lighting does so much more than just let you see. It sets the entire mood of a room and has a real impact on people’s energy levels. If the lighting is too dim, too harsh, or creates a nasty glare on screens, you’re just inviting eye strain and fatigue—a guaranteed productivity killer for long meetings.

The best strategy is a layered lighting approach. This just means combining different types of light to create a balanced, flexible environment. You want bright, even light for taking notes, but you also need to kill those harsh shadows and screen glares that make video calls a nightmare. On that note, think about the materials you use; for instance, see how glass partition walls for offices can help bring in natural light while still keeping things quiet.

Keeping the Air Fresh and Comfortable

Finally, let’s talk about something most people completely forget: fresh air. A stuffy, warm room is a recipe for drowsy, distracted people. As a meeting fills up, carbon dioxide levels climb, and you can literally feel the focus leave the room.

Your HVAC system needs to be sized for the room’s maximum capacity, keeping the temperature comfortable and consistent. Just as important, it needs to run quietly so it doesn’t become another source of distracting noise. A comfortable climate keeps everyone alert and ready to contribute, turning a potentially draining meeting into one where great ideas happen.

Sample Layouts and Your Planning Checklist

Trying to juggle all the rules for sizing, traffic flow, and technology can feel a bit overwhelming. Sometimes, the best way to make sense of it all is to see it in action. Let’s look at a few common examples to visualize how these principles play out in the real world.

Seeing a layout on paper is often the easiest way to understand how specific dimensions create a meeting space that’s both functional and comfortable for everyone inside. These examples should give you a solid starting point.

Three Common Conference Room Layouts

To bring these concepts to life, we’ve sketched out three sample layouts, each built for a different purpose and capacity. You’ll see how the right size of a conference room directly supports what it’s meant to do, from quick huddles to formal board meetings.

  • The Compact Huddle Room (4 People): Perfect for those quick check-ins or one-on-one video calls. These spaces are usually around 10′ x 10′ (100 sq ft). You’ll typically find a small round table (about 48″ in diameter) and a wall-mounted monitor, which leaves just enough room to move around comfortably without any wasted space.
  • The Versatile Meeting Room (10 People): This is the workhorse of most offices. A room measuring about 12′ x 20′ (240 sq ft) easily fits a 12-foot rectangular table. This setup gives you plenty of clearance (at least 42 inches) and leaves space at one end for a large display and a credenza to house AV gear.
  • The Tech-Ready Boardroom (20 People): When you need to host large, formal meetings, you’ll want a room around 16′ x 30′ (480 sq ft). This size can handle a substantial table, allows for generous 48-inch circulation paths, and supports integrated tech like ceiling microphones and multiple displays.

To make these layouts even clearer, here’s a quick-reference table summarizing the key specs for each room type.

Sample Conference Room Layout Specifications

Room Type Capacity Minimum Room Dimensions Typical Table Size Key Features
Huddle Room 2-4 People 10’ x 10’ 48” Round Small footprint, ideal for quick, informal meetings and video calls.
Mid-Size Meeting Room 8-10 People 12’ x 20’ 12’ Rectangular Versatile for team meetings, presentations, and client discussions.
Large Boardroom 16-20 People 16’ x 30’ 18’+ Rectangular Designed for formal meetings with integrated A/V and ample circulation.

These numbers provide a great baseline, but always remember to adjust for your specific furniture and technology choices, including a wide range of cubicles.

Your Essential Planning Checklist

Before you sign off on any floor plans, take a minute to run through this checklist. Answering these questions now will help you catch any oversights and save you from expensive mistakes down the road. A little foresight prevents major headaches, especially when it’s time for the build-out. For a seamless setup, getting professional help with office furniture installation can ensure your vision is executed perfectly.

  1. Define Primary Use: What is this room’s main job? (e.g., video calls, brainstorming, formal presentations?)
  2. Determine Max Capacity: How many people really need to fit in here at one time?
  3. Confirm Table Shape & Size: Is a round, square, or rectangular table the best fit for the room’s purpose?
  4. Map Out Circulation Paths: Have you left at least 36-48 inches of clearance behind every chair?
  5. Plan for Technology: Where will the screen, camera, and microphones actually go?
  6. Locate Power & Data: Are outlets and ports planned for both the table and the walls?
  7. Assess Environmental Factors: Have you thought about acoustics, lighting, and ventilation?

This visual summary highlights the key environmental factors that turn a sized room into a functional one.
As you can see, a great conference room isn’t just about square footage—it’s about balancing these three elements to create a space where people can actually be productive and comfortable.

Still Have Questions? Here Are Some Common Ones

Even with all the guidelines, planning the perfect conference room can feel a bit like a puzzle. Getting clear, straightforward answers to those nagging questions is the best way to move forward with confidence and sidestep the common pitfalls that can derail a project.

Let’s dig into some of the most frequent questions we hear about getting the size of a conference room just right. Answering these helps nail down the small details that make a huge difference in the final layout.

How Much Space Should I Plan For Per Person?

A solid rule of thumb is to plan for 20-25 square feet per person. This isn’t just an arbitrary number. It’s a balanced calculation that gives each person enough personal space at the table, room to pull their chair out, and a clear path to walk behind others without causing a disruption.

Could you technically squeeze it down to 15 square feet per person? Sure, but it will feel cramped, especially during longer meetings. Sticking to that 20-25 square foot range is the key to creating a comfortable and productive environment.

What’s a Good Size for a 10-Person Conference Room?

For a 10-person meeting, you’ll want a room that is at least 200 to 250 square feet. A common and highly effective dimension for this capacity is around 12 feet by 20 feet.

This size comfortably fits a large conference table (think 4 ft x 12 ft) and still provides about four feet of clearance on all sides for easy movement. It also leaves dedicated space at one end for a presentation screen, whiteboard, or credenza without making the room feel cluttered.

How Do You Calculate a Room’s Capacity?

First, start by measuring the room’s length and width to get the total square footage. Don’t forget to subtract any unusable space taken up by permanent fixtures like support columns or bulky built-in cabinets.

Next, just divide that usable square footage by your target space per person (let’s use 25 sq ft for a comfortable setup). So, a room with 250 usable square feet would have a capacity of 10 people (250 / 25 = 10). Always remember that the conference table itself is often the real limiting factor.

What Common Mistakes Should I Avoid?

The most frequent error we see is underestimating how much circulation space people actually need. People often calculate size based only on the table and chairs, forgetting to leave at least 36-48 inches behind chairs so others can walk past without disrupting the meeting.

Another big one is not planning for the footprint of technology. AV equipment, credenzas, and whiteboards all consume significant floor and wall space. We also see companies overbuilding, creating massive boardrooms when most of their day-to-day meetings are small. For instance, tech firms often find their rooms are sized larger than needed, with actual occupancy being 15-20% lower than what booking rates suggest. This highlights a growing need for more small-to-medium rooms. You can read more on meeting room utilization benchmarks to see how data is shaping modern office design.


At Cubicle By Design, we help you move beyond questions and start building solutions. From efficient workstation cubicles to collaborative meeting spaces, our team is here to help you design a better workplace.

Read More
Conference Tables Dimensions Guide

Conference Tables Dimensions Guide

Standard conference table dimensions usually kick off at about 6 feet long for a small group of 4-6 people. For a large boardroom, they can stretch out to 20 feet or even more to seat a crowd of 20. The real trick is getting the table size just right for your room and the number of people you typically host, creating a meeting space that’s comfortable and actually works.

Finding the Perfect Fit for Your Meeting Space

Picking out a conference table isn’t just about looks; it’s a critical decision that affects how your team collaborates, how comfortable they are, and ultimately, how productive your meetings will be. A table that’s too big will make the room feel tight and hard to get around. One that’s too small just looks awkward and doesn’t serve your team properly. This guide is your blueprint to avoid those common mistakes.

Think of your conference table as the command center for collaboration. A chef needs the right amount of counter space to cook efficiently, and your team needs a properly scaled table to brainstorm, present, and make decisions. We’ll walk through how to find that sweet spot.

Why Sizing Is So Important

Nailing the dimensions impacts everything, from day-to-day workflow to the impression you make on clients. A well-proportioned conference room shows you’ve put thought into your space and signals professionalism. It’s no surprise that the demand for functional, ergonomic meeting spaces is on the rise.

In fact, the global conference table market was valued at around USD 8.7 billion in 2024 and is expected to hit USD 15.2 billion by 2033. This growth shows a clear trend: companies worldwide are investing in office furniture that truly supports how we work today. You can get more details on this growing market from Business Research Insights.

A conference table isn’t just furniture; it’s a communication tool. Its size and shape directly influence how people interact, share ideas, and connect during critical discussions.

Key Factors to Consider

Before we dive into the numbers, let’s cover the basic elements that will steer your decision. A great choice balances three key factors, making sure the final piece fits your environment like a glove.

  • Room Size: First things first, measure your room’s length and width. Don’t forget to account for any obstructions like columns, doors that swing inward, or cabinets that will eat into your clearance space.
  • Seating Capacity: Figure out how many people usually attend your meetings. It’s also smart to have a maximum number in mind for those occasional, larger gatherings.
  • Meeting Style: What’s the main purpose of the room? Is it for formal board meetings with presentations at one end? Or is it more for collaborative brainstorming sessions and video calls? The room’s function will help determine the best shape and size.

Once you’ve thought through these points, you can confidently explore the huge selection of conference tables from Cubicle By Design knowing exactly what will fit your space and empower your team.

Matching Table Shape to Meeting Style

The shape of your conference table does a lot more than just fill up space—it’s the invisible director of every meeting you hold. A long, imposing table can create a very formal, top-down atmosphere, while a round one can make everyone feel like an equal part of the conversation.

Choosing the right shape is really about matching the furniture to your company culture and what you want to achieve in your meetings. Once you understand how each shape impacts the way people interact, you can pick a design that not only fits your room but actually makes collaboration and productivity better.

This flowchart maps out the key decisions, starting with your room’s dimensions and moving through seating needs to the final table shape.

Flowchart illustrating steps to choose a conference table based on room size, seating capacity, and table shape.

As you can see, picking a conference table is a step-by-step process. Your room measurements, how many people you need to seat, and the kind of meetings you’ll be having are all connected.

The Classic Rectangular Table

When you picture a traditional boardroom, you’re probably imagining a rectangular table. It’s a classic for a reason: it fits the maximum number of people along its length, which makes it perfect for large groups and formal presentations.

The clear “head” of the table establishes a focal point, which is great for meetings where a leader is speaking to the team. On the flip side, that same feature can sometimes make it harder for people sitting at opposite ends to have an open, back-and-forth conversation.

The Collaborative Round Table

When you want to encourage equality and open discussion, you can’t beat a round table. With no head of the table, everyone has an equal seat and a clear line of sight to everyone else. This setup naturally creates a more collaborative and less formal vibe.

Round tables are a perfect fit for:

  • Small team meetings: They’re fantastic for brainstorming and group problem-solving where every voice matters.
  • Huddle spaces: Their smaller footprint makes them a great choice for informal areas designed for quick check-ins.
  • Cafes and break rooms: They help create a friendly, social atmosphere that encourages casual chats.

The main drawback of round tables is that they don’t scale up very well. As you increase the diameter to fit more people, the middle becomes a dead zone, making it tough for people to hear and talk to those on the other side. For a smaller, collaborative space, a simple piece like this round non-powered conference table can be an excellent choice.

Boat-Shaped and Oval Tables

Boat-shaped and oval tables are a brilliant compromise between the formal feel of a rectangle and the all-in-this-together vibe of a circle. They are wider in the middle and get narrower toward the ends—a subtle design change that has some big benefits.

This unique shape dramatically improves sightlines, letting people on the sides see each other and the presentation screen more easily. It’s a huge plus for video conferencing, as it avoids the “tunnel vision” you can get with long, straight tables.

A boat-shaped table is designed to make every seat a good seat. By gently curving the sides, it ensures that no one feels visually cut off from the conversation, blending authority with accessibility.

These shapes keep a sense of structure with defined ends but soften the hierarchy. This makes them a versatile pick for modern boardrooms that need to accommodate all kinds of meeting styles.

Square and Modular Tables

For smaller groups, square tables work a lot like round ones, creating an intimate setting for teams of up to eight. They give each person a generous amount of personal space, which is great for working sessions where you need to spread out documents or use laptops.

If you’re looking for ultimate flexibility, modular tables are an incredible solution. These systems are made of smaller sections—often trapezoids or rectangles—that you can arrange in all sorts of configurations.

Think about modular tables if your space has to wear multiple hats:

  • Push them together to create one large table for a board meeting.
  • Break them apart for small-group breakout sessions.
  • Set them up in a U-shape for training or presentations.

This adaptability is a smart investment for dynamic offices where the room’s needs can change from one day to the next.

To help you visualize how these shapes translate to real-world spaces, we’ve put together a quick-reference table. This chart breaks down the common dimensions for each table shape, along with the ideal seating capacity and the minimum room size you’ll need to accommodate it comfortably.

Detailed Comparison of Table Dimensions and Seating

Table Shape Table Dimensions (Feet) Seats Minimum Room Size (Feet)
Rectangular 4′ x 8′ 6-8 12′ x 16′
Rectangular 5′ x 12′ 10-12 13′ x 20′
Rectangular 6′ x 20′ 18-20 14′ x 28′
Round 4′ Diameter 4 12′ x 12′
Round 6′ Diameter 6-8 14′ x 14′
Boat-Shaped 5′ x 10′ 8-10 13′ x 18′
Square 5′ x 5′ 4-6 13′ x 13′

This table should give you a solid starting point for figuring out what will work best for you. Remember to always factor in clearance for chairs and walkways to ensure your meeting room is functional, not just furnished.

Mastering Your Room Layout and Clearance

A beautiful, high-end conference table can feel completely wrong if it’s shoehorned into a room that’s too small. The secret to getting it right isn’t just about the table itself; it’s all about clearance—the essential “breathing room” you leave around it. Getting the layout right is what makes a space feel comfortable, accessible, and ready for business.

Think of clearance as a personal “comfort bubble” for each person at the table. To create a room that actually works, you need enough space for chairs to slide back, for people to walk behind seated colleagues without a major disruption, and for everyone to get in and out easily. It’s the difference between a functional workspace and a frustrating obstacle course.

A modern conference room setup with measuring tape and floor markings to show proper clearance dimensions.

This might sound complicated, but it really just boils down to some simple math. By understanding a few key measurements, you can figure out the maximum table size your room can handle, ensuring your final choice enhances the space instead of overwhelming it.

The Golden Rule of Clearance

The industry-standard rule of thumb is to leave 48 inches (4 feet) of open space between the edge of your conference table and any wall or obstruction. This isn’t just a random number; it’s a measurement grounded in creating a comfortable and efficient environment.

Here’s why that much space is so important:

  • Seating Space: A person needs about 24 inches just to pull their chair out and sit down comfortably.
  • Walking Path: You need another 24 inches for someone to walk behind that seated person without forcing everyone to squeeze by.
  • Total Clearance: Add them together, and you get the recommended 48 inches.

This buffer zone prevents those awkward “excuse me” traffic jams and makes the entire room feel more open and professional. While you might be able to get by with a bare minimum of 36 inches in a very tight space, aiming for 48 inches is always the best practice. For a deeper dive into creating functional layouts, explore our expert advice on office space planning and design.

Calculating Your Maximum Table Size

Okay, let’s turn these principles into a practical formula you can use right now. Grab a tape measure and get your room’s length and width. With those two numbers, you can easily pin down the largest table that will fit without compromise.

The calculation is really straightforward:

  1. Measure Room Length: Start by getting the total length of your conference room, wall to wall.
  2. Subtract Clearance: Now, subtract 8 feet (96 inches) from that length. This covers the 48-inch clearance zone you need at both ends of the table.
  3. Measure Room Width: Do the same for the width of the room.
  4. Subtract Clearance: Again, subtract 8 feet (96 inches) from the width to account for the 48 inches of space on both sides.

The two numbers you’re left with are the absolute maximum length and width for your new conference table.

Example Calculation
Let’s say your room is 20 feet long by 14 feet wide.

  • Maximum Table Length: 20 feet – 8 feet = 12 feet
  • Maximum Table Width: 14 feet – 8 feet = 6 feet
    In this room, the largest table that would fit comfortably is 12 feet by 6 feet.

This simple formula takes all the guesswork out of the process. It empowers you to shop for tables with confidence, knowing exactly what size will work and preventing the costly mistake of ordering something that just won’t fit.

Planning for Other Furniture and Obstructions

Of course, your conference table is rarely the only thing in the room. You have to account for all the other elements that take up valuable floor space and affect your clearance.

Before you finalize that table size, take a look around for these common obstructions:

  • Credenzas or Cabinets: If you have storage furniture against a wall, you must measure your clearance from the edge of the furniture, not the wall itself.
  • Whiteboards or AV Carts: Make sure there’s enough room for someone to stand and present without being backed up against the table.
  • Inward-Swinging Doors: The arc of a swinging door can easily eat into your clearance zone. Check that it can open fully without hitting a chair.
  • Columns or Pillars: Structural elements can create awkward pinch points. Always measure your clearance from the widest point of any obstruction.

For rooms with trickier layouts or multiple pieces of furniture, visualizing the space can be a massive help. Planning ahead ensures every piece of your meeting room fits together perfectly.

Planning for Accessibility and Technology

Getting the raw dimensions right is just the start. A truly modern and effective conference room has to be inclusive and ready for the tech we use every day. Smart design isn’t just about the table’s footprint; it’s about thinking through how every single person will use the space and how technology will either help or hinder their work.

This means planning for accessibility and integrating power and data right from the get-go. A thoughtfully designed room ensures everyone, regardless of physical ability, can pull up a chair and contribute. Likewise, a room that anticipates your team’s tech needs keeps meetings on track and frustration-free. These details are every bit as important as the table’s shape or how much clearance you leave.

Ensuring ADA Compliance

Accessibility is non-negotiable—it’s a core requirement for any shared space. The Americans with Disabilities Act (ADA) gives us clear guidelines to make sure our rooms are usable for everyone, including those who use wheelchairs. For conference tables, this boils down to providing enough clearance for someone to comfortably approach and use the table.

Here are the key ADA numbers to keep in mind:

  • Knee and Toe Clearance: The table must have at least 27 inches of vertical space for knees. This clearance should extend at least 8 inches deep from the table’s edge.
  • Clear Floor Space: You need a clear patch of floor measuring at least 30 inches by 48 inches at each accessible seating spot.
  • Clear Pathways: The paths for walking around the table and moving through the room must be at least 36 inches wide.

These measurements guarantee that a wheelchair user can easily pull up to the table and navigate the room without running into obstacles. As you plan your layout, make sure to designate specific accessible seating positions and double-check that your table choice meets these crucial standards. It’s about building a welcoming environment for your whole team.

Integrating Power and Connectivity

Let’s be real—meetings today run on laptops, presentation screens, and video calls. A conference table without easy access to power is like a car with no charging ports. It technically works, but it’s missing something essential for how we operate now.

Many modern tables solve this problem with built-in power modules. These can include:

  • Standard electrical outlets
  • USB-A and USB-C charging ports
  • HDMI or other data ports for easy screen sharing

A tech-ready conference table transforms from a passive surface into an active hub for productivity. By centralizing power and data access, it eliminates cable clutter and keeps teams focused on collaboration, not finding an open outlet.

Cable management is the other piece of the puzzle. You’ll want a table with built-in grommets, troughs, or even hollow legs to hide all the wires. This keeps the tabletop clean and, more importantly, prevents a tangled mess of trip hazards on the floor. For a deeper dive into wiring your office furniture, our guide on cubicle electrical setup has some great tips that apply just as well to conference rooms.

Optimizing for Hybrid Meetings

With hybrid work here to stay, video conferencing is now a permanent part of business. The design of your room and the shape of your table can make a huge difference for your remote team members. The goal is to make them feel just as present as the people physically in the room.

Boat-shaped and oval tables are fantastic for video calls. Their tapered ends give the camera better sightlines, allowing it to capture more faces in one shot without that weird “tunnel” effect you get with long, narrow tables. By placing your main screen and camera at one end, you give remote attendees a clear, commanding view of the action, ensuring everyone feels included.

Choosing the Right Table for Different Meeting Types

The right conference table does more than just fill a room; it sets the stage. It can turn a generic space into a high-energy hub for quick decisions, a formal chamber for executive strategy, or a flexible classroom for team development. Let’s move beyond the theory of sizes and shapes and see how this plays out in the real world.

By looking at common meeting spaces, we can see exactly why a specific table is the perfect fit. The goal is to choose furniture that actively supports the work happening around it, making every meeting more productive. This practical approach will help you picture the ideal setup for your own office.

Three examples of modern office meeting spaces with different conference table dimensions and shapes.

The Small Huddle Room

The huddle room is the modern office’s answer for spontaneous, get-it-done collaboration. These small, informal spaces are designed for 2-4 people to sync up for a quick check-in, brainstorm, or solve a problem without tying up a large boardroom. The furniture has to match this fast-paced, egalitarian vibe.

A compact round table is the undisputed champion here. Its circular shape gets rid of any sense of hierarchy, putting every participant on equal footing where they can easily see and hear one another. This encourages a natural, free-flowing conversation—exactly what you want for agile teamwork.

Think of a huddle room table less as a piece of furniture and more as a launchpad for ideas. Its small scale and open design remove physical and psychological barriers, helping collaboration happen faster.

Dimensions for a huddle room table are typically small, usually between 36 to 48 inches in diameter. This is just enough space to fit a few laptops and notebooks without anyone feeling squeezed. For furnishing these collaborative nooks, a dedicated small round conference table offers the perfect blend of function and compact design.

The Executive Boardroom

The executive boardroom is all about projecting authority, professionalism, and confidence. This is where the big decisions get made, high-stakes negotiations unfold, and important clients are hosted. The conference table is the undeniable centerpiece, and its size and style have to reflect the room’s gravitas.

A large, elegant boat-shaped or rectangular table is the traditional choice, and for good reason. A table measuring 12 to 20 feet or more commands the space and gives directors plenty of elbow room. The boat shape, with its gently curved sides, has a modern edge by improving sightlines down the length of the table—a crucial detail for presentations and video calls. It helps everyone, even those at the far ends, feel connected to the conversation.

This demand for high-end, functional boardrooms is a major force in the furniture market. North America and Europe make up about 75% of global conference table sales, with North America alone accounting for roughly 40% of the market as of 2024. This trend shows how much established corporations continue to invest in quality office furnishings.

The Versatile Training Room

Training rooms are dynamic spaces that need to adapt to different learning styles, from lectures and workshops to group activities. A single, massive conference table just won’t cut it. The keyword here is flexibility, and the furniture needs to be reconfigured in a snap.

Modular tables are the perfect answer. These are smaller, lightweight tables—often in rectangular, square, or trapezoid shapes—that can be arranged in countless ways:

  • Classroom Style: Rows of tables facing a presenter, perfect for lectures.
  • U-Shape: Great for fostering interaction between the speaker and the audience.
  • Pods: Small clusters of tables for collaborative breakout sessions.

This adaptability allows one room to serve many purposes, which maximizes the value of your office space. When you invest in modular tables, you’re choosing furniture that can evolve with your company’s training needs, ensuring the room is always set up for effective learning and development.

Putting It All Together: Your Final Measurement Checklist

You’ve explored the different table shapes, learned how clearance space makes or breaks a room’s flow, and thought about the practical needs of technology and accessibility. Now it’s time to pull all that knowledge together. Before you even think about browsing options, use this final checklist to get all your critical data in one place.

Having these numbers in hand transforms a potentially overwhelming decision into a simple, confident process. This isn’t just about dodging the mistake of a table that’s too big or too small; it’s about proactively designing a space that actually works. With this information, you can explore solutions from Cubicle By Design and know exactly what you’re looking for.

Essential Room and Furniture Details

Use this quick list to record your space’s vital statistics. This is no time for estimates—grab a tape measure and get it right.

  • Room Length and Width: Start by measuring wall-to-wall. These are your foundational numbers.
  • Ceiling Height: This is surprisingly important, especially if you’re planning on any statement-making hanging light fixtures.
  • Obstructions: Take careful note of any columns, inward-swinging doors, low-hanging windows, or existing credenzas.
  • Outlet Placement: Where are your power and data ports already located? This is a huge factor in deciding where the table can even go.

Define Your Functional Needs

Next, get honest about how the room will actually be used day-to-day. This step ensures your final choice genuinely supports how your team works.

  • Desired Seating Capacity: What’s your typical meeting size? More importantly, what’s the absolute maximum number of people you need to fit?
  • Primary Meeting Style: Is this room for formal board meetings with clients? Or is it more for collaborative brainstorming sessions and hybrid video calls?

With this checklist complete, you officially have a blueprint for success. You’re now perfectly equipped to find a conference table that fits not just your room, but your company’s culture and goals. You can even start visualizing how different pieces work together with our Cubicle Designer tool. Let’s build a conference room that’s as functional as it is beautiful.

Got Questions? We’ve Got Answers.

We get a lot of questions about getting conference table dimensions just right. Here are some quick answers to the most common ones we hear, helping you clear up any lingering doubts and choose with confidence.

How Much Room Does Each Person Need at the Table?

As a general rule of thumb, you’ll want to give each person 24 to 30 inches of table space. That’s usually enough for a chair and some decent elbow room for taking notes without bumping into their neighbor.

But, if you’re outfitting an executive boardroom or know your team will be spreading out with laptops, documents, and coffee, it’s smart to aim for the higher end of that range. Pushing that to 30 to 36 inches per person gives everyone the breathing room they need to work comfortably and effectively.

What’s the Best Table Shape for Video Calls?

For hybrid meetings and video conferencing, boat-shaped and oval tables are hands-down the best choice. Their gently curved sides and tapered ends give everyone at the table—especially those at the far ends—a much clearer line of sight to the camera.

This shape naturally pulls everyone into the frame, preventing that awkward “tunnel view” you often get with long, rectangular tables. It makes remote participants feel more included and helps the whole conversation flow more naturally.

Will a 10-Foot Table Work in a 15-Foot Room?

Technically, yes, a 10-foot table will physically fit inside a 15-foot room. But that doesn’t mean it’s a good idea. You’d be left with a measly 30 inches of clearance at each end, which is barely enough to slide a chair out, let alone walk behind someone who is already seated. It’s a recipe for a cramped, awkward space.

To keep things comfortable and allow people to move around freely, you really need a minimum of 48 inches (or 4 feet) of clearance on all sides of the table. A much better fit for a 10-foot table would be a room that’s at least 18 feet long.

Are Modular Conference Tables a Good Idea?

Absolutely. Modular tables are a fantastic investment, particularly for dynamic, multi-purpose rooms that need to adapt on the fly. Because they’re made of smaller sections, you can easily pull them apart and rearrange them into different shapes and sizes.

This kind of flexibility is a game-changer for growing businesses. One day you might need a large table for a formal presentation, and the next you might need smaller breakout pods for a training session. A modular system lets your furniture do it all, ensuring you get the most out of every square foot of your office.


At Cubicle By Design, our specialty is creating workspaces that work as hard as you do. From commanding conference tables to productive workstation cubicles and focused private office cubicles, we have the cubicles you need to build a better office.

Ready to design your ideal space? Find the perfect office solutions with our Cubicle Designer or visit us at https://cubiclebydesign.com/.

Read More